Soul Shoppe's work is made possible by donors and partners who care deeply about the young people in their communities! We can't do this work without you. Support our work in classrooms and on playgrounds across the nation by donating here.
Welcome to our practical guide to Social-Emotional Learning (SEL) for elementary students. In an environment where emotional intelligence is as critical as academic knowledge, providing young learners with tools to understand their feelings and connect with others is essential. This article offers a deep dive into powerful sel activities for elementary students, designed to be practical, engaging, and effective for teachers, counselors, and parents alike.
We move beyond abstract ideas to give you actionable steps, specific examples, and adaptations for different age groups. For instance, instead of just suggesting "breathing exercises," we detail how a "Bear Breath" technique can calm a first grader's pre-test jitters, while a "4-7-8 Breathing" script can help a fifth grader manage frustration during a group project. This guide is your roadmap to implementing these important practices.
Our goal is to help you cultivate resilient, emotionally intelligent learners who are ready to collaborate, solve problems, and succeed. The following curated collection of activities will help build a strong foundation for lifelong well-being and academic success. You will find detailed instructions for everything from peer empathy exercises to growth mindset lessons, all organized to be easily implemented in a classroom or at home. Let's explore the activities that will foster a more connected, safe, and empathetic community for your students.
1. Mindfulness and Breathing Exercises
Mindfulness and breathing exercises are structured practices that teach students to anchor their attention in the present moment. These foundational SEL activities for elementary students help them develop self-awareness and self-management by learning to calm their own nervous system, particularly during moments of high energy, stress, or conflict. The core idea is simple: by focusing on the physical sensation of breathing, a child can create distance from overwhelming emotions and respond more thoughtfully.
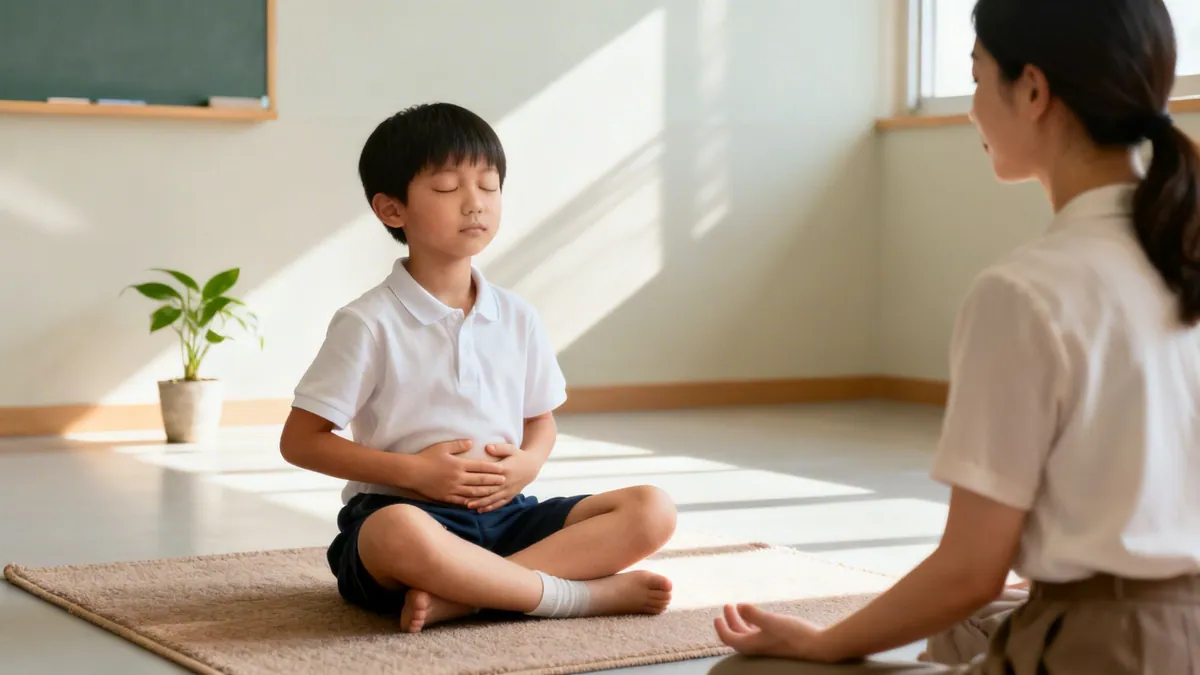
To deepen the understanding of these practices, educators can explore resources that explain in detail what mindfulness meditation entails. These exercises are not about emptying the mind but rather about paying attention on purpose, without judgment. This skill is critical for building emotional intelligence and resilience.
How to Implement in Your Classroom
Effective integration relies on consistency and modeling. You can introduce these practices as "brain breaks" between subjects, as a centering routine to start the day, or as a cool-down activity after recess.
Belly Breathing: Have students place a hand on their belly and feel it rise and fall like a balloon as they inhale and exhale slowly. Practical Example: Before a spelling test, say, "Let's take three balloon breaths. Put your hand on your belly. Breathe in and feel the balloon get bigger… now breathe out and let the air out slowly."
Box Breathing: Guide students to inhale for a count of four, hold for four, exhale for four, and hold for four. Drawing a square in the air with their finger can help them track the steps. Practical Example: When the class is noisy after recess, say, "Let's get our focus back with box breathing. Trace a square in the air. Breathe in… hold… breathe out… hold."
Five Senses Grounding: When a student is anxious, ask them to name five things they can see, four things they can feel, three things they can hear, two things they can smell, and one thing they can taste. Practical Example: If a child is crying over a scraped knee, you could say, "Okay, let's calm our body. Can you tell me five blue things you see in the room right now?"
Classroom Tip: Practice alongside your students. When they see you taking deep breaths before a challenging lesson, it normalizes the strategy and demonstrates its practical application in everyday life. Start with sessions as short as one minute and gradually increase the duration as students become more comfortable.
2. Emotion Identification and Feelings Vocabulary Activities
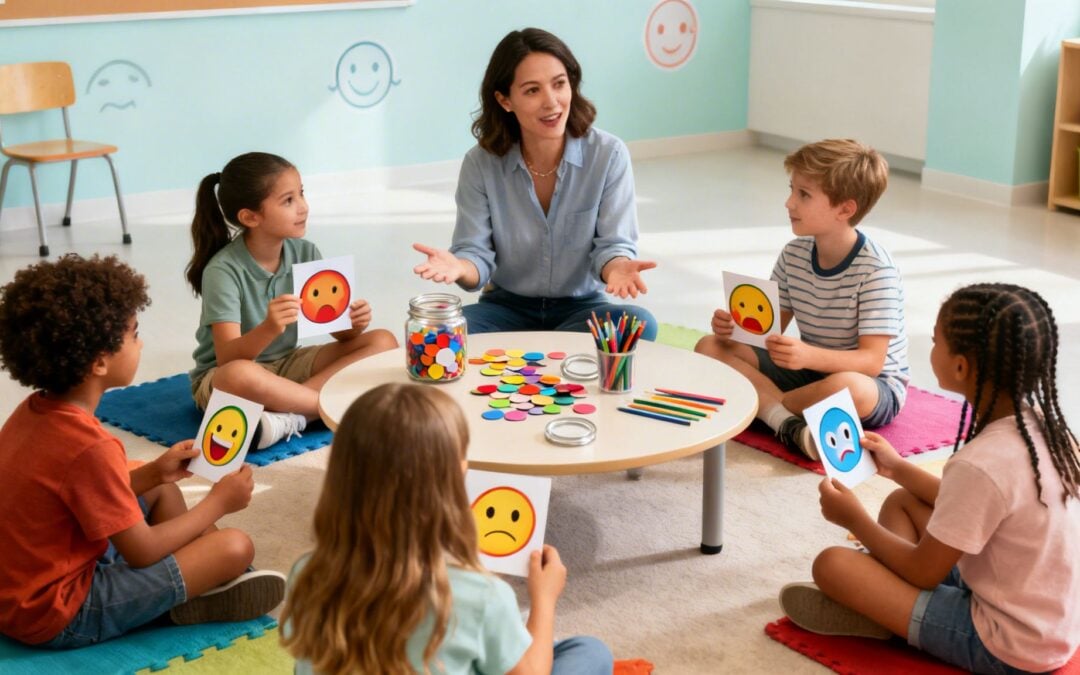
Emotion identification activities are interactive lessons and games designed to expand students' emotional vocabulary, helping them name and understand feelings in themselves and others. These foundational SEL activities for elementary students build emotional literacy, a critical component of self-awareness and social awareness. The goal is to give children the specific words they need to move beyond "mad" or "sad" to more nuanced feelings like "frustrated," "disappointed," or "anxious," enabling better communication and self-regulation.
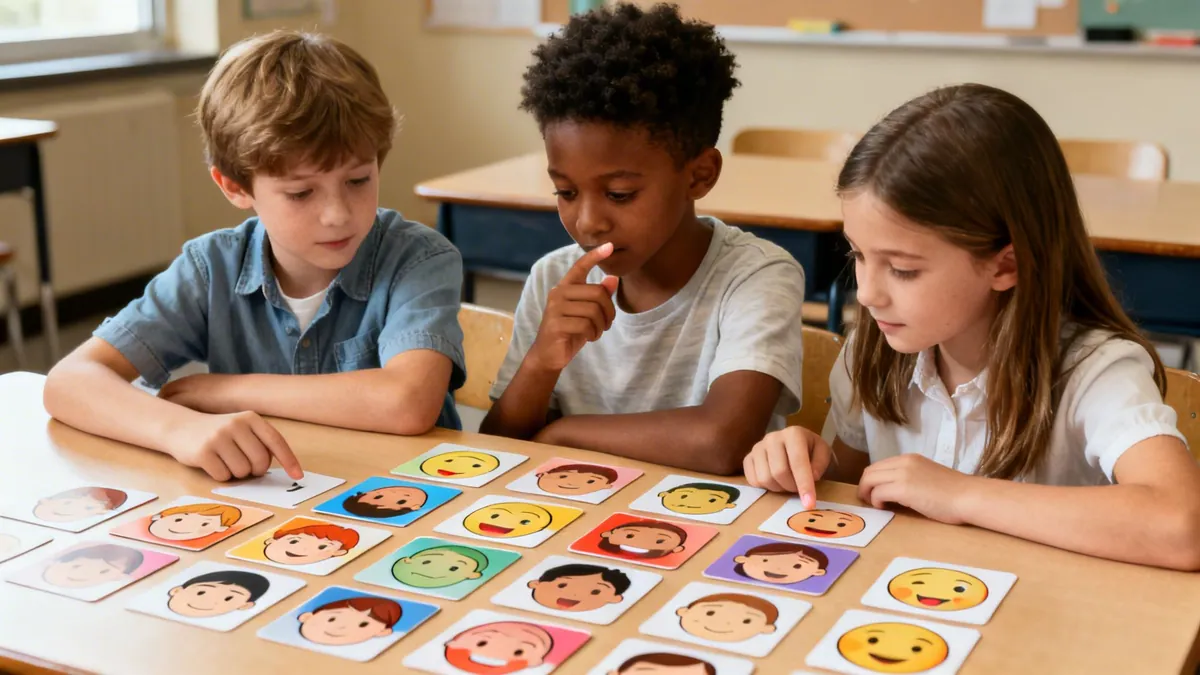
Pioneered by experts like Marc Brackett at the Yale Center for Emotional Intelligence, this work emphasizes that if you can name an emotion, you can begin to manage it. By making feelings vocabulary a regular part of classroom conversation, educators create a safe environment where all emotions are acknowledged as valid, even if the behaviors they cause need guidance.
How to Implement in Your Classroom
Integrating these activities works best through consistent, playful practice rather than a single lesson. Use them during morning meetings, as transitions, or in response to social situations that arise naturally.
Feelings Wheel or Chart: Create a large, visible feelings wheel in the classroom. During check-ins, students can point to the emotion that best describes how they feel, providing a low-pressure way to share. Practical Example: During morning meeting, have students put a clothespin with their name on it next to the feeling on the chart that best matches their mood.
Emotion Charades: Write different emotions on cards. A student picks a card and acts out the feeling without words, while classmates guess. Practical Example: A student picks "frustrated." They might stomp their foot lightly and cross their arms. Another student guesses, "Are you angry?" The teacher can then ask, "What's the difference between angry and frustrated?"
Literature-Based Discussion: During read-alouds, pause and ask, "How do you think this character is feeling right now? What clues in the story or pictures tell you that?" Practical Example: While reading Where the Wild Things Are, pause and ask, "When Max was sent to his room, what feeling was he showing? Look at his face. Is it just anger, or maybe disappointment too?"
Classroom Tip: Collaboratively create a classroom "emotions anchor chart" with your students. As you introduce new feelings words throughout the year, add them to the chart with simple definitions or drawings. This co-created resource fosters ownership and makes the vocabulary more meaningful.
To find more games, charts, and tools for your classroom, you can find further resources for teaching emotional vocabulary to kids that make learning about feelings engaging and effective.
3. Gratitude and Positive Reflection Practices
Gratitude and positive reflection practices are simple yet powerful exercises that teach students to intentionally notice and appreciate the good in their lives. These foundational SEL activities for elementary students build self-awareness and social awareness by shifting focus from problems to positives. The core principle, supported by positive psychology research, is that training the brain to look for what's working builds resilience, strengthens relationships, and improves overall well-being.
By consistently identifying things they are thankful for, students learn to recognize the value in everyday moments, people, and their own abilities. This practice counters negativity bias and helps children develop a more balanced and optimistic outlook, which is crucial for managing challenges and building strong emotional health.
How to Implement in Your Classroom
Integrating gratitude into your daily routine can be simple and quick, making it a sustainable practice. The key is modeling authentic appreciation and providing structured opportunities for students to share. You can add these activities to your morning meeting, use them as a calm-down transition, or conclude the day on a positive note.
Gratitude Journals: Provide notebooks where students can write or draw something they are grateful for each day. Practical Example: At the end of the day, prompt students: "Today, draw or write about one person who was kind to you." For younger students, provide the sentence starter, "I am thankful for…"
Appreciation Circles: During a morning meeting, have students go around the circle and complete the sentence, "Today, I am grateful for…" This builds community as students listen to their peers' appreciations. Practical Example: On a Monday, you might ask, "Share one thing you are grateful for that you did this weekend."
Thank You Letters: Guide students in writing and delivering letters of appreciation to classmates, school staff, or family members. This directly practices relationship skills and empathy. Practical Example: Before a holiday break, have students write a short thank-you note to the school custodian, librarian, or a cafeteria worker, telling them one specific thing they appreciate.
Classroom Tip: Expand the concept of gratitude beyond material things. Use sentence starters to help students appreciate experiences ("I'm grateful for learning how to…"), people ("I'm thankful for my friend because…"), and personal strengths ("I'm proud that I was able to…"). This teaches them to find value in a wide range of life experiences.
For additional guidance on fostering a culture of thankfulness, explore these practical ways to show gratitude that can be adapted for both school and home environments.
4. Cooperative Learning and Team-Building Games
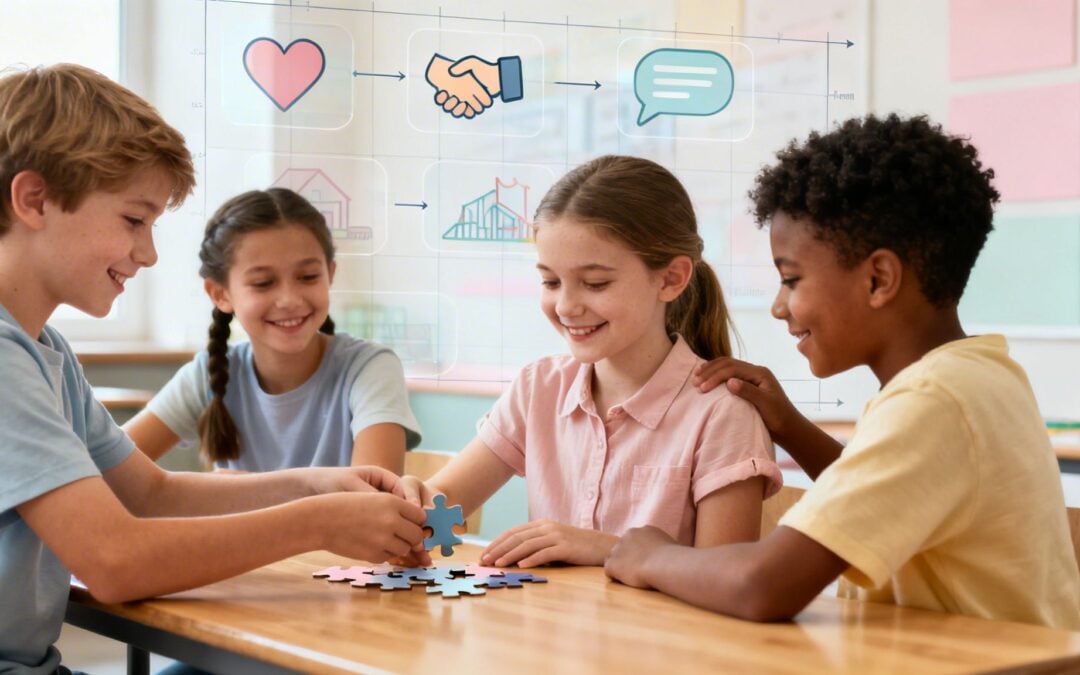
Cooperative learning and team-building games are structured group activities designed to build collaboration, communication, and problem-solving skills. These essential SEL activities for elementary students create an environment where interdependence is necessary for success, which helps foster a sense of belonging and reduces feelings of isolation. The focus is on shared goals, requiring students to listen to peers, negotiate ideas, and work together, thereby strengthening relationship skills and social awareness.
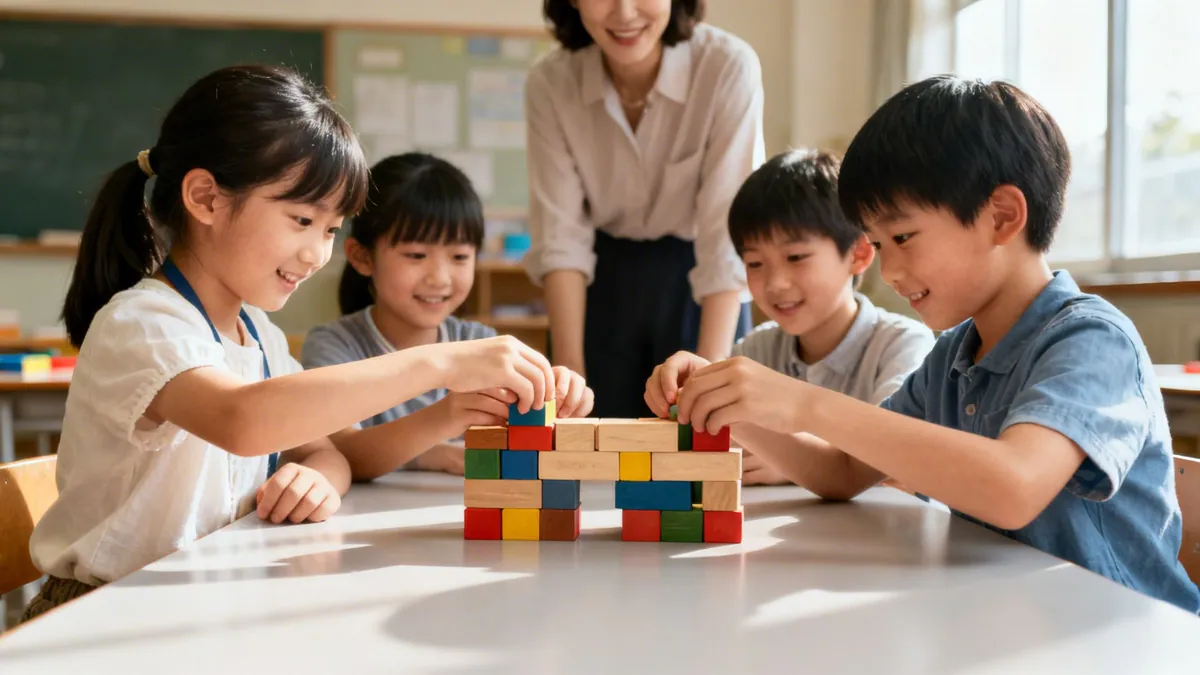
By participating in these activities, students learn to appreciate diverse perspectives and contribute to a common objective. The process helps them understand the give-and-take of working in a group, a critical life skill. To better understand the framework behind these interactions, educators can find value in exploring resources that explain what collaborative problem-solving is and how it supports student development. These games are not just about fun; they are carefully designed practice for real-world social navigation.
How to Implement in Your Classroom
Successful integration depends on clear structure and intentional debriefing. You can use these games as icebreakers, brain breaks, or dedicated time during morning meetings to build a strong classroom community from the very beginning of the school year.
Human Knot: Have a small group of students stand in a circle, reach across to grab the hands of two different people, and then work together to untangle themselves into a single circle without letting go. Practical Example: Split the class into groups of 6-8. After they form a "knot," tell them, "Talk to your teammates to figure out who needs to move where. You might have to go under someone's arms!"
Silent Sequencing: Give each student in a small group a card with a number, a letter of the alphabet, or part of a picture sequence. The group must line themselves up in the correct order without speaking. Practical Example: Give a group of five students cards showing the life cycle of a butterfly. They must use gestures and observation to line up in the correct order: egg, caterpillar, chrysalis, butterfly, etc.
All Aboard: Mark a small area on the floor with tape (the "ship"). Challenge a group of students to fit entirely inside the space. Gradually make the ship smaller in each round, requiring more creative problem-solving and cooperation. Practical Example: Start with a hula-hoop. Challenge a group of 8 to get both feet inside. Then, fold a large towel in half and challenge them again.
Classroom Tip: After each activity, lead a short debrief session. Ask questions like, "What was challenging about that?" or "What did your team do well to succeed?" This reflection is where the most significant SEL learning occurs, as it connects the game to real-life teamwork and communication skills.
5. Peer Empathy and Perspective-Taking Activities
Peer empathy and perspective-taking activities are structured exercises designed to help students understand and share the feelings of others. These essential SEL activities for elementary students focus on building social awareness and relationship skills by encouraging children to see situations from another person’s viewpoint. The main goal is to develop both the cognitive ability to imagine another's experience and the emotional capacity to connect with their feelings, which is foundational for kindness, conflict resolution, and positive relationships.
This approach is central to the work of experts like Daniel Goleman, who identifies empathy as a key component of emotional intelligence. Programs like Soul Shoppe's bullying prevention curriculum put these ideas into practice, teaching students that understanding someone else's perspective is the first step to resolving conflicts peacefully. These activities move beyond simply telling students to "be nice" and give them the tools to actually understand why their actions affect others.
How to Implement in Your Classroom
Integrating empathy-building exercises requires creating a safe space where students feel comfortable sharing and exploring different viewpoints. You can use literature, real-life scenarios, or structured role-plays as a springboard for these discussions.
Character Perspective Switch: During a read-aloud, pause the story and ask students to act out how a different character might feel. Practical Example: After reading The Three Little Pigs, ask, "How would the story be different if the wolf told it? What might he say about why he was blowing the houses down? Maybe he was just cold and had a bad cough?"
Empathy Interviews: Pair students and provide them with gentle, open-ended questions to ask each other, such as "Can you tell me about a time you felt really proud?" or "What is something that makes you feel happy?" This builds active listening skills and mutual understanding. Practical Example: Give partners three minutes each. Student A asks Student B, "What's your favorite thing to do on the weekend and why?" Student A can only listen and then summarizes what they heard.
Scenario Role-Play: Present a common, low-stakes conflict, like two students wanting to use the same playground ball. Have them role-play the situation and then switch roles to experience the other side. Debrief with questions like, "What did it feel like to be in their shoes?" Practical Example: Set the scene: "Maria and Leo both want the red ball at recess." Ask two students to act it out. Then say, "Okay, switch! Now, Leo, you're Maria. How does it feel to see someone else grab the ball you wanted?"
Classroom Tip: Start with fictional characters or hypothetical situations before moving to real classroom conflicts. This creates a safe distance, allowing students to practice empathy skills without feeling personally targeted. Regularly celebrate and point out instances where students show genuine understanding or compassion for a peer.
For more resources on fostering empathy and peaceful conflict resolution, explore the tools offered by the Junior Giants Strike Out Bullying partnership, which provides excellent models for youth programs.
6. Social-Emotional Learning Circles and Community Meetings
Social-Emotional Learning (SEL) circles and community meetings are structured group discussions where students share experiences, solve problems, and build a sense of belonging. These dedicated times create a predictable space for voice, connection, and collective problem-solving. This practice is one of the most effective SEL activities for elementary students because it directly develops relationship skills, social awareness, and responsible decision-making in a safe, peer-supported environment. The core idea is that by sitting in a circle, every member is equal and visible, fostering a community where listening is as important as speaking.
These meetings establish a consistent rhythm for relationship-building and maintenance, moving beyond academic instruction to nurture the whole child. Concepts like the soul circles developed by Soul Shoppe emphasize creating psychological safety, allowing students to express themselves without fear of judgment. This routine practice strengthens the classroom ecosystem, making it more resilient to conflict and more conducive to learning.
How to Implement in Your Classroom
Success with community circles depends on consistency and clear expectations. You can hold them daily as a morning meeting to set a positive tone or weekly to address emerging classroom issues. They can also be used as needed for problem-solving or celebrating successes.
Establish a Routine: Begin each day with a 10-15 minute morning meeting. Include a greeting, a sharing component, a group activity, and a brief message for the day to build predictability. Practical Example: Start with a "Handshake Greeting" where students walk around and shake 3 classmates' hands. Then have them share one thing they're excited to learn today.
Use a Talking Piece: Introduce a special object, like a small decorated stone or a soft ball, as a "talking piece." Only the person holding the object may speak, which teaches patience and respectful listening. Practical Example: Hold up a "talking stone" and say, "We are going to pass this around the circle. When it's your turn, please share one goal you have for this week. If you don't want to share, you can just pass it to the next person."
Set Clear Norms Together: Co-create guidelines with your students. Examples include: "Listen with your heart," "Speak your truth," "Respect the talking piece," and "What's said in the circle stays in the circle."
Provide Sentence Starters: Support reluctant speakers with prompts like, "I feel happy when…" or "One challenge I'm facing is…" This lowers the barrier to participation. Practical Example: Write on the board: "I'm proud that I…" and invite students to complete the sentence when it's their turn.
Classroom Tip: Start with low-risk topics. Ask students to share their favorite weekend activity or something they are proud of. As trust builds, you can gradually move toward more complex conversations, such as resolving a playground conflict or discussing ways to make the classroom more inclusive.
For additional guidance on facilitating these powerful conversations, explore the principles of restorative circles in schools which offer frameworks for repairing harm and strengthening community bonds through structured dialogue.
7. Growth Mindset and Resilience-Building Lessons
Growth mindset and resilience-building lessons teach students that intelligence and skills can be developed through dedication and hard work. These critical SEL activities for elementary students shift the focus from fixed traits to the power of effort, practice, and learning from mistakes. Popularized by researchers like Carol Dweck, these lessons help children build resilience by reframing failure as an essential part of the learning process, empowering them to persist through challenges.
The core principle is teaching students about neuroplasticity, the brain's ability to form new connections. When children understand their brain can grow stronger with effort, they see challenges not as roadblocks but as opportunities. This fosters self-management and a positive, motivated approach to learning that extends far beyond the classroom walls.
How to Implement in Your Classroom
Integrating a growth mindset requires intentional language, celebratory framing of mistakes, and consistent reinforcement. You can weave these concepts into daily instruction, feedback, and classroom culture.
Introduce "The Power of Yet": When a student says, "I can't do this," add the word "yet." This simple linguistic shift frames the task as an achievable goal rather than an impossible one. Practical Example: A student says, "I can't tie my shoes." You respond with a smile, "You can't tie your shoes yet. Let's practice one step."
Create a "Mistake Wall" or "Productive Struggle" Board: Dedicate a space in the classroom to celebrate mistakes as learning opportunities. Have students share what they learned from an error, normalizing the experience and highlighting its value. Practical Example: Post a sticky note that says, "I kept getting 15 instead of 16, but I learned I was forgetting to carry the one!"
Use Process-Focused Feedback: Instead of praising intelligence ("You're so smart!"), praise the process and effort. Practical Example: Instead of "You're a great artist," say, "I love how you used so many different colors in your drawing and how you kept working on the details."
Share Stories of Resilience: Discuss famous figures or even your own personal stories of overcoming challenges through persistence. This shows students that struggle is a universal part of success. Practical Example: Read a picture book about Michael Jordan being cut from his high school basketball team and talk about how he used that failure to motivate himself.
Classroom Tip: Model a growth mindset yourself. When you make a mistake in front of the class, acknowledge it openly and talk through how you will fix it or what you learned. This authentic modeling is powerful and shows students that everyone is a learner.
For a deeper dive into the research and practical applications, Carol Dweck's work on mindset theory provides foundational knowledge for educators aiming to build resilient, motivated learners.
8. Conflict Resolution and Peer Mediation Training
Conflict resolution and peer mediation training are structured programs that equip students with the skills to manage disagreements constructively. These essential SEL activities for elementary students focus on relationship skills and responsible decision-making by teaching a clear, step-by-step process for peaceful problem-solving. Instead of relying on adult intervention for every dispute, students learn to become active agents in creating a positive and supportive school climate.
Picture this: a child so excited to share an answer they blurt it out before the teacher finishes the question. Or a toddler who, overcome with frustration, snatches a toy from a friend. These moments aren't about being "bad"—they're windows into a developing skill called impulse control.
Think of it less as a switch for good behavior and more like learning to ride a bike. It takes time, practice, and a whole lot of guidance to find that balance.
Why Impulse Control Is a Skill Every Child Needs
At its core, impulse control is the ability to hit the pause button between feeling an urge and acting on it. It’s the brain's internal braking system. For kids, that system is still being built, which is why they so often seem to act first and think second.
This skill is the bedrock for making friends, doing well in school, and handling all the big emotions that come with growing up. When we actively teach impulse control, we’re helping children strengthen that internal pause button, leading to calmer classrooms and more cooperative homes.
The Real-World Impact of Impulse control
A child who can manage their impulses can wait their turn for the slide instead of pushing ahead. They can raise their hand instead of shouting. These might seem like small things, but they are huge victories in their social and emotional journey.
This ability to pause and think has a ripple effect on a child's entire world. Strong impulse control helps children:
Build Healthier Friendships: They learn to share, take turns, and talk through disagreements instead of grabbing or hitting. For example, instead of snatching a toy, they learn to say, "Can I have a turn when you're done?"
Succeed Academically: They're better able to focus on instructions, stay on task, and resist the constant distractions of a busy classroom. For example, they can listen to all the directions for an art project before immediately starting to paint.
Manage Big Emotions: They find ways to use their words to express frustration rather than defaulting to a meltdown. For example, instead of throwing their blocks when a tower falls, they can say, "I'm so mad it fell over!"
A child’s capacity for self-control is one of the most important predictors of positive outcomes. It's more than just behavior management; it's about giving them the tools for lifelong well-being.
It's a Foundational Life Skill
Ultimately, helping kids with impulse control is about preparing them to handle life's frustrations and setbacks with grace. It’s a cornerstone of social-emotional learning that helps them feel seen, understood, and in charge of their own actions.
Activities that require focus and respect for others can be a huge help. For example, exploring how structured physical programs aid in building confidence and discipline in children shows how external routines can build internal strength. When we model and teach this skill, we’re not just correcting a behavior—we're building a child's resilience from the inside out.
How a Child's Developing Brain Shapes Impulsive Behavior
To really get why a child might snatch a toy or blurt out an answer, we have to look under the hood at their developing brain. It helps to think of it as a team with two very different players: one is a speedy, emotional "first responder," and the other is a thoughtful, slower "planning manager." The dynamic between these two is the secret to understanding impulse control.
The first responder is the limbic system, which you can think of as the brain's emotional core. It's where big feelings like excitement, frustration, and fear come from. This part of the brain is fully formed and running the show from a very young age, which is why toddlers and young children have such powerful, immediate reactions to everything.
The planning manager is the prefrontal cortex, located right behind the forehead. This is the brain's CEO, responsible for logic, thinking ahead, and most importantly, hitting the brakes on those sudden urges. But here's the catch: the prefrontal cortex is the very last part of the brain to fully mature. Its major development continues well into a person's early 20s.
The Accelerator and the Brakes
Picture a car with a super-sensitive gas pedal but brakes that are still being installed. In a child's brain, the emotional limbic system is that powerful accelerator, while the developing prefrontal cortex is the unreliable brake. This imbalance is exactly why children so often act first and think later.
Their emotional engine revs high with excitement or curiosity, and the impulse to do something is immediate. The thoughtful "planning manager" simply hasn't built up the strength or speed to consistently jump in and say, "Hang on, let's think this through."
Practical Example: A five-year-old sees a colorful cupcake on the kitchen counter. Their limbic system (the first responder) practically shouts, "I want that now!" and sends an urgent signal to grab it. Their prefrontal cortex (the planning manager) is supposed to intervene with, "Wait, we should ask first," but that connection is still a bit slow and weak. The result? The child's hand is already reaching for the cupcake before the "stop" signal even has a chance to arrive.
Building Brain Connections Through Co-Regulation
Knowing about this developmental gap completely changes how we should look at discipline. When a child acts impulsively, it isn't a sign of bad behavior or defiance. It's a signal that their brain's braking system needs a helping hand. This is where co-regulation comes in. By acting as their external "brakes," we help children navigate overwhelming feelings and impulses they can't yet manage on their own.
Co-regulation isn't just about stopping a single impulsive act. It's the process of lending a child your own calm and logic, which actively helps build and strengthen the neural pathways between their emotional brain and their thinking brain.
This process is a fundamental part of developing crucial self-management skills. You can learn more about these foundational abilities by checking out our guide on what are self-management skills.
Here’s what co-regulation looks like in action:
Lending Your Calm: When a child is getting worked up, you make a point to stay calm yourself. This gives them a steady emotional anchor in their storm. Practical example: Your child starts crying loudly because their sibling won't share. Instead of matching their volume, you get down on their level and speak in a soft, steady voice.
Narrating the Feeling: You give them the words for what they're feeling. For instance, "You seem really frustrated that your turn is over." Practical example: "I can see you're very angry that the block tower fell. It's okay to feel that way."
Guiding the Next Step: You offer a clear, simple solution. "How about we take three deep breaths together before we decide what to play next?" Practical example: "It’s not okay to hit. Let's use our strong hands to squeeze this pillow instead, and then we can talk about it."
Every single time you guide a child through this process, you’re doing so much more than just correcting a behavior. You are physically helping to build the brain architecture they need for lasting impulse control. You're not just correcting them; you are essentially being their prefrontal cortex until their own is strong enough to take the wheel.
Realistic Milestones for Impulse Control Development
It’s one thing to know that impulse control develops over time, but it’s another to know what’s “normal” for a specific age. We don’t expect a toddler to read a chapter book, so we shouldn’t expect them to have the same self-restraint as a ten-year-old. Setting realistic expectations is the very first step in offering support that actually works.
Think of this as a developmental map. It’s here to help you recognize what’s age-appropriate and spot when a child might need a little extra coaching.
The brain's emotional center and its logical "planning center" mature at very different speeds. This timeline gives you a great visual of how that gap influences a child's ability to manage their impulses from moment to moment.
As you can see, the emotional, reactive part of the brain is online and ready to go from early on. The thoughtful, planning part? That takes years to fully connect. This is exactly why our patience and consistent coaching are so critical.
To help you set appropriate expectations, here's a look at the typical journey of impulse control, from grabbing toys in preschool to navigating social situations in middle school.
Impulse Control Milestones From Preschool to Middle School
Age Group
Common Impulsive Behaviors
Emerging Self-Regulation Skills
Preschool (3-5)
Grabbing toys, blurting out thoughts, big emotional reactions (tantrums) to small problems.
Beginning to understand simple rules, can wait for very short periods with reminders, starts to label feelings.
Early Elementary (6-8)
Acting out when tired or excited, interrupting conversations, difficulty losing games gracefully.
More awareness of social rules, can follow multi-step directions, can use simple calming strategies (like taking a deep breath).
Upper Elementary (9-11)
Rushing through work, occasional sarcastic or unfiltered comments, getting distracted by peers.
Better at thinking before acting, can understand another person’s perspective, starts to use problem-solving skills independently.
These milestones aren't rigid rules but gentle guides. Every child develops at their own pace, and skills can look strong one day and disappear the next—especially when a child is tired, hungry, or overwhelmed.
A Closer Look at Each Stage
Preschoolers (Ages 3-5)
At this age, the world is all about immediate wants and needs. Their brain’s emotional "first responder" is in the driver's seat, while the logical "planning manager" is just learning to give directions. Impulsive behavior isn't just common; it's their default setting.
Practical example: A four-year-old sees a shiny red truck in another child's hands. Their brain screams, "I want it!" and their hand grabs it. They aren’t being mean—they simply haven't built the neural wiring yet to pause, consider the other child, and ask for a turn.
Early Elementary (Ages 6-8)
As kids start school, their "planning manager" starts to get stronger. They have a better grasp of rules and are more aware of others' feelings, but their impulse control is still pretty inconsistent. It takes a lot of mental energy for them to manage their urges.
Practical example: Think of a seven-year-old in a board game. They know the rules say to wait for their turn, and they manage for a few rounds. But as the game gets exciting, they might forget and roll the dice early. They have the knowledge, but consistent follow-through is still a work in progress.
This is a perfect time to focus on a child’s emotional literacy. Digging into the full spectrum of child emotional development gives you a much richer context for all the changes happening under the surface.
During these years, impulse control is like a flickering lightbulb. It shines brightly in moments of calm but can easily go out when a child is tired, hungry, or overstimulated. Consistency and gentle reminders are your best friends.
Upper Elementary (Ages 9-11)
This stage often brings a major leap in self-regulation. The prefrontal cortex—the brain’s CEO—is making huge strides. This allows kids to think more logically about consequences and get a better handle on their immediate desires.
Practical example: You'll notice they can hold back impulses more reliably, even when they're excited or upset. A nine-year-old working on a group project might disagree with a friend's idea. Instead of blurting out, "That's a dumb idea!" (something they might have done a few years ago), they're now more capable of pausing to say, "What if we tried it this way instead?"
This shows a real ability to filter that first reaction and choose a more constructive path. It's a huge milestone that shows all that earlier groundwork is finally paying off.
Effective Classroom Strategies for Impulse Control
Building a classroom that supports impulse control isn't about stamping out every single outburst. It’s about creating a predictable, supportive space where kids can practice hitting their own internal "pause button" with you as their guide. These techniques are designed to be woven right into your daily classroom life, turning ordinary moments into powerful learning opportunities.
The real key is to shift from correcting impulsive behaviors after they happen to proactively teaching the skills that prevent them in the first place. This simple change helps create a calmer, more focused, and cooperative learning environment for everyone.
Implement the Stop, Think, Act Framework
The "Stop, Think, Act" model is a simple but incredibly powerful mental script. It helps children interrupt their own impulses, and your job is to make this internal process visible and external until they can manage it on their own.
It works because it gives kids a concrete, three-step process to follow when they feel that sudden urge. It breaks down a really complex self-regulation skill into small, memorable parts.
You can use consistent verbal cues throughout the day for those common challenges:
Lining up for recess: "Okay, everyone, before we all jump up, let's Stop and look at the door. Think about what a quiet, safe line looks like. Now, let's Act by pushing in our chairs and walking."
Answering a question: "I see so many excited hands! Remember to Stop before you call out. Think about your answer. I'll call on someone to Act and share it with us."
Starting a new activity: "Pencils down for a moment. Let's all Stop and listen to the directions. Think about the very first step. When I say 'go,' you can Act."
Make Waiting Concrete with Visual Timers
For a child who struggles with waiting, being told to "wait five minutes" can feel like an eternity. Waiting is an abstract concept, but you can make it tangible and way less frustrating with visual timers.
A visual timer physically shows the passage of time, which reduces anxiety. Kids can see that the waiting period has a clear, predictable end, making it much easier to manage their patience.
Try these in your classroom:
Practical example: Use a simple sand timer for short waits, like when students are taking turns in a game.
Practical example: A Time Timer (the kind where the red disk slowly disappears) is great for longer stretches, like during independent reading.
Practical example: For class-wide transitions, project a large digital countdown timer on the board so everyone can see it.
"I can see you're excited to use the computer. Let's set the timer for five minutes. When all the sand is at the bottom, it will be your turn."
Use Role-Playing for Common Conflicts
Practicing how to handle tough situations when everyone is calm is one of the best ways to prepare students for real-life disagreements. Think of role-playing as building muscle memory for positive social behaviors.
It works because students can safely try out communication and problem-solving skills without the pressure of a real, emotional conflict. This helps them build a script for what to say and do when they feel frustrated or unheard.
Set up short, simple scenarios based on common classroom problems:
Scenario: Two students both reach for the last green marker.
Script: Have one student practice saying, "Can I use it when you're done?" instead of just grabbing it. Then, have the other student practice responding, "Sure, you can have it in two minutes."
Debrief: Ask the class, "What did you notice? How did that feel better than just grabbing the marker?"
Structured classroom management programs can be incredibly effective at reducing impulsivity. For instance, research from Johns Hopkins trials on the Good Behavior Game—a classroom intervention for disruptive behaviors—found that kids in the program showed lasting reductions in impulsive and aggressive actions all the way through adolescence. It’s proof that consistent, structured strategies yield powerful, long-term benefits for impulse control in children.
Proactive Environmental and Instructional Support
Beyond direct instruction, the way you set up your classroom and deliver your lessons can make a huge difference in reducing impulsive behaviors. For students who need more support, consider these self-regulation strategies for students.
Here are a few key adjustments you can make:
Provide Seating Options: Offer wobble stools or resistance bands on chair legs to give students a quiet outlet for their physical energy.
Break Down Instructions: Instead of giving all the directions at once, deliver them one or two steps at a time.
Preview Transitions: Give a heads-up five minutes before a change. Say, "In five minutes, we will clean up our art supplies and get ready for math."
Offer Brain Breaks: Schedule short, 2-3 minute movement breaks between periods of focused work to help everyone reset.
Fun Home Activities That Build Self-Regulation
You don't need workbooks or rigid lessons to build impulse control in children. In fact, some of the most powerful opportunities are hiding in plain sight—in your playroom, in your kitchen, and in your daily routines.
The real key is to make practicing self-regulation feel like a game, not a chore. When you do, you help your child build the mental muscles for patience, listening, and thinking before they act, all in a safe and playful space.
Games That Teach the "Pause" Button
Classic childhood games are perfect for practicing response inhibition—the ability to stop an action that’s already in motion. It’s all about hitting that internal "pause button" on command.
Red Light, Green Light: This one is a classic for a reason. When you yell "Red Light!", a child has to fight the powerful urge to keep running and freeze in place. It’s a direct, physical way to practice stopping an impulse.
Freeze Dance: This works the same muscle. Kids have to dance with abandon until the very second the music stops, training them to pay close attention and control their bodies instantly.
Want to add a challenge? Try changing the rules. For a practical twist, tell them to "freeze" when the music starts and "dance" when it stops. This makes them inhibit their old habits and adapt on the fly, adding another layer of cognitive control.
Activities for Following Steps and Delaying Gratification
So many household activities are natural lessons in patience and following a sequence. These are the skills that help counter that powerful "I want it now!" urge that every child feels.
Building self-control isn't about rigid discipline; it's about playful practice. When a child learns to wait for a cookie to bake or a turn in a game, they are building the foundation for bigger life skills like waiting to speak or thinking before acting.
Baking Together
Following a recipe to bake cookies or a cake is a fantastic, multi-step lesson in managing impulses. Your child can’t just dump everything into the bowl at once and expect a good result.
Patience: They have to wait for each ingredient to be measured and added.
Following Directions: They learn that steps must be followed in a specific order to get the treat they want.
Delayed Gratification: And of course, the ultimate test is waiting for the cookies to bake and cool before they can finally take a bite.
Building with Blocks or LEGOs
When a child is following instructions to build a specific model, they have to resist the urge to just start clicking random bricks together. They have to slow down, find the correct pieces, and connect them in the right order. This activity strengthens their ability to manage frustration and stick with a plan.
Prosocial behavior, which consists of actions intended to help others, is the bedrock of a kind, safe, and collaborative community. For parents and educators, fostering these skills is more critical than ever. It is about moving beyond simply telling children to 'be nice' and instead giving them a concrete toolkit for empathy, cooperation, and support. To begin cultivating a prosocial mindset, it is essential to understand the core principles of social responsibility and how individual actions contribute to the well-being of the group.
This guide provides a detailed look at ten powerful examples of prosocial behavior, offering practical, grade-appropriate strategies for K-8 students. We will break down not just what these behaviors are, but exactly how to teach, model, and reinforce them in various settings. You will find actionable takeaways for implementing peer support, conflict resolution, kindness campaigns, and more. The goal is to provide a clear roadmap for building connected, empathetic school cultures where children are equipped with the skills they need to thrive both socially and academically. From the classroom to the playground and into the community, these strategies are the building blocks for creating a more supportive environment for every child.
1. Active Listening and Empathetic Responding
Active listening is a foundational prosocial behavior where a person focuses entirely on what someone else is saying, rather than just waiting for their turn to speak. This practice involves paying attention to verbal and non-verbal cues, reflecting back what was heard to confirm understanding, and responding with empathy. It requires suspending judgment and validating the other person's feelings before offering solutions, creating a sense of psychological safety and belonging.
This skill is a cornerstone of positive social interaction and a powerful tool against isolation and conflict. When students learn to truly listen, they build stronger, more meaningful connections with their peers. This is one of the most powerful examples of prosocial behavior because it directly builds empathy and community.
Practical Applications and Tips
To put active listening into practice, educators and parents can model it and provide structured opportunities for children to learn.
Model the Behavior: During classroom discussions or family meetings, adults should demonstrate active listening by making eye contact, nodding, and paraphrasing what a child says. For example: "It sounds like you felt frustrated when your tower fell. Is that right?"
Use Sentence Starters: Provide scaffolding with phrases like, "What I hear you saying is…" or "It seems like you're feeling…" to help children structure their empathetic responses. For instance, have students practice this after a partner shares something about their weekend.
Practice with Role-Play: Use role-playing scenarios to give students a safe space to practice. A teacher can set up a scenario where one student pretends they lost their favorite pencil and the other student practices listening and responding with empathy. For a hands-on guide, check out this simple and effective active listening activity.
2. Peer Support and Buddy Systems
Structured peer support programs intentionally pair students to offer academic help, emotional encouragement, and social companionship. These buddy systems are a powerful way to connect isolated or struggling students with empathetic peers who can model positive behaviors and provide informal mentorship. This approach reduces student isolation, fosters a sense of belonging, and uses the strong influence of peer relationships for positive growth.
These programs formalize the act of helping one another, transforming it into a reliable school resource. By creating structured opportunities for students to connect, schools can build a more inclusive and supportive community. This is one of the most effective examples of prosocial behavior because it systematically builds social skills and a network of support for all students involved.
Practical Applications and Tips
To implement a successful buddy system, clear structure and training are essential for both students and supervising adults.
Define Clear Roles: Provide written guidelines that outline the purpose and expectations for all participants. For example, a "New Student Buddy" might be tasked with showing a new classmate around, sitting with them at lunch for the first week, and explaining classroom routines.
Train Your Buddies: Equip student volunteers with the necessary skills. Training should cover active listening, maintaining role boundaries, and knowing when to seek help from a trusted adult. For example, role-play a scenario where a buddy doesn't know the answer to a question and needs to ask a teacher for help.
Match for Success: Pair students based on compatible personalities and shared interests, not just academic standing. A good character fit is often more important for building a genuine connection than matching high-achievers with struggling students.
Schedule Regular Check-ins: A teacher can hold a 5-minute meeting with the buddy pair once a week to ask, "What's one good thing that happened this week?" and "Is there anything you need help with?" This helps address any challenges and reinforces the program's value.
3. Cooperative Learning and Collaborative Projects
Cooperative learning moves beyond simple group work by structuring activities so students must rely on one another to succeed. This approach requires interdependence to achieve shared academic and social goals. By working together, students naturally develop empathy, perspective-taking, and mutual support as they navigate group dynamics, assign tasks based on strengths, and solve problems as a team.
This method is one of the most effective examples of prosocial behavior because it integrates social skill development directly into academic learning. When students see that their individual success is tied to the group's success, they become more motivated to help, listen to, and encourage their peers. This builds a classroom culture where collaboration is valued over competition.
Practical Applications and Tips
To successfully integrate cooperative projects, educators should intentionally teach and reinforce the necessary social skills alongside the academic content.
Assign and Rotate Roles: Structure group projects with specific roles like "Researcher," "Recorder," "Presenter," and "Materials Manager." For a history project, one student researches dates, another writes down the group's findings, a third manages the art supplies, and a fourth presents the final poster. Rotating these roles ensures every student develops different skills.
Use Structured Protocols: Implement strategies like "Jigsaw," where each student becomes an expert on one piece of information and then teaches it to their home group. For a science unit on planets, each student in a group could learn about a different planet and then teach the others, ensuring equal participation and individual accountability.
Build in Reflection Time: After a project, guide groups to discuss their collaborative process. A parent can do this at home after a family chore by asking, "What went well when we cleaned the kitchen together?" and "What could we do differently next time?"
Practice at Home: For students learning to work together, engaging in activities like playing the best cooperative board games or building a large LEGO creation together can be an excellent way to practice teamwork in a low-stakes, fun environment.
4. Kindness Campaigns and Recognition Programs
Kindness campaigns are organized school-wide initiatives that encourage, track, and celebrate acts of kindness. These programs use positive reinforcement and peer recognition to make prosocial behavior a visible and valued part of the school culture. By creating a system to highlight helpfulness, schools show students that these actions are both expected and appreciated.
These programs make empathy and care tangible and public. Initiatives like a "kindness chain," where each link represents a kind act, or a gratitude wall for thank-you notes, provide visual proof of a caring community. These are powerful examples of prosocial behavior because they shift the school's focus toward positive actions, building a culture of mutual support and belonging.
Practical Applications and Tips
To implement a successful kindness campaign, the focus should be on accessibility, inclusion, and extending the practice beyond the school walls.
Define Kindness Broadly: Encourage students to notice quiet acts, not just grand gestures. For example, a student might be recognized for inviting someone to play at recess, offering help with a difficult math problem, or giving a genuine compliment.
Create Simple Systems: Use low-barrier methods for recognition. A classroom "kindness jar" where students drop notes describing a kind act they witnessed is a great example. A "Kindness Rocks" project, where students paint positive messages on rocks and hide them around the playground for others to find, is another easy and engaging activity.
Connect to SEL: Tie the campaign directly to social-emotional learning competencies. For example, during a unit on social awareness, challenge students to notice and report acts of kindness they observe. At home, a parent could start a "Caught Being Kind" chart on the fridge.
5. Conflict Resolution and Restorative Practices
Conflict resolution and restorative practices shift the focus from punishment to accountability and healing. Instead of simply penalizing a student who caused harm, this approach brings together all affected parties to discuss the impact of the actions and collaboratively decide on a path to repair relationships. This structured method teaches students to understand the consequences of their behavior, take responsibility, and work together toward a positive resolution.
Collaborative problem solving is what happens when a group works together to get past a shared challenge. It’s a powerful blend of social skills, like communication and empathy, mixed with thinking skills, like planning and troubleshooting. It’s all about working toward one common goal.
Think of it as the magic ingredient that turns a chaotic group project into a creative, effective success.
Defining Collaborative Problem Solving
Picture a group of kids determined to build the ultimate pillow fort. They don’t just start grabbing cushions and hoping for the best. That would end in a heap on the floor.
Instead, they talk it out. They make a plan. They work together to figure out how to keep the walls from collapsing. One child might suggest using the heavy couch cushions for the base, while another has a great idea for draping a blanket to make the roof. That is collaborative problem solving (CPS) in a nutshell.
It’s the amazing thing that happens when we combine our brainpower and our social skills to tackle something tricky together. This is totally different from a lot of group work, which often turns into a “divide and conquer” mission where everyone just does their own separate part.
In collaborative problem solving, the process is just as important as the final product. The real goal is to build a shared understanding, handle disagreements in a positive way, and co-create a solution that no single person could have come up with on their own.
This approach takes more than just giving everyone a job to do. It means kids have to practice active listening, see things from another person’s point of view, and learn how to blend different ideas into one solid plan.
Beyond a Simple Definition
At its heart, collaborative problem solving is where thinking meets relating. It's a method that helps kids not only solve the problem in front of them but also build stronger relationships and communication skills along the way.
To really get good at it, kids need to develop skills in a few key areas. Think of them as the four pillars holding up any successful team effort.
The Four Pillars of Collaborative Problem Solving
This table breaks down the core skills students need to become effective collaborative problem solvers, with examples for parents and teachers.
Pillar
What It Looks Like in Action
Practical Example
Building a Shared Understanding
The group works together to define the problem. Everyone agrees on what the final goal is.
At home: Planning a family movie night. Everyone agrees the goal is to pick a movie and a snack that everyone can enjoy.
Exploring and Planning
Kids brainstorm different ideas and weigh the pros and cons. They create a step-by-step plan together.
In class: Students plan a party. They list all tasks on the board (decorations, music, games) before deciding who does what.
Communicating and Cooperating
Everyone listens to each other's ideas, shares their own thoughts clearly, and works to build consensus.
At home: Siblings decide how to share a new toy. They listen to each other's ideas for a schedule instead of grabbing.
Reflecting and Adapting
The group checks in on their progress. If something isn’t working, they adjust the plan as a team.
In class: A group project isn't working. They pause and ask, "What's not working? What's one thing we can change right now?"
When kids practice these skills, they're not just learning to be better teammates. They're developing a dynamic combination of abilities that are essential for success, both in the classroom and in the real world. In fact, this is the very foundation of how many professional fields, like design and creative services, operate.
This process directly nurtures key parts of a child's growth. You can see just how deeply these skills connect by reading our guide on what is social emotional development.
Ultimately, CPS teaches a powerful lesson: our collective brainpower is almost always stronger than our individual knowledge. It’s what transforms a simple group of kids into a true, unstoppable team.
The Three Essential Ingredients for Team Success
True collaborative problem solving isn’t something that just happens when you put kids in a group. It’s built on a specific set of skills they need to learn and practice together. When you see a group truly clicking, you'll notice three key ingredients at work.
Learning to blend these components is what turns chaotic group work into a powerful and productive learning experience. Once you can spot these three parts, you really understand what collaborative problem solving is all about.
Social Regulation: The Emotional Glue
The first ingredient is social regulation, which is really about managing emotions and navigating interactions when things get a little tense. It’s the ability to stay focused and respectful, even when people disagree. Think of it as the emotional glue that holds a team together during a challenge.
For any team to find success, its members have to be able to handle frustration, genuinely listen to different points of view, and share their own feelings without causing a fight. Without social regulation, a simple conflict can derail the whole project before a solution is even close.
Practical Example for Parents and Teachers: Imagine a group of students is trying to decide on a theme for a class project. A disagreement starts. One child slams their pencil down, clearly frustrated. A teacher can step in and say, "I see this is getting frustrating. Let's all take a deep breath. Can we try using 'I-statements' to share our feelings? For example, instead of 'That's a bad idea,' try, 'I feel worried that idea won't work because…'" This small script gives them a tool to manage the tension productively.
Shared Understanding: The Team’s Compass
Next up is shared understanding. This is all about getting everyone on the same page about what the problem is and what the end goal looks like. It acts like a team’s compass, making sure everyone is moving in the same direction.
This goes beyond just reading the instructions. It’s about creating a collective mental picture of what success will be. When every single team member understands the objective, they can all contribute in a much more meaningful way.
A team that lacks a shared understanding is like a boat with people rowing in different directions. They might all be working hard, but they won't get anywhere meaningful.
Practical Example for Parents and Teachers: A family is trying to plan a Saturday outing. To build a shared understanding, a parent can grab a piece of paper and say, "Okay, let's make sure we all agree on our goal. Are we trying to find something fun and free, or is it okay if it costs a little money? Do we want to be outdoors or indoors?" By writing down the agreed-upon criteria ("free," "outdoors," "less than 20 minutes away"), the family creates a shared filter to evaluate all their ideas.
Task Regulation: The Action Plan
Finally, there's task regulation. This is the "how" of the project—it’s all about planning the work and then working the plan. This means organizing the process, keeping an eye on progress, and being willing to make adjustments along the way. It’s the team's action plan for turning ideas into reality.
This skill helps a group take a big, intimidating problem and break it down into smaller, more manageable steps. It also involves figuring out who is doing what so that everyone knows their role in reaching the finish line.
Practical Example for Parents and Teachers: A group of students needs to create a presentation. To practice task regulation, they can create a simple checklist on a shared document or whiteboard.
Task 1: Research Topic A (Assigned to: Sam and Chloe) – Due Tuesday
Task 2: Find images and videos (Assigned to: Maria) – Due Wednesday
Task 3: Create the presentation slides (Assigned to: Leo) – Due Thursday
Task 4: Practice the presentation together (Assigned to: All) – Friday morning
By creating this visible plan with roles and deadlines, the students aren't just dividing the work; they're co-creating a strategy for success and holding each other accountable.
Bringing Collaborative Problem Solving Into the Classroom
Theory is one thing, but seeing collaborative problem solving come to life in a bustling classroom is where the magic really happens. Moving from concept to practice means creating intentional, structured opportunities for students to build these skills brick by brick. The secret is to design challenges that feel real, engaging, and perfectly suited to their age.
Across all grades, the teacher’s role shifts from being the "sage on the stage" to the "guide on the side." You’re not there to hand out answers. Your job is to facilitate, ask probing questions, and help students work through the inevitable disagreements that pop up. This is how they build real capacity for teamwork and critical thinking.
Early Grades (K-2): The Classroom Tidy-Up Team
Our youngest learners do best with goals that are concrete and immediate. A simple “Classroom Tidy-Up Team” challenge can transform a mundane chore into a powerful lesson in collaborative problem solving. The mission is simple: figure out the best way to organize a messy reading nook or a chaotic art station together.
Instead of just telling them what to do, frame it as a puzzle they need to solve as a team. This prompts them to talk, plan, and delegate. You’ll see it right away—leaders emerge, organizers start sorting, and the little negotiators find ways to make things fair.
Teacher Prompts to Guide the Process:
"What should our plan be? Do we sort the books first, or should we put away the crayons?"
"I see two friends both want to stack the blocks. How can we figure this out so it feels fair for everyone?"
"What's the fastest way to get our space clean? Let's listen to everyone's idea before we start."
This small-scale activity teaches those foundational skills like taking turns, listening to others, and working toward a goal they can all see and celebrate. It’s the perfect first step into teamwork.
Elementary Grades (3-5): The Build a Better Recess Project
By upper elementary, students are ready for more ownership. A "Build a Better Recess" project empowers them to actively improve their own school environment. Working in small groups, students must brainstorm, develop, and propose a new recess game or activity.
This task moves beyond just sharing ideas. To succeed, groups have to interview their peers to see what’s popular, negotiate which ideas are actually doable, and then create a clear, compelling plan to present. This forces them to manage differing opinions and find a compromise everyone can get behind.
The real learning happens when students realize they can’t just push for their own idea. They have to listen, find common ground, and combine concepts to create something the whole group supports.
Teacher Prompts to Guide the Process:
"Your group has three great game ideas. How can you decide together which one to focus on for your proposal?"
"Maria's interviews show kids want more running games, but Ben's show they want something calmer. Is there a way your plan could include both?"
"What are the most important steps to explain in your presentation so your idea is easy for me to understand?"
If you're looking for more group activity ideas, you might find inspiration in these other engaging problem-solving activities for kids. Projects like these teach a vital lesson: the best solutions often come from blending different perspectives.
Middle School (6-8): The Solve a School Problem Initiative
Middle schoolers are itching to tackle more complex, real-world issues. A "Solve a School Problem" initiative channels their growing desire for justice and autonomy into something incredibly constructive. Groups can choose a genuine issue they care about, like long lunch lines, crowded hallways, or a lack of recycling bins on campus.
This project introduces more advanced problem-solving skills. Students will need to:
Gather Data: This isn't just about opinions. They might need to survey students, time the lunch line with a stopwatch, or count foot traffic in the hallways.
Develop a Solution: Using their data as evidence, they must create a practical, detailed proposal that goes beyond a simple complaint.
Pitch Their Idea: The final step is presenting their solution to school staff or administration, which requires clear communication, persuasive arguments, and a bit of courage!
Teacher Prompts to Guide the Process:
"Your data shows the hallway is most crowded at 10:15 a.m. What does that tell you about what might be causing the problem?"
"That's a fantastic solution! Now, let's think about what challenges or costs the school might face if they tried to make it happen."
"How can you present your findings to the principal in a way that convinces them your plan is worth trying?"
This kind of initiative helps students see themselves as capable agents of change. They learn to turn frustration into action and, in the process, develop skills they will carry with them for a lifetime.
How to Practice Collaborative Problem Solving at Home
While the classroom is a great, structured place to learn, home is where these skills truly come to life. Family life is brimming with little challenges and decisions—perfect, low-stakes moments to practice working together.
By reframing everyday situations as teamwork, you help your kids build stronger communication and empathy without it ever feeling like a lesson. The secret is shifting from giving orders to inviting collaboration. Instead of just assigning chores, think of it as a family mission. This simple change moves the dynamic from a top-down instruction to a team huddle, where everyone is working toward the same goal.
Turn Chores Into Challenges
That messy living room or chaotic playroom might make you want to sigh, but it's actually a golden opportunity. Try framing it as a fun challenge, like a “Weekend Reset Mission,” where the whole family teams up to conquer a space.
Instead of telling everyone what to do, get the ball rolling with questions that get them thinking like a team.
“Okay, team, take a look at this room. What's our game plan to get it looking great again?”
“Where should we start? Sorting toys, wiping down tables, or putting all the books back on the shelf?”
“What job does each person want to take on so we can get this done quickly?”
This approach gives kids ownership. When they have a say in the plan, they're far more invested in the result. They're not just following orders; they’re learning to plan, divide tasks, and see how their part contributes to the whole family's success.
Plan Family Fun Together
Even something as simple as a movie night can be a fantastic exercise in collaborative problem solving. The goal isn't just to pick a movie; it's about planning the entire experience together.
Let the kids be part of the whole process. They can help choose the film, decide on snacks that work with a set budget, and figure out how to make the living room extra cozy for everyone. For even more ways to build these skills while having a blast, check out these family game night ideas.
When siblings disagree—and they will—it’s a perfect coaching moment. Your role isn't to be the judge who declares a winner, but the facilitator who helps them find a middle ground.
Simple scripts can guide them toward a solution. For instance, if one child wants to watch a comedy and the other wants an adventure movie, you can say, “I’m hearing two really fun ideas. How can we make a choice that feels fair to both of you? Could we watch one tonight and the other next week? Or maybe find a movie that's an action-comedy?" This question steers them away from just their own wants and toward a group-focused mindset. Learning to handle these small disagreements is the foundation of empathy, a skill we explore more in our guide on how to teach empathy.
Why This Skill Matters More Than Ever
In a world that’s constantly changing, the ability to solve problems with others isn't just a nice-to-have skill for a resume. It’s becoming one of the most essential tools for a successful life. And the research backs this up in a big way.
A few years ago, researchers conducted the first-ever global assessment of collaborative problem solving, and the results were a major wake-up call for parents and educators.
The 2015 PISA study looked at the abilities of 15-year-old students across 52 different countries. What they found was startling: a tiny 8% of students could be considered highly skilled at working together to solve problems. This points to a huge gap between the skills kids are learning and the skills they actually need. You can find the full results of this historic study on the National Center for Biotechnology Information website.
Connection Is the Secret Sauce
But here’s where it gets really interesting. The study dug into what separated the successful collaborators from the rest. It turns out that just telling kids to “work as a team” didn't help. In fact, it sometimes made things worse.
The real key wasn't forcing teamwork—it was nurturing a genuine sense of connection between the students.
The study showed that students who valued interpersonal relationships performed significantly better at collaborative problem solving. In contrast, those who focused only on teamwork as a task showed worse results.
This is powerful evidence that social-emotional skills like kindness, empathy, and perspective-taking aren't just fluffy add-ons. They are the bedrock of what makes a child an effective problem-solver and a successful student.
More Than an Academic Skill
This link between social connection and problem-solving ability gets to the heart of why this matters so much. When we intentionally teach kids how to listen, how to appreciate different viewpoints, and how to navigate disagreements with respect, we're handing them the toolkit for tackling tough challenges as a team.
The takeaway is simple. When we teach kids how to connect with each other, we are teaching them a critical life skill. It’s the foundation that allows them to build the strong, empathetic, and creative teams that will define their success—in school, in their careers, and in life.
Your Step-By-Step Guide to a CPS Activity
Ready to lead your first collaborative challenge? Knowing what collaborative problem solving is and actually doing it are two very different things. This simple guide is designed to give parents and teachers the confidence to jump in, guiding a group from a shared goal all the way to a successful outcome.
Think of this less as a rigid script and more as a flexible game plan. You can adapt it for a big classroom project, a small family decision, or even a simple weekend chore. The real magic happens when you shift your role from director to facilitator, empowering kids to find their own way forward, together.
1. Frame the Challenge
First things first: set a clear and exciting goal. A vague task just leads to confusion, but a compelling mission is what really sparks creativity. The goal should be simple enough for everyone to grasp, but open-ended enough to invite all kinds of different solutions.
Practical Examples:
At Home: “Our family mission is to design a brand-new board game we can all play on Friday nights. What could it be about?”
In the Classroom: “Our challenge is to create a welcome kit for a new student. What would make someone feel included and happy on their very first day?”
2. Set the Ground Rules
Before anyone starts brainstorming, lay down a few simple norms for how the team will work together. This is all about creating psychological safety, making it a space where everyone feels comfortable sharing ideas without worrying about being judged. These rules are the true foundation of respectful teamwork.
The most important ground rule is that collaboration isn't a competition. The goal is to build the best idea together, not to prove whose idea was best from the start.
Post these rules where everyone can see them. A few simple but powerful examples include:
Listen to understand, not just to reply.
All ideas are good ideas to start.
We help each other when someone is stuck.
3. Kickstart Brainstorming
Now it's time to get those ideas flowing. Your main job here is to ask open-ended questions that encourage a wide range of thoughts. Steer clear of any question that can be answered with a simple "yes" or "no," as those can shut a conversation down before it even starts.
Practical Example: Instead of asking, "Do you want to make a poster?" ask, "In what different ways could we share our idea with the class?" This opens the door to ideas like making a video, performing a skit, or building a model.
4. Be the Guide on the Side
As the group gets to work, you're going to feel the urge to jump in with answers or solve their problems for them. Resist it. Your real power is in asking questions that nudge them to think more deeply and connect their ideas. You are the guide, not the hero of the story.
Helpful Guiding Questions:
"That's an interesting idea. What do you all think would happen if we tried that?"
"How could we combine Sarah's idea for the game board with Leo's idea for the characters?"
"What's one small step we could take right now to test out that idea?"
5. Navigate the 'Stuck' Points
Conflict is a totally natural—and necessary—part of collaborative problem solving. When disagreements pop up or the team hits a wall, don't rush in to fix it. This is a huge learning moment. Instead, help students find the words to express how they're feeling and work through the issue themselves.
Practical Example: If two students disagree on a plan, a teacher can mediate by saying, "It sounds like we have two different ideas here. Can each of you share one thing you like about the other person's idea? Let's see where we agree." This helps them find common ground.
6. Reflect on the Process
Finally, once the task is done, the learning isn’t over. The real magic happens in the reflection, where students get to internalize the skills they just practiced. Ask questions that help them think about how they worked together, not just what they made.
Reflection Prompts:
"What was the hardest part of working as a team today?"
"What was one thing someone did that really helped our group move forward?"
"What did we learn today that will make us an even better team next time?"
Common Questions About Collaborative Problem Solving
Diving into collaborative problem solving for the first time always brings up some great questions. It’s a shift in thinking, for sure. Here are a few of the most common ones we hear from teachers and parents, along with some straightforward answers.
What if One Child Dominates the Conversation?
This is such a common scenario, and it's actually a perfect coaching moment. The goal is to gently balance the scales without making anyone feel called out.
For the child who loves to lead, you can validate their enthusiasm while creating an opening for others. Try something like, "That's a fantastic idea to get us started! Let's pause for a moment and make sure everyone has a chance to share their thoughts before we move forward."
For a quieter child, a gentle, direct invitation can work wonders. "Sarah, I'd love to hear what you're thinking about that idea." You can also use a simple structure, like giving each child three “talking chips.” Once their chips are used, they have to listen. It’s a concrete way to teach the group that every voice has value.
How Is This Different from a Regular Group Project?
This is a big one. The main difference comes down to focus.
A traditional group project is almost always about the final product. This often encourages students to just "divide and conquer" the work. They might each do their part separately and staple it together at the end, without ever truly collaborating.
Collaborative problem solving, on the other hand, puts the spotlight on the process. The real goal is to explicitly teach lifelong skills like communication, taking another's perspective, and resolving disagreements. The final outcome is still part of the equation, but the rich learning that happens as the team figures out how to work together is the real prize.
A note on grading: It's best to assess collaboration based on growth, not just performance. Instead of a single grade, try a simple checklist to note behaviors like, “Shared a helpful idea” or “Helped the group solve a disagreement.” This keeps the focus on building skills, not just getting an A.
At Soul Shoppe, we believe that building these skills is the foundation for creating safer, more connected school communities. We provide schools and families with practical, research-based programs that equip students with the tools they need for empathy, effective communication, and peaceful conflict resolution.
Ready to bring more connection and less conflict to your campus? Learn more about our programs and how they can help.
What if classroom conflict wasn’t something to be stamped out with punishment, but a chance for students to grow? That’s the idea behind restorative circles in schools. It’s a powerful shift away from focusing on consequences and toward repairing harm and rebuilding community. This simple method gives everyone a voice, turning tense moments into real opportunities for empathy and connection.
Moving from Conflict to Connection with Restorative Circles
Think about what happens when a problem pops up in a typical classroom. Maybe two students get into a heated argument. The usual response is often punitive—a trip to the office, detention, or lost privileges. This approach zeros in on punishing the behavior, but it rarely gets to the root of the problem or helps mend the relationship.
Restorative circles offer a completely different path. Instead of asking, “What rule was broken and who gets punished?” we start asking different questions:
Who was harmed by this?
What do they need to feel okay again?
Whose job is it to help make things right?
This small change in framing shifts the entire goal from punishment to accountability and healing. The focus is now on making things right, not just making someone pay for being wrong. By bringing everyone involved into a structured conversation, circles help students see and understand the real impact of what they do.
A Tale of Two Responses
Let’s look at a common scenario: a fifth-grader keeps disrupting a math lesson by making loud jokes while you’re trying to explain a new concept.
The Traditional Response: You’ve given several warnings, and your frustration is mounting. You send the student to the principal’s office. They get a detention slip and a lecture about being respectful. The disruption is over for today, but the student feels misunderstood and resentful. The rest of the class just learned that acting out gets you removed, and no one ever found out why the student was being disruptive in the first place.
The Restorative Response: The teacher finds a calm moment to pull together a quick restorative circle. It includes the student who was being disruptive and a few classmates who were affected. Using a talking piece (an object that gives the holder the exclusive right to speak) ensures everyone gets heard without interruption. The teacher might ask, “What happened?” and “What were you thinking at the time?”
The disruptive student might share that they felt anxious about the math and used humor to cover it up. The other students might share that the jokes made it hard for them to concentrate. From there, the group works together on a solution. For example, the student could apologize and the group might agree on a quiet signal they can use with the teacher next time they feel lost or overwhelmed.
The restorative approach doesn’t let misbehavior slide; it tackles it head-on by making the community part of the solution. This process builds empathy and teaches priceless conflict-resolution skills that directly support social-emotional learning (SEL).
Beyond Discipline: A Tool for Community
While circles are fantastic for responding to harm, their real power lies in being proactive. Many schools use them for daily check-ins, celebrating successes, or even discussing academic topics. For example, a teacher might hold a 10-minute circle every Monday morning with the prompt: “Share one goal you have for this week.” These routine, low-stakes circles build the trust and safety needed for the more challenging conversations to work when conflicts eventually happen.
By practicing sharing and listening when things are calm, students develop the skills to navigate difficult moments with maturity and respect. This foundation is at the heart of the entire restorative movement in schools, which you can explore further by learning about what restorative practices in education are. It all leads to a classroom where every student feels seen, heard, and valued—the essential ingredients for a truly positive learning environment.
The Real Impact of Restorative Practices on Students and Schools
When you hear “restorative practices,” it’s easy to think only of conflict resolution. But the truth is, the benefits go so much deeper, reshaping the entire school climate in ways you can see and measure. It’s not just about students feeling better; it’s about creating an environment where they can actually learn and you can actually teach.
One of the first things schools notice is a dramatic drop in punitive discipline. When students have a structured process for addressing harm and mending relationships, the need for office referrals and suspensions plummets. For any teacher or administrator, this is a game-changer.
Just think about all the time spent on discipline paperwork and the instructional hours lost when a student is sent out of the room. Restorative circles give you that time back, redirecting it toward proactive community building and positive learning experiences.
Building a Foundation for Academic Success
It turns out a more connected school community is a more academically successful one. When students feel seen, heard, and respected, they have more mental and emotional space to focus on learning. Instead of worrying about peer conflicts or feeling misunderstood, they can engage fully with their lessons.
This creates a calmer, more predictable classroom where education can finally take center stage. And the data backs this up, showing a clear link between restorative approaches and better student outcomes.
Schools that effectively use restorative circles in schools often see a powerful ripple effect. Fewer disruptions mean more time for focused instruction, which leads to stronger academic performance for everyone. It’s a positive cycle that feeds itself.
This isn’t just theory. A landmark study from the Learning Policy Institute looked at restorative practices in 485 middle schools, with data from nearly 2 million students. The research found that as students were exposed more to restorative practices, they saw measurable gains on standardized tests in both English and math.
So, what does this impact look like on a day-to-day basis? It shows up in real, observable changes that make school better for everyone.
Fewer Classroom Disruptions: Teachers can spend far more time teaching and less time managing behavior because students are gaining the skills to solve their own problems.
Reduced Administrative Burden: Principals and office staff are freed from a constant cycle of discipline and can focus on instructional leadership and school improvement.
Improved Teacher Morale: Educators feel more supported and effective when they are part of a collaborative, problem-solving culture.
Stronger Student Relationships: Students learn empathy and communication skills firsthand, which naturally reduces incidents of bullying and social isolation.
Imagine a school that used to deal with daily lunchtime conflicts. After implementing regular community-building circles, students start mediating their own disagreements. A small argument over a game no longer blows up into a major office referral. Instead, kids use the language and skills they practiced in the circle (“When you said that, it made me feel…”) to work it out right there on the spot.
This kind of shift doesn’t happen overnight, but the results are profound. By investing in relationships, schools build a resilient community where every member feels a sense of belonging and responsibility. See firsthand how our programs help schools measure these positive changes. This focus on connection is the key to unlocking not just better behavior, but a healthier and more successful school for everyone.
Laying the Groundwork for Successful School Circles
A powerful restorative circle doesn’t just happen. The real magic begins long before anyone sits down in that circle. Without thoughtful preparation, even the best intentions can fall flat, turning what could be a cultural cornerstone into just another passing initiative.
Getting this groundwork right starts with the adults in the building. Restorative practices thrive when they’re a shared mission, not a top-down mandate. For this to take root, teachers, staff, and administrators need to see and believe in its value first.
Start with a Pilot to Build Momentum
Instead of attempting a massive school-wide rollout from day one, try starting small. Launching a pilot program with a handful of enthusiastic educators is a fantastic way to build momentum.
This approach gives a few teachers the space to experiment, figure out what works, and become your school’s first restorative champions. Their genuine success stories will do more to convince skeptical colleagues than any district directive ever could.
Form an implementation team with these early adopters and an administrator to steer the process. They can plan the training, share resources, and provide that crucial peer-to-peer support. Research consistently shows that schools with a dedicated coordinator see much better results. This person becomes the go-to guide, ensuring everyone feels supported as they learn.
A common misstep is assuming a one-day training is enough. Real implementation is a journey of learning, practicing, and reflecting over multiple years. It starts with building a shared philosophy and foundational skills among the adults first.
This groundwork is what builds the safe, predictable environment students need to thrive. To learn more about this, check out our guide on how to create a safe space for students. When educators feel confident, they can lead circles that truly build community.
Co-Creating Your Circle Agreements
Once your pilot team is ready to go, one of the first and most important steps is setting your circle agreements, or norms. Here’s the key: these must be co-created with your students.
This simple act of shared ownership is a restorative practice in itself. It sends a powerful message that their voices are essential in shaping the classroom community.
A teacher might kick this off by saying, “We’re going to start having circles to get to know each other and solve problems together. What promises do we need to make so everyone feels safe enough to share their thoughts?”
Through brainstorming, students almost always land on the core tenets of a strong circle:
Listen to understand, not just to reply. This fosters deep, active listening.
What’s said in the circle stays in the circle. This builds the trust needed for honesty, with the clear exception that safety concerns are always brought to a trusted adult.
Speak from the heart. This encourages students to share what’s real for them, not what they think they should say.
You have the right to pass. No one should ever feel forced to speak. The circle is an invitation, not a demand.
Post these agreements where everyone can see them. They’ll serve as a constant reminder of the community’s shared commitments. Of course, how you introduce these ideas will change depending on your students’ ages. The table below offers some practical language and prompts you can adapt for your classroom.
Age-Appropriate Circle Prompts and Agreements
This table provides sample circle agreements and tiered talking points to introduce and facilitate restorative circles for different elementary and middle school grade levels.
Grade Level
Sample Agreement
Introductory Script Snippet
Proactive Circle Prompt (Community Building)
Responsive Circle Prompt (Addressing Harm)
K–2nd
Use kind words and listening ears.
“In our circle, we use a talking piece. When you have it, it’s your turn to talk, and everyone else has their listening ears on.”
“Share about a time this week when you felt proud of yourself.”
“What happened at recess? How did it make your heart feel?”
3rd–5th
Respect the talking piece. Listen from the heart.
“Today we’re starting something new called a circle. It’s a special time for us to share and listen so we can be a stronger team.”
“If you could have any superpower to help others, what would it be and why?”
“What were you thinking when the argument started? What do you think is needed to make things right?”
6th–8th
Speak your truth. Lean into discomfort.
“Circles are a space for us to be real with each other. We’re creating our agreements together to ensure this is a place of respect.”
“Share about a challenge you’ve overcome and what you learned from it.”
“What was the impact of your actions? Who was affected, and what do they need to move forward?”
Using these age-appropriate starting points makes it easier to introduce restorative circles in schools in a way that feels natural and effective for every student.
How to Lead a Restorative Circle with Confidence
Knowing the theory is one thing, but stepping into the center of a circle to actually lead one? That’s something else entirely. Real confidence comes from having a clear process and practical tools ready to go. This guide will walk you through the essential parts of leading a circle, giving you the language and techniques to create a space built on trust and respect.
At the very heart of every circle is the talking piece. This is just a designated object—maybe a special stone, a small stuffed animal, or even a decorated stick—that gives the person holding it the floor to speak. It’s a simple but powerful tool that slows conversations down, prevents interruptions, and ensures even the quietest voices are invited to share. How you model its use is everything.
Opening the Circle and Setting the Tone
Every restorative circle needs a clear, intentional beginning. This simple ritual signals to students that they’re shifting out of their regular classroom routine and into a special, focused space.
Your opening can be quick, but it should be consistent. You might start by welcoming everyone and briefly stating the purpose of today’s circle.
For a proactive, community-building circle: “Welcome, everyone. In our circle today, we’re going to share a little bit about what makes us feel proud. The talking piece will move around, and remember, you always have the right to pass.”
For a responsive circle addressing harm: “Thank you all for being here. We’re coming together today to talk about what happened at lunchtime so we can understand everyone’s perspective and figure out how to move forward in a good way.”
That initial moment sets the stage. It establishes safety and reminds everyone of the shared agreements you’ve already created together. A strong opening makes it clear this isn’t just another conversation.
Using the Talking Piece to Guide the Flow
The talking piece is so much more than a turn-taking tool; it’s a physical symbol of respect and listening. When a student is holding it, they have the group’s full, undivided attention. When they don’t have it, their job is to listen with an open mind.
As the facilitator, you’ll use the talking piece, too. This is crucial because it shows you’re a member of the circle, not an authority figure standing outside of it. Your first few shares are a perfect chance to model a little vulnerability and set a constructive tone.
Effectively leading these circles hinges on your ability to facilitate meaningful dialogue. Knowing some powerful topics for group discussion and how to frame your questions will make all the difference, as your prompts truly guide the entire conversation.
Proactive vs. Responsive Circle Scenarios
The way you structure your circle will change depending on its purpose. Is it a proactive circle meant to build community? Or a responsive one meant to repair it?
Scenario 1: A Proactive Morning Check-In Imagine you want to build community in your 3rd-grade class. You open with, “Good morning! As the talking piece comes to you, share one thing you’re looking forward to this week.” This is a low-stakes prompt that’s easy for everyone to answer, and it builds a positive habit of sharing.
Scenario 2: A Responsive Lunchtime Conflict Two 7th-graders, Sam and Alex, had a heated argument over a game that almost got physical. You gather them along with two other students who saw what happened.
Here, your prompts become much more focused:
“What happened?” (Each person shares their perspective, one at a time, without being interrupted.)
“What were you thinking and feeling at the time?” (This gets to the heart of the matter, uncovering the emotions that were driving the behavior.)
“Who has been affected by this, and how?” (This broadens the view from a two-person fight to its impact on the community.)
“What’s needed to make things right?” (Now the focus shifts to accountability, repair, and finding a solution together.)
This structured line of questioning keeps the circle from turning into a blame game. Instead, it guides students toward taking responsibility for the harm and fixing it.
Key Takeaway: A facilitator’s primary role is not to solve the problem for the students, but to hold the space and ask the right questions so they can solve it together. This empowers them with invaluable problem-solving skills.
The image above shows the typical journey a school takes when starting with circles. It’s a phased process that highlights just how critical training is for bridging the gap between getting buy-in and launching a successful pilot program.
Troubleshooting Common Challenges
Even with the best preparation, things will come up. Here’s how to handle a few common challenges with grace.
The Quiet or Reluctant Student: Never, ever force a student to speak. The “right to pass” is sacred. If a student passes, just say, “Thank you for listening,” and move the talking piece along. Later, you can gently invite them back in by saying, “We’ve heard from everyone else. Is there anything you’d like to add?” This low-pressure invitation often works once they’ve had time to listen and feel safe. Your patience and validation are key here—it’s all about active listening. For more ideas, check out our guide on practicing active listening with your students.
The Dominant Personality: Some students will naturally want to speak without the talking piece or go on for too long. Gently redirect them. “Thanks for your energy, Michael. Let’s make sure Maria has a chance to finish her thought.” You can also remind the group of the purpose: “Remember, the talking piece helps us make sure every single voice is heard.”
The Outcome: The goal of responsive restorative circles in schools is to reach an agreement on how to repair the harm. This isn’t about you, the facilitator, handing down a consequence. You might ask, “So, what can we agree on to make sure this doesn’t happen again?” The solution needs to feel relevant, respectful, and reasonable to everyone involved. For example, if a group of students made a mess, the agreement might be that they stay after to help the janitor, not that they lose recess for a week.
Having a dedicated person to lead this work can make a world of difference. A trial at River Ridge Elementary found that hiring a full-time restorative coordinator was a game-changer. They saw a 28% decrease in student suspensions and a 30% drop in office referrals, not to mention academic gains. You can dive into the full study on the Restorative School Communities model to learn more.
Closing the Circle
Just as you opened with intention, you need to close the same way. The closing provides a sense of finality and appreciation. It could be a simple go-around where each person shares one word about how they’re feeling, or you could offer a short, collective statement.
For example, you could say, “Thank you all for your honesty and courage today. Let’s take the feeling of respect we built in this circle with us for the rest of the day.” This seals the experience and helps students transition smoothly back into their regular activities.
How to Adapt Circles for Your School and Measure Success
This is exactly why consistent and faithful implementation is so vital. When restorative practices are rolled out inconsistently or without proper training and buy-in from everyone, the results will be mixed at best. Real success comes from a whole-school commitment to the philosophy behind the practice.
Common Questions About Restorative Circles
When schools start exploring restorative practices, questions always come up. That’s a good thing! It means you’re thinking deeply about how to build a stronger, more connected school community. Moving away from traditional discipline isn’t always easy, so let’s walk through some of the most common questions we hear from educators just like you.
How Much Time Do Restorative Circles Take?
This is probably the number one concern, and it’s a valid one. The reality is, circles are incredibly flexible.
Community-building circles—the ones you run to build trust and connection—can be surprisingly quick. Many teachers weave a simple 10- to 15-minute circle into their morning routine. It’s a small daily investment that pays huge dividends when conflict eventually pops up.
Responsive circles, the kind used to address a specific issue, do take more time. But think about the time you’re already spending on that conflict. The hours spent on phone calls home, filling out paperwork, and dealing with the same unresolved issues day after day. A responsive circle is time spent teaching crucial skills and actually solving the problem, not just putting a band-aid on it.
What If Students Don’t Want to Participate?
A restorative circle is an invitation, never a demand. In fact, the “right to pass” is one of the most important parts of making a circle feel genuinely safe.
If you force a student to share before they’re ready, you’ve already lost their trust. The goal isn’t compliance; it’s connection. When a student chooses to pass, just thank them for being a good listener and move the talking piece along. Nine times out of ten, a student who passes at the beginning will feel safe enough to share by the time the circle comes back around to them.
As a facilitator, your job is to make the circle a comfortable space. You can do this by modeling vulnerability yourself and starting with fun, low-risk prompts. When a student chooses to pass, they’re practicing autonomy. Respecting that choice makes the circle stronger for everyone.
For instance, if a student seems hesitant, you might say, “Thanks for listening while others share. We’ll come around again at the end in case you think of something you want to add.” It’s a low-pressure way to honor their choice while keeping the door open.
Do Restorative Circles Replace Consequences?
This might be the biggest myth out there. Restorative practices don’t get rid of consequences; they make them meaningful. The entire focus shifts from punishment (which is about making someone suffer) to accountability (which is about making things right).
A circle allows everyone involved to understand the real impact of what happened. From that shared understanding, the group works together to decide what needs to happen to repair the harm. These aren’t random punishments—they are logical consequences that connect directly back to the action.
Here’s what that looks like in practice:
Instead of detention for writing on a desk, a student might agree to help the custodian clean desks after school.
After an argument with hurtful words, the students might create a classroom poster about respectful communication.
A student who kept disrupting class for attention could be asked to lead the morning greeting the next day, giving them a positive way to be seen.
In every case, the student is held accountable by taking direct action to fix what they broke.
Can Circles Be Used for Serious Issues Like Bullying?
Yes, but this is where you need to be extremely careful and ensure you have a highly skilled facilitator. For something as sensitive as bullying, the top priority has to be the physical and emotional safety of the person who was targeted. A poorly run circle can do more harm than good and easily re-traumatize a student.
Before even considering a group circle, the facilitator absolutely must hold separate pre-meetings with everyone involved. This is non-negotiable. You have to gauge their readiness and make sure they feel truly safe to participate. For severe incidents, circles are just one piece of a much larger safety and support plan, not the entire response. The goal is to create a path toward healing, not a forced confrontation.
At Soul Shoppe, we believe in equipping schools with the tools to build connected, empathetic communities where every child can thrive. Our programs and coaching provide the practical skills and support needed to implement restorative practices effectively.