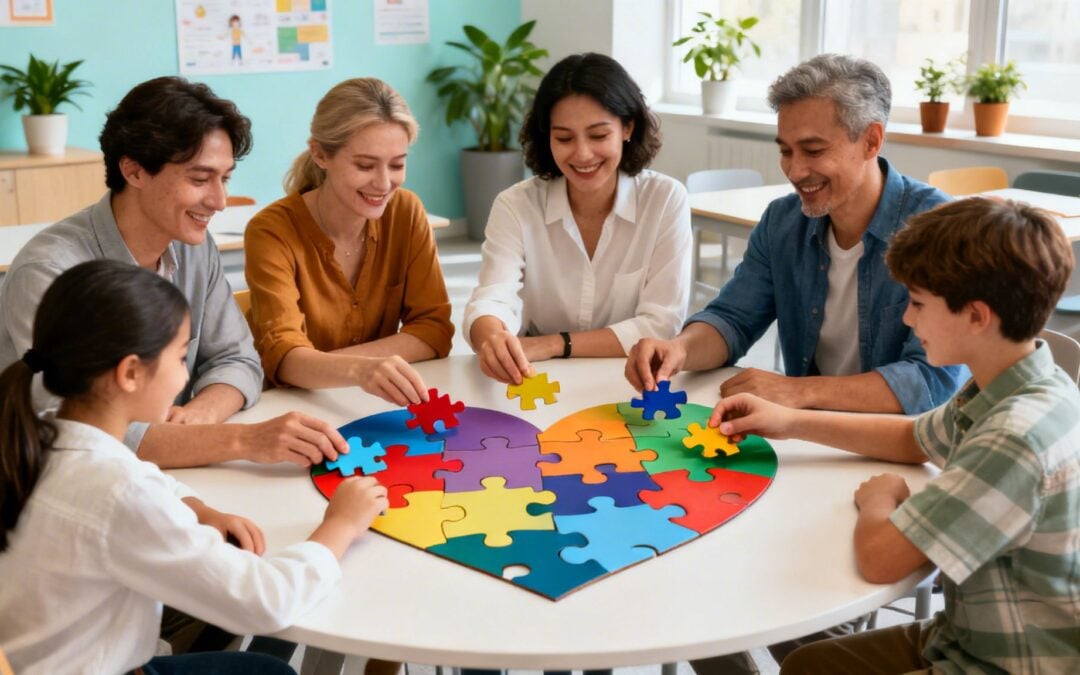
Relationship conflict resolution isn’t about stopping fights. It’s about using those tricky moments to teach kids how to build stronger, more resilient connections with each other. It turns a frustrating disagreement into a real-life lesson in empathy, communication, and bouncing back from challenges—skills they’ll need for the rest of their lives.
Shifting from Conflict to Connection in the Classroom
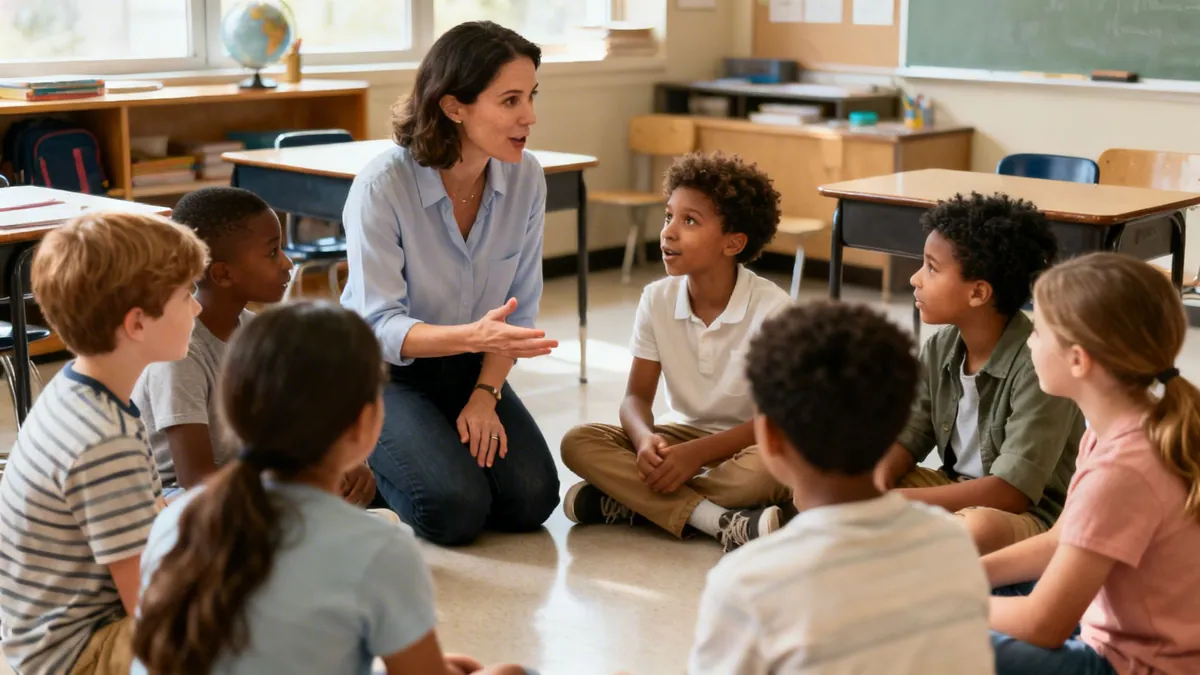
What if we saw every classroom disagreement not as a disruption, but as a chance for kids to grow? This one shift in perspective moves conflict resolution from something we try to stamp out to a vital part of social-emotional learning (SEL). When students learn to work through their disputes, they aren’t just solving a problem; they’re building a toolkit for life.
Think of unresolved tension in the classroom like a leaky faucet. It’s a constant, low-grade annoyance that disrupts the flow of learning and makes the room feel less safe. But a structured approach to conflict is more like a fire drill. It gives everyone a clear plan, so when a real flare-up happens, they can respond calmly and effectively, strengthening their bonds instead of breaking them.
A New Approach to Disagreements
This framework empowers adults—both teachers and parents—to see arguments as teachable moments. Instead of stepping in as a judge to decide who’s right and who’s wrong, we can act as guides, helping children find their own way to mutual understanding. This process builds the psychological safety students need to share their feelings without worrying about being punished.
For example, when two students are arguing over a shared set of markers, the goal isn’t just to end the argument. It’s to help them see each other’s point of view and find a solution they can both live with. A teacher might gently say, “It looks like you both really want to use the markers. Can you each tell me what you were hoping to draw?” That simple question opens the door to real listening and problem-solving, perhaps leading them to decide to share the colors or work on a picture together.
By reframing disagreements as a tool for connection, we show kids that conflict is a normal part of life—and that working through it with respect can actually make their friendships stronger.
The Lifelong Benefits of Early Skills
The skills students pick up in these moments go far beyond the classroom. A child who learns how to navigate a disagreement with a classmate is better prepared to handle arguments with family, friends, and, one day, their own coworkers. This foundation is crucial for creating more peaceful and inclusive communities everywhere. You can see how these ideas play out by exploring what restorative practices in education look like.
Teaching conflict resolution helps build:
Empathy: The ability to imagine what someone else is feeling. For example, a student learns that when they bragged about their score, their friend felt sad not because they lost, but because they felt left out of the celebration.
Resilience: The skill of bouncing back when things get tough. Students discover that a disagreement over game rules doesn’t have to mean the end of a friendship.
Effective Communication: The art of speaking your truth clearly and listening with an open heart. Kids practice using “I-Statements” to explain their feelings without blaming others.
Ultimately, making these practices a part of your school culture creates a place where every child feels seen, heard, and valued. It turns everyday conflicts into some of the most profound opportunities for connection and growth.
The Hidden Costs of Unresolved School Conflict
What’s the real price of unchecked conflict in a school? When disagreements between students and staff are brushed aside, the fallout is much more than just hurt feelings. These unresolved issues create real, system-wide problems that affect everyone, from the quietest kid in the back row to the most dedicated teacher.
Think of persistent conflict as a hidden tax on your school’s resources. It’s a direct drain on instructional time, leading to more disciplinary referrals, sinking academic engagement, and faster teacher burnout.
Instead of teaching math or history, educators find themselves spending countless hours mediating disputes, documenting incidents, and managing disruptions. For students, the emotional toll is huge. It can lead to anxiety, isolation, and a feeling that school just isn’t a safe place to be.
The Ripple Effect on Learning and Well-Being
Conflict rarely stays between just two people. It sends ripples across the entire school community. A single argument on the playground can easily escalate, pulling in other students and creating a cloud of tension that follows them right back into the classroom.
When kids feel on edge or unsafe, their brains simply aren’t primed for learning.
Here’s what that looks like in practice:
Lowered Academic Performance: A student preoccupied with a social conflict can’t focus on their lessons. For example, a student who had a fight with their best friend that morning may spend math class worrying about who they’ll sit with at lunch instead of engaging with the curriculum.
Increased Absenteeism: For some kids, especially those who feel targeted or left out, avoiding school can feel like the only way to cope. This leads to missed instruction and a growing academic gap.
Erosion of School Climate: When conflict becomes the norm, trust disappears. Students are less likely to collaborate, and teachers feel unsupported. This can poison the entire school environment. For more on this, check out our guide on how to improve school culture.
A teacher might notice a once-enthusiastic student has become withdrawn and quiet. The cause isn’t a sudden inability to learn, but a lingering argument with a friend that has left them feeling ostracized. This is the unseen cost of unmanaged conflict.
Quantifying the Impact on Time and Resources
The time drain from unresolved conflict is a real, measurable problem. Just think about the hours spent each week addressing student disagreements, calling parents, and handling disciplinary paperwork. This is precious time that could be spent on lesson planning, one-on-one student support, or professional development.
Investing in relationship conflict resolution isn’t a luxury; it’s a strategic imperative. It’s about reclaiming lost instructional time, boosting student achievement, and creating a positive school climate where everyone can thrive.
This problem doesn’t just exist on the playground. Research shows that in the workplace, disputes and personality clashes eat up about 2.8 hours per employee every week. That lost productivity costs U.S. companies an estimated $359 billion a year.
By teaching students these skills now, we’re making a direct investment in their futures. We’re giving them tools that will save them—and their future employers—immeasurable time, money, and emotional strain. When we tackle conflict head-on, we can transform a major liability into a powerful opportunity for student growth and community well-being.
Core Skills for Healthy Conflict Resolution
Handling disagreements well isn’t magic—it’s a set of practical skills we can teach. Think of it like a toolbox. When conflicts pop up, as they always do, we want kids to have the right tools ready to go. This turns an abstract idea like “peace” into concrete actions they can actually use.
The most essential tools in this box are active listening, emotional regulation, and perspective-taking. When used together, they help a child turn a moment of pure frustration into a chance to connect and understand someone else a little better.
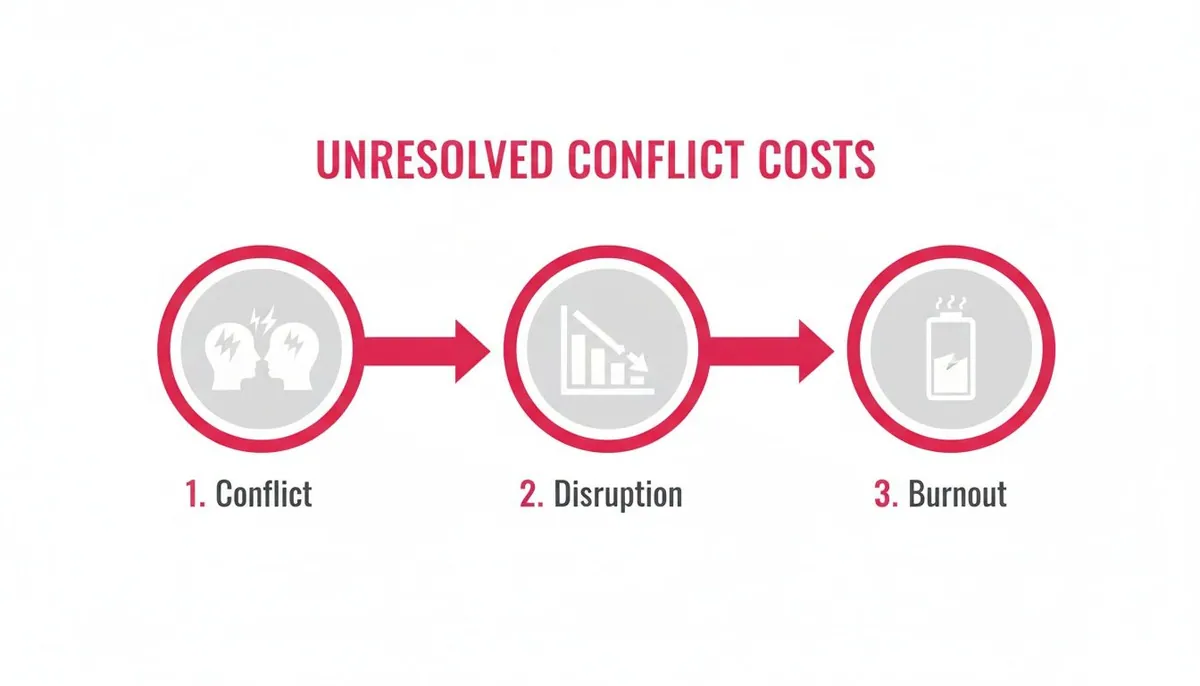
When we don’t give kids these tools, small disagreements can spiral. A single unresolved conflict creates ripples of disruption that can lead to frustration and burnout for students and staff alike.
This cycle drains a school’s emotional and academic energy, showing just how important it is to address conflict at the source.
Mastering I-Statements to Express Feelings
One of the most powerful tools you can give a child is the “I-Statement.” It’s a simple shift in language that helps them share their feelings without blaming or accusing anyone. This one change can immediately lower defenses and open the door for a real conversation.
For instance, a child’s first instinct might be to shout, “You always ruin the game!” That’s an attack, and it almost guarantees a defensive or angry response.
With a little guidance, we can help them rephrase it: “I feel frustrated when the rules change mid-game because I don’t know how to play anymore.” This version isn’t an attack. It’s an honest look into their feelings and why they’re there, making it so much easier for the other person to actually hear them.
An “I-Statement” acts like a bridge, not a wall. It invites the other person into your experience instead of pushing them away with blame.
A Simple Model for Peaceful Problem-Solving
Once kids can share their feelings without starting a bigger fight, they need a map to find a solution. A simple, four-step model gives them the structure to work through problems together, guiding them from that first emotional spark to a shared agreement.
The table below breaks down a simple framework you can use to walk students through this process.
Step
What It Means
Example Teacher/Parent Prompt
1. Stop and Cool Off
Taking a moment to breathe and regulate big emotions before talking.
“It looks like you’re both upset. Let’s take three deep breaths before we talk.”
2. Use I-Statements
Each person shares their feelings and perspective without blame.
“Can you tell me how you felt when that happened? Start with ‘I felt…'”
3. Listen and Restate
Each person repeats what they heard the other say to ensure they understand.
“Okay, now can you tell me what you heard your friend say they were feeling?”
4. Brainstorm Solutions
Both people suggest ideas to solve the problem and agree on one to try.
“What’s one thing you could both do differently next time? Let’s think of some ideas.”
This four-step process gives students a reliable method they can turn to again and again. Of course, effective communication is key, and if you’re looking for ways to restore family bonds after a lack of communication, these foundational skills are a great place to start.
A huge part of this process is truly hearing what the other person is saying. To help your students build this crucial skill, check out our guide with an active listening activity for your classroom.
By teaching these fundamental skills, we give kids the confidence to manage their relationships with peace and respect. These aren’t just “nice-to-have” social graces; they are essential life skills that build resilience, foster empathy, and create a more positive learning environment for everyone.
Practical Strategies for Teachers and Counselors
Knowing the theory is one thing, but putting it into practice in a busy classroom is where the real magic happens. As a teacher or counselor, you’re not a judge meant to declare a winner and a loser. You’re a guide, helping students find their own way to a solution.
This shift in your role is huge. It builds their confidence and ensures the lessons actually stick. Your goal is to create a safe, structured space where kids feel comfortable enough to be honest, share what’s really going on, and work toward understanding each other. These strategies are designed to be used tomorrow, helping you build a more peaceful classroom right away.
Facilitate Role-Playing for Common Scenarios
Role-playing is one of my favorite tools because it gives students a safe place to practice before the pressure is on. It’s like a scrimmage before the big game. They can try out new ways of communicating without the weight of big, real-time emotions, building muscle memory for peaceful responses.
Start with simple, everyday situations they’ll instantly get.
Scenario 1: The Playground Dispute. Two kids want the same swing. One has been on it forever, and the other is getting frustrated. It’s about to turn into a shouting match.
Scenario 2: The Group Project Problem. In a group, one student feels like they’re doing all the work, while another feels like they’re being bossed around and ignored.
Scenario 3: The Misunderstanding. A student tells a joke, but it accidentally hurts another’s feelings, and now they aren’t speaking.
As they act it out, hit the “pause” button. Ask questions like, “What’s another way you could say that?” or “How do you think your friend is feeling right now?” For more great scenarios, you can find a ton of ideas in our guide on conflict resolution activities for kids.
Provide Ready-to-Use Scripts and Starters
When emotions are running high, it’s hard for anyone—kids and adults alike—to find the right words. Giving students a few go-to phrases can instantly lower the tension and open the door for a real conversation. These scripts are like training wheels for using their own “I-Statements.”
Educator’s Script: “It sounds like you both have strong feelings about this. Let’s take a turn sharing your side using an I-Statement. Remember to start with ‘I feel…'”
This simple prompt does so much. It validates their feelings, gives them a clear turn-taking structure, and reinforces a core communication skill.
Here are a few more conversation starters to keep in your back pocket:
“Help me understand what happened from your point of view.”
“It looks like we have different ideas. What’s one thing we can agree on?”
“What do you need to feel better about this situation?”
These questions gently shift the focus from blaming each other to finding a solution together.
Establish a Peace Corner
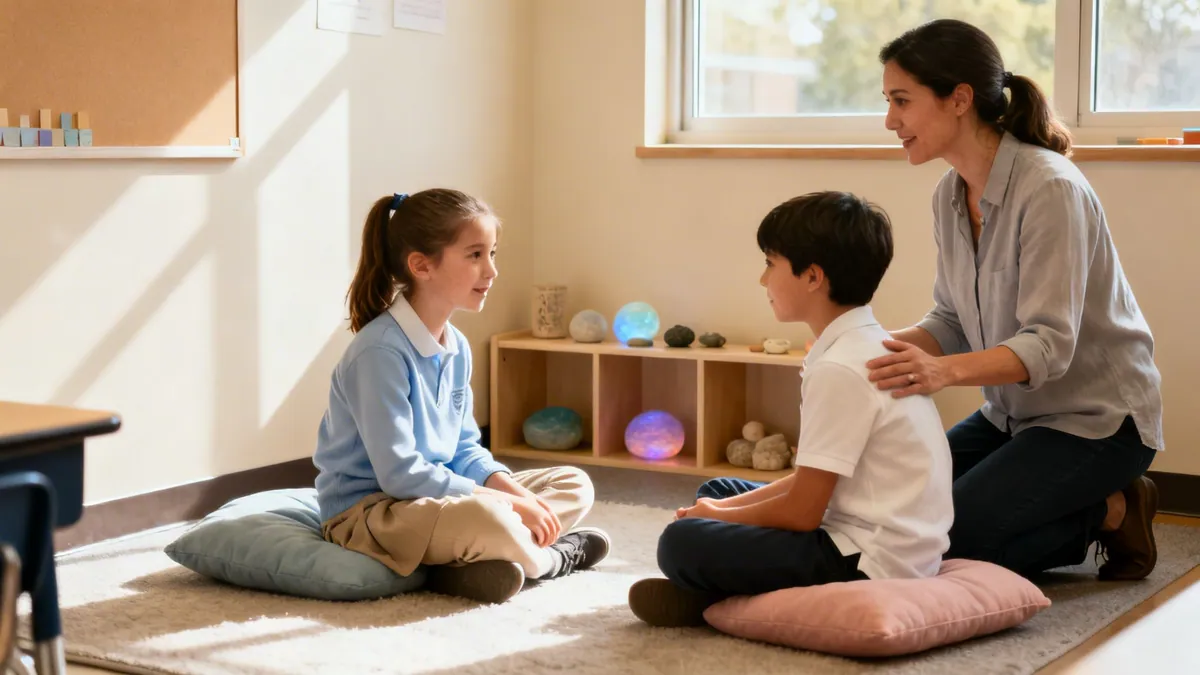
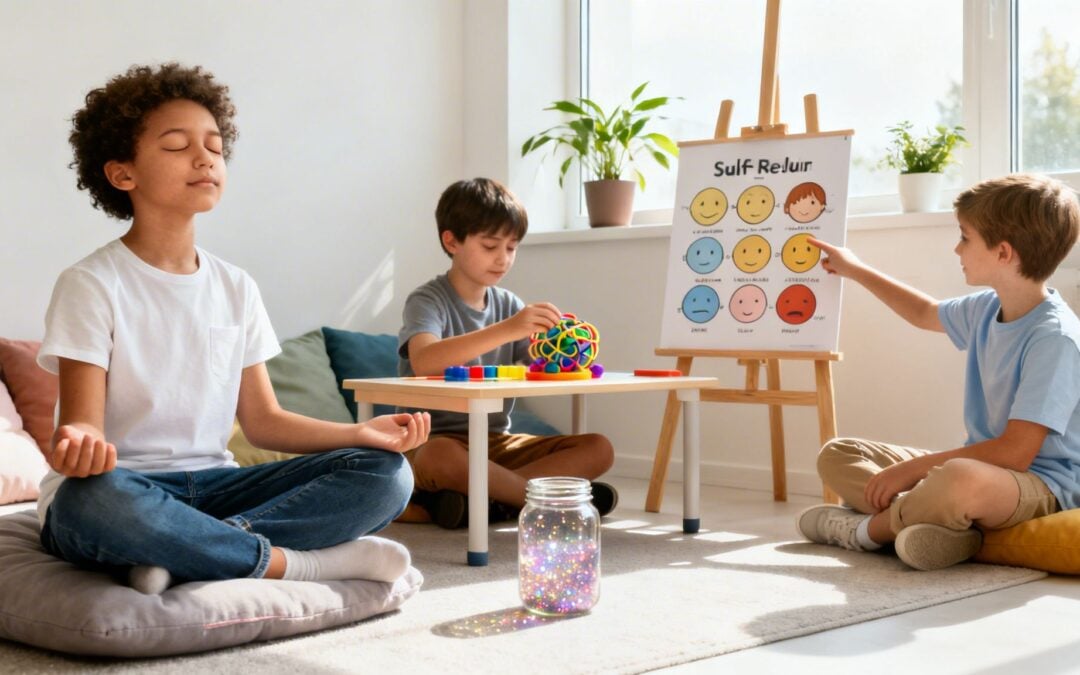
A “Peace Corner” is a specific spot in your classroom where students can go to cool down before they try to solve their problem. It’s not a punishment or a time-out chair. It’s a resource they can choose to use to regulate their emotions.
Stocking this space with the right tools empowers kids to take charge of their feelings.
Your Peace Corner might include:
A Feeling Faces Chart: A visual guide to help students put a name to their emotion.
Calming Tools: Things like stress balls, glitter jars, or a soft pillow.
Problem-Solving Steps: A simple, illustrated chart reminding them of the process.
“I-Statement” Prompt Cards: Sentence stems printed out to guide their words.
When a disagreement pops up, you can say, “It seems like you both need a minute. Why don’t you head to the Peace Corner, and when you’re ready, you can use the talking stick to share your feelings?” This teaches them to take ownership of the process.
How Parents Can Foster Resolution Skills at Home
The school bell doesn’t signal the end of learning for the day. A child’s first—and most important—classroom is the home, and parents are their most influential teachers. When you reinforce the same conflict resolution skills at home that your kids are learning at school, you create a powerful, consistent environment where these habits can truly stick.
This consistency is everything. When kids hear the same language, like “I-Statements,” and practice the same problem-solving steps in the living room and the classroom, the lessons become deeply ingrained. You’re building a bridge between school and home that gives your child a social-emotional foundation to last a lifetime.
Turn Sibling Squabbles into Teachable Moments
Sibling disagreements might feel like a headache, but they are the perfect low-stakes training ground for relationship conflict resolution. The next time a fight breaks out, try shifting your role from judge to coach. The goal isn’t just to stop the fighting, but to guide your children toward finding their own solution.
Think about the classic argument over the TV remote. Your first instinct might be to just take it away. Instead, what if you coached them through it?
Parent as a Coach Example:
Acknowledge Feelings: Start by simply noticing the emotions without placing blame. “Wow, it looks like you are both really frustrated about this remote.”
Guide I-Statements: Prompt each child to use the “I feel…” structure they’re learning. You could say, “Can you tell your sister how you feel when she grabs the remote? Try starting with, ‘I feel…'”
Encourage Listening: Make sure the other child is hearing them. “What did you hear your brother say? Can you tell me what he’s feeling right now?”
Brainstorm Solutions: Put the problem back in their hands. “Okay, this is our problem to solve together. What are a few fair ways we can decide who gets the remote next? Maybe you can use a timer, or each pick a show to watch.”
This approach gives them the power to fix their own problems. It turns a moment of frustration into a real-world lesson in empathy, communication, and collaboration.
Model Healthy Disagreements
Your kids are always watching. One of the most powerful ways to teach healthy conflict resolution is to simply let them see it in action in your own relationships. When you and your partner or another adult have a disagreement, it’s a chance to show them that conflict is normal and can be handled with respect.
You don’t need to be perfect; you just need to be real. Letting your kids see you work through a disagreement and come back together teaches them that conflict doesn’t have to break a connection—it can even make it stronger.
For example, let’s say you and your partner disagree on weekend plans. You can show them what a respectful conversation looks like. Instead of, “You never want to do what I want,” you could try, “I feel a little disappointed because I was really looking forward to the park. Can we talk about a plan that works for both of us?” This shows them how to share needs without blame.
Even seeing you apologize and reconnect after things get a little tense is a huge lesson in how to repair a relationship. You might say in front of them, “I’m sorry I got frustrated earlier. Let’s try talking about our plans again calmly.”
How Administrators Can Build a Conflict-Positive Culture
Tips for Effective Implementation
To make body language a successful active listening activity, concentrate on these intentional actions:
Position for Connection: Whenever possible, position yourself at the speaker’s eye level. This simple adjustment reduces perceived power dynamics and fosters a feeling of equality.
Mirror an Open Posture: Avoid crossing your arms, which can signal defensiveness. Instead, keep your posture open and lean in slightly to convey interest.
Use Mindful Gestures: Nodding shows you are following along, but do it naturally. Your facial expressions should reflect the emotional tone of the speaker’s message, showing empathy.
Eliminate Distractions: Put away your phone, turn away from your computer screen, and give the speaker your full physical presence. This is one of the clearest non-verbal signs that you are listening. Teaching children about reading social cues is a related skill that reinforces this practice.
6. Active Listening Circles (Talking Piece Protocol)
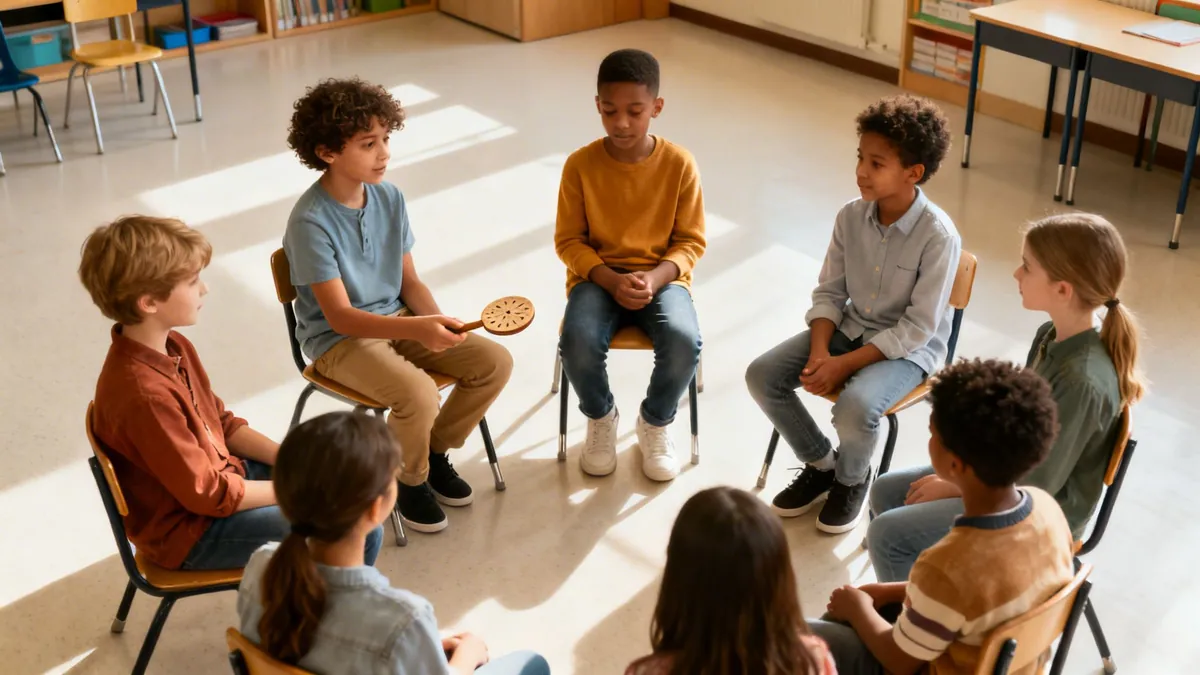
Active listening circles, also known as the talking piece protocol, are structured group activities where participants take turns speaking without interruption. While sitting in a circle, a designated object (the “talking piece”) is passed from person to person, and only the individual holding the piece is allowed to speak. This ancient practice, with roots in Indigenous peacemaking traditions, fosters equitable participation and teaches students to listen deeply to all voices, not just those they usually agree with.
This method is a powerful active listening activity because it slows down conversation and creates a safe, predictable space for sharing. By ensuring every student gets an uninterrupted turn, it helps build a strong classroom community, elevates quieter voices, and provides a structured format for addressing group challenges. It is a core component of restorative practices in schools, promoting empathy and collective problem-solving.
How to Use Active Listening Circles
Gather your group in a circle where everyone can see each other. Introduce the talking piece and explain the three core rules: only the person holding the piece may speak, everyone else listens respectfully, and you have the right to pass if you don’t wish to share.
Key Insight: The circle’s power comes from its structure. The talking piece isn’t just a tool to manage turns; it’s a symbol of respect for each person’s voice and a physical reminder for others to focus on listening.
Classroom Example:
Topic: “Share one ‘high’ and one ‘low’ from your weekend.”
Teacher: (Holding a small decorated stone) “I’ll start. My high was seeing a beautiful sunset on my walk, and my low was spilling coffee on my favorite shirt. I’ll now pass the talking piece to my left. Remember, you can pass if you’d like.” The stone is then passed to the next student, who shares while all others listen.
Home Example:
Topic: “What’s one thing our family could do to be kinder to each other this week?”
Parent: (Holding a favorite seashell) “I think we could all put our phones away during dinner so we can connect more. I’m passing this to you now. What are your thoughts?” The shell is passed to a child, who is given the floor to speak without being interrupted.
Tips for Effective Implementation
To ensure your listening circle is a successful active listening activity, pay attention to the setup and facilitation:
Start with Low Stakes: Begin with simple, fun topics like “favorite superpower” or “what made you smile today” to build comfort and familiarity with the process.
Set Time Guidelines: For larger groups, suggest a gentle time limit (e.g., 1-2 minutes per person) to ensure everyone gets a turn and the activity stays focused.
Establish the Right to Pass: Explicitly state that anyone can pass their turn without giving a reason. This creates psychological safety and removes pressure.
Debrief the Process: After the circle, ask students reflective questions: “What did you notice about your listening when you couldn’t interrupt?” or “How did it feel to share without being cut off?”
7. Empathy Mapping and Perspective-Taking
Empathy mapping is a structured exercise where listeners visualize another person’s experience by considering what they see, hear, think, feel, say, and do. This technique moves beyond surface-level listening to a deeper understanding of someone’s internal world. It makes empathy tangible by asking us to step into another person’s shoes and consider their reality from multiple angles.
Popularized by innovators like Dave Gray and supported by the empathy research of Brené Brown, this powerful active listening activity helps students and adults alike move from sympathy (“I feel sorry for you”) to empathy (“I can understand what you’re feeling”). It builds a crucial foundation for conflict resolution, peer support, and creating an inclusive community.
How to Use Empathy Mapping
The core of this activity is filling out a four-quadrant map (or six, in some versions) focused on another person’s experience. This can be done individually or in groups after listening to someone’s story or reading about a character.
Key Insight: The goal is to separate observation from inference. By mapping what someone says and does versus what they might think and feel, participants learn to look beyond outward behavior to understand underlying motivations and emotions.
Classroom Example:
Scenario: A student is withdrawn and snaps at classmates who try to talk to them. The teacher leads the class in creating an empathy map to understand the student’s perspective without judgment.
Teacher: “Let’s think about what our classmate might be experiencing. What might they be thinking when they’re alone? What could they be feeling that makes them seem angry?” This shifts the focus from blame to understanding.
Home Example:
Scenario: A child is struggling to understand why their friend is ignoring them.
Parent: “Let’s make a map for your friend. What do you think they saw or heard that might have upset them? What might they be thinking about right now, even if they aren’t saying it?”
Tips for Effective Implementation
To make empathy mapping a successful active listening activity, consider these practical steps:
Start with Fictional Characters: Begin with characters from books or historical figures. This provides a safe, low-stakes way to practice before applying the skill to real-life peer conflicts.
Use Visuals: Draw the map on a whiteboard or large paper. Using different colors for each quadrant and allowing for drawings makes the process more engaging for visual learners.
Ask Guiding Questions: Prompt deeper thought with questions like, “What challenges might they be facing that we can’t see?” or “What worries might be keeping them up at night?”
Connect to Real Listening: Combine empathy mapping with real conversations. After a student shares a problem, have the listeners create a map to check their understanding. You can find more ideas in these perspective-taking activities.
8. Peer Tutoring and Teach-Back Method
The teach-back method is an active listening activity where the listener demonstrates understanding by explaining what they heard back to the speaker or to another person. It shifts listening from a passive act to an active one, requiring the listener to process, synthesize, and articulate information. When used for peer tutoring, this technique creates a powerful learning cycle that benefits both students. The “teacher” deepens their own comprehension, while the “learner” receives confirmation that their message was accurately received.
This method, with theoretical support from Vygotsky’s work on peer learning and Spencer Kagan’s cooperative learning structures, is highly effective in K-8 settings. It turns listening into a tangible and accountable skill, strengthening both academic retention and social-emotional competencies like empathy and clear communication.
How to Use the Teach-Back Method
The core idea is simple: after one person speaks or explains something, the other person’s job is to “teach it back” in their own words. This can be done in pairs, small groups, or even as a whole-class check for understanding.
Key Insight: The focus is on demonstrating comprehension, not on perfect recitation. The goal is to prove you listened well enough to explain the main idea, which is a much higher-level skill than simply remembering words.
Classroom Example:
Context: After a mini-lesson on the water cycle, the teacher puts students in pairs.
Teacher: “Turn to your partner. Partner A, you have one minute to explain the process of evaporation. Partner B, your job is to listen carefully.”
After 1 minute: “Okay, now Partner B, teach back to Partner A what you heard them say about evaporation. Start with, ‘What I heard you say was…'”
Home Example:
Context: A child is explaining the complicated rules of a new video game they want to play.
Child: “First you have to collect three power crystals, but you can’t get the red one until you beat the mini-boss in the forest, and he’s weak to ice attacks…”
Parent: “Okay, let me see if I’ve got this. So the first step is to find three power crystals. To get the red crystal, I have to go to the forest and defeat a specific enemy using an ice attack. Did I understand that correctly?”
Tips for Effective Implementation
To make the teach-back method a successful active listening activity, consider these practical steps:
Use Sentence Stems: Provide students with sentence starters to reduce anxiety and structure their responses. Phrases like, “My partner shared that…” or “What I understood was…” are great scaffolds.
Normalize Mistakes: Frame teach-back errors as learning opportunities, not failures. If a student misinterprets something, the original speaker can clarify, strengthening both of their skills.
Start Small: Begin with paired teach-backs before asking students to share with the whole class. This builds confidence in a lower-stakes environment.
Create Strategic Pairings: Pair students thoughtfully. Sometimes pairing a stronger student with one who needs support is beneficial, while other times, pairing students of similar abilities can foster a sense of shared discovery.
Celebrate Good Listening: When you see a student effectively teach back what their partner said, praise their listening skills explicitly. Say, “That was excellent listening. You really understood what she was explaining.”
Comparison of 8 Active Listening Activities
Technique
Implementation complexity
Resource requirements
Expected outcomes
Ideal use cases
Key advantages
Reflective Listening (Paraphrasing)
Low–Moderate; practice to sound natural
Minimal; brief training and practice time
Fewer misunderstandings; increased trust and clarity
Immediate feedback, deepens learning, builds confidence and accountability
Putting It All Together: Creating a Culture of Listening
The journey from a noisy classroom to a community of engaged listeners is built one interaction at a time. The activities outlined in this article, from Reflective Listening to the Peer Tutoring and Teach-Back Method, are more than just isolated exercises. They are the essential building blocks for creating a culture where feeling heard is the norm, not the exception. Integrating even one new active listening activity per week can begin to shift the dynamic in your classroom or home, fostering deeper connections and a stronger sense of belonging.
The true power of these techniques lies in their cumulative effect. When a child learns to paraphrase a peer’s feelings in an Active Listening Circle, they are not just completing a task; they are practicing the empathy needed to resolve a future conflict on the playground. When a student uses clarifying questions during a peer tutoring session, they are developing the critical thinking skills required to understand complex academic material and diverse perspectives. These are not soft skills; they are foundational life skills that directly support academic achievement and emotional well-being.
From Individual Activities to Daily Habits
To make listening a core value, it’s crucial to move beyond scheduled activities and weave these practices into the fabric of daily life. The goal is to create a shared language and a set of common expectations around communication.
Model the Behavior: The most powerful tool you have is your own example. When a child is upset, get down on their level, use Silent Listening to give them space, and then paraphrase what you heard: “It sounds like you felt really frustrated when your tower fell down.” This demonstrates respect and shows them what empathetic listening looks like in action.
Create Visual Reminders: Post anchor charts with sentence stems for clarifying questions (“Can you tell me more about…?”) or paraphrasing (“So, what you’re saying is…”). These visual cues support students, especially younger ones, as they internalize these new habits.
Celebrate the Effort: Acknowledge and praise students when you see them actively listening. A simple comment like, “Michael, I noticed you were looking right at Sarah while she was speaking and waited for her to finish. That was great listening,” reinforces the desired behavior far more effectively than correcting poor listening.
The Long-Term Impact of True Listening
Implementing a consistent active listening activity program does more than just quiet a room. It equips children with the tools to navigate a complex world with compassion and confidence. Students who feel heard are more likely to engage in learning, take healthy risks, and see themselves as valued members of a community. They learn that their voice matters and, just as importantly, that the voices of others matter, too.
A classroom culture rooted in active listening becomes a place where curiosity thrives over judgment, and connection is valued over correctness. Children learn that understanding someone is a more powerful goal than simply winning an argument.
By prioritizing these skills, you are making a direct investment in preventing bullying, reducing classroom conflicts, and building the social-emotional resilience every child needs to succeed. You are teaching them how to build and maintain healthy relationships, a skill that will serve them throughout their academic careers and far into adulthood. The quiet confidence that comes from knowing how to truly listen and be heard is one of the greatest gifts you can give a child.
Ready to take the next step and bring a comprehensive, school-wide listening culture to your community? Soul Shoppe provides dynamic programs and proven strategies that empower students with the social-emotional tools they need to thrive, with a core focus on the power of an active listening activity. Visit Soul Shoppe to see how their on-site and virtual programs can help you build a safer, more connected school environment.
Learning how to self soothe is one of the most important skills we can teach our kids. It’s what allows them to navigate big, overwhelming feelings and build the resilience they’ll need for a lifetime. When a child can recognize an emotional storm coming, use a personal strategy to find their calm, and practice this in a safe space, they build a foundation for everything else—from focusing in class to creating positive friendships.
The Foundations of Self-Soothing in Children
Let’s clear up a common myth right away. Teaching a child to self-soothe has nothing to do with leaving them alone to “cry it out.” True self-soothing is a skill that’s learned, not forced. It develops through our active guidance, modeling, and co-regulation—the process of calming with them.
Think of it as the ability to independently manage emotional waves. It’s a skill that grows slowly, right alongside their developing brains. For our youngest kids, regulation is almost entirely external; they need a trusted adult to be their anchor in a storm. Over time, they start to internalize the strategies we show them, eventually learning to use them all on their own.
Creating Emotional Safety
The journey always begins with emotional safety. Before a child can even think about managing their feelings, they have to know it’s okay to have them—even the messy, inconvenient ones.
A huge part of this is giving them the words for what’s happening inside. When we create a shared, simple language for emotions, we demystify the experience. For example, a teacher might say to a second-grader, “It looks like you’re feeling frustrated because that puzzle piece won’t fit. Frustration can feel tight and hot in your body, can’t it?” This does two things: it labels the feeling and normalizes the physical sensation without judgment. You’re helping them connect the inner feeling to an outer word, which is a core building block of social-emotional development.
A child’s ability to self-soothe is directly tied to the feeling of being seen and understood by their caregivers. When we validate their emotions, we give them the security to explore and eventually manage those feelings independently.
While we’re focusing on school-aged kids here, these principles start way earlier. The groundwork for self-regulation is laid in infancy. If you’re curious about this stage, there are great guides on how to teach baby to self soothe that dig into the specifics.
Identifying Triggers and Modeling Responses
A key piece of the puzzle is learning to spot what sets off big emotions in the first place. These triggers change dramatically with age. What sends a kindergartener into a tailspin is worlds away from what rattles a middle schooler.
When we can anticipate these age-specific triggers, we can be proactive about modeling healthy ways to respond. A young child who’s crushed over losing a game might just need a hug and a quiet moment. A parent might say, “Losing feels so disappointing. It’s okay to be sad. Let’s get a big hug.” For an older student stressing about a test, you might model taking a few deep breaths and using positive self-talk, saying, “Wow, this test feels like a lot. I’m going to take three slow breaths to calm my brain down.”
To help you get started, here’s a look at some common triggers and simple soothing responses you can model for different age groups.
Age-Based Emotional Triggers and Initial Soothing Responses
This table breaks down some of the most frequent emotional stressors for K-8 students and offers immediate, age-appropriate actions you can model to help them begin the self-soothing process.
Age Group
Common Triggers
Initial Soothing Response to Model
K–2
Losing a game, sharing toys, transitioning between activities, loud noises.
“Let’s take a slow breath together.” Hugging a favorite stuffed animal. Moving to a quiet corner.
3–5
Peer disagreements, homework frustration, feeling left out, academic pressure.
“It’s okay to feel upset. Let’s write or draw about it.” Squeezing a stress ball. Taking a short walk.
6–8
Social drama, test anxiety, fear of failure, body image concerns, complex homework.
“I can see this is tough. Let’s listen to a calm song.” Journaling thoughts. Talking to a trusted friend.
By consistently modeling these simple actions, you give kids a real-life script they can draw from when their own emotions feel too big to handle alone.
Building a Sensory Toolkit for Calming Down
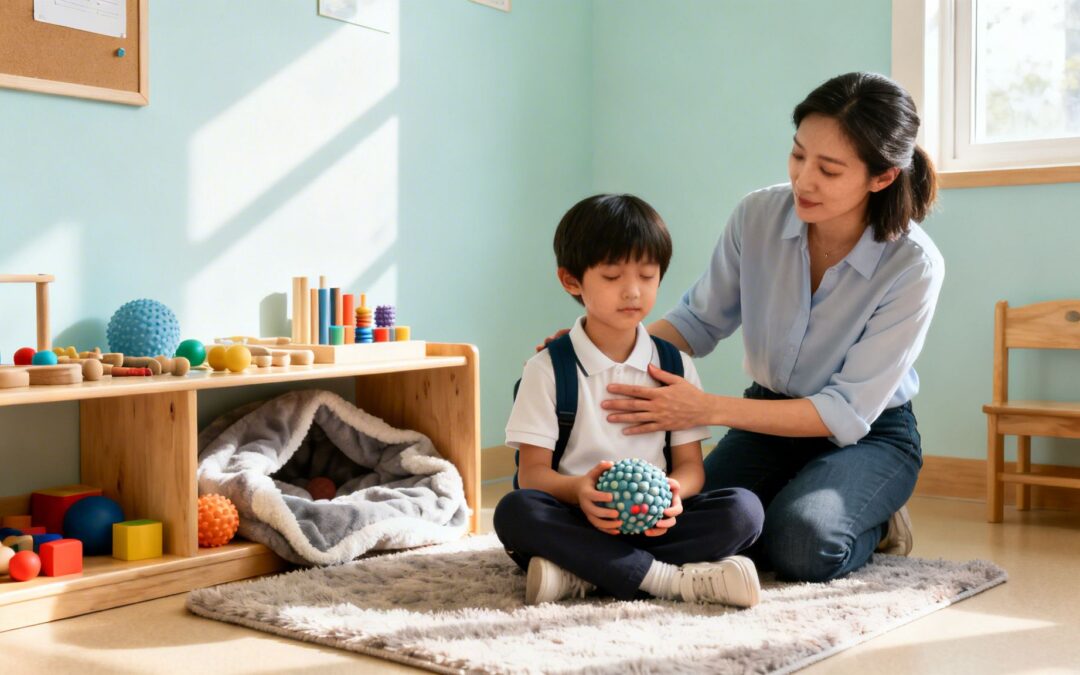
Once a child can name their feelings and triggers, we can give them something physical to do about it. This is where a sensory toolkit—often called a “calm-down kit”—becomes one of the most powerful resources you can have, both at home and in the classroom.
Engaging the senses is one of the fastest ways to ground a child who feels like they’re spiraling. When big emotions hijack their brain, the logical, thinking part goes offline. Sensory input helps cut through the noise, pulling them out of that reactive state and back into their bodies.
The Power of Sensory Engagement
A calm-down kit isn’t just a box of toys to distract a child. It’s a hand-picked collection of items designed to provide specific sensory input that actively de-escalates stress. Research backs this up, showing that tactile (touch) and proprioceptive (deep pressure) input have a significant calming effect on the nervous system.
You don’t need to spend a fortune on fancy gadgets. Honestly, some of the most effective items are things you probably already have, or can find at a local dollar store. The whole point is to offer a variety of textures, weights, and even smells that a child can turn to when their world feels a little too loud.
Here are a few powerful, low-cost ideas to get your kit started:
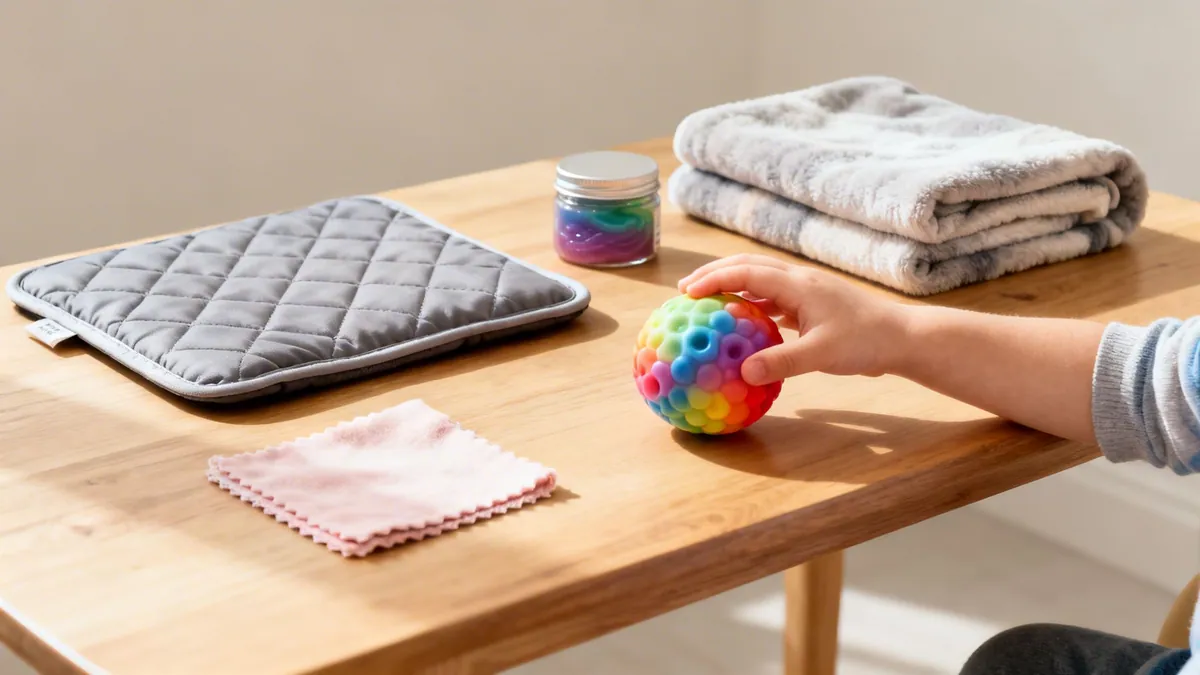
For Touch: A scrap of faux fur, a smooth river stone, a small sequin pillow, or different fabric swatches like velvet, corduroy, and silk.
For Pressure: A weighted lap pad (easy to make with a pouch of rice or dried beans), a perfectly squishy stress ball, or some therapy putty.
For Scent: Scented putty or play-doh with calming smells like lavender or chamomile. Even peppermint can be great for helping a child refocus their attention.
Co-Creating the Kit With Your Child
This is the most important part: build the toolkit with your child. When they get to choose what goes inside, they develop a sense of ownership over the tools and are far more likely to actually use them.
Find a calm, quiet moment to sit down together. Explain the kit’s purpose in a way they’ll understand. A parent might say, “Remember how your body feels when you get really frustrated? Let’s make a special box of things that can help your body feel calm and safe again.” A teacher could say, “Our classroom is a team. Let’s build a ‘Peace Corner’ with tools anyone can use when they need a quiet moment to reset.”
When a child co-creates their own sensory toolkit, they are not just picking out items; they are practicing self-awareness. They learn to identify what truly helps them feel better, turning a box of objects into a powerful symbol of their own competence and control.
For instance, a third-grader feeling anxious before a spelling test might pull out their peppermint-scented putty. The act of kneading it provides calming deep pressure to their hands, while the focusing scent helps clear their mind.
Practical Examples in Action
Let’s look at how this plays out in the real world. These scenarios show how a simple toolkit can be woven right into a child’s day.
Example 1: A Kindergartener After a Loud Assembly
Scenario: Leo comes back from a noisy all-school assembly feeling jittery and overstimulated. He’s having a hard time settling down for quiet reading.
Tool: His teacher quietly guides him to the classroom’s “calm-down corner,” where he has his own small sensory box. He picks out a small, weighted lizard to place on his lap.
Outcome: The gentle pressure from the weighted animal helps ground him. That simple, physical sensation gives his nervous system the input it needs to settle down. In just a few minutes, he’s ready to rejoin the group.
Example 2: A Middle Schooler After a Disagreement
Scenario: Maya, a seventh-grader, has a small argument with a friend at lunch and comes home feeling upset and withdrawn.
Tool: Instead of pushing her to talk, her parent reminds her about the “chill out” basket they created together. Maya grabs a soft fleece blanket and her sketchbook.
Outcome: She wraps herself tightly in the blanket, giving herself a comforting, cocoon-like hug. She then spends 10 minutes doodling, which lets her process her feelings without having to find the words. This is a fantastic example of using established self-regulation strategies for students in a personal and meaningful way.
Mindful Movements and Breathing You Can Teach Today
While sensory tools are fantastic for grounding, some of the most powerful self-soothing strategies don’t come in a box. When we teach children how to use their own breath and body, we give them a toolkit they can carry anywhere, for life.
This isn’t just about telling a kid to “take a deep breath.” These are engaging, memorable activities designed to interrupt the stress cycle and return a child’s sense of control. Mastering this skill is at the heart of learning how to self soothe.
Breathing Exercises With Kid-Friendly Scripts
The goal is to make breathing feel less like a chore and more like a superpower. Using simple, playful scripts helps kids connect with the practice and, more importantly, remember it when they need it most.
Here are a few of my go-to’s that work wonders in both classrooms and homes.
1. Balloon Breaths This one is perfect for helping kids visualize their breath and slow down, which is incredibly helpful for taming anxiety.
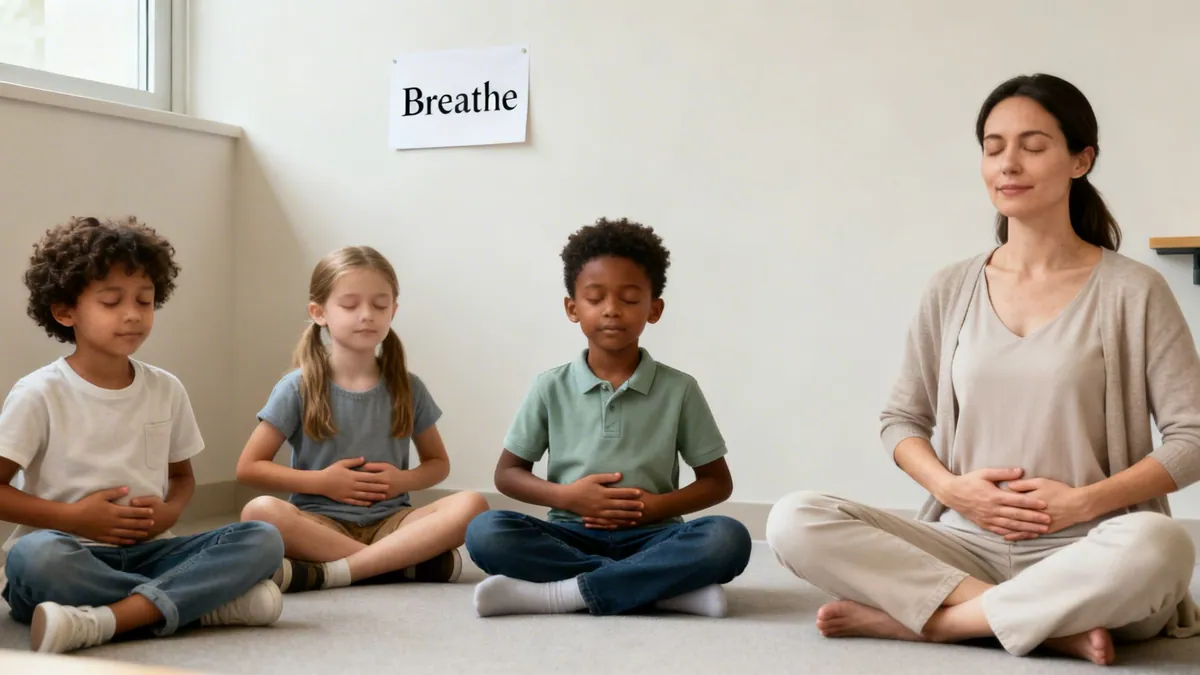
The Script: “Pretend your belly is a big balloon. Put your hands right on your tummy. As you breathe in slowly through your nose, feel that balloon get bigger and bigger. Now, breathe out slowly through your mouth, letting all the air whoosh out as your balloon deflates.”
Practical Scenario: A parent sees their fourth-grader getting frustrated over a tough math problem. They might say, “Hey, let’s pause and do three Balloon Breaths to give our brains a mini-break.” This shifts the moment from struggle to proactive self-care.
2. Dragon Breaths This is the one I pull out for releasing frustration or big, pent-up energy. It encourages a strong, cleansing exhale.
The Script: “Sit up tall like a mighty dragon. Take a giant breath in through your nose, filling up your whole belly. Now, open your mouth wide and breathe out a powerful, fiery breath—whoosh!—to get all that mad energy out.”
Practical Scenario: After a disagreement on the playground, a teacher sees a student stomping back to class. Instead of scolding, they can get down on the child’s level and say, “I see some fiery feelings in you. Let’s be dragons together and breathe that fire out.”
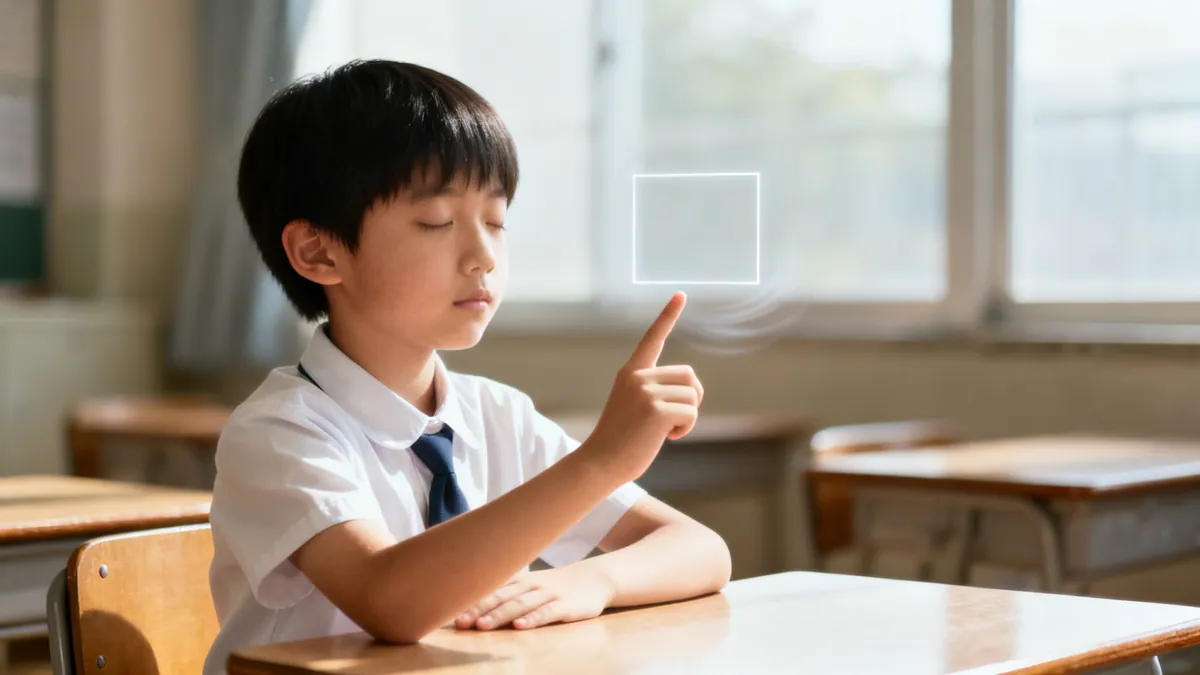
3. Box Breathing (or Square Breathing) This technique is excellent for older kids (grades 3–8) because it introduces rhythm and focus. It involves tracing a square in the air or on their leg to pace the breath.
The Script: “Let’s draw a square with our breath. Using your finger, trace one side up as you breathe in for four counts. Hold your breath for four counts as you trace the line across the top. Breathe out for four counts as you trace down the other side. And hold your breath for four counts as you trace the bottom to finish the square.”
Practical Scenario: A middle schooler is visibly nervous before a presentation. A counselor could quietly guide them: “Let’s do some Square Breathing at your desk. No one even has to know. Just trace the square on your notebook.”
Mindful breathing activates the parasympathetic nervous system—the body’s natural “rest and digest” mode. By intentionally slowing their breath, children can lower their heart rate and signal to their brain that they are safe, effectively short-circuiting an anxious response.
Mindful Movements to Reset and Refocus
Sometimes, a child’s body just needs to move to let go of tension. These simple stretches can be done right at a desk or in a small space, making them perfect for classroom transitions or quick resets at home.
Starfish Stretches This full-body stretch is a fantastic way to wake up the body and release tension after sitting for a while.
How to Do It: “Stand up and reach your arms and legs out as wide as you can, like a big starfish! Stretch your fingers and toes. Now, curl into a tiny, tight ball. Let’s do it again—big starfish stretch, then tiny ball.”
Practical Scenario: A teacher notices the class energy is getting chaotic after a loud assembly. They can announce, “Okay, everyone, on your feet! Let’s do three big Starfish Stretches to help our bodies feel calm and ready for our next activity.” It gives students a physical outlet and instantly resets the room’s atmosphere.
Teaching these techniques is a vital step in helping kids build their emotional regulation skills, but it’s just one piece of the puzzle. The need for these practices is wider than you might think. For instance, a 2023 Safer Society survey found that while 74% of people have a daily self-care practice, 80% still report high burnout. More telling for us, 45% of respondents reported high stress in the prior six months. You can read the full research about these findings to see how stress is affecting people of all ages.
You don’t need fancy programs or complex exercises to teach a child how to self-soothe. In fact, some of the most powerful strategies are probably already happening in your home or classroom. The key is to turn these everyday activities into intentional tools for emotional regulation.
It’s all about helping a child connect the dots. When we guide them to see why listening to a certain song or doodling in a notebook makes them feel better, we’re handing them the keys. They move from just passively distracting themselves to mindfully managing their inner world.
Turn Passive Habits Into Active Soothing
Many activities kids already gravitate toward are, at their core, a form of self-regulation. Our job is to help them recognize this and use these habits on purpose. Instead of just seeing screen time or hobbies as “downtime,” we can frame them as real and valid self-care tools.
This isn’t just a hunch; it’s how kids are already coping. A 2023 survey revealed that 93% of youth use self-care to manage their emotions. The most common methods? Listening to music (72%), watching movies or TV (53%), and playing video games (47%). You can dive into the full breakdown of these powerful self-care findings to see just how central these activities are to their well-being.
By validating these existing habits, we remove the shame that can sometimes come with them. We send a clear message: “What you’re doing to feel better isn’t just okay—it’s a skill. Let’s get good at using it when you need it most.”
This shift in perspective is everything. It helps kids build a personalized menu of calming options that feel genuine and easy to reach for, boosting their confidence to handle whatever comes their way.
Create a “Calm-Down Playlist”
Music has a direct line to the emotional centers of the brain. The right song can shift a child’s mood, slow their heart rate, and give them a much-needed mental break. Building a “Calm-Down Playlist” with a child is a fantastic collaborative exercise.
For the Classroom: During a quiet moment, ask students to share one song that helps them feel calm or happy. Compile them into a class playlist to use during independent work, tricky transitions, or after a high-energy gym class.
For Home: Sit down with your child and explore different kinds of music. Try instrumental tracks, nature sounds, or even their favorite gentle pop songs. Ask them how each one makes their body feel. Does it make them want to tap their feet or relax their shoulders?
Practical Example: A fifth-grade teacher sees his class is getting antsy before a math test. He says, “Okay team, let’s put on our calm-down playlist for five minutes while we get our pencils ready.” A quiet, instrumental track comes on, and without him saying another word, the energy in the room visibly settles.
Set Up a “Doodle Corner” for Quiet Expression
Drawing, doodling, and coloring aren’t just for art class—they’re forms of non-verbal processing. For a child who can’t find the words for their big feelings, a pen and paper can be a lifeline. It gives them a way to get frustration or sadness out without having to talk about it.
In the Classroom: Designate a small, cozy area with paper, colored pencils, and markers. Frame it as a spot to “draw your feelings out” or to “give your brain a quiet break.”
At Home: Keep a “doodle basket” with sketchbooks and art supplies somewhere easy to grab. When you see your child is upset, you can suggest, “It looks like you have some big feelings right now. Do you want to go doodle them out in your book for a bit?”
Practical Example: An eight-year-old is fuming after an argument with her brother. She stomps off and grabs her sketchbook. She starts by furiously drawing dark, scribbly storm clouds. After a few minutes, she begins adding little sunbeams peeking through. The act of drawing helps her process the anger and move through it on her own terms.
Adapting Strategies for Different Ages and Needs
What works for a five-year-old won’t fly with a fifth-grader. The journey to learning how to self-soothe isn’t a one-size-fits-all path. What brings comfort to a six-year-old might feel silly or even embarrassing for a thirteen-year-old, so adapting our strategies is key.
As kids grow, their worlds expand. Their ability to think abstractly, understand their own feelings, and connect with others deepens. This means our approach has to evolve right alongside them, shifting from purely sensory methods for our youngest learners to more cognitive and relational tools for older students.
Kindergarten to Second Grade: Concrete Comfort
For kids in K-2, the world is very literal and hands-on. Their emotional regulation is deeply tied to their senses and what their bodies are experiencing. When big feelings hit, they need concrete, physical actions to feel safe and grounded again.
Self-soothing strategies at this age should be simple, easy to remember, and focused on the body.
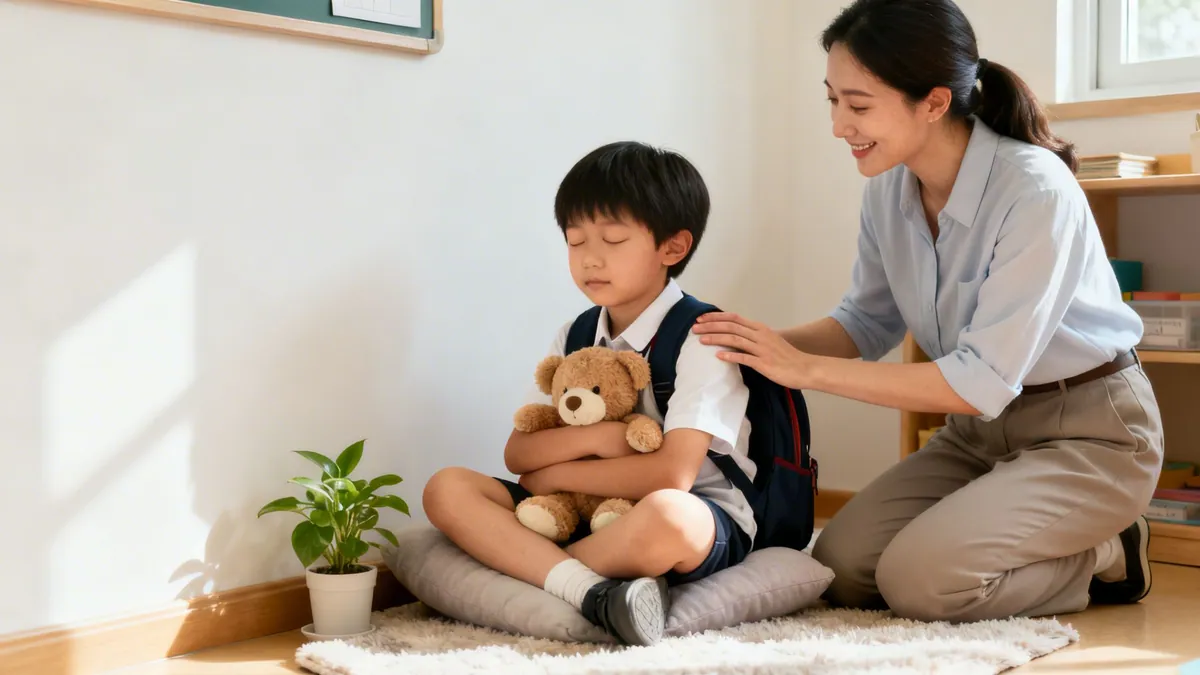
Hugging a Stuffed Animal: The gentle pressure and soft texture offer immediate comfort. Practical Example: A first-grader feels sad after a playground squabble and the teacher allows them to get the classroom’s “feel-better bear” from the calm-down corner to hold at their desk for a few minutes.
Using a Weighted Lap Pad: During quiet reading, a child who feels wiggly and overstimulated can place a small weighted pad on their lap. That deep pressure sends calming signals straight to the nervous system.
Looking at a Calm-Down Jar: A glitter jar is a perfect visual anchor. Practical Example: A kindergartener is upset about their parent leaving at drop-off. The teacher can sit with them for a moment, shake the glitter jar, and say, “Let’s watch all the glitter settle. By the time it’s calm, our hearts might feel a little calmer, too.”
The goal here is to move from co-regulation to self-regulation. We start by modeling the soothing action with them—hugging them, breathing deeply beside them—and then guide them to use a physical tool on their own, like their favorite stuffed animal.
These early skills are incredibly important. Research shows that a child’s ability to self-soothe grows dramatically even in the first year of life, jumping from just 27.55% at one month to 46.39% by twelve months. This early development, often supported by comfort objects, helps build lifelong emotional health. You can learn more about how these foundational soothing skills develop and why they matter for a child’s future.
Third to Fifth Grade: Building a Bridge to Self-Awareness
Students in upper elementary are in a fascinating transition. They still absolutely benefit from sensory strategies, but they’re also starting to develop the ability to use more internal, cognitive techniques. They can actually think about their feelings and begin using simple self-talk.
This is the perfect age to connect concrete actions with their growing self-awareness.
Drawing or Journaling: A fourth-grader who’s frustrated with a tough math problem can be encouraged to “draw their frustration” or write down three angry words. This gets the feeling out without needing a complex conversation.
Using a Fidget Tool Discreetly: A fidget spinner or therapy putty can be used under a desk to manage pre-test jitters. It gives them quiet sensory input that helps focus the mind without distracting anyone else.
Listening to a Short Guided Meditation:Practical Example: A teacher can have students put their heads down for three minutes before a test and play a short audio clip: “Imagine a calm, blue light filling up your body, from your toes to your head, making you feel peaceful and focused.”
Sixth to Eighth Grade: Thinking and Connecting to Calm Down
By middle school, students are swimming in a sea of complex social dynamics and higher academic stakes. A squishy ball might still have its place, but they need more sophisticated tools that respect their growing independence and need for privacy.
The focus naturally shifts to internal self-talk and trusted peer connections.
Practicing Positive Self-Talk: A student who bombed a quiz can be taught to reframe their thoughts. Practical Example: A parent can model this by saying, “I’m so frustrated I burned dinner! Okay, deep breath. It’s not the end of the world. Let’s order a pizza and I’ll try that recipe again tomorrow.” This shows the student how to talk themselves through a mistake.
Creating a Calming Music Playlist: Music is a huge mood regulator for this age. An eighth-grader overwhelmed by social drama can put on their headphones and tune into a pre-made “chill” playlist, creating a personal bubble of calm.
Relational Soothing: Encourage them to reach out to a trusted friend. Practical Example: A teacher might notice a student is upset and say, “It looks like you’re having a hard time. Would you feel better if you took five minutes to talk with Sarah in the hallway?” This validates peer support as a healthy coping strategy.
When Self-Soothing Is Not Enough
Even with the best game plan, bringing mindfulness into a classroom isn’t always a walk in the park. Let’s get real about the bumps you’ll hit along the way. The good news? These challenges are totally normal, predictable, and you can absolutely navigate them with a little creativity and a lot of heart.
When you first introduce mindfulness, you’re almost guaranteed to hear, “This is boring!” or “This is so silly.” It’s a rite of passage, especially with older students. The trick is to not let it get under your skin. Instead, get curious. More often than not, that pushback comes from feeling self-conscious or just not getting why you’re doing it.
Getting Past “This is Boring”
The best way to flip skepticism on its head is to reframe the whole thing. Tie mindfulness directly to stuff they already care about—like leveling up in a video game, nailing a free throw, or not panicking during a test. You can even call it “attention training” to help them get focused and stay cool under pressure.
Another game-changer is tweaking your language. If a kid is squirming in their seat, don’t rush to label them “unfocused.” Try using their wiggles as part of the practice.
Here’s what that sounds like: Instead of saying, “You need to sit still,” try something like, “I notice your body has a lot of energy right now. That’s totally okay. For just a moment, let’s see if we can notice that ‘body energy’ without needing to fix it. Is it a buzzy feeling? Or maybe a jumpy one?”
This little shift validates what they’re feeling and turns their restlessness into an object of curiosity, not a behavior problem. It’s a subtle but powerful move from judgment to awareness.
Finding Time in a Jam-Packed Day
“I just don’t have the time.” We hear this from teachers and parents all the time, and it’s a valid concern. But here’s the secret: you don’t need to find a new 30-minute block in your day. It’s all about using the little pockets of time you already have. This is where “micro-practices” become your secret weapon.
These are super-short, 30- to 60-second mindfulness hits you can sprinkle throughout the day. They’re amazing for hitting the reset button without derailing your entire schedule.
Right Before a Test: Lead a 30-second “cool the pizza” breath. “Okay, let’s pretend we have a super hot slice of pizza. Breathe in and smell that yummy pizza… now blow out nice and slow to cool it down.”
Lining Up for Recess: Try a quick “sound safari.” “While we’re waiting, let’s close our eyes for a minute and see how many different sounds we can hear. Go!”
Switching Between Subjects: Use a one-minute mindful walk. “Let’s walk to our reading spots in super slow motion. See if you can feel your feet on the floor with every single step.”
When you weave in these tiny moments, mindfulness stops feeling like another thing to do and just becomes part of the classroom rhythm. It proves you don’t need a ton of time to make a huge difference.
Measuring What Really Matters
While it’s great to see data on improved test scores or focus, the most profound signs of success aren’t usually found on a spreadsheet. Real progress shows up in how kids talk to themselves, how they treat each other, and how they handle their big feelings.
So, what are you looking for? Success isn’t about kids sitting in perfect silence with empty minds. It’s about their growing awareness.
Qualitative Signs of Success
What You Might See
What It Really Means
Self-Regulation
A student says, “I’m getting frustrated, I need a minute,” instead of melting down. They’re noticing an emotion and choosing how to respond. That’s a huge win.
Empathy & Kindness
You spot fewer squabbles on the playground or see a child comforting a friend who’s upset. This shows they’re tuning into how others feel, not just their own world.
Home Connection
A parent emails you to say their child used a breathing exercise to calm down before bed or started talking about their “internal weather” at home. This is the gold standard—it means the skills are sticking.
These are the moments that tell you the practice is truly taking root. It shows that kids aren’t just doing mindfulness exercises; they’re starting to live more mindfully. Every time a child shows a little more patience, a bit more self-awareness, or an ounce more kindness, you’re witnessing real, tangible success.
Got Questions About Teaching Mindfulness?
When you’re just starting to bring mindfulness to kids, it’s natural for a few common questions to pop up. Whether you’re a teacher or a parent, you’re not alone in wondering about the practical side of things. Let’s walk through some of the most frequent ones I hear from educators just like you.
How Do I Introduce Mindfulness Without Touching on Religion?
This is a big one, and the answer is simpler than you might think: keep it secular and grounded in brain science. I always advise teachers to frame mindfulness as “attention practice” or “brain training.” The focus is on concrete, observable benefits like better focus and a calmer way to handle stress.
Use simple, universal language. Instead of words that might feel spiritual, try phrases like:
“Let’s notice our breath.”
“We’re going to pay attention on purpose for a minute.”
“Let’s check in with our feelings right now.”
The goal is to teach a life skill for mental well-being, just like P.E. class teaches students how to care for their bodies. A “Mindful Minute” isn’t a spiritual ritual; it’s a tool for getting ready to learn.
The most successful school programs have one thing in common: they treat mindfulness as a mental fitness exercise. You’re helping kids train the muscle of attention—a skill every single child can benefit from, no matter their family’s personal beliefs.
I’m a Teacher. What’s the Single Most Important First Step for Me?
Before you teach anyone else, start your own practice. Seriously. It doesn’t have to be a huge commitment—even five minutes a day can make a world of difference. Study after study shows that students get significantly more out of mindfulness when their teacher has a personal practice.
You don’t need to become a meditation guru overnight. The point is to understand what you’re teaching from the inside out. This is what allows you to teach with authenticity.
It lets you troubleshoot from experience and, most importantly, model a calm, present demeanor for your students. When a child says, “I can’t stop thinking!” you’ll be able to nod and say with genuine empathy, “I know what you mean, my mind gets super busy too! Let’s just watch those thoughts go by like clouds in the sky.” Your own practice is the bedrock of a truly mindful classroom.
How Can I Start If I Have Zero Budget for SEL Programs?
Great news: many of the most powerful mindfulness activities are completely free. You can start today. The most important investment isn’t money; it’s your consistent time and energy.
Here are a few zero-cost ideas to get you started:
Breathing Buddies: Grab some stuffed animals for a simple “Buddy Breathing” exercise where kids watch the animal rise and fall on their belly. Or try “Cool the Pizza” breathing to teach slow, intentional exhales.
Mindful Listening: Ring a chime, a bell, or just use the sounds already in your classroom for a “Sound Safari.” The goal is just to notice.
One-Minute Resets: Squeeze in a quick, one-minute “Mindful Reset” during transitions between subjects. It’s a perfect way to help students shift gears and bring their focus back.
Start small. Keep a simple log of the positive changes you see—maybe fewer disruptions or kids being a little kinder to each other. This kind of real-world evidence can build a powerful case for getting a budget for more formal social-emotional learning programs down the road.
At Soul Shoppe, we believe that every child deserves the tools to build a kind and connected world, starting from within. Our programs provide students and educators with the shared language and practical skills to cultivate empathy, resilience, and psychological safety in schools. Ready to bring these powerful social-emotional learning tools to your community? Explore our programs and see how we can help your school thrive.
The ability for a child to manage their emotions, thoughts, and behaviors is a foundational skill for success. Self-regulation is not about suppressing feelings; it’s about navigating them effectively to achieve goals, build healthy relationships, and thrive academically. For parents and educators supporting students from kindergarten through 8th grade, finding practical, evidence-based self regulation strategies can feel overwhelming. This guide cuts through the noise and delivers a toolkit of proven methods.
We will explore ten powerful, actionable strategies you can implement immediately in the classroom and at home. This is more than just a list of ideas. It’s a direct roadmap designed for practical application.
Inside this guide, you will find:
Step-by-step instructions for each strategy, from deep breathing to cognitive reframing.
Real-world examples and sample scripts to show you what these techniques look like in action with K-8 students.
Age-appropriate adaptations to help you adjust each tool for a second grader versus a seventh grader.
These tools are designed to create environments where children develop resilience, focus, and emotional intelligence. Forget abstract theories; this article provides concrete steps to help you foster self-regulation skills that will last a lifetime. Let’s get started.
1. Mindfulness and Deep Breathing
Mindfulness and deep breathing are foundational self-regulation strategies that empower students to connect with the present moment and manage their physiological stress response. Mindfulness is the practice of paying attention to the here and now without judgment, while deep breathing directly activates the body’s parasympathetic nervous system, creating a sense of calm. Together, they provide a powerful, accessible tool for children and adults to recognize rising emotions before they become overwhelming.
This approach works by interrupting the “fight, flight, or freeze” reaction. When a student feels anxious or angry, their breathing becomes shallow and their heart rate increases. Intentional deep breaths send a signal to the brain that the danger has passed, allowing the prefrontal cortex-the brain’s center for rational thinking-to come back online. This shift is crucial for problem-solving and learning. For a deeper look at specific, immediate relief techniques, explore these science-backed methods to calm down fast.
How to Implement Breathing and Mindfulness
For Younger Students (K-3):
“Smell the Flowers, Blow Out the Candles”: Guide children to inhale deeply through their nose as if smelling a flower, then exhale slowly through their mouth as if blowing out birthday candles. Example: Before a challenging activity, say, “Let’s get our brains ready. Everyone pick a beautiful flower in your mind. Okay, let’s smell it… [breathe in]… now gently blow out the birthday candles… [breathe out].”
“Belly Breathing”: Have students lie down and place a small stuffed animal on their belly. They can watch it rise and fall with each deep breath, providing a visual anchor. Example: During a calm-down moment, you can say, “Let’s give our ‘breathing buddies’ a ride. Lie on your back, put your buddy on your belly, and let’s see if you can rock it to sleep with your slow, deep breaths.”
For Older Students (4-8):
Box Breathing: Students inhale for four counts, hold for four, exhale for four, and hold for four. Tracing a square in the air or on their desk can help them follow the rhythm. Example: Before a test, guide them: “Let’s calm our nerves with some box breathing. Silently, we’ll breathe in for four, hold for four, out for four, hold for four. You can trace the box on your desk as we go.”
4-7-8 Breathing: Inhale through the nose for four seconds, hold the breath for seven seconds, and exhale completely through the mouth for eight seconds. This is particularly effective for managing anxiety. Example: If a student is visibly upset, you can quietly say, “Let’s try that 4-7-8 breath we practiced. I’ll do it with you. In through your nose for four… hold it… and a long, slow whoosh out for eight.”
Pro Tip: Normalize taking a “breathing break.” Frame it as a smart, strong choice anyone can make to reset their brain, not as a punishment or sign of weakness. Consistent practice builds this skill into an automatic response over time. You can find more calming activities for the classroom to build a supportive environment.
2. Emotional Labeling and Naming
Emotional labeling is the practice of identifying and putting words to feelings as they arise. Popularized by neuroscientist Daniel Siegel’s concept to “name it to tame it,” this strategy helps students build a rich emotional vocabulary and is a cornerstone of emotional intelligence. The act of naming an emotion reduces activity in the amygdala (the brain’s alarm center) and engages the prefrontal cortex, allowing for more thoughtful responses instead of impulsive reactions. This foundational skill enables students to communicate their needs clearly and develop empathy for others.
This approach works by externalizing an internal state, creating a small but critical space between a feeling and a reaction. When a student can move from a general “I’m mad” to a more specific “I feel frustrated and left out,” they gain control over the experience. They are no longer consumed by the emotion but are observing it. This cognitive shift is one of the most effective self-regulation strategies because it empowers students to understand their internal world and make conscious choices about their behavior. For a deeper guide on this, explore these practical tips for naming feelings and helping kids find the words they need.
How to Implement Emotional Labeling
For Younger Students (K-3):
Feelings Chart Check-in: Start the day by having students point to a picture on an emotion chart that shows how they are feeling and say the word aloud. Example: During morning circle, say, “Let’s check in with our hearts. Look at our feelings chart. Today, I’m pointing to ‘calm.’ Maria, which picture is closest to your feeling right now?”
Storybook Emotions: While reading a story, pause and ask, “How do you think that character is feeling right now? What clues tell you that?” Example: While reading The Three Little Pigs, you might ask, “Look at the pig’s face when the wolf is at the door. He looks scared. How can you tell he is scared?”
For Older Students (4-8):
Emotion Wheel: Use a more detailed emotion wheel to help students move from basic feelings (like “sad”) to more nuanced ones (like “disappointed,” “lonely,” or “grieving”). Example: If a student says they’re “mad” about a group project, you can pull out an emotion wheel and ask, “Let’s look closer. Is it angry-mad, frustrated-mad, or maybe even feeling disrespected?”
“Feeling/Behavior” Sentence Frames: Teach students to separate feelings from actions with this script: “I feel [emotion] because [reason], and I am choosing to [calm-down strategy].” Example: “I feel annoyed because my pencil broke, and I am choosing to take three deep breaths before I ask for a new one.”
Pro Tip: Model this in your own life. Verbally narrate your own feelings in a calm way, such as, “I’m feeling a little overwhelmed by the noise in here, so I’m going to take three deep breaths.” This shows students that all emotions are normal and manageable.
3. The STOP Technique (Stop, Take a breath, Observe, Proceed)
The STOP technique is a simple yet effective four-step strategy designed to interrupt impulsive reactions and create space for a more thoughtful response. It serves as a mental “pause button,” allowing students to break free from an automatic emotional spiral. By guiding them through the sequence of Stopping, Taking a breath, Observing their thoughts and feelings, and then Proceeding with a choice, this tool helps students move from a reactive state to a responsive one. It directly supports social-emotional learning by building self-awareness and responsible decision-making skills.
This method works by creating a critical gap between a triggering event and a student’s reaction. When a student feels frustrated or angry, their immediate impulse might be to lash out. The STOP technique creates a moment for their prefrontal cortex to catch up with their emotional brain, the amygdala. This pause allows them to recognize their feelings, consider the consequences of their actions, and choose a more constructive path forward. The simplicity of the acronym makes it one of the most memorable and practical self-regulation strategies for in-the-moment support.
How to Implement the STOP Technique
For Younger Students (K-3):
Physical STOP Sign: Use a visual cue, like holding up a hand like a stop sign, to initiate the first step. Guide them verbally: “Let’s STOP. Now let’s take a big dragon breath.” Example: When two students start arguing over a toy, you can say, “Freeze! Let’s both use our STOP power. First, we stop our bodies and our voices.”
“Notice and Name”: During the “Observe” step, help them name their feeling. Ask, “What are you noticing in your body? Does your tummy feel tight? You might be feeling frustrated.” Example: “Okay, we’ve taken our breath. Now let’s observe. I see you’ve made fists with your hands. That’s a clue that you might be feeling angry. Is that right?”
For Older Students (4-8):
Internal Monologue: Encourage them to run through the steps silently in their head. The goal is for the technique to become an internal, automatic process. Example: If you see a student getting frustrated with a math problem, you can quietly walk over and whisper, “Looks like a good time to use STOP in your head. Just pause and take that one good breath.”
Scenario Role-Playing: Practice using STOP in hypothetical situations during a morning meeting, like what to do if someone cuts in line or takes their pencil without asking. Example: “Today’s scenario: someone posts an unkind comment online. What’s the first thing we do? Right, STOP. We don’t type back right away. What’s next? Take a breath. Good. Now, what are we observing…?”
Pro Tip: Model using STOP yourself. When you feel overwhelmed, say aloud, “Okay, I’m feeling a little flustered. I’m going to STOP, take a breath, observe what’s happening, and then decide how to proceed.” This authentic modeling shows students that self-regulation is a skill for everyone.
4. Movement and Physical Activity
Intentional movement and physical activity are powerful self regulation strategies that help students manage their emotions by releasing endorphins and providing essential sensory feedback. Whether through structured sports, stretching, or spontaneous dance, physical activity works as both a proactive tool to maintain an emotional baseline and a reactive one to shift out of a dysregulated state. It is particularly effective for kinesthetic learners who process information and emotions through their bodies.
This approach helps complete the stress response cycle, allowing the body to physically discharge built-up tension and frustration. When a student feels agitated or unfocused, their body holds that energy. Movement provides a healthy outlet, improving blood flow to the brain and resetting the nervous system. This physical reset makes it easier for students to re-engage with learning and social situations constructively, a core principle found in programs like Soul Shoppe’s movement-based curriculum.
How to Implement Movement and Physical Activity
For Younger Students (K-3):
Animal Walks: Have students move across the room like different animals, such as a bear (on hands and feet), a frog (jumping), or a crab (crawling backward). This provides great sensory input. Example: “I see a lot of wiggly energy! Let’s take a one-minute animal break. Everybody, crawl like a bear to the bookshelf and back to your spot.”
Dance Breaks: Put on a short, energetic song and lead a quick “freeze dance” session. When the music stops, everyone freezes in place until it starts again. Example: Use this as a transition. “Okay, writers, pens down! Time for a 90-second dance party before we start math!”