

10 Proven Problem Solving Activity Models for Kids in 2026
In today’s complex world, the ability to navigate challenges, understand different perspectives, and collaborate on solutions is more critical than ever. For educators and parents, fostering these skills goes beyond academic instruction; it requires equipping students with practical social-emotional learning (SEL) tools. To move beyond worksheets and focus on building resilient young problem-solvers, educators can leverage strategies like Problem Based Learning, which challenges students to solve real-world problems. This approach sets the stage for deeper, more meaningful engagement.
This article provides a curated collection of ten powerful, classroom-ready problem-solving activity models designed for K–8 students. Each entry is a deep dive, offering not just a concept but a comprehensive guide. You will find step-by-step instructions, practical examples for teachers and parents, differentiation tips, and clear connections to core SEL competencies.
We will explore a range of powerful techniques, from the analytical Five Whys and Fishbone Diagrams to the empathetic practices of Restorative Circles and Empathy Mapping. You’ll discover how to implement structured dialogue with protocols like Brave Space Conversations and Collaborative Problem-Solving. The goal is to provide actionable frameworks you can use immediately to build a more connected, empathetic, and resilient school community. These aren’t just activities; they are frameworks for transforming your classroom or home into a dynamic space for growth, aligning with Soul Shoppe’s mission to help every child thrive. Let’s explore how these proven strategies can empower your students.
1. The Five Whys Technique
The Five Whys technique is a powerful root-cause analysis tool that helps students and educators move past surface-level issues to understand the deeper, underlying reasons for a problem. By repeatedly asking “Why?” (typically five times), you can peel back layers of a situation to uncover the core issue, which is often emotional or social. This problem solving activity is excellent for addressing conflicts, behavioral challenges, and social dynamics in a way that fosters empathy and genuine understanding.
This method transforms how we approach discipline, shifting the focus from punishment to support. Instead of simply addressing a behavior, we seek to understand the unmet need driving it.
How It Works: A Classroom Example
Imagine a student, Alex, consistently fails to turn in his math homework. A surface-level response might be detention, but using the Five Whys reveals a more complex issue.
- Why didn’t you turn in your homework? “I didn’t do it.” (The initial problem)
- Why didn’t you do it? “I didn’t understand how.” (Reveals a skill gap, not defiance)
- Why didn’t you ask for help? “I was afraid to look dumb in front of everyone.” (Uncovers social anxiety)
- Why were you afraid of looking dumb? “Last time I asked a question, some kids laughed at me.” (Identifies a past negative social experience)
- Why do you think they laughed? “Maybe they don’t like me or think I’m not smart.” (Pinpoints the root cause: a feeling of social isolation and a need for belonging)
This process reveals that the homework issue is not about laziness but about a need for a safe and inclusive classroom environment. The solution is no longer punitive but focuses on building community and providing discreet academic support.
Key Insight: The Five Whys helps us see that behavior is a form of communication. By digging deeper, we can address the actual need instead of just reacting to the symptom.
Tips for Implementation
- Create a Safe Space: This technique requires trust. Ensure the conversation is private and framed with genuine curiosity, not interrogation. Start by saying, “I want to understand what’s happening. Can we talk about it?”
- Model the Process: Teach students the Five Whys method directly. Use it to solve classroom-wide problems, like a messy coatroom, so they learn how to apply it themselves. Practical Example: A teacher might say, “Our coatroom is always a mess. Why? Because coats are on the floor. Why? Because the hooks are full. Why? Because some people have multiple items on one hook. Why? Because there aren’t enough hooks for our class. Why? Because our class size is larger this year.” The root cause is a lack of resources, not student carelessness.
- Be Flexible: Sometimes you may need more or fewer than five “whys” to get to the root cause. The goal is understanding, not adhering strictly to the number.
For more tools on building a supportive classroom culture where this problem solving activity can thrive, explore our Peace Corner resources.
2. Fishbone Diagram (Ishikawa Diagram)
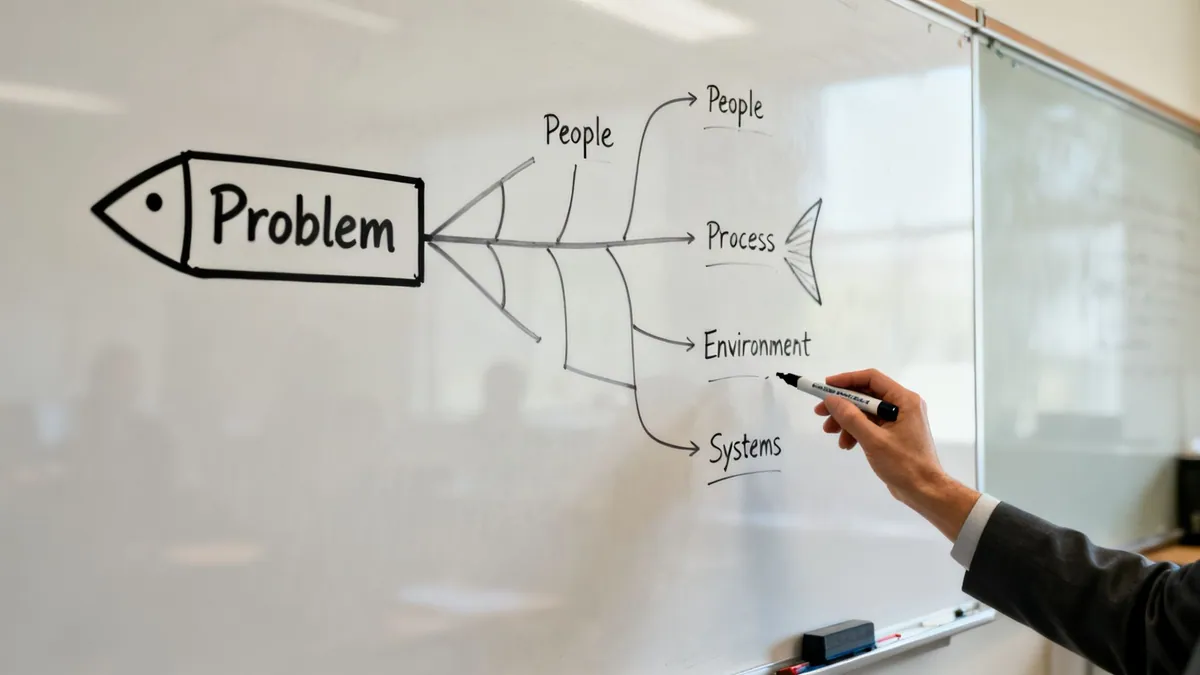
The Fishbone Diagram, also known as an Ishikawa or Cause and Effect Diagram, is a visual tool that helps groups brainstorm and map out the potential causes of a specific problem. Its structure resembles a fish skeleton, with the “head” representing the problem and the “bones” branching out into categories of potential causes. This problem solving activity is ideal for unpacking complex, multi-faceted issues like bullying, student disengagement, or chronic classroom disruptions.
It encourages collaborative thinking and prevents teams from jumping to a single, simplistic conclusion. Instead, it systematically organizes potential factors into logical groups, making it easier to see how different elements contribute to the central issue.
How It Works: A School-Wide Example
Imagine a school is struggling with low student engagement during Social-Emotional Learning (SEL) blocks. The problem statement at the “head” of the fish is: “Students are disengaged during SEL time.” The team then brainstorms causes under key categories.
- Instruction (Methods): Lessons are not culturally relevant; activities are repetitive; delivery is lecture-based rather than interactive.
- Environment (Setting): Classroom setup doesn’t support group work; SEL is scheduled right before lunch when students are restless.
- People (Students/Staff): Staff lack confidence in teaching SEL topics; students don’t see the value or feel it’s “not cool.”
- Resources (Materials): The curriculum is outdated; there are not enough materials for hands-on activities.
By mapping these factors, the school can see that the issue is not just one thing. The solution must address curriculum updates, teacher training, and scheduling changes. To help visualize potential causes for a problem, explore more detailed examples of Cause and Effect Diagrams.
Key Insight: Complex problems rarely have a single cause. The Fishbone Diagram helps teams see the interconnectedness of issues and develop more comprehensive, effective solutions.
Tips for Implementation
- Be Specific: Start with a clear and concise problem statement. “Why do 4th graders have frequent conflicts during recess?” is much more effective than a vague statement like “Students are fighting.”
- Involve Diverse Voices: Include teachers, students, counselors, and support staff in the brainstorming process to gain a 360-degree view of the problem.
- Customize Your Categories: While traditional categories exist (like People, Process, etc.), adapt them to fit your school’s context. You might use categories like Policies, Peer Culture, Physical Space, and Family Engagement. Practical Example: For the problem “Students are frequently late to school,” a parent-teacher group might use categories like: Home Factors (alarms, morning routines), Transportation (bus delays, traffic), School Factors (boring first period, long entry lines), and Student Factors (anxiety, lack of motivation).
- Focus on Action: After completing the diagram, have the group vote on the one or two root causes they believe have the biggest impact. This helps prioritize where to direct your energy and resources.
3. Design Thinking Workshops
Design Thinking is a human-centered problem-solving framework that fosters innovation through empathy, collaboration, and experimentation. This problem solving activity guides students and educators to develop creative solutions for complex school challenges, from social dynamics to classroom logistics, by focusing on the needs of the people involved. It builds skills in critical thinking, communication, and resilience.
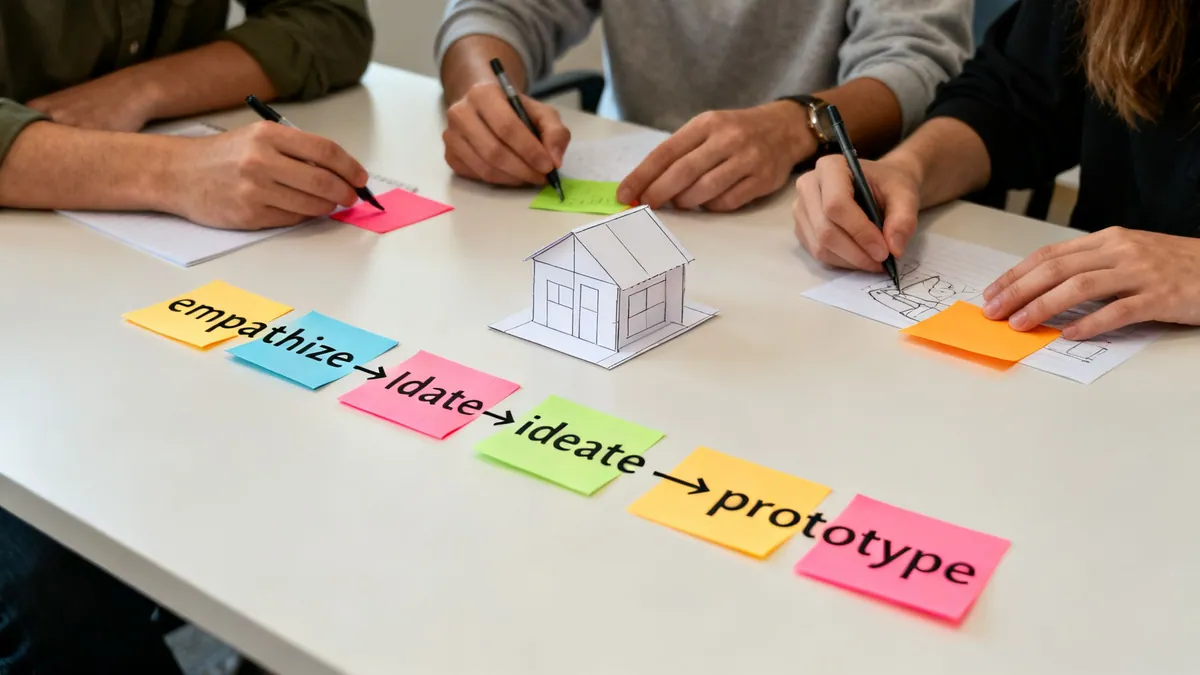
This approach shifts the focus from finding a single “right” answer to exploring multiple possibilities through an iterative process of understanding, ideating, prototyping, and testing. It empowers students to become active agents of positive change in their own community.
How It Works: A School Example
Imagine a group of students is tasked with improving the cafeteria experience, which many find chaotic and isolating. Instead of administrators imposing new rules, students use design thinking to create their own solutions.
- Empathize: Students conduct interviews and observations. They talk to peers who feel lonely, kitchen staff who feel rushed, and supervisors who feel stressed. They discover the long lines and lack of assigned seating are key pain points.
- Define: The group synthesizes their research into a clear problem statement: “How might we create a more welcoming and efficient lunch environment so that all students feel a sense of belonging?”
- Ideate: The team brainstorms dozens of ideas without judgment. Suggestions range from a “talk-to-someone-new” table and a pre-order lunch app to music playlists and better line management systems.
- Prototype: They decide to test the “conversation starter” table idea. They create a simple sign, a few icebreaker question cards, and ask for volunteers to try it out for a week.
- Test: The team observes the prototype in action, gathers feedback from participants, and learns what works and what doesn’t. They discover students love the idea but want more structured activities. They iterate on their design for the next phase.
This process results in a student-led solution that directly addresses the community’s needs, building both empathy and practical problem-solving skills.
Key Insight: Design Thinking teaches that the best solutions come from deeply understanding the experiences of others. Failure is reframed as a valuable learning opportunity within the iterative process.
Tips for Implementation
- Start with Curiosity: Frame the problem as a question, not a foregone conclusion. Begin with genuine interest in understanding the experiences of those affected without having a solution in mind.
- Encourage ‘Yes, And…’ Thinking: During the ideation phase, build on ideas instead of shutting them down. This fosters a creative and psychologically safe environment where all contributions are valued.
- Prototype with Low-Cost Materials: Prototypes don’t need to be perfect. Use cardboard, sticky notes, role-playing, and sketches to make ideas tangible and testable quickly and cheaply. Practical Example: To improve hallway traffic flow, students could create a small-scale model of the hallways using cardboard and use figurines to test different solutions like one-way paths or designated “fast” and “slow” lanes before proposing a change to the school.
For structured programs that help build the collaborative skills needed for design thinking, explore our Peacekeeper Program.
4. Restorative Practices and Peer Mediation
Restorative Practices and Peer Mediation offer a powerful framework for resolving conflict by focusing on repairing harm rather than assigning blame. This approach shifts the goal from punishment to accountability, healing, and reintegration. As a problem solving activity, it teaches students to take responsibility for their actions, understand their impact on others, and work collaboratively to make things right. It is especially effective for addressing complex issues like bullying and significant peer disagreements.
This method builds a stronger, more empathetic community by involving all affected parties in the solution. It empowers students to mend relationships and rebuild trust on their own terms.
How It Works: A Classroom Example
Imagine a conflict where a student, Maria, spread a hurtful rumor about another student, Sam. Instead of just sending Maria to the principal’s office, a peer mediation session is arranged. A trained student mediator facilitates the conversation.
- Setting the Stage: The mediator establishes ground rules for respectful communication. Each student agrees to listen without interrupting and speak from their own experience.
- Sharing Perspectives: The mediator first asks Sam to share how the rumor affected him. He explains that he felt embarrassed and isolated. Then, Maria is given a chance to explain her side.
- Identifying Needs: The mediator helps both students identify what they need to move forward. Sam needs an apology and for the rumor to be corrected. Maria needs to understand why her actions were so hurtful and wants to be forgiven.
- Creating an Agreement: Together, they create a plan. Maria agrees to privately tell the friends she told that the rumor was untrue and to apologize directly to Sam. Sam agrees to accept her apology and move on.
This process resolves the immediate conflict and equips both students with skills to handle future disagreements constructively.