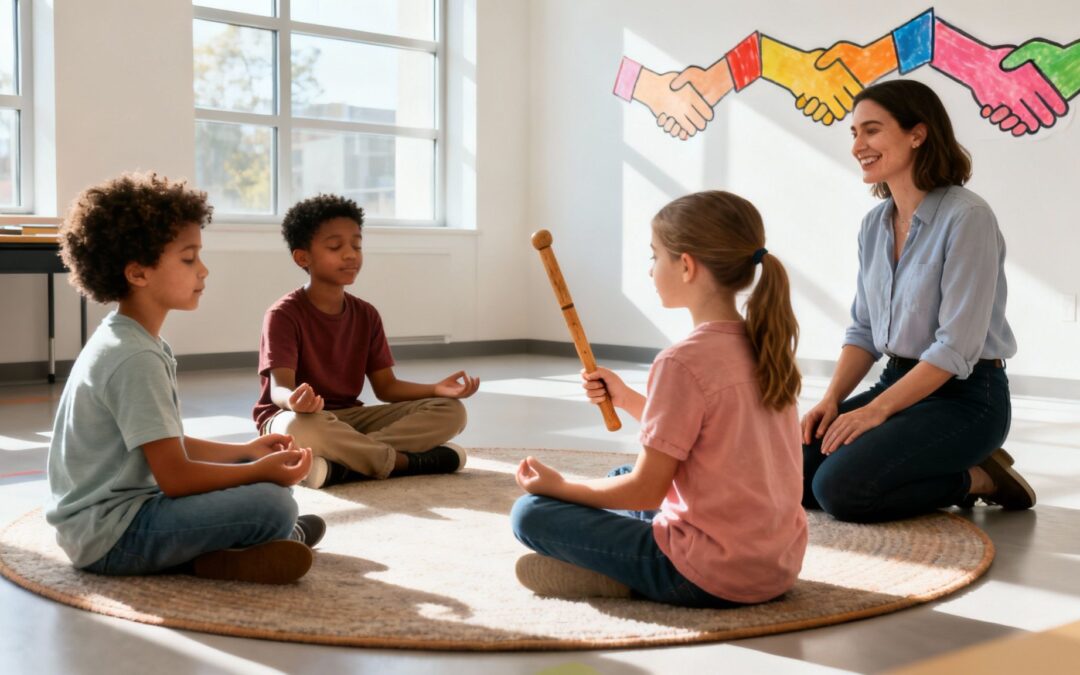
Restorative practices in education are about making a fundamental shift in how we think about student behavior. Instead of just punishing kids for breaking rules, the focus is on repairing harm and strengthening relationships. It’s an approach that moves past traditional consequences to get to the root of what’s happening and understand its impact on the whole community.
Shifting from Punishment to Connection
For decades, the go-to disciplinary model in many schools has been punitive. The main questions were always, “What rule was broken?” and “What’s the punishment?” This is kind of like yanking weeds out of a garden without ever checking the health of the soil. You might get rid of the visible problem for a moment, but you haven’t done anything to fix the conditions that let the weed grow in the first place. Often, a student’s behavior is just a form of communication—a signal that a need isn’t being met or that they feel disconnected.
Restorative practices, on the other hand, are all about nurturing that soil. This mindset flips the script and asks a totally different set of questions:
Who was harmed by this action?
What do they need to feel whole again?
Whose job is it to meet those needs and make things right?
This shift acknowledges a simple truth: when a student acts out, the harm doesn’t just stop with them. It ripples outward, affecting other students, teachers, and the entire feeling of the classroom. The goal is no longer just to punish one person but to mend those relationships and bring the student back into the community in a way that helps everyone learn and grow.
To give you a clearer picture, let’s look at how these two mindsets stack up side-by-side.
Punitive vs. Restorative Approaches at a Glance
Aspect
Traditional Punitive Approach
Restorative Practices Approach
Core Philosophy
Rule-breaking requires punishment and exclusion.
Harm to relationships requires repair and inclusion.
Guiding Questions
What rule was broken? Who is to blame? What punishment is deserved?
Who was harmed? What are their needs? How can we make things right?
Primary Goal
Deter future misbehavior through negative consequences.
Repair harm, restore relationships, and build community.
Focus
On the rule-breaker’s actions and assigning blame.
On the needs of everyone affected (the person harmed, the person who caused harm, and the community).
Typical Actions
Detention, suspension, expulsion, loss of privileges.
Restorative chats, circles, peer mediation, conferences, community service.
Outcomes
Can lead to resentment, shame, and disconnection.
Fosters empathy, accountability, and a stronger sense of belonging.
Seeing them laid out like this makes the difference pretty stark, doesn’t it? One is about enforcing rules, while the other is about nurturing people.
Moving Beyond Zero Tolerance
This isn’t a new idea that just popped up out of nowhere. It’s a direct response to a long history of exclusionary discipline in our schools. For years, research has shown how zero-tolerance policies—like automatic suspensions for relatively minor issues—are tied to lower achievement and higher dropout rates, especially for students of color. Restorative practices offer a powerful, more effective alternative. The real magic happens when you focus on building community in the classroombefore conflict ever starts, using tools like classroom circles and shared agreements to create a genuine sense of belonging.
The central idea is that human beings are happier, more cooperative and productive, and more likely to make positive changes in their behavior when those in positions of authority do things with them, rather than to them or for them.
Fostering a Culture of Belonging
At its heart, this approach is about creating safer, more supportive schools where every single student feels seen, heard, and valued. When we teach kids how to communicate their feelings, listen with empathy, and solve problems together, we’re giving them skills they’ll use for the rest of their lives. A core part of guiding these important dialogues involves mastering the art of asking questions that open up conversation instead of shutting it down. When a strong community becomes the foundation, academic and social success naturally follow.
The Three Pillars of a Restorative School
To really get what restorative practices are all about in a school setting, it helps to think of them as having three core pillars. These aren’t separate concepts; they’re interconnected stages that build on each other to create a resilient, supportive school culture. You can picture them as the foundation, the framework, and the open door of a restorative building.
The whole system works on a simple but powerful idea: the relationship bank account. Every positive chat, shared laugh, and moment of understanding is a deposit. When conflict comes up—and it always does—the community has this deep well of trust and connection to draw from to make things right.
Pillar 1: Building Community
This is the proactive, foundational pillar, and honestly, it’s where most of the real work happens. Building community is all about intentionally making those daily deposits into the relationship bank account. It’s about creating a genuine sense of belonging and psychological safety for every single student and staff member.
This is the essential groundwork that has to be in place before any harm occurs. Without a strong community, trying to respond to conflict is like trying to build on sand—there’s no shared trust to fall back on. This pillar is all about creating the shared experiences and norms that bind everyone together.
How This Looks in Practice:
Teacher Example: A teacher can kick off each day with a simple morning circle where every student shares how they’re feeling, perhaps using a “weather report” metaphor. A student might say, “I’m feeling sunny today because I have art class,” or “I’m a little cloudy because I didn’t sleep well.” This simple act normalizes talking about feelings and builds empathy from the first bell.
Parent Example: At home, a parent can create a similar ritual during dinner. Each family member could share one “rose” (something good that happened) and one “thorn” (a challenge they faced) from their day. This builds the habit of open communication.
Classroom Example: Instead of the teacher just handing down a list of rules, the class works together to create agreements for how they want to treat each other. A teacher might ask, “What does respect actually look like and sound like in our room?” The students’ own answers become their shared commitments.
A core belief of restorative practices is that it’s far better to build a strong community than to constantly have to repair a broken one. This proactive work of building social capital is the most critical piece of the puzzle.
Pillar 2: Responding to Harm
The second pillar is responsive—it kicks in when something goes wrong. When a conflict happens or someone is hurt, the focus immediately shifts away from blame, rules, and punishment. The key questions are no longer about who broke what rule, but about repairing the relationships that were damaged.
The goal is to understand the real impact of an action and give everyone involved a voice in figuring out the solution. This is where the school draws on all that trust built in the first pillar to navigate tough conversations. It turns moments of conflict into powerful opportunities for learning and growth.
How This Looks in Practice:
Parent Example: A parent finds out their child took a toy from a sibling. Instead of an immediate timeout, they might ask, “What happened? How do you think your brother felt when he couldn’t find his favorite toy? What do you think you can do to make it right?” This encourages accountability and empathy, not just compliance.
Teacher Example: A teacher sees two students arguing over a ball during recess. They pull them aside for a quick restorative chat: “I can see you’re both upset. Can each of you tell me your side of the story? What do you need to happen so you can both feel okay and get back to playing?”
Pillar 3: Reintegrating Individuals
This final pillar is maybe the most overlooked, but it’s absolutely vital. After the harm has been addressed and a plan for repair is in place, the community has to consciously and actively welcome the student back into the fold. This step is what prevents the shame and isolation that so often follow traditional punishment.
Reintegration makes sure that a student’s mistake doesn’t become their permanent identity. It sends a powerful message: “We are not throwing you away. You are still part of this community, and we will support you as you move forward.” This final step closes the loop, reinforcing the strength and resilience of the entire community.
How This Looks in Practice:
Teacher Example: After a student returns from an in-school suspension, their homeroom might hold a brief circle. The student could share what they learned, and their classmates can offer words of support, making it clear they are glad to have them back.
Parent Example: After a teenager breaks a family rule and has a consequence (like losing phone privileges), a parent can make a point to connect the next day. They might say, “I know yesterday was tough. I want you to know we love you, and we’re a team. Let’s talk about how we can make tomorrow better.” This separates the behavior from the person.
Putting Restorative Practices Into Action
Knowing the philosophy is one thing, but making it real in the hallways and classrooms? That’s where the magic happens. Shifting to a restorative model isn’t about one single program; it’s about having a toolbox of strategies ready to go. Think of it in three tiers, moving from proactive community-building for everyone to more intensive support when serious conflicts pop up.
And schools are catching on. According to recent federal school safety data, a whopping 59% of U.S. public schools reported using restorative practices in the 2021–22 school year. That’s a huge jump from just 42% in 2017–18, showing a clear move toward building connection over just handing out punishment.
Tier 1: Proactive Strategies for Everyone
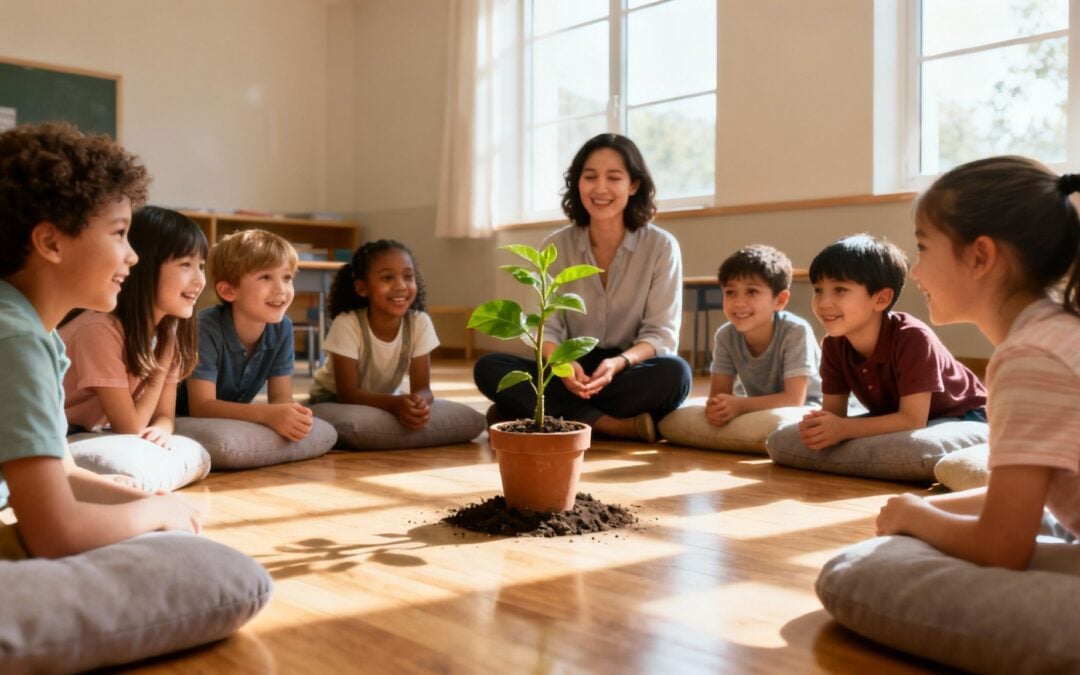
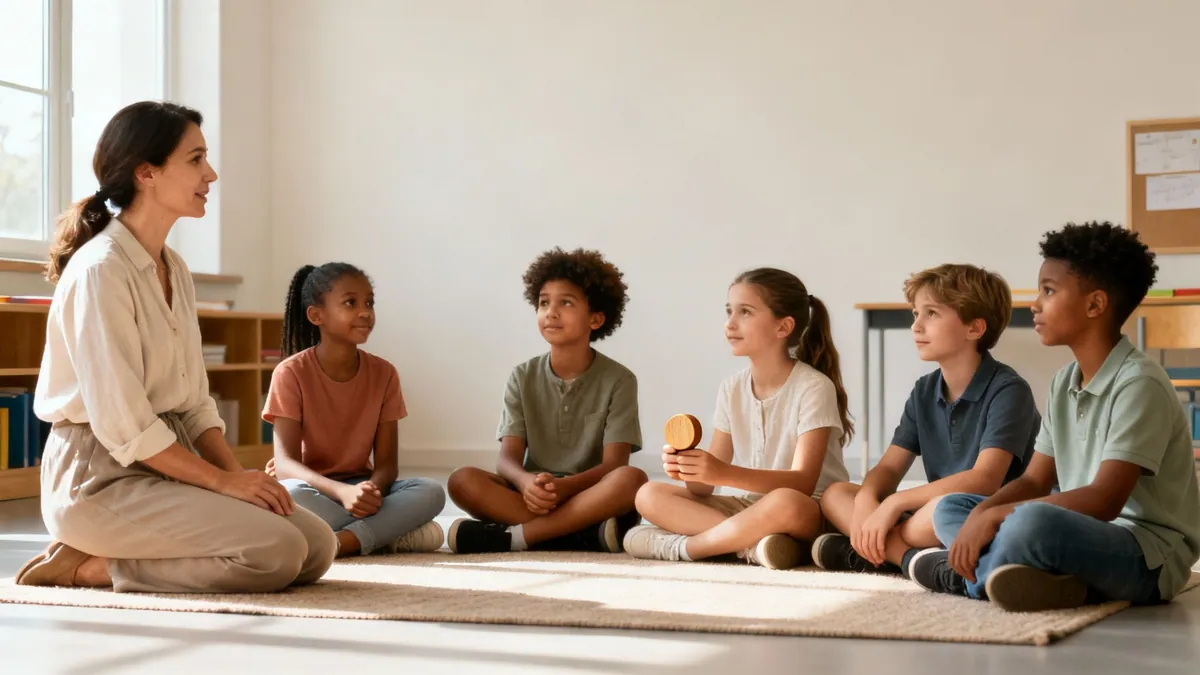
The foundation of it all is Tier 1. These are the everyday, universal things you do to build a strong sense of community and stop conflicts before they even start. This is where you make daily deposits into the “relationship bank account.” The most powerful tool here? The community-building circle.
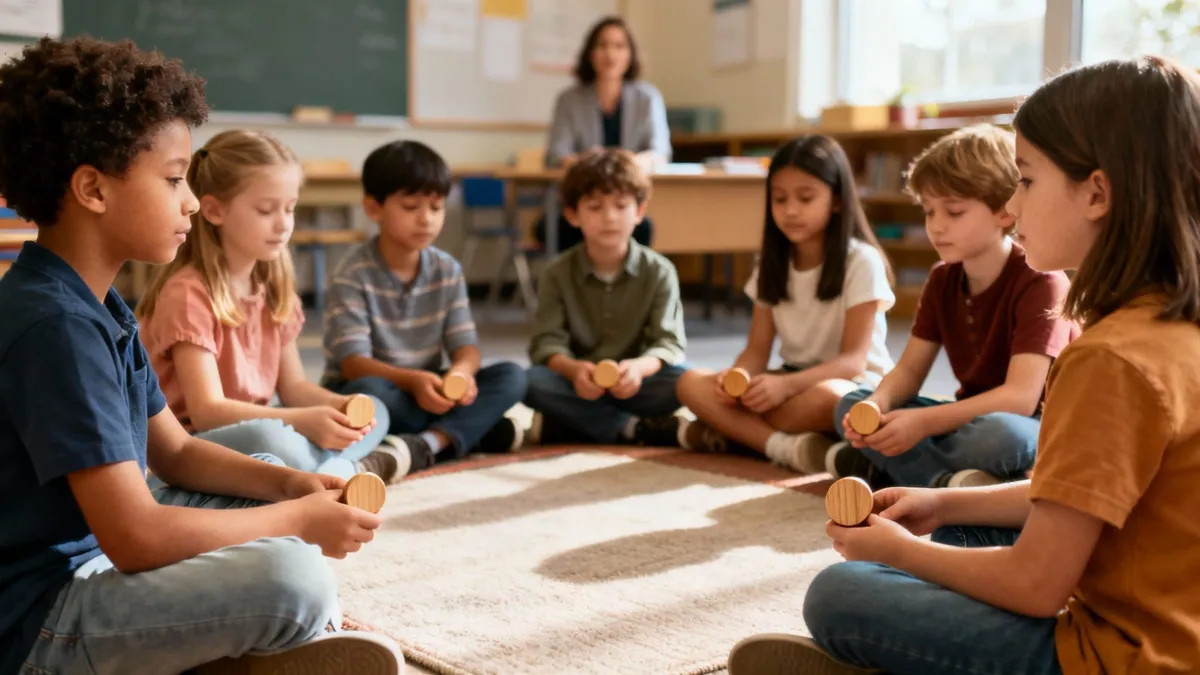
Circles are beautifully simple. They create a dedicated space where every single student has a voice and feels like they truly belong.
How to Run a Morning Check-In Circle
Set the Space: Get everyone in a circle where they can see each other. No desks or tables in the way—just open space.
Use a Talking Piece: This is key. Pick a special object (a smooth stone, a small stuffed animal) that gets passed around. Only the person holding it can speak.
Establish the Tone: The facilitator, usually the teacher, explains the circle’s purpose and shares a simple agreement, like “Respect the talking piece” or “Listen from the heart.”
Offer a Prompt: Ask a simple, low-stakes question to get the conversation flowing.
Pass the Piece: The facilitator goes first to model, then passes the talking piece around the circle. It’s always okay for a student to pass if they don’t feel like sharing.
Practical Examples: Circle Prompts for Different Ages
For Teachers (Grades K-2): “What’s one thing that made you smile this morning?” or “If you could be any animal, what would you be and why?”
For Teachers (Grades 3-5): “Share a time you felt proud of yourself this week,” or “What’s one thing you’re excited to learn?”
For Parents (at the dinner table): “What was the best part of your day?” or “What’s one thing you’re looking forward to this weekend?”
For Teachers (Grades 6-8): “What’s one challenge you’re navigating right now?” or “Who is someone you can count on for support, and why?”
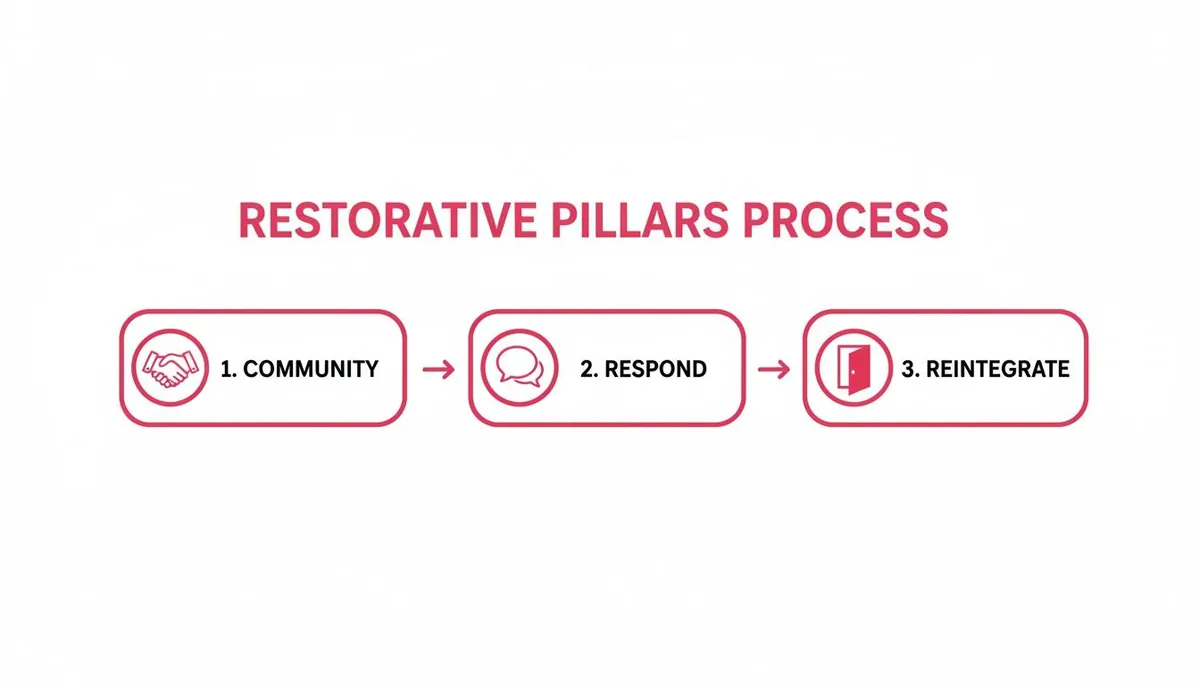
This whole process is captured perfectly in the Restorative Pillars Process flow.
As the visual shows, you have to build that strong community first. It’s the bedrock that allows you to effectively respond to harm and, eventually, bring everyone back together.
Tier 2: Responsive Strategies for Minor Conflicts
Tier 2 kicks in when those smaller, everyday conflicts happen—think arguments on the playground or disagreements between friends. The go-to tool here is the restorative chat. It’s a quick, informal conversation that turns a moment of discipline into a moment of learning.
The goal of a restorative chat isn’t to figure out who’s right and who’s wrong. It’s to help students see each other’s point of view and work together to find a way forward.
Imagine two kids arguing over a ball. Instead of a time-out, a teacher can pull them aside for a quick restorative chat. It only takes a minute or two.
Having some go-to questions makes these conversations feel natural instead of forced.
Practical Scripts for Restorative Conversations
This table offers some simple, powerful questions you can use in restorative chats or circles. The idea is to move from blame to understanding and repair.
Situation
Key Restorative Questions to Ask
Goal of the Conversation
Two students argue over a game.
1. “What happened?” (Listen to each person.)
2. “What were you thinking at the time?”
3. “How has this affected you? How do you think it affected the other person?”
4. “What do you need to move forward?”
Help students understand the impact of their words/actions and collaboratively find a solution.
A student is disruptive in class.
1. “I noticed you were [describe behavior]. What was going on for you then?”
2. “Who do you think was affected by that?”
3. “What can we do to make things right and get back to learning?”
Connect behavior to impact on the community and empower the student to take responsibility for repair.
A student feels left out.
1. “What happened from your perspective?”
2. “What was it like for you when that happened?”
3. “What would have made it better?”
4. “What do you need from your classmates to feel included?”
Validate the student’s feelings, build empathy in others, and create a plan for inclusion.
These simple scripts are powerful because they teach kids how to solve their own problems. They are a core part of our guide to conflict resolution strategies for students.
Tier 3: Intensive Strategies for Significant Harm
For bigger issues—bullying, theft, or physical fights—you need a more formal and intensive approach. This is Tier 3, which often involves a formal restorative conference. It’s a structured meeting that brings together everyone impacted by an incident to collectively figure out how to repair the harm.
This isn’t a quick fix. A conference requires careful preparation and a trained facilitator to guide the process.
Practical Example: A Formal Conference
Imagine a student vandalized a school bathroom. A punitive response would be suspension. A restorative conference, however, would involve a meeting with the student, their parents, the principal, and the janitor who had to clean up the mess. The janitor would share how the act impacted their workload and morale. The student would have to face this direct impact, and the group would work together on a repair plan, which might include the student helping the janitor with after-school cleanup for a week.
Key Elements of a Formal Conference:
Participants: The meeting includes the person who caused the harm, the person who was harmed, and supporters for each (like parents, friends, or trusted staff members). A neutral facilitator is essential.
Voluntary Participation: Everyone has to agree to be there. You can’t force restoration.
Structured Process: The facilitator uses a script of restorative questions to keep the conversation safe, focused, and productive for everyone.
The Outcome: The group works together to create a written agreement. It clearly states what the person who caused harm will do to make things right, whether that’s an apology, replacing a broken item, or doing something for the community.
As schools continue to weave restorative practices into their culture, exploring effective online teaching strategies can also help deepen that sense of connection and engagement, making the classroom feel like a supportive community, whether it’s in-person or online.
How Restorative Practices Fuel Social-Emotional Learning
Bringing a social-emotional learning program into your school community is a journey, not just a destination. Real success isn’t found in a single training day or a binder full of new curriculum. It’s built through a thoughtful, phased approach that earns trust, builds confidence, and creates lasting change. A deliberate plan is what separates an initiative that fizzles out from one that becomes a core part of your school’s identity.
Think of it like building a house. You wouldn’t just start putting up walls without a solid foundation and a clear blueprint. In the same way, a strong SEL launch needs careful planning, starting with a united team and a shared vision.
Phase 1: Build Your Team and Gain Buy-In
Your first move? Assemble a dedicated SEL committee. This team needs to be a real cross-section of your school: administrators, teachers from various grade levels, support staff like counselors, and even parents. A diverse team ensures all perspectives are heard and helps everyone see the program as a school-wide effort, not some top-down mandate.
Once your team is in place, the focus shifts to getting authentic buy-in from the rest of the staff. The absolute best way to do this is to let them experience SEL for themselves. Instead of just talking about empathy or self-awareness in a staff meeting, lead them through a powerful, short activity that brings the concept to life. A practical example is a “Two-Minute Mindful Listening” exercise where teachers pair up, one speaks, and the other listens without interrupting, then they switch. This simple activity demonstrates the power of feeling truly heard.
When teachers feel the positive impact of an SEL practice for themselves, they become its most passionate advocates. This experiential approach transforms skepticism into genuine enthusiasm far more effectively than any data sheet or presentation ever could.
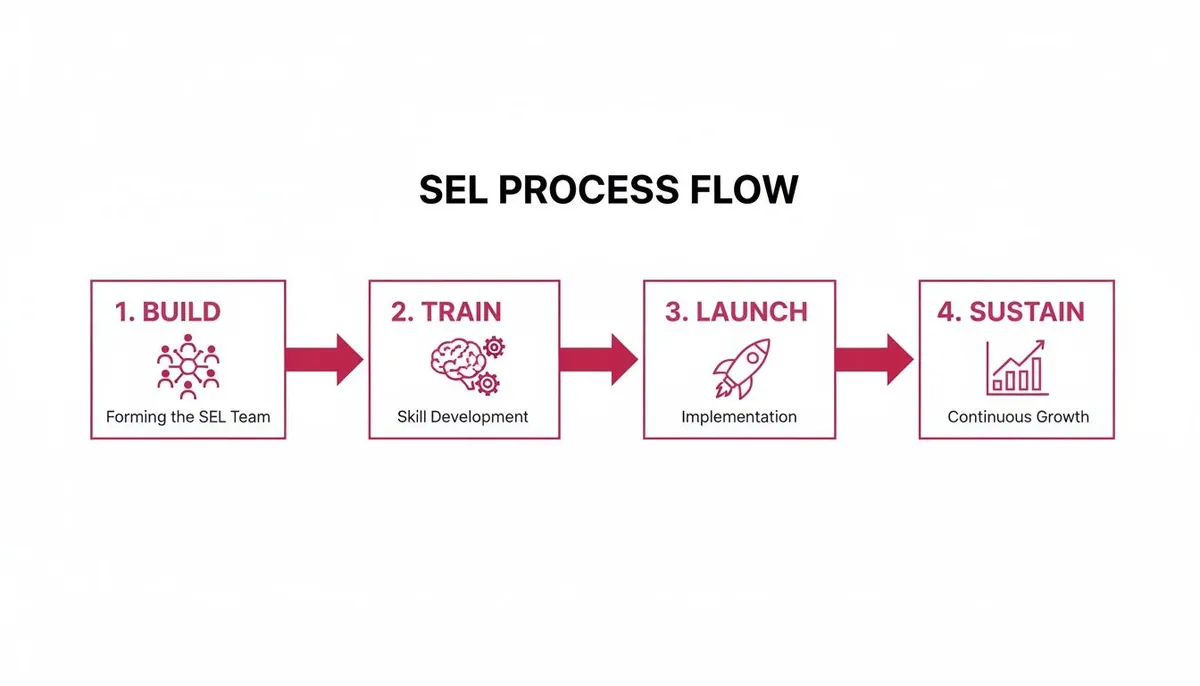
This visual shows the four key stages for successfully implementing social emotional learning programs for schools.
This process flow makes it clear that implementation is a continuous cycle, moving from building a team all the way to sustaining momentum for the long haul.
Phase 2: Meaningful Professional Development
With buy-in secured, the next phase is providing high-quality training. Effective professional development has to move beyond theory and give teachers practical, classroom-ready strategies they can use tomorrow. This training should be ongoing, not a one-off event.
Research consistently shows that continuous coaching and collaborative learning are far more effective. Teachers need opportunities to practice new skills, share what’s working, and get feedback in a supportive environment. The goal is to build teacher confidence so they can weave SEL seamlessly into their daily instruction. For a comprehensive look at what this entails, exploring a well-structured professional development program for educators can provide valuable insights.
Phase 3: Launch and Integrate Into School Life
Now it’s time to bring SEL to the students! A strong launch is more than just starting the first lesson. It means creating a school-wide kickoff that generates real excitement, like a themed assembly or a week of activities focused on a core skill like kindness.
But integration is the key to making SEL stick. Encourage teachers to connect SEL concepts to their academic subjects. It’s easier than it sounds.
In Literature: Discuss a character’s motivations and feelings (Social Awareness). For example, “How do you think Katniss felt when she volunteered for the Hunger Games? What clues does the author give us?”
In History: Analyze the perspectives of different groups during a historical event (Empathy). For example, when studying the American Revolution, students could write a journal entry from the perspective of a British soldier.
In Science: Practice perseverance and managing frustration during a challenging experiment (Self-Management). A teacher might say, “It’s okay to feel stuck. Let’s take three deep breaths and look at the problem from a new angle.”
Phase 4: Monitor, Adapt, and Sustain Momentum
Finally, successful implementation is an ongoing process of monitoring and adapting. You can’t improve what you don’t measure. When mapping out your SEL implementation, it’s essential to include all the supporting infrastructure, including tools for internal communication. Platforms like communication software for universities can help streamline feedback collection and keep your team coordinated.
Gather feedback and data regularly to see what’s working and where you need to adjust. Use a mix of methods:
School Climate Surveys: Ask students, staff, and parents about their sense of safety and belonging.
Discipline Data: Track changes in office referrals, suspensions, and bullying incidents.
Qualitative Feedback: Hold focus groups with students and have informal check-ins with teachers.
Use this information to celebrate your wins and make targeted improvements. This ensures your SEL program continues to meet the very real, evolving needs of your school community.
Bringing SEL to Life in the Classroom and Beyond
This is where the rubber meets the road—where social-emotional learning moves from a concept on paper into the living, breathing heart of a school. The most powerful social emotional learning programs for schools don’t just teach ideas; they build experiences that actually stick with kids.
Imagine a school where every student and staff member shares the same language for talking about emotions and conflict. That kind of consistency is a game-changer. It’s built not through a single lesson, but through interactive workshops, engaging school-wide assemblies, and simple daily routines that weave SEL skills into the fabric of school life.
Case Study: A Middle School Peer Mediation Program
A local middle school was wrestling with constant hallway arguments and small conflicts that were eating up teachers’ time and energy. They decided to try a peer mediation program, training a group of student volunteers in active listening, finding common ground, and brainstorming solutions.
Within just a few months, the results were impossible to ignore. Disciplinary referrals for minor conflicts plummeted by over 30%. But more importantly, students started using the mediation skills on their own, stopping disagreements before they could even escalate.
One 8th-grade mediator put it this way:
“Before, if someone had a problem, it was all about who was right or wrong. Now, we know how to find the ‘win-win.’ It makes you feel powerful to solve your own problems instead of just getting a teacher to fix it.”
Making SEL Concepts Stick
For social-emotional learning to become part of a school’s DNA, it has to be felt, not just taught. An experiential approach is key, turning abstract ideas like empathy and self-regulation into something tangible that students can remember and use. This is about moving beyond worksheets and into hands-on activities.
This approach helps create a unified culture where students feel safe, seen, and connected. Ultimately, a major outcome of effective SEL is creating a positive learning environment, which is the foundation for both well-being and academic success.
Here are a few practical ideas that any teacher can adapt:
Daily Emotion Check-Ins: An elementary teacher started each day with a “feelings circle.” Using a color-coded chart, students shared one word describing how they felt. This simple ritual normalized talking about emotions, calmed the room, and gave the teacher a quick read on who might need extra support.
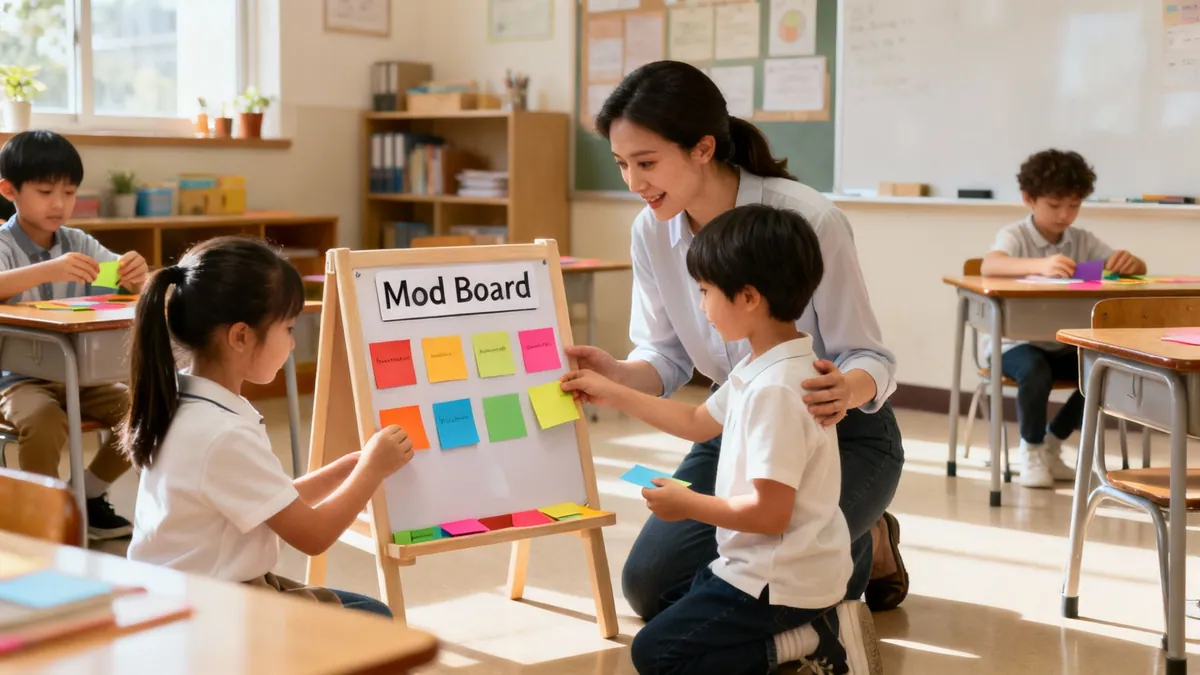
“Mistake Memos”: To build resilience, a 4th-grade teacher set up a bulletin board for students to anonymously post “mistake memos.” They’d write down a mistake they made that week and what they learned from it. It completely reframed errors as learning opportunities, dialing down the anxiety around being perfect.
School-Wide Assemblies: Instead of being passive lectures, assemblies can become interactive workshops. An assembly on empathy could have students role-play different scenarios, allowing them to physically and emotionally step into someone else’s shoes for a moment.
These examples show that when SEL is active, engaging, and consistent, it doesn’t just change student behavior—it has the power to transform an entire school culture.
When schools start exploring social emotional learning, it’s completely normal for everyone—administrators, teachers, and parents—to have some practical questions. Getting these concerns out in the open is the best way to build confidence and lay the groundwork for a program that really works.
Here are a few of the most common questions we hear, along with some straight answers.
How Much Instructional Time Will SEL Take?
This is usually the first question on every educator’s mind. The great news is that effective social emotional learning programs for schools aren’t about cramming another subject into an already packed day. It’s about integration.
Think of it as weaving these skills into the fabric of what you already teach. A history lesson can become a powerful exercise in social awareness by asking students to consider an event from multiple perspectives. A collaborative science project? That’s a real-time opportunity to practice relationship skills and navigate disagreements. A practical example for parents is asking their child at dinner, “What was something you and your group worked on together today? How did you make sure everyone had a chance to share their ideas?” SEL doesn’t replace core instruction; it makes it richer.
How Can We Measure the Return on Investment?
The ROI of SEL shows up in two ways: in the numbers and in the school’s culture. You absolutely can, and should, track key metrics to see the concrete impact of your efforts. This data is invaluable for showing stakeholders what’s working.
Disciplinary Referrals: A significant drop in office referrals is often one of the first things schools notice.
Bullying Incidents: You’ll see a measurable decrease in reported bullying and peer conflict.
Absenteeism Rates: When kids feel safer and more connected to their school community, they show up more often. It’s that simple.
But beyond the data, you can feel the difference. It shows up in positive school climate surveys, in the stories students and teachers share, and in a genuine sense of belonging that you can sense just by walking through the halls.
The real return is a culture where students are ready to learn and teachers have more time to teach. Fewer classroom disruptions mean more time on task, which benefits every single student.
How Can We Get Parents Involved?
Getting parents on board is a game-changer for making SEL skills stick. When the language used in the classroom is echoed in the living room, the learning becomes deeply ingrained.
The best way to do this is by providing simple, consistent resources that bridge that school-home connection. Imagine sending home a short weekly email that explains a concept like empathy. You could include a couple of conversation starters for the dinner table, like, “Tell me about a time you understood how a friend was feeling today.” It’s a small effort that reinforces learning and builds a powerful partnership.
Is SEL Appropriate for All Age Groups?
Absolutely. The beauty of a well-designed SEL program is that it’s scaffolded to meet students where they are developmentally. The core concepts—like self-awareness or responsible decision-making—stay the same, but how they are taught evolves as children mature.
In kindergarten, it might look like using a “feelings chart” with smiley and frowny faces to help little ones put a name to their emotions. By the time those same students are in middle school, the lessons have deepened into navigating complex friendships, making ethical choices online, and setting meaningful personal goals.
Ready to build a more connected and empathetic school community? Soul Shoppe offers experiential programs that equip students and staff with practical tools for a lifetime of well-being. Discover how we can support your school.
Navigating disagreements is a crucial life skill, yet children often need explicit guidance to move beyond yelling, tattling, and tears. For parents and educators, the real challenge lies in transforming these difficult moments into powerful learning opportunities. This guide moves beyond generic advice to offer a comprehensive roundup of powerful conflict resolution strategies for kids in grades K-8, designed for immediate use. We’ll provide actionable scripts, step-by-step activities, and age-appropriate examples you can implement today in the classroom, on the playground, and at home.
You will learn how to empower children with the language and tools to understand others, express their own needs, and solve problems collaboratively. We’ll cover everything from foundational skills like Active Listening and using I-Statements to more structured approaches such as Peer Mediation and Restorative Practices. These aren’t just quick fixes; they are foundational social-emotional learning (SEL) skills for building empathy, resilience, and healthier relationships.
The goal is to equip you with a toolkit to help children manage their emotions, communicate effectively, and take ownership of their solutions. We provide concrete steps for facilitating these processes, whether you’re a teacher establishing a peaceful classroom or a parent mediating a sibling squabble. For those seeking supplementary resources to reinforce these concepts, exploring a category dedicated to children’s books can offer stories and tools relevant to early social-emotional development. Let’s dive into the practical strategies that turn conflict into connection.
1. Active Listening, Reflective Speaking, and Perspective-Taking
This foundational strategy combines three powerful communication skills to transform how children navigate disagreements. Instead of reacting defensively, students learn to listen to understand, confirm what they’ve heard, and genuinely consider the other person’s point of view. This integrated approach builds a crucial bridge of empathy and is one of the most effective conflict resolution strategies for kids because it de-escalates tension and promotes mutual respect.
This method moves beyond simply “hearing” to deep, engaged listening. It fosters psychological safety, making it easier for children to express their true feelings without fear of immediate judgment. The goal is not to agree, but to understand.
How It Works in Practice
This strategy involves a clear, three-part process that can be taught and practiced in various settings, from classroom circles to playground disputes.
Active Listening: The listener gives their full, undivided attention to the speaker. This means putting down pencils, making eye contact, and focusing completely on what the other person is communicating with their words and body language.
Reflective Speaking: After the speaker finishes, the listener paraphrases what they heard to check for understanding. They might start with a simple phrase like, “So, what I’m hearing you say is…” This step is crucial because it validates the speaker’s feelings and corrects any misunderstandings before they escalate. Example: If Mia says, “I’m mad because Leo scribbled on my drawing,” Leo’s job is to reflect back, “So you’re saying you’re mad because I drew on your picture.”
Perspective-Taking: Both children are then prompted to consider the situation from the other’s shoes. This could involve asking questions like, “How do you think they felt when that happened?” or “What might have been their reason for doing that?” Example: The teacher might ask Leo, “How would you feel if someone scribbled on your favorite drawing?” This final step cultivates empathy, the core ingredient for resolving conflict peacefully.
Actionable Implementation Tips
Provide Scaffolds: Use sentence stems like “It sounds like you felt…” and “I can see why you would think…” to guide students. An emotion wheel can help younger children identify and name their feelings accurately.
Model Consistently: Adults must model this behavior. When a child comes to you with a problem, practice active listening and reflective speaking with them to show how it’s done.
Use Literature: Read stories featuring characters in conflict. Pause to ask students, “What is this character feeling? Why do you think they acted that way?” This builds perspective-taking muscles in a low-stakes environment. You can explore more ideas with this communication skills activity guide from soulshoppe.org.
Start Small: Practice these skills during calm moments, like morning meetings or class discussions, before applying them to real-time conflicts.
2. I-Statements and Emotion Naming
This strategy empowers children to communicate their feelings and needs clearly without resorting to blame or accusations. By using a structured “I feel…” format, students take ownership of their emotions and articulate the impact of another’s actions on them. This method is one of the most effective conflict resolution strategies for kids because it shifts the focus from fault-finding to feeling-sharing, which lowers defensiveness and opens the door to constructive dialogue.
Pairing I-statements with the ability to name emotions accurately is crucial for emotional intelligence. When children can pinpoint what they are feeling beyond just “mad” or “sad,” they gain better control over their reactions and can communicate their inner world more effectively. The goal is to express, not attack.
How It Works in Practice
This strategy relies on a simple, teachable sentence structure that can be adapted for children of all ages. The core formula helps de-personalize the conflict and focuses on behavior and feelings.
Name the Feeling: The child starts by identifying their specific emotion. This requires a moment of self-reflection to understand what they are truly feeling (e.g., frustrated, lonely, embarrassed).
State the Behavior: They then describe the specific action that led to that feeling. This part is objective and avoids generalizations or character attacks (e.g., “when you took my crayon” instead of “you’re mean”).
Explain the ‘Why’: The final part connects the feeling to the consequence or reason. This helps the other person understand the impact of their actions. The full statement looks like this: “I feel [emotion] when you [specific behavior] because [reason/impact].”
Practical Example (Playground):
Instead of: “You’re a cheater! You always cut in line!”
Use an I-Statement: “I feel frustrated when you cut in front of me in line because I have been waiting for my turn.”
Practical Example (Home):
Instead of: “Stop being so annoying!”
Use an I-Statement: “I feel distracted when you talk to me while I’m doing my homework because I can’t focus on my work.”
Actionable Implementation Tips
Create an Emotion Vocabulary Chart: Use an emotion wheel or a chart with pictures and words to help younger children identify and name their feelings. Start with basic emotions and gradually introduce more nuanced ones like “disappointed,” “anxious,” or “excluded.”
Model I-Statements Yourself: Adults should consistently model this language. For example, say, “I feel concerned when the floor is messy because someone could trip and get hurt.” This shows children how it’s done in everyday situations.
Practice During Calm Times: Introduce and role-play I-statements during morning meetings or class circles, not just in the heat of a conflict. This builds the skill as a habit before it’s needed under stress.
Use Sentence Stems: Provide visual aids with the sentence formula: “I feel ___ when you ___ because ___.” This scaffold helps children structure their thoughts, especially when they are upset. You can find more resources for helping kids find the words they need on soulshoppe.org.
3. The Problem-Solving Steps (Collaborative Resolution)
This strategy provides children with a structured, step-by-step framework to navigate disagreements collaboratively. It shifts their focus from blaming each other to working together toward a mutually acceptable solution. By following a clear process, children learn to approach conflicts with logic and creativity, transforming a moment of friction into an opportunity for growth. This method is one of the most powerful conflict resolution strategies for kids because it builds agency, critical thinking, and cooperation.
Instead of getting stuck on who is right or wrong, this approach empowers students to become active problem-solvers. It gives them a reliable roadmap to follow, reducing anxiety and promoting a sense of shared responsibility for finding a peaceful outcome.
How It Works in Practice
The process is broken down into clear, manageable steps that guide children from identifying the problem to implementing a solution. This structured format helps prevent discussions from devolving into arguments.
Identify the Problem: Both children state the problem from their perspective without blame. The goal is to agree on a neutral definition of the issue. Example: “We both want to use the only blue iPad.”
Brainstorm Solutions: Together, they generate as many potential solutions as possible without judgment. The rule is that no idea is a bad idea at this stage. Example: Ideas might include: “We can take turns for 10 minutes each,” “We can find another iPad,” “We can use the blue iPad together for a project,” “We can play rock-paper-scissors for it.”
Evaluate and Choose: They review the brainstormed list and discuss the pros and cons of each option. They then work together to choose one solution that both of them can agree on. Example: They decide taking turns for 10 minutes each is the fairest solution.
Implement the Plan: The children put their chosen solution into action. Example: They find a teacher to set a timer for 10 minutes for the first person’s turn.
Follow Up: Later, they check in to see if the solution worked. If not, they can return to the brainstorming step to try a different approach.
Actionable Implementation Tips
Post the Steps Visibly: Create a colorful chart or poster outlining the problem-solving steps and display it prominently in the classroom or home. This serves as a constant visual reminder.
Use Consistent Language: Adopt a consistent name for the process, like “The Five Problem-Solving Steps,” across different classrooms and grade levels to build a shared school-wide culture. To effectively teach this, educators can draw inspiration from problem-based learning approaches that center on student-led inquiry.
Practice with Scenarios: Use role-playing with hypothetical situations, like two students wanting the same library book, to practice the steps in a low-stakes environment before applying them to real conflicts.
Document Solutions: For younger children, have them draw a picture of their agreed-upon solution. Older students can write it down. This simple act increases their commitment to the plan.
4. Peace Circles and Restorative Practices
This community-focused strategy shifts the goal from punishment to repairing harm and strengthening relationships. Instead of asking, “Who is to blame?” restorative practices ask, “What harm was done, and what needs to be done to make things right?” Peace circles provide a structured, equitable format for these conversations, making this one of the most transformative conflict resolution strategies for kids because it builds accountability and community simultaneously.
The circle format itself is symbolic, communicating that every voice holds equal importance. A “talking piece” is often passed around, granting the holder the right to speak without interruption. This deliberate process slows down reactive emotions and encourages thoughtful participation from everyone involved, ensuring even the quietest students have a chance to be heard.
How It Works in Practice
Peace circles can be used proactively to build relationships (community-building circles) or reactively to address harm (restorative circles). The process follows a clear structure that promotes safety and fairness.
Opening and Norms: The circle begins with an opening ritual or quote to set a positive tone. The facilitator and group then co-create or review shared agreements, such as “Listen with respect,” “Speak from the heart,” and “What is said in the circle stays in the circle.”
Rounds with a Talking Piece: The facilitator poses a question and passes a talking piece (like a special stone or ball). Only the person holding the piece may speak. Initial rounds often involve simple check-ins (“Share one word about how you are feeling today”) before moving to the core issue.
Repairing Harm (Restorative Circles): When addressing a conflict, questions focus on impact and repair. Example: After a student’s joke hurt another’s feelings, the facilitator asks, “What happened?” “Who has been affected, and how?” and “What does our group need to do to make things right?” The group might decide that an apology and a promise to think before speaking are the best path forward.
Closing: The circle ends with a closing ritual or a final round of reflections, reinforcing the sense of community and shared responsibility for the outcome.
Actionable Implementation Tips
Start Proactively: Use circles for daily morning meetings or weekly check-ins to build trust and routine. This makes it feel natural to use the same format when a conflict arises.
Use a Meaningful Talking Piece: Allow students to choose or create a talking piece for the classroom. This small act gives them ownership over the process and makes it more special.
Train Facilitators: Effective facilitation is key. Train teachers, counselors, and even student leaders in restorative questions and circle management. The International Institute for Restorative Practices (IIRP) offers extensive training and resources.
Create Visual Agreements: Write the circle norms on a large poster and display it prominently. This serves as a constant, visual reminder of the group’s commitments to each other.
Keep Groups Manageable: When first introducing circles, work with smaller groups of 8 to 15 students to ensure everyone feels safe and has adequate time to participate.
5. Cool-Down Strategies and Self-Regulation Tools
Before a child can listen, reflect, or compromise, they must be calm. This strategy focuses on teaching children to recognize the physical and emotional signs of escalating anger or frustration and providing them with concrete tools to regulate their nervous system. Teaching students to “cool down” first is one of the most essential conflict resolution strategies for kids because a regulated brain is required for logical thinking and problem-solving.
These tools empower children with a sense of control over their big emotions. Instead of reacting impulsively, they learn to pause and choose a strategy that helps them return to a state where they can communicate effectively and resolve the issue peacefully.
How It Works in Practice
This approach involves creating an environment where taking a break to self-regulate is normalized and supported. Children are explicitly taught various techniques and given access to resources that help them manage their internal state.
Recognize the Signs: Adults help children identify their personal “escalation signals.” This might be a hot face, clenched fists, a racing heart, or a loud voice. Using a “feelings thermometer” visual can help them see how their emotions are rising.
Choose a Strategy: Children are given a menu of pre-taught, accessible cool-down options. This could range from simple breathing exercises to movement breaks or using sensory tools. The power of choice is critical for building autonomy and self-awareness.
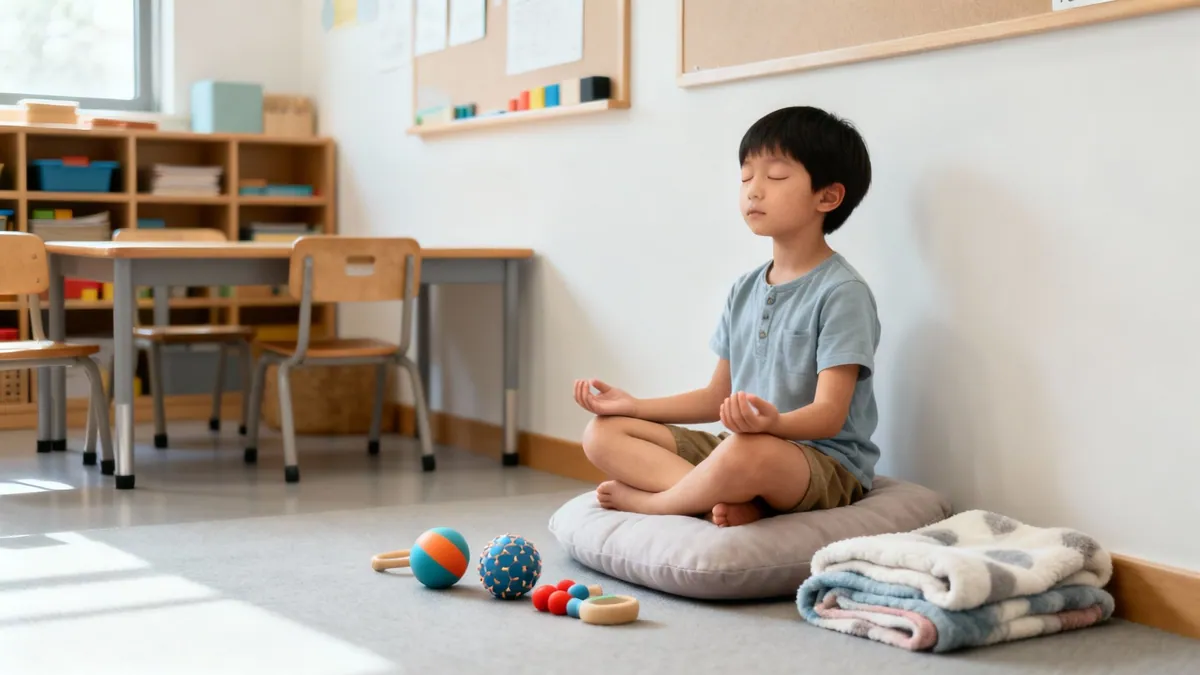
Take a Break: The child uses their chosen strategy in a designated safe space, like a classroom “calm corner” or a quiet spot at home. This physical separation from the conflict provides the time and space needed for their nervous system to settle. Practical Example: A student who is getting frustrated during a math problem might say, “I need to go to the calm corner for five minutes.” There, they might squeeze a stress ball and do three deep “pizza breaths” (smelling the pizza, then blowing to cool it down) before returning to their desk, ready to try again.
Why It Works: Physical movement metabolizes excess stress hormones like cortisol and adrenaline while boosting the production of mood-enhancing endorphins and neurotransmitters like dopamine and serotonin. This biological reset helps students shift from a state of stress or lethargy to one of alertness and readiness to learn, allowing them to better manage their impulses and emotions.
6. Problem-Solving and Conflict Resolution Strategies
Instead of simply telling students to “calm down” or “work it out,” structured problem-solving frameworks give them a clear, repeatable process for navigating challenges. These strategies teach students to analyze situations, brainstorm solutions, and consider consequences before acting, moving them from reactive to responsive. This empowers them to handle everything from peer disagreements to academic frustrations independently.
By providing a scaffold for logical thinking during social and emotional challenges, these frameworks build crucial executive functioning skills. Models like STOP (Stop, Think, Options, Proceed) and restorative practices give students tangible steps to follow, reducing impulsive behavior and fostering a sense of capability and fairness within the classroom community.
How to Implement It
For Younger Students (K-3): Use a simple, visual “Problem-Solving Wheel” with pictures representing solutions like “Ask Nicely,” “Wait and Cool Off,” “Say, ‘Please Stop’,” or “Get a Teacher.”
Practical Example: Two students want the same red crayon. A teacher can bring them to the wheel and ask, “Which of these choices could we try to solve this problem?” and help them role-play the chosen solution.
For Older Students (4-8): Introduce more complex frameworks like the STOP model.
Practical Example: A student is upset about a grade. The teacher can coach them through the model: “Stop and take a breath. Think about why you’re upset. Options: you could complain to a friend, talk to me respectfully, or crumple the paper. What’s the best Proceed choice?”
Tips for Success
Teach Proactively: Introduce and practice these frameworks when students are calm and regulated, not in the middle of a conflict.
Use Visual Aids: Post charts, posters, or individual desk cards outlining the problem-solving steps. This visual reminder is crucial when emotions are high.
Role-Play Regularly: Dedicate a few minutes during morning meetings to role-play common problems, allowing students to practice the steps in a low-stakes environment.
Coach, Don’t Solve: When a conflict arises, act as a coach. Guide students through the steps with questions like, “What is the first step in our problem-solving plan?” or “What are some possible options here?”
Why It Works: These strategies externalize the internal process of self-regulation. By providing an explicit, step-by-step guide, they reduce the cognitive load on a student’s already-stressed brain. This allows the prefrontal cortex to engage in logical thinking and decision-making, rather than letting the amygdala’s emotional response take over. A key part of this process is teaching students to express their needs clearly, which you can explore further by discovering the magic of “I Feel” statements for kids on soulshoppe.org.
7. Time Management and Prioritization
Teaching students to manage time and prioritize tasks is a powerful, proactive self regulation strategy. It equips them with the executive functioning skills needed to break down large assignments, plan their approach, and allocate energy effectively. This reduces the feelings of overwhelm and anxiety that often lead to procrastination, frustration, and dysregulation.
When students feel in control of their workload, they are less likely to experience the stress that triggers a fight-or-flight response. By learning to identify what is most important and urgent, they build confidence and a sense of agency over their academic and personal responsibilities, which is foundational for emotional stability.
How to Implement It
For Younger Students (K-3): Make time visible and concrete.
Practical Example: Use a visual timer (like a Time Timer) to show how much time is left for an activity. Create simple “First, Then” boards with pictures (e.g., “First, finish math worksheet, Then, free play”) to introduce sequencing.
For Older Students (4-8): Introduce planners, digital calendars, or project planning templates.
Practical Example: For a big science project, guide students to work backward from the due date. On a calendar, they can mark dates to: “Week 1: Choose topic & research. Week 2: Write rough draft. Week 3: Create presentation. Week 4: Practice presentation.”
Tips for Success
Teach Time Estimation: Ask students to guess how long a task will take, then time it. Discuss the results to help them build a more realistic internal clock.
Break It Down: A big project can feel paralyzing. Guide students to list every single step required, no matter how small, and then schedule those steps.
Color-Code Systems: Use different colors for different subjects or types of tasks (e.g., green for homework, orange for tests) in a planner or calendar to make organization more intuitive.
Why It Works: Time management skills directly address the root causes of academic anxiety and avoidance. By making tasks predictable and manageable, these strategies reduce cognitive load and prevent the buildup of stress. This allows the brain to stay in a regulated state, ready for learning and problem-solving. To help students make the most of their study time and personal commitments, exploring external resources on effective time management strategies can provide additional helpful frameworks.
8. Stress Management and Relaxation Techniques
Beyond single breathing exercises, a broader toolkit of stress management and relaxation techniques helps students actively manage physiological arousal. Practices like progressive muscle relaxation (PMR), guided imagery, and journaling deliberately activate the body’s parasympathetic nervous system, providing healthy outlets for both chronic and acute stress.
These methods teach students that they have agency over their stress response. By learning to release physical tension or reframe anxious thoughts, they build resilience and develop crucial coping mechanisms. This proactive approach is a cornerstone of effective self regulation strategies for students, preventing emotional overwhelm before it escalates.
How to Implement It
For Younger Students (K-3): Make relaxation concrete.
Practical Example (PMR): Have them pretend they are squeezing lemons as hard as they can with their hands (tensing), and then drop the lemons and let their hands go limp (releasing). Go through different muscle groups this way.
For Older Students (4-8): Introduce journaling with specific prompts.
Practical Example: Offer prompts like, “What is one thing I can control in this situation?” or “Write down three things you can see, two you can hear, and one you can feel right now” (a 5-4-3-2-1 grounding technique).
Tips for Success
Offer Variety: Provide multiple relaxation modalities to honor different preferences. A calm-down corner could include sensory tools, art supplies, and a journal.
Model and Normalize: Regularly model using these techniques yourself. Talk openly about stress as a normal part of life and these tools as the way we manage it effectively.
Teach Proactively: Introduce and practice these skills during calm moments. It is difficult to learn a new relaxation technique in the middle of a meltdown.
Why It Works: Stress management techniques directly address the mind-body connection. PMR releases stored physical tension, while guided imagery and journaling engage the prefrontal cortex to shift focus away from stressors and toward a sense of calm and control. This process interrupts the brain’s alarm system and reinforces neural pathways for emotional regulation.
9. Social Connection and Peer Support Systems
Humans are social creatures, and building strong relationships is a foundational self-regulation strategy. Social connection provides emotional safety, a sense of belonging, and a powerful buffer against stress. When students feel seen, heard, and supported by their peers, they are better equipped to navigate challenges and regulate their emotions.
This approach focuses on creating an environment where students actively support one another. Research from organizations like CASEL shows that positive relationships are a core component of social-emotional learning, leading to better mental health outcomes and academic success. A connected community turns the classroom into a resource for co-regulation.
How to Implement It
For Younger Students (K-3): Implement a Classroom Buddy System.
Practical Example: Pair students up to help each other during transitions, lunch, or new activities. For morning meetings, use structured partner shares with a prompt like, “Share one good thing that happened this morning with your buddy.”
For Older Students (4-8): Establish Peer Mentoring Programs or intentional group work.
Practical Example: During a collaborative project, explicitly teach roles like facilitator (keeps everyone on track), scribe (writes down ideas), and encourager (offers positive feedback). This ensures everyone contributes and feels valued.
Tips for Success
Be Intentional: Start the school year with activities designed to build community. Don’t assume positive relationships will form on their own.
Teach the Skills: Explicitly teach collaboration, active listening, and how to give and receive constructive feedback. Role-play scenarios where students can practice offering support.
Create Rituals: Consistent routines like morning meetings, classroom celebrations, or “shout-outs” for positive peer interactions reinforce a supportive culture.
Why It Works: Positive social connections trigger the release of oxytocin, a hormone that reduces anxiety and promotes feelings of trust and safety. When a student feels overwhelmed, a supportive peer can help them co-regulate, effectively lowering the cortisol (stress hormone) in their system. Discover more ways to foster these bonds with these classroom community-building activities on soulshoppe.org.
10. Self-Awareness and Reflection Practices
Self-awareness, the ability to understand one’s own emotions, triggers, and thought patterns, is the bedrock of effective self-regulation. By engaging in reflection, students develop metacognition, or the skill of “thinking about their thinking.” This internal observation allows them to identify what they need to stay calm and focused, empowering them to choose the right self regulation strategies for students at the right time.
When students can recognize their unique internal cues, they move from being reactive to proactive. This foundational skill, central to SEL frameworks, helps them not only manage challenging moments but also understand their personal strengths and areas for growth, which is crucial for building resilience and a positive self-concept.
How to Implement It
For Younger Students (K-3): Use simple, concrete tools.
Practical Example: Use end-of-day “exit tickets” where they draw a picture of a “happy moment” and a “tricky moment” from their day. This promotes early, non-verbal reflection.
For Older Students (4-8): Introduce structured journaling with prompts.
Practical Example: After a challenging group project, provide prompts like, “What was one challenge today, and what strategy helped me handle it?” or “When did I feel most focused, and why?” to guide deeper thinking.
Tips for Success
Provide Scaffolds: Offer sentence starters or prompt cards, especially for reluctant writers. Examples include “I felt proud when…” or “Next time I feel frustrated, I will try…”
Offer Multiple Modalities: Allow students to reflect in ways that suit them best, whether through writing, drawing, voice recording on a tablet, or a quiet one-on-one conversation.
Model the Process: Share your own reflections openly. Saying something like, “I noticed I was getting impatient when the technology wasn’t working, so I took three deep breaths to reset,” normalizes self-awareness for students.
Why It Works: Reflection builds the neural pathways for introspection and self-monitoring. As students practice noticing their internal states and connecting them to their actions, they strengthen the prefrontal cortex’s ability to manage impulsive, emotional responses from the amygdala. This practice turns self-regulation from a list of external techniques into a personalized, internal skill.
Teaching self-regulation in the classroom
Teach the “window of tolerance.” Help students understand that everyone has a zone where they feel calm and ready to learn — and zones outside it where they’re either revved up (anxious, agitated, impulsive) or shut down (withdrawn, foggy, numb). Use concrete, visual language. Once students can name where they are in a given moment, they have the first ingredient for change: awareness.
Practice co-regulation first. Before students can regulate themselves, they need to experience co-regulation — the steadying presence of a calm, connected adult. When you slow your breathing, keep a grounded voice during conflict and stay steady while a student escalates, you give their nervous system something to match. Saying “I’m feeling a little frustrated right now too, so I’m going to take a breath” is honest, and it’s powerful modeling.
Weaving self-regulation into the daily routine
One-off lessons don’t build lasting skills; consistency does. A few ways to build it into the day without adding a separate program:
Morning check-ins: a quick emotional temperature check — a thumbs scale, a mood meter, or “how does your body feel right now?” — builds self-awareness and shows you early who may need extra support.
Transition rituals: brief breathing or movement at natural transition points — after lunch, before a test, at the end of the day. Predictability itself is calming.
Reflection moments: after a hard moment, come back to the student once things are settled: “What was happening in your body? What helped?”
Celebrate the wins: when you see a student use a strategy, name it.
Goal-setting cycles, student-led conferences, growth-mindset work
Foundation for self-regulation, supports individualized learning
Putting It All Together: Building a Culture of Self-Regulation
The journey to mastering self-regulation is not about perfection; it is about progress. The ten powerful self regulation strategies for students detailed in this guide, from mindful breathing to collaborative problem-solving, are not isolated tricks. They are interconnected skills that, when cultivated, form the bedrock of emotional intelligence, academic success, and lifelong well-being. Implementing them is less about adding another task to a crowded schedule and more about shifting the entire culture of a classroom or home to one of awareness, empathy, and proactive support.
Think of these strategies as individual threads. A single thread, like teaching a child to use positive self-talk, is useful. But when woven together with others, such as regular reflection practices, opportunities for physical movement, and a rich emotional vocabulary, they create a strong, resilient tapestry. This integrated approach ensures students have a full toolkit to draw from, whether they are facing a frustrating math problem, a disagreement with a friend, or the anxiety of a big presentation.
From Individual Tools to a Community Ecosystem
The true power of these strategies is realized when they become a shared language and a collective practice. When a teacher models their own goal-setting process or a parent openly labels their feeling of disappointment and explains their plan to manage it, they are doing more than just teaching a concept. They are normalizing the human experience of having and navigating complex emotions.
This creates an environment where a student who feels overwhelmed knows they can ask for a movement break without judgment. It builds a classroom where peers can support each other in conflict resolution because they have all practiced the same steps. This consistency between home and school is the accelerator for growth.
A supportive ecosystem doesn’t just present self-regulation tools; it embeds them into daily interactions, making them as natural and accessible as a pencil or a book. The goal is to move from “doing” self-regulation activities to “being” a self-regulated community.
Your Actionable Path Forward
Moving from theory to practice can feel daunting, but you can start small and build momentum. Here are your next steps:
Choose One or Two Strategies to Start: Don’t try to implement all ten strategies at once. Select one or two that address an immediate need for your students or child. Perhaps you start with a two-minute breathing exercise after recess or introduce a “feeling of the week” to expand emotional vocabulary.
Model, Model, Model: The most effective way to teach these skills is to live them. Narrate your own process out loud. For example, a teacher could say, “I’m feeling a little frustrated that the technology isn’t working. I am going to take three deep breaths before I try again.”
Create Visual Reminders: Post anchor charts of the problem-solving steps, a wheel of emotions, or goal-setting templates. Visual cues serve as powerful, silent reminders for students to access these self regulation strategies for students independently.
Celebrate the Effort, Not Just the Outcome: Recognize and praise students when you see them trying a strategy, even if they aren’t completely successful. Saying, “I saw you take a moment to think before you responded. That was a great choice,” reinforces the process and builds a student’s sense of competence and confidence.
Ultimately, teaching self-regulation is one of the most profound gifts we can give our children. It equips them with an internal compass to navigate the inevitable challenges of life with grace and resilience. By committing to this work, we are not just helping them become better students; we are empowering them to become more capable, compassionate, and self-aware human beings who can thrive in any environment.
For over 20 years, Soul Shoppe has partnered with schools to build this very culture of connection and safety. Our experiential programs provide the shared language and practical tools that turn these individual self regulation strategies for students into a community-wide practice. Discover how our programs can transform your school’s climate and empower every student by visiting us at Soul Shoppe.
Welcome, educators and parents. We know that a peaceful, engaged classroom is the foundation of all learning, but achieving it often feels like an endless cycle of redirecting, reminding, and reacting. What if we shifted our focus from simply managing behavior to proactively building connection, resilience, and emotional intelligence? This guide offers powerful, research-informed classroom management strategies for teachers that do just that.
Rooted in social-emotional learning (SEL) principles, these aren’t just quick fixes. They are transformative approaches to creating a learning environment where every student feels safe, seen, and ready to thrive. Moving beyond traditional discipline, the strategies outlined here help cultivate a classroom ecosystem built on mutual respect, empathy, and collaboration. When students understand their emotions and can communicate their needs constructively, disruptions decrease and engagement naturally increases.
This article provides a curated collection of ten practical, actionable techniques designed for immediate implementation. For each strategy, you will find:
A clear explanation of the concept and why it works.
Step-by-step guidance for introducing it in your K-8 classroom.
Classroom scripts and practical examples that you and parents can adapt.
Troubleshooting tips for common challenges.
Measurement ideas to help you track impact and progress.
Our goal is to equip you with a comprehensive toolkit to foster a more responsive and positive community, reducing the need for reactive discipline and creating more time for what matters most: teaching and learning. Let’s explore the strategies that can help you build that thriving classroom.
1. Restorative Practices and Circles
Restorative practices shift the focus of classroom management from punishment to community building and healing. Instead of asking “What rule was broken and who is to blame?”, this approach asks, “What happened, who has been affected, and what do we need to do to make things right?”. This powerful reframe transforms discipline into a learning opportunity, fostering empathy, accountability, and stronger relationships.
This strategy is highly effective because it addresses the root causes of behavior rather than just the symptoms. By giving every student a voice, it validates their experiences and teaches them to resolve conflicts constructively, making it one of the most impactful classroom management strategies for teachers aiming to build a truly inclusive and supportive learning environment.
How to Implement Restorative Circles
Start Small with Community Building: Begin with low-stakes “check-in” circles. Use a talking piece (an object that gives the holder the exclusive right to speak) and go around the circle, asking students to share their name and answer a simple prompt.
Practical Example: On Monday morning, say, “Let’s start with a check-in. Our prompt is: ‘Share one thing you’re looking forward to this week.’ I’ll start…”
Establish Clear Norms: Co-create agreements with your students for how you will engage in circles. Norms often include: Respect the talking piece, Speak from the heart, and Listen with respect. Post these norms visually.
Introduce Restorative Questions: Once community is established, you can use circles to address harm.
Practical Example: Two students, Sam and Alex, argue over a shared tablet. Gather them and say, “Let’s have a restorative chat. Sam, what happened from your perspective?” After Sam speaks, turn to Alex: “Alex, what happened from your view?” Then ask both: “Who else was affected by this? How can we make this right so you can both continue learning?”
Troubleshooting and Measurement
Quick Tip: If students are reluctant to share, model vulnerability by answering the prompt first. Keep initial circles short and predictable to build safety and routine. If a conflict is too intense for a student-led circle, facilitate it yourself or with a counselor.
Track Your Impact: Monitor the frequency and nature of classroom conflicts over time. You can use a simple log to note incidents. Look for a decrease in repeated negative behaviors and an increase in students using “I-statements” and resolving minor issues independently.
5. Collaborative Problem-Solving and Empathy Building
This student-centered approach shifts classroom management from adult-imposed solutions to a collaborative process. Instead of simply enforcing rules, teachers guide students to understand different perspectives, listen deeply to one another, and work together to solve problems. The focus is on building empathy and finding mutually beneficial solutions to classroom challenges, from sharing resources to resolving peer conflicts.
This strategy is powerful because it equips students with essential social-emotional skills for life. It transforms discipline into an opportunity for growth, teaching students how to communicate their needs, consider others’ feelings, and take ownership of their community. Using collaborative problem-solving is one of the most effective classroom management strategies for teachers who want to develop compassionate, responsible, and independent thinkers.
How to Implement Collaborative Problem-Solving
Teach and Model Active Listening: Explicitly teach skills like making eye contact, not interrupting, and paraphrasing.
Practical Example: During a morning meeting, practice with a fun topic. Say, “Juan, please share your favorite part of the weekend. Maria, your job is to listen and then say, ‘What I hear you saying is…’ to show you were listening.”
Use Sentence Stems: Provide students with language to express themselves constructively. Post stems like, “I felt ___ when ___ because I need ___.” or “I understand you feel ___ because ___.” This helps students separate the person from the behavior.
Facilitate Problem-Solving Conferences: When a conflict arises, bring the involved students together.
Practical Example: A ball is taken during recess. You gather the students. Step 1: “Maya, please share what happened.” Step 2: “Leo, please share your side.” Step 3: “It sounds like the problem is we only have one ball and you both want it. What are some ideas to solve this?” Step 4: Students might suggest taking turns with a timer. You help them agree on a plan.
Troubleshooting and Measurement
Quick Tip: If a conflict is emotionally charged, give students a cool-down period before bringing them together. For younger students, use puppets or drawings to help them explain their perspectives. Always validate all feelings, even if you don’t agree with the behavior that resulted from them.
Track Your Impact: Keep a simple log of conflicts that require your intervention. Over time, look for a decrease in the frequency of these incidents. You should also see an increase in students independently using sentence stems, “I-statements,” and attempting to solve minor disagreements on their own before seeking adult help.
8. Relationship Building, Family and Community Partnership
This foundational strategy centers on the idea that students learn best when they feel seen, valued, and connected to a supportive network. It involves intentionally building genuine relationships with students, fostering a positive peer culture, and creating strong partnerships with families and the wider community. Instead of viewing management as a system of control, this approach sees it as a result of mutual respect and trust.
This strategy is powerful because it addresses the fundamental human need for belonging. When students feel a genuine connection to their teacher and peers, they are more motivated to engage, cooperate, and take academic risks. Extending this network to families makes it one of the most holistic classroom management strategies for teachers, creating a consistent web of support that reinforces positive behavior and academic success both at school and at home.
How to Implement Relationship Building and Partnerships
Focus on Individual Connections: Make time for one-on-one interactions.
Practical Example: Implement “2×10” strategy: Spend 2 minutes a day for 10 consecutive days talking with a student about anything other than schoolwork. Ask about their pets, hobbies, or favorite video games.
Build a Classroom Community: Create shared experiences and rituals that foster a sense of “us.”
Practical Example: Start a “Student of the Week” program where each student gets a special bulletin board to share photos and facts about themselves, and classmates write positive notes to them.
Engage Families Proactively: Don’t wait for a problem to arise to contact home.
Practical Example: Make it a goal to send two positive notes or emails home each day. “Dear Parent, I wanted to share that Maria was incredibly helpful to a new student today. You should be so proud!”
Leverage Community Resources: Invite community members, like local artists, scientists, or elders, to share their expertise. Partner with local organizations to provide mentorship opportunities or support for students and families facing challenges.
Troubleshooting and Measurement
Quick Tip: With a student who seems withdrawn or resistant, start small. A simple, non-academic question like, “I noticed you like to draw; what’s your favorite thing to create?” can be an entry point. When communicating with families, always lead with a positive observation before discussing a concern.
Track Your Impact: Monitor qualitative and quantitative data. Keep anecdotal notes on student interactions and engagement levels. Track family attendance at conferences and school events. Survey students and families about their sense of belonging. Look for a decrease in office referrals and an increase in positive communication between home and school.