Soul Shoppe's work is made possible by donors and partners who care deeply about the young people in their communities! We can't do this work without you. Support our work in classrooms and on playgrounds across the nation by donating here.
In today's classrooms and communities, the ability for students to connect, empathize, and collaborate is more than a 'nice-to-have'—it's foundational to academic success and emotional well-being. Strong peer relationships create the psychological safety necessary for students to take risks, ask for help, and engage fully in their learning. When students feel a sense of belonging, they are more likely to participate, cooperate, and support one another.
For parents and teachers, fostering these connections isn't about forcing friendships; it's about intentionally creating opportunities for positive interaction. This guide moves beyond generic advice to provide a curated roundup of 10 powerful, research-based relationship building activities. Each entry is designed for practical implementation, complete with age-differentiated examples, clear instructions, and alignment with core Social-Emotional Learning (SEL) competencies.
Whether you are a teacher building a supportive classroom culture, a school counselor leading a small group, or a parent helping your child navigate social dynamics, these activities offer concrete tools to help every student feel seen, valued, and connected. From Cooperative Games that teach teamwork to Empathy Mapping that encourages perspective-taking, this list provides specific, actionable strategies to strengthen the bonds that underpin a thriving learning environment. You will find practical examples for various age groups, helping you adapt each exercise for your specific needs.
1. Two Truths and a Lie
This classic icebreaker is one of the most effective and adaptable relationship building activities for any age group. It fosters a climate of psychological safety and shared discovery with minimal setup. Participants share three statements about themselves: two that are true and one that is false. The group then guesses which statement is the lie, leading to surprising revelations and genuine connections.
The activity’s strength lies in its participant-led nature. Each person controls the level of personal information they disclose, making it a low-stakes way to practice vulnerability. For example, a student might share, "I have a pet tarantula," "I have been to Hawaii," and "My favorite food is broccoli." This simple format sparks curiosity and helps peers find common ground in a playful, non-threatening manner.
How to Implement "Two Truths and a Lie"
Objective: To build rapport, foster active listening, and create a safe space for sharing.
Best For: All ages (K-8+), opening new groups, warm-ups before deeper discussions.
Time: 10-20 minutes.
Materials: None required (optional: whiteboards, index cards, or paper for writing).
Step-by-Step Instructions:
Model First: The facilitator (teacher, counselor, or parent) should always go first to set a clear example. Share three interesting but not overly obvious statements about yourself.
Give Thinking Time: Allow students 1-2 minutes to silently prepare their three statements. For younger students (K-2), provide sentence starters like, "My favorite animal is…" or "I have visited…" to guide them.
Share in Small Groups: Have students share in pairs or small groups of 3-4. This increases participation and reduces the pressure of presenting to a large audience.
Guess Respectfully: Instruct students to listen carefully to each person's three statements before discussing and making a group guess.
Reveal and Elaborate: After the group guesses, the sharer reveals the lie and can briefly elaborate on one of the true statements, adding context and personality.
Key Insight: The debrief is as important as the activity itself. After a round, ask questions like, "What did we learn about our classmates today?" or "What made a lie believable?" This reflection reinforces the goal of getting to know one another beyond surface-level assumptions. Soul Shoppe, a social-emotional learning organization, frequently uses this activity to establish a safe, playful tone at the beginning of their classroom workshops.
2. Circle of Trust / Talking Circles
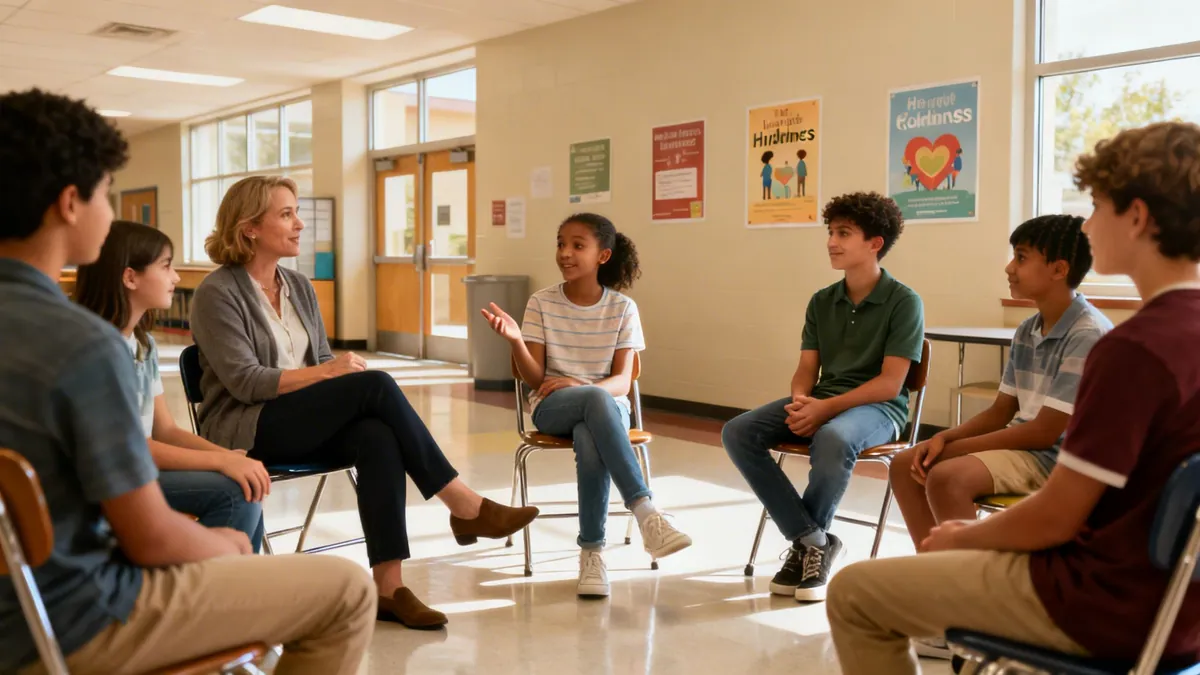
This intentional gathering is one of the most powerful relationship building activities for establishing equity and deepening connections. Rooted in indigenous wisdom and restorative practices, Talking Circles create a space where participants sit in a circle and take turns speaking and listening without interruption. This structured format promotes authentic dialogue and ensures every person has an equal voice and visibility.
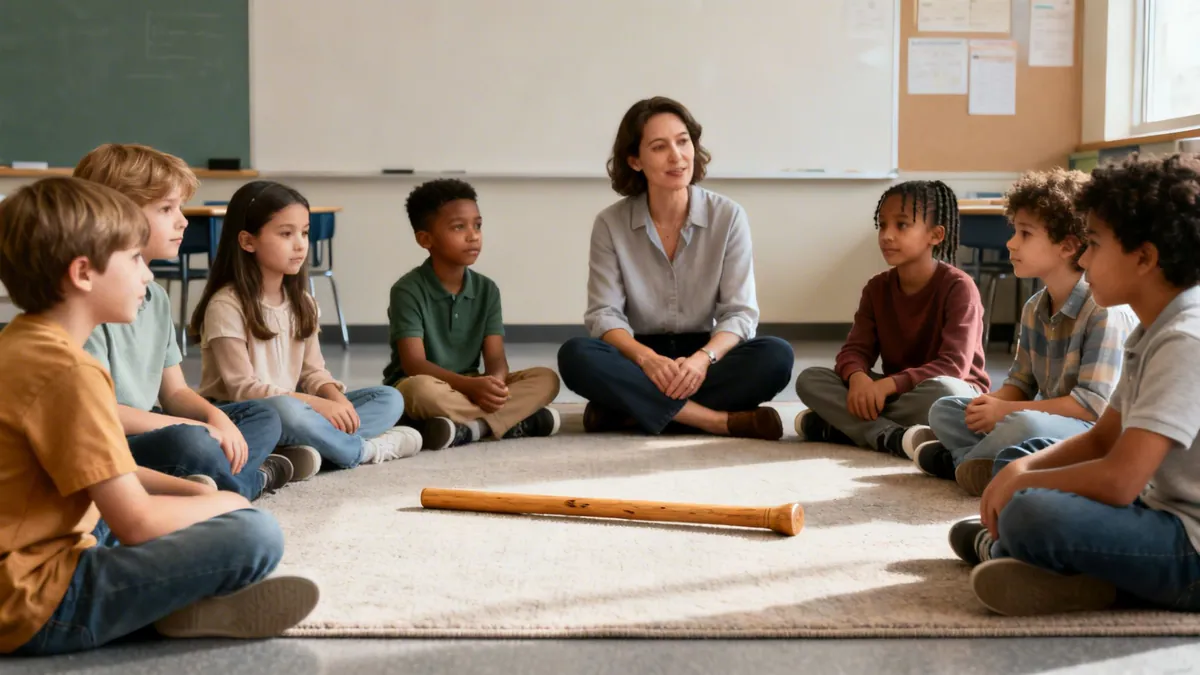
The circle's strength is its ability to build empathy and understanding of diverse perspectives. By using a "talking piece" (an object that grants the holder the right to speak), the dynamic shifts from a free-for-all debate to focused, respectful listening. It is used effectively in restorative justice circles to address peer conflict, as well as in daily morning meetings to build a positive classroom community from the start.
How to Implement "Circle of Trust / Talking Circles"
Objective: To build empathy, cultivate respect for diverse perspectives, and create a brave space for authentic sharing.
Best For: All ages (K-8+), community building, conflict resolution, daily check-ins.
Time: 15-30 minutes (adaptable).
Materials: A designated "talking piece" (e.g., a decorated stone, a small stuffed animal, a special stick).
Step-by-Step Instructions:
Establish Circle Agreements: Before the first circle, collaboratively create agreements with the group. These often include principles like "Listen with respect," "Speak from the heart," "What is said in the circle stays in the circle," and "It's okay to pass."
Introduce the Talking Piece: Explain that only the person holding the object may speak. This simple rule is key to ensuring everyone is heard and interruptions are eliminated.
Pose an Open-Ended Prompt: The facilitator starts by asking a question that invites reflection, not a simple "yes" or "no" answer.
Practical Example (K-2): "Share one thing that makes you smile."
Practical Example (3-5): "Talk about a time you showed kindness to someone."
Practical Example (6-8): "Describe a challenge you are proud of overcoming."
Model and Pass: The facilitator answers the prompt first, then passes the talking piece to the next person in the circle. Remind participants they can pass if they do not wish to share.
Allow for Silence: Do not rush to fill pauses. Silence gives participants time to think and shows respect for the person who just spoke.
Close with Intention: End the circle with a closing ritual. This could be a shared quote, a moment of silent reflection, or a collective thank you to honor what was shared.
Key Insight: The structure itself teaches social-emotional skills. The act of waiting for the talking piece builds impulse control, while listening to every peer's perspective cultivates empathy. As a core component of restorative practices, circles shift the focus from punishment to understanding, helping communities repair harm and strengthen bonds after a conflict.
3. Cooperative Games and Team Challenges
Cooperative games shift the focus from individual competition to shared success, making them powerful relationship building activities. In these exercises, groups work together toward a common goal, requiring communication, problem-solving, and mutual support. This approach builds group cohesion while teaching practical collaboration skills that are essential in both academic and social settings.

The value of cooperative play is evident in its application across various youth settings. An elementary PE class might use the "Human Knot" to encourage physical problem-solving, while a middle school advisory period could feature a digital escape room to foster strategic thinking. Furthermore, a variety of energising indoor team building activities can effectively boost cooperation and communication among students, particularly in diverse learning environments. The shared struggle and eventual success create strong bonds and positive memories.
How to Implement Cooperative Games and Team Challenges
Objective: To improve communication, build trust, and develop group problem-solving skills.
Best For: All ages (K-8+), breaking down cliques, building team identity, applying SEL skills.
Time: 15-30 minutes.
Materials: Varies by activity (e.g., rope for Human Knot, building blocks for a tower challenge, or just open space).
Step-by-Step Instructions:
Select an Appropriate Challenge: Choose a game that fits the group's developmental level.
Practical Example (K-2): "Keep the Balloon Up." Students work together to keep one or more balloons from touching the floor.
Practical Example (3-5): "Group Juggle." Students stand in a circle and toss a soft ball to one another, aiming to establish a pattern and see how quickly they can complete it without dropping the ball.
Practical Example (6-8): "Spaghetti Tower." Groups get 20 sticks of spaghetti, a yard of tape, and a marshmallow. The goal is to build the tallest freestanding tower with the marshmallow on top.
Clearly State the Cooperative Goal: Before starting, explicitly state that the goal is to succeed as a team. For example, "The goal is for everyone in your group to untangle the knot, not to see which group finishes first."
Facilitate, Don't Direct: Your role is to monitor group dynamics. Watch for students who may be excluded or for individuals who dominate the conversation. Gently intervene with questions like, "Let's hear what Maria thinks," or "How can we make sure everyone has a chance to help?"
Allow for Productive Struggle: Don't be too quick to offer solutions. Let students experience the challenge of working together. This is where the most significant learning and bonding occurs.
Debrief with Reflection: After the game, lead a discussion. Ask questions like, "What was the hardest part?" "What did someone do that helped the group succeed?" and "How can we use this teamwork in our classroom?" Soul Shoppe provides many excellent ideas for cooperative games that build community.
Key Insight: The primary goal is the process, not the outcome. Whether a team "wins" or "loses" the challenge is less important than how they communicated, supported each other, and managed frustration. Emphasize that these skills are the same ones needed to be a good friend, a helpful classmate, and a supportive teammate in any situation.
4. Guided Reflection and Journaling Prompts
Structured writing or drawing exercises provide a quiet, introspective path toward stronger relationships, starting with the one we have with ourselves. By using guided prompts, individuals reflect on their experiences, emotions, and interactions, creating a powerful foundation for empathy and connection. This method is especially valuable for introverted students who may process their thoughts more effectively internally before sharing with others.
Journaling’s effectiveness comes from the safe, private space it creates for honest self-expression. A student can explore complex feelings about a peer conflict or celebrate a moment of kindness without the pressure of an immediate audience. For instance, a prompt like, "Describe a time you felt proud of how you treated a friend," allows a child to connect positive actions to their own emotions, building both self-awareness and social-emotional skills.
How to Implement "Guided Reflection and Journaling Prompts"
Objective: To develop self-awareness, practice self-regulation, and create a safe outlet for emotional processing before sharing with others.
Best For: All ages (K-8+), introverted learners, after-conflict resolution, morning meetings, or individual check-ins.
Time: 10-15 minutes.
Materials: Journals or notebooks, paper, writing/drawing tools (optional: digital tools like the Soul Shoppe app).
Step-by-Step Instructions:
Introduce the Prompt Clearly: Present a single, open-ended prompt.
Practical Example (K-2): "Draw a picture of a time you felt happy with a friend. What were you doing?"
Practical Example (3-5): "Write about a time it was hard to be a good friend. What happened and what did you learn?"
Practical Example (6-8): "Reflect on a time you disagreed with a friend. How did you handle it, and what might you do differently next time?"
Offer Multiple Formats: Emphasize that there is no "right" way to respond. Students can write sentences, use bullet points, draw a picture, or create a mind map. This accommodates different learning styles and expressive preferences.
Create Quiet Reflection Time: Build in 5-10 minutes of uninterrupted, quiet time for students to work in their journals. The focus is on reflection, not production. Ensure the space feels calm and free of pressure.
Make Sharing Voluntary: If sharing is part of the activity, make it optional and low-stakes. Use partner sharing or a "talking circle" where students can pass if they choose. Never force a student to read their private reflections aloud.
Connect to a Theme: Use themed journals (e.g., Gratitude, Friendship, Managing Big Feelings) to give the practice structure over time and track growth in specific areas.
Key Insight: The primary goal is honest reflection, not writing quality. To build trust, keep initial journal entries private. As a facilitator, your role is to create the conditions for safety and underscore that journaling is a tool for understanding ourselves, not an assignment to be graded. Programs like Soul Shoppe integrate journaling to help students master self-regulation, turning internal reflection into a cornerstone of healthy peer relationships.
5. Peer Mentoring and Buddy Systems
Pairing experienced students with younger or socially isolated peers is a powerful strategy for building an inclusive school climate. These structured buddy systems create authentic opportunities for support, modeling, and friendship. By creating a formal program, schools can nurture prosocial behaviors, reduce bullying, and give students a profound sense of belonging.
The effectiveness of this approach comes from its peer-led foundation. A mentor relationship feels more natural and less intimidating than adult intervention. For instance, a school might pair a confident 5th grader with a shy kindergartener to help them navigate the lunchroom, or train a group of 8th graders to act as peer allies for new students. These connections build genuine peer bonds that increase feelings of safety and community.
How to Implement "Peer Mentoring and Buddy Systems"
Objective: To build empathy, foster leadership skills, reduce social isolation, and create a supportive peer culture.
Best For: All ages (K-8+), school-wide initiatives, supporting new students, and bullying prevention.
Time: Ongoing throughout the school year or a semester.
Materials: Training materials, mentor applications, and a clear role description.
Step-by-Step Instructions:
Define the Program's Goal: Be clear about the purpose. Is it to help new students adjust, support academic skills, or improve social dynamics at recess? This will guide your mentor selection and training.
Train Your Mentors: Explicitly teach mentors key skills. Provide training on active listening, confidentiality, problem-solving, and knowing when to get an adult involved. Use frameworks like Soul Shoppe’s communication tools to give mentors specific language to use.
Match Pairs Intentionally: Thoughtfully pair students based on personality, shared interests, and specific goals. Avoid random pairings. A quiet, artistic 6th grader might be a great match for a new 4th grader who loves to draw.
Structure Low-Pressure Activities: Start the relationships with fun, informal activities.
Practical Example (K-5): "Reading Buddies." Older students read picture books to their younger buddies once a week.
Practical Example (6-8): "Lunch Buddies." Mentors meet their mentees for lunch once a month to chat and help them connect with other peers.
Provide Ongoing Support and Check-Ins: Schedule regular check-ins with the mentors. Give them a safe space to share their experiences, ask for advice, and discuss any concerns. This prevents mentor burnout and ensures the program's health.
Key Insight: A mentor’s role is to be a supportive friend, not to fix another student’s problems. Clarify this boundary from the start with a role description that states, “Your job is to be a friendly peer support and a positive role model.” This empowers mentors to act within their capacity and helps them understand that their primary contribution is building a trusting relationship.
6. Empathy Mapping and Perspective-Taking Exercises
These structured relationship building activities guide students to analyze another person's experience by considering what they might see, hear, think, and feel. By mapping out another's perspective, whether it's a fictional character, a peer, or a public figure, students practice the foundational SEL skill of empathy. This process builds a deeper understanding of others, reduces conflict, and encourages supportive behaviors in the community.
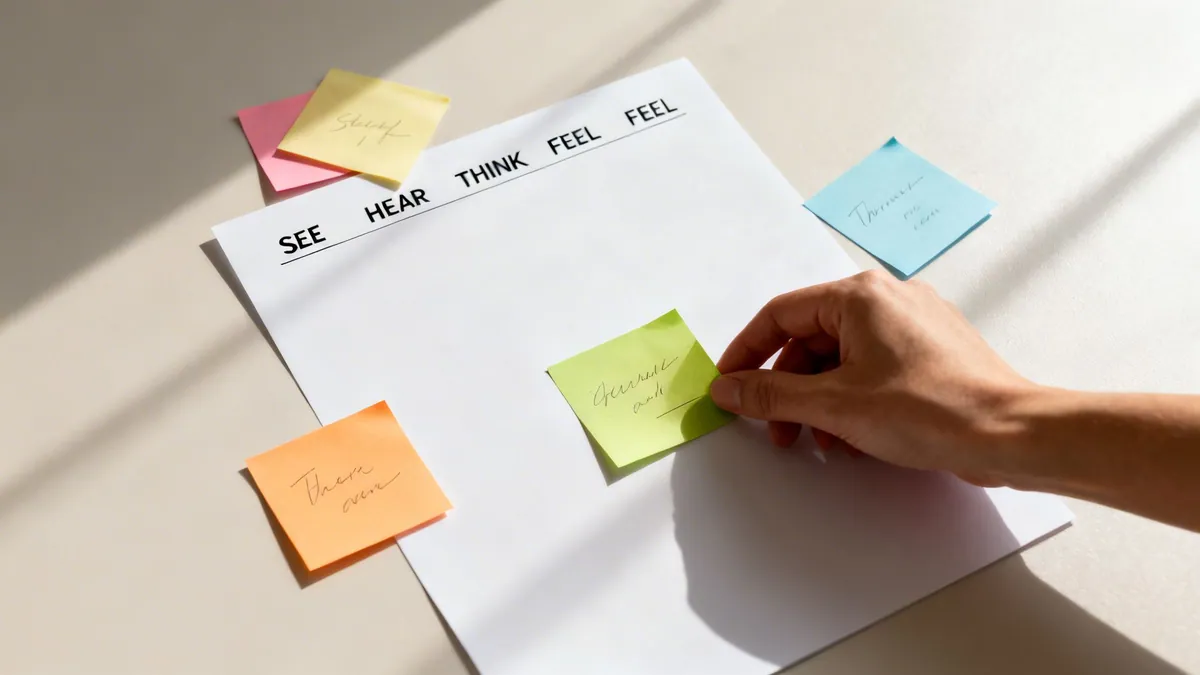
The power of empathy mapping lies in its structured approach to a complex emotional skill. It moves students beyond simple sympathy toward genuine perspective-taking. For instance, after reading a story, a first-grade class might map out how a character felt when they were left out. In middle school, students could use an empathy map to analyze the perspective of someone who engaged in bullying, exploring the potential needs or pressures that led to their actions. This helps dismantle assumptions and fosters a more compassionate school climate.
How to Implement "Empathy Mapping"
Objective: To develop empathy, improve social awareness, and promote pro-social problem-solving.
Best For: All ages (K-8+), conflict resolution, literature analysis, anti-bullying initiatives.
Time: 15-30 minutes.
Materials: Whiteboard, chart paper, or individual worksheets with an empathy map template (sections for See, Hear, Think, Feel, Needs/Wants).
Step-by-Step Instructions:
Introduce the Subject: Select a subject for the empathy map. This could be a character from a book, a historical figure, a student in a hypothetical scenario, or even a real but anonymized situation from the school community.
Explain the Map: Draw or distribute the empathy map. Guide students through each quadrant: What does this person See in their environment? What do they Hear from others? What might they Think to themselves? How do they Feel?
Brainstorm Collaboratively: As a class or in small groups, have students brainstorm ideas for each quadrant.
Practical Example (K-2): After reading The Recess Queen, create a class empathy map for the character "Mean Jean." What did she see (kids running away)? What did she feel (lonely, angry)?
Practical Example (3-5): Use a map to explore the perspective of a new student on their first day of school. What might they be thinking and feeling?
Identify Needs and Pains: After filling out the main quadrants, discuss the person’s underlying needs, wants, or pains. What is their core challenge or desire in this situation?
Connect to Action: Ask students, "Now that we understand this perspective, how could we support this person?" or "What is one kind thing we could do?" This step turns empathy into compassionate action. More perspective-taking activities can help build this skill.
Key Insight: The goal is understanding, not necessarily agreement or forcing a conclusion that "we are all the same." After mapping, focus reflection on how this new perspective might change future interactions. In its conflict resolution curriculum, Soul Shoppe uses role-play and perspective-taking to help students understand the impact of their actions, a crucial step in restorative practices after harm has occurred.
7. Social-Emotional Learning (SEL) Skill-Building Workshops and Assemblies
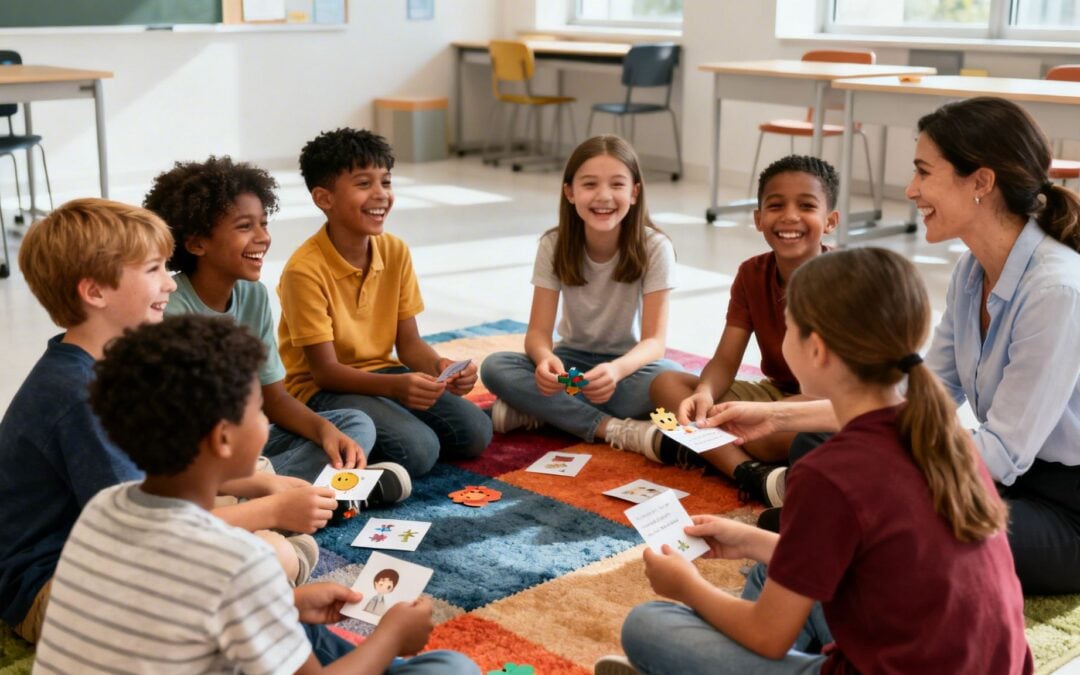
Moving beyond brief icebreakers, structured SEL skill-building workshops and assemblies are powerful relationship building activities that directly teach core competencies. These are not one-off events but intentional, interactive presentations designed to equip students with practical tools for self-awareness, conflict resolution, and social awareness. By focusing on experiential learning, these programs make abstract concepts like empathy concrete and memorable.
The effectiveness of this approach comes from its direct instruction model. Instead of hoping students absorb skills implicitly, organizations like Soul Shoppe create signature assemblies that explicitly teach students how to use "I-statements" to resolve conflicts or how to recognize and regulate their emotions. These skills become a shared language for the entire school community, fostering a culture of mutual respect and understanding that reduces bullying and improves classroom dynamics.
How to Implement SEL Skill-Building Workshops
Objective: To explicitly teach, model, and practice specific SEL skills (e.g., conflict resolution, emotional regulation) in a structured, school-wide format.
Best For: All ages (K-8+), whole-school culture initiatives, targeted interventions for specific grade levels or behavioral challenges.
Time: 45-60 minutes for an assembly or workshop; can be a series or a single event.
Materials: Varies by program; often includes props, visuals, take-home resources, and follow-up lesson plans for teachers.
Step-by-Step Instructions:
Identify a Specific Need: Before booking a program, use school climate data or teacher feedback to pinpoint a precise skill gap. Are students struggling with managing frustration or resolving playground disputes? Choose a workshop that addresses that exact need.
Select a Reputable Provider: Partner with an organization that specializes in experiential SEL, such as Soul Shoppe, which has a 20-year track record. Ensure their approach is interactive and aligns with your school’s values.
Prepare Students and Staff: Frame the assembly as an exciting, practical learning opportunity, not a lecture on behavior. Brief teachers beforehand on the key skills that will be introduced so they can help reinforce them.
Engage During the Event: Encourage active participation. Effective programs use student volunteers to model skills, role-play real-world scenarios, and lead call-and-response chants that make learning sticky.
Plan for Reinforcement: A one-time assembly is a starting point. Use the provider's follow-up materials, such as posters and classroom activities, to integrate the new skills into daily routines and school-wide language.
Practical Example: A teacher can reference a "Peace Path" poster taught in the assembly when two students have a disagreement. They can walk the students through the steps on the poster: 1. Cool down. 2. Use "I-statements." 3. Brainstorm solutions.
Key Insight: To get leadership buy-in, frame SEL workshops as a direct investment in academic achievement. Explain that when students learn to manage their emotions and relationships, they are more available for learning, leading to improved attendance, focus, and test scores. Presenting SEL as a cornerstone of a successful academic environment, not just a "nice-to-have" program, is critical for securing resources and support.
8. Restorative Practices and Repair Circles
When conflict causes harm, restorative practices shift the focus from punishment to accountability, healing, and community repair. Unlike punitive measures that isolate individuals, these practices bring together those affected to understand the impact of actions and collaboratively find a path forward. This process is one of the most profound relationship building activities because it rebuilds trust after it has been broken.
The core of this approach is the repair circle, a facilitated meeting that includes the person who caused harm, the person harmed, and supporters for each. For instance, after a bullying incident, a restorative circle allows the student who was targeted to explain the emotional impact, and the student who did the bullying to understand the consequences beyond a simple disciplinary action. This structured dialogue helps rebuild the social fabric and prevents future harm by addressing root causes.
How to Implement "Restorative Practices and Repair Circles"
Objective: To repair harm, rebuild trust, and teach accountability and empathy after a conflict.
Best For: All ages (K-8+), responding to peer conflict, bullying, or community disruptions.
Time: 30-60 minutes, depending on the complexity of the situation.
Materials: A talking piece (an object to signify whose turn it is to speak), a quiet and private space.
Step-by-Step Instructions:
Invest in Training: Facilitating a repair circle requires skill. Seek professional development from organizations like Soul Shoppe to learn how to manage difficult conversations and guide participants toward resolution.
Conduct Pre-Meetings: Meet with the person who caused harm and the person who was harmed separately. Prepare them for the process, listen to their perspectives, and ensure they are willing to participate.
Set the Stage: Begin the circle by clearly stating its purpose: "Our goal today is to understand what happened and work together to make things right." Establish ground rules, such as using the talking piece and listening without interrupting.
Use Restorative Questions: Guide the conversation with specific, non-blaming questions:
What happened?
What were you thinking at the time?
Who has been affected by what you did, and how?
What do you think you need to do to make things right?
Create a Repair Agreement: Collaboratively develop a concrete plan of action.
Practical Example: After a student repeatedly interrupted a classmate's presentation, a repair agreement might include: 1) A sincere, specific apology to the presenter. 2) The student practices active listening skills with a counselor. 3) The student writes a short reflection on why respecting others' work is important.
Key Insight: Restorative practices are most effective when they are also used proactively to build community from the start, not just reactively after harm. Soul Shoppe coaches teachers to use circle formats for daily check-ins, creating a foundation of trust that makes repair conversations more successful when conflicts arise. To learn more, see this detailed overview of what restorative practices in education are and how they can be implemented.
9. Gratitude and Strength-Based Recognition Activities
These structured activities create a culture where students regularly acknowledge peer strengths, express gratitude, and celebrate positive contributions. This practice combats isolation by ensuring every student feels seen and valued for their unique qualities. By making recognition a daily habit, schools build an environment of belonging and mutual respect.
The power of these relationship building activities comes from their consistency. When students are taught how to spot and name specific strengths in others, it shifts their focus from deficits to assets. For instance, instead of a generic "good job," a student might learn to say, "I appreciated how you included Sarah in our game at recess; that was really kind." This level of specificity makes the recognition more meaningful and helps students see positive behaviors in concrete terms.
How to Implement "Gratitude and Strength-Based Recognition"
Objective: To build a culture of appreciation, improve self-esteem, and help students recognize positive qualities in themselves and others.
Best For: All ages (K-8+), morning meetings, classroom community building, restorative practices.
Time: 5-15 minutes, depending on the activity.
Materials: Sticky notes, index cards, a "gratitude jar," or a designated bulletin board.
Step-by-Step Instructions:
Teach Genuine Recognition: Model how to give specific and sincere appreciation. Explain the "what and why" format: "I noticed you (specific action), and it mattered because (specific impact)."
Integrate Into Routines: Make recognition a predictable part of the day or week. Use a "Gratitude Circle" during morning meetings, asking, "Who did you see being a good friend yesterday and what did they do?"
Offer Multiple Formats: Accommodate different comfort levels.
Practical Example: Create a "Shout-Out" bulletin board where students can write positive notes about classmates on sticky notes and post them publicly.
Practical Example: Use a "Gratitude Jar" where students drop in private notes of thanks for others. The teacher can read a few aloud (with permission) at the end of the week.
Celebrate Diverse Strengths: Ensure a wide range of contributions are celebrated, including academic, social, creative, and athletic skills. Highlight qualities like kindness, perseverance, and leadership.
Model Receiving Gratitude: Teach students how to accept a compliment gracefully. Practice simple responses like, "Thank you, that means a lot to me," to avoid deflecting positive feedback.
Key Insight: To ensure every student is seen, facilitators should discreetly track who receives recognition. If certain students are consistently overlooked, find opportunities to "spotlight" their strengths publicly or prompt peers to notice their contributions. This intentional approach ensures that recognition activities are truly inclusive and reinforce the value of every single member of the community.
10. Social Skills and Conversation Coaching
This targeted approach moves beyond general activities to provide direct instruction in specific social skills that are foundational to forming relationships. It involves modeling, role-playing, and guided practice in areas like initiating conversations, reading social cues, or managing disagreements. This coaching is especially helpful for socially isolated students, those with social anxiety, or anyone needing explicit support to build peer connections.
The power of this method is in its precision. Instead of hoping social skills develop on their own, coaching breaks them down into small, achievable steps. For instance, a counselor might role-play with a student how to join a group at recess, starting with observing the group, finding a natural opening, and using a simple phrase like, "Hi, what are you playing?" This makes the abstract goal of "making friends" a concrete, repeatable process.
We often talk about the importance of empathy, but where does it come from? The answer starts with a skill called perspective-taking.
So, what is perspective-taking, really? Think of it as the ability to mentally "try on" someone else's point of view—to see the world through their eyes, even if just for a moment. It’s the cognitive workhorse behind empathy, effective communication, and solving conflicts peacefully.
It’s about moving beyond our own immediate experience to understand another person’s thoughts, feelings, and beliefs, without needing to agree with them.
What Is Perspective Taking Really
Let's go deeper than a simple definition. At its heart, perspective-taking is an active, curious process. It’s not just noticing a friend is sad. It's wondering why they might be feeling that way based on their unique situation and what they’re going through.
This is a game-changer on the playground, in a group project, or around the dinner table.
For a child, it’s the shift from seeing a classmate grab a toy and thinking, "He's mean!" to considering, "Maybe he didn't know I was still using it." That subtle pivot is how we build bridges instead of walls.
The Three Types of Perspective Taking
Perspective-taking isn't a one-size-fits-all skill. It actually develops in stages and shows up in different forms. Understanding these types can help parents and teachers see where a child is thriving and where they might need a little more support.
Perceptual Perspective Taking: This is the most basic form and one of the first to develop. It's the simple, concrete understanding of what another person can physically see from their vantage point. A practical example is asking a child, "I see the door from here. Can you see the door from your chair, or is the bookshelf in your way?"
Cognitive Perspective Taking: This is a bigger leap. It’s the ability to understand that other people have different thoughts, beliefs, and knowledge. For instance, a child developing this skill realizes that a friend doesn't know a secret just because they know it. A teacher might ask, "Even though you know the answer, does Sarah know it if she wasn't here yesterday?"
Emotional Perspective Taking: This is where we get to the heart of empathy. It's the ability to infer what another person is feeling. A parent might use this by saying, "Your brother looks upset. How do you think he feels about his tower falling over?"
A Practical Example: A Classroom Disagreement
Imagine two students, Maria and Leo, are arguing over a shared tablet. Maria is upset because Leo snatched it without asking. Leo is frustrated because he's rushing to finish his assignment.
Without perspective-taking, the conflict just gets louder. "It's my turn!" "No, it's mine!"
But a teacher can guide them to practice the skill.
"Maria, can you think of why Leo might be feeling so rushed right now? What is he trying to get done? Leo, how do you think it made Maria feel when you grabbed the tablet without talking to her first?"
This simple prompt encourages both students to put on each other’s "mental glasses." Maria might realize Leo is stressed about a deadline, and Leo might understand his action felt disrespectful to Maria. This doesn’t magically fix the problem, but it reframes the conflict. It becomes a shared problem they can solve together instead of a battle to be won.
This skill is a close cousin to another important concept; you can learn more about this in our guide to define empathetic listening.
By truly understanding perspective-taking, we can see why it’s a non-negotiable skill for our children. It lays the foundation for a more compassionate and collaborative world, one interaction at a time.
Why Perspective Taking Is an SEL Superpower
What if you could give your students a superpower that improves almost every social interaction they’ll ever have? That’s what perspective-taking does. It’s so much more than a soft skill; it’s a core part of social-emotional learning (SEL) that fuels positive change in classrooms, homes, and entire communities.
When we talk about perspective-taking, we mean the ability to see a situation from someone else’s point of view. It’s the engine that drives empathy, makes communication clearer, and sets the stage for real conflict resolution. Without it, kids are stuck seeing the world through their own narrow lens.
This one skill is the difference between a student thinking a quiet classmate is being rude, and realizing they might just be having a tough morning. It’s a small mental shift that completely changes the social landscape.
Building Stronger Friendships and Reducing Conflict
One of the first things you’ll notice when kids develop perspective-taking skills is that their friendships get healthier. Students who can genuinely understand a friend's feelings or point of view are just better at navigating the normal ups and downs of relationships.
We see it time and again: children who are good at this are more likely to help, share, and comfort others. This naturally makes them more well-liked by their peers and helps them avoid feeling left out or rejected.
Practical Example: A Playground Disagreement Two students, Sam and Chloe, both want the last swing on the playground.
Without Perspective-Taking: Sam just grabs it and says, "It's mine!" Chloe gets upset, an argument starts, and they both walk away angry.
With Perspective-Taking: Sam sees the disappointed look on Chloe's face. He pauses and asks, "Did you want this swing?" Chloe explains she had a bad morning and just wanted a minute alone. Sam gets it. "Oh, okay. You can have it. I'll go on the slide."
What could have been a fight becomes a moment of connection. Sam learned something about Chloe, and Chloe felt seen and understood. That tiny interaction not only prevented a problem but actually strengthened their friendship.
Fostering a Positive School Climate
When perspective-taking becomes a real value in a school, the whole atmosphere changes. It’s a powerful defense against bullying, exclusion, and day-to-day classroom friction. After all, bullying is often rooted in a complete failure to see the other person's humanity.
A school environment that actively teaches and models perspective-taking is an environment where bullying has a much harder time taking root. Students learn to see their classmates as complex people with their own stories, not just as simple targets.
This skill also makes group projects and other collaborative work run so much more smoothly. Students become better at:
Listening to and valuing their teammates’ ideas.
Understanding why a peer might be struggling with their part of the task.
Compromising and finding solutions that work for the whole group.
A practical example is during a group project. When one student fails to complete their part, instead of getting angry, a classmate with perspective-taking skills might ask, "Is everything okay? You seem a little stressed." This opens the door to understanding that the student might be overwhelmed with other work, rather than just being lazy.
This creates a more cooperative, less competitive classroom where students feel safe enough to share their thoughts and ideas. The many benefits of social-emotional learning are truly unlocked when perspective-taking is front and center.
Developing Resilience and Social Awareness
Finally, perspective-taking is absolutely essential for building resilience. It gives children the tools to handle tricky social situations without getting overwhelmed or completely shutting down. They learn that not every negative moment is a personal attack.
For example, if a child isn't invited to a birthday party, their first instinct might be to feel hurt and rejected. A parent can help them practice perspective-taking by asking, "I know you feel sad. Can we think of some other reasons? Maybe their parents only allowed a small number of guests, or maybe they only invited kids from their soccer team." This helps the child realize the situation might not be a personal slight.
This social awareness helps them "read the room" and adjust their behavior, which is a vital skill for success in school and in life. By making perspective-taking a priority, we're not just teaching kids to be nice; we're giving them a strategic social-emotional superpower that will serve them for the rest of their lives.
The Developmental Journey of Perspective Taking
Knowing what perspective taking is is one thing, but seeing how it blossoms in a child is another entirely. This skill doesn't just switch on one day. It’s a slow, steady journey that unfolds over years, much like a child learns to walk before they can run. They have to master simple social viewpoints first before they can ever hope to navigate complex friendships and disagreements.
This developmental path isn't a strict schedule but more of a general roadmap. It’s helpful to think of it through frameworks like Vygotsky's sociocultural theory, which shows us how much social interaction shapes a child’s growing mind. Each stage builds on the one before, and when we know what’s typical for each age, we can offer the right support at just the right time.
Perspective-taking abilities change significantly as children mature. The table below breaks down these stages, offering a quick guide for educators and parents to see what's happening at each age and how they can best support this growth.
Developmental Stages of Perspective Taking
Age Group
Typical Abilities
Practical Example
Supportive Prompt for Adults
Kindergarten – 2nd Grade
Egocentric View: Sees the world from their own physical viewpoint. Begins to identify basic emotions in others.
A child hides by covering their own eyes, thinking "If I can't see you, you can't see me."
"I see you're looking at the blue car. What do you think I see from where I'm sitting?"
3rd Grade – 5th Grade
Second-Person View: Understands that others have different thoughts, feelings, and information.
A child realizes that their friend might not know about the surprise party, even though they do. They keep it a secret.
"Can you think of any other reasons your friend might have seemed upset today? What might they be thinking?"
Middle School & Beyond
Third-Person View: Can step back and see a situation from a neutral, outside perspective.
Two friends in a fight can analyze the problem as if they were an uninvolved observer, seeing both sides.
"Let's pretend you're a mediator. How would you describe the problem fairly to both people?"
By tailoring our guidance to a child's developmental stage, we can meet them where they are and help them build these crucial skills one step at a time.
Early Foundations: Kindergarten to 2nd Grade
In these early years, kids are naturally egocentric. Their universe spins around their own feelings and experiences—and that's completely normal. At this stage, perspective taking is very concrete and tied to what they can physically see.
The main skill popping up is perceptual perspective taking. This is the literal ability to get that someone else sees something differently from their own physical spot.
A great way to practice this is to sit on the floor with a child and put a big book or toy between you. Ask them what they see on their side. Then, ask what they think you see from your side. It’s a simple game that helps them grasp the core idea that two people can have different views of the exact same object.
The focus here is on linking actions to feelings. For example, a child learns that if they snatch a toy, it makes their friend sad. They aren't ready to dive deep into their friend's inner world, but they're laying the foundation for emotional empathy.
As you can see, perspective taking is a core skill that fuels other SEL superpowers like empathy, friendship, and resilience as kids grow.
This shows how a child’s ability to handle more complex social and emotional situations matures right alongside their perspective-taking skills.
Expanding Horizons: 3rd to 5th Grade
Once kids hit the upper elementary grades, their thinking takes a huge leap. They move past just physical views and start to understand that other people have different thoughts, beliefs, and knowledge. This is cognitive perspective taking. They finally get that just because they know the secret to a surprise party, it doesn't mean everyone else does.
This is a game-changer for social life, as friendships get way more complicated. Kids at this age can start to put themselves in someone else's "mental shoes" and think about their intentions.
A key shift during this period is the ability to recognize that a person's actions are driven by their own unique thoughts and knowledge. This insight is fundamental to moving past black-and-white thinking and seeing the nuances in social situations.
For example, imagine a student is sad because their friend didn't save them a seat at lunch. Instead of just focusing on the hurt, a teacher can ask, "Can you think of any reasons why your friend might not have saved you a seat? Maybe they didn't see you, or maybe someone else asked to sit there first." This nudges the child to explore other possibilities beyond their own feelings.
Advanced Understanding: Middle School and Beyond
Middle school drops kids into a whole new level of social complexity, and their perspective-taking skills have to level up, too. Now, adolescents become capable of something pretty sophisticated: seeing a situation from a neutral, third-party perspective. They can actually step back from a fight and look at it like an outside observer would.
This skill is absolutely vital for navigating peer pressure, solving messy arguments, and understanding bigger societal issues. They learn that truth isn't always black and white and that two people can have totally valid but opposite views on the same problem.
Say two friends are arguing over a group project. One feels the other isn't pulling their weight, while the second feels swamped with other commitments. A counselor could guide them by saying, "Let's pretend you're a reporter writing a story about this. What would each person's side of the story be? What's the fair way to describe what happened?"
This simple prompt helps them detach from their intense emotions and see the situation more objectively—the ultimate goal of mature perspective taking. When you understand this developmental journey, you can be a much better guide for students every step of the way.
Proven Classroom Strategies to Teach Perspective Taking
Helping students define perspective taking for themselves is one of the most powerful things we can do as educators. It’s not just an abstract theory—it’s a practical tool that helps kids navigate their social world with more kindness and understanding.
The best part? You don’t need a whole separate curriculum. These strategies can be woven right into the fabric of your daily routine. Everyday moments can become powerful lessons in empathy.
The key is making this skill visible and practical. When teachers model perspective taking, it becomes a natural part of the classroom culture rather than just another rule to follow. Let’s look at a few proven ways you can start doing this tomorrow.
Use Think-Alouds During Read-Alouds
Storytime is the perfect laboratory for practicing perspective taking. As you’re reading to your class, just pause and model your own thought process out loud. This "think-aloud" technique makes the internal process of seeing another's viewpoint clear and simple for your students.
Instead of just reading the words on the page, you can show your curiosity:
"Hmm, the wolf says he just had a cold, but the pig looks terrified. I wonder what the pig is thinking right now?"
"Wow, she just lost her favorite toy. How do you think she's feeling inside right now? What would you want a friend to do for you if that happened?"
"He isn't sharing his snack. What could be a reason for that? Maybe he's extra hungry today or didn't have breakfast."
This simple act invites students to step into the characters' shoes. It shows them there’s almost always more than one reason for a person's behavior, moving them beyond snap judgments.
Integrate Perspective Taking into Core Subjects
Perspective taking isn’t just for your SEL block; it's a critical thinking skill that makes every academic subject richer. By weaving it into your existing lessons, you reinforce the concept all day long.
In Literature: Go beyond simple comprehension questions. Ask students to dig into character motivations. Why did a character make a certain choice? How did their past experiences shape their actions? For example, "Why do you think the villain in this story acts so mean? What might have happened in their past to make them this way?"
In History and Social Studies: History is packed with opportunities. Instead of just having students memorize dates, ask them to explore events from multiple viewpoints.
Example: When studying a conflict, you could divide the class into groups representing different sides. Have each group research and argue from that perspective. This helps them see that history is often a matter of interpretation and that different groups can experience the same event in profoundly different ways.
Research supports this approach. Using case studies from history or even lived experiences helps students analyze conflicts. They can search for evidence of where a lack of perspective taking led to problems and discuss how empathy might have changed the outcome.
Leverage Structured Role-Playing
Role-playing takes perspective taking from a mental exercise to a physical one. It’s a safe way for students to practice navigating the kinds of conflicts they face every day on the playground or in the classroom.
You can start with simple, common scenarios:
Set the Scene: Two students both want to use the same computer.
Assign Roles: One student needs the computer to finish work. The other wants to play a game.
Practice the Script: Guide them to use "I feel" statements and to state what they think the other person wants. For example: "I feel frustrated because I need to finish my work. I get that you want to play a game, and you've been waiting for a turn."
This kind of structured practice builds muscle memory for empathy. It gives students the words they need when a real conflict pops up. For even more hands-on ideas, check out our guide on fun and engaging perspective taking activities.
Empower with Question Stems
Finally, give your students the tools to practice perspective taking on their own. Post a few simple question stems around the classroom as visual reminders they can use during disagreements or group projects.
Helpful question stems include:
"How might they see this differently?"
"What's another reason they might have done that?"
"What do they need right now?"
"Can you say back what you heard them say?"
By consistently using these strategies, you create an environment where understanding others is a skill that’s both valued and practiced. You're not just managing behavior; you're building a foundation for compassionate, socially aware kids.
How Parents Can Build Perspective Taking at Home
While classrooms provide a wonderful, structured space for social-emotional learning, the most powerful lessons often take root at home. As a parent, you play a vital role in nurturing perspective taking, turning everyday family moments into real-world learning opportunities.
These small, consistent practices are your secret weapon. The goal isn't to add more to your already full plate, but to weave this skill into the things you already do—from watching movies to navigating sibling squabbles. When perspective taking becomes a natural part of your family’s dialogue, you show your child how much it matters in a way no lesson plan ever could.
Turn Dinnertime into a "Feeling" Feast
The family dinner table is more than a place to eat; it’s a daily empathy gym. Make it a habit to go beyond "How was your day?" and ask questions that gently nudge your children to think about the feelings of others.
Try a simple game like "Rose, Thorn, Bud." Each person shares:
A Rose: The best part of their day.
A Thorn: A challenging moment they had.
A Bud: Something they're looking forward to.
This simple structure creates a perfect opening for practicing perspective taking. If a child shares a “thorn” about a conflict with a friend, you can gently ask, "That sounds so frustrating. How do you think your friend might have been feeling in that moment?" This normalizes thinking about another person's experience.
Use Media as an Empathy Mirror
Family movie night—or even a 10-minute cartoon—is a fantastic laboratory for building perspective taking. The characters on screen offer a low-stakes way for kids to practice walking in someone else’s shoes.
The key is to pause and ponder. When a character makes a surprising choice or shows a big emotion, hit pause and get curious.
"Why do you think she did that? What’s another reason she might have acted that way?"
"Look at his face. What do you think he’s feeling, and what makes you say that?"
"How would you feel if that happened to you?"
By exploring characters’ motivations and emotions, you’re teaching your child to look for the “why” behind people’s actions. This builds the mental habit of considering what’s happening beneath the surface—a core skill for empathy.
This simple act turns passive screen time into an active, engaging lesson. Reading stories together works just as well; you can find some great titles in our curated list of books on emotions for children.
Navigate Sibling Squabbles with a Script
Sibling disagreements are inevitable. But they’re also prime opportunities to teach conflict resolution and empathy in the heat of the moment. Instead of just sending kids to separate corners, use these moments to explicitly practice perspective taking.
Introduce a simple "Stop and State" rule. Before you jump in to find a solution, each child must first try to calmly state the other’s point of view.
Practical Example: The Broken Toy
One child is crying because their sibling broke their favorite toy. The other child is defensive, insisting it was an accident.
Stop: Separate them and help them both take a breath to calm down.
State: Ask the upset child, "Can you try to explain what your brother is saying happened?" Then turn to the other and ask, "Can you tell me how your sister is feeling right now and why?"
Solve: Once they've each made an effort to see the other's side, they can start working on a solution together, like fixing the toy or offering a real apology.
This process forces a pause and requires them to step outside their own intense feelings, even for a second. It shows them that understanding isn't the same as agreeing, but it’s the essential first step toward finding a fair and kind solution.
Building Empathetic Schools with Soul Shoppe Programs
Self-regulation is the cornerstone of learning, resilience, and emotional well-being. It is the core ability to manage emotions, thoughts, and behaviors to achieve a specific goal. But what does it actually look like in practice, especially in a busy classroom or a hectic home environment? For many parents and educators, moving from abstract theory to tangible action can feel like a significant challenge.
This guide is designed to bridge that gap. We will provide clear, actionable examples of self-regulation that work for students across different ages and settings. Instead of just theory, you'll get specific tactics you can implement immediately.
We will break down seven powerful techniques, from in-the-moment breathwork to long-term problem-solving skills. Each section includes practical scripts, quick implementation tips, and brief notes on how to teach or reinforce each skill. By the end of this article, you will have a toolkit of replicable strategies to help children build the emotional intelligence they need to handle challenges and succeed. Let's dive into the first powerful example of self-regulation.
1. Breathwork and Mindfulness (Deep Breathing, Box Breathing, and Present-Moment Awareness)
Breathwork and mindfulness are foundational self-regulation strategies that directly influence the body's physiological stress response. By consciously controlling our breathing, we can activate the parasympathetic nervous system, which slows the heart rate and creates a sense of calm. This technique is a powerful example of self-regulation because it provides an immediate, accessible tool for managing overwhelming emotions like anxiety, anger, or frustration.
Mindfulness expands on this by training the brain to focus on the present moment without judgment. It helps children and adults notice their thoughts and feelings as temporary events rather than getting swept away by them. This builds the mental muscle needed to pause before reacting, a core component of emotional control. Combining these two practices offers both an in-the-moment rescue tool (breathwork) and a long-term preventative skill (mindfulness).
Strategic Breakdown and Implementation
Why It Works: Deliberate, slow breathing sends a signal to the brain that there is no immediate danger, counteracting the "fight or flight" response. This is especially effective for children, whose nervous systems are still developing. Simple diaphragmatic breathing, often called belly breathing, is a great starting point. To learn more about this specific technique, you can explore this detailed guide on the belly breathing technique.
When to Use It:
Proactively: Before known triggers, like a test, a public speaking event, or a difficult conversation. For example, a teacher can lead the class in one minute of quiet breathing before a math quiz.
Reactively: When feeling overwhelmed, angry, anxious, or unable to focus. For example, a parent can say, "I see you're getting frustrated. Let's take three deep 'lion breaths' together."
Routinely: As a daily practice to build baseline resilience and emotional awareness. For example, starting each morning with "Five Finger Breathing" where a child traces their hand while breathing in and out.
Key Insight: The goal isn't to stop thoughts or eliminate feelings, but to notice them without getting stuck. Teach kids that their mind will wander-the "work" is gently bringing their attention back to their breath each time.
Actionable Examples and Prompts
For the Classroom (Ages 5-8): Use a visual like an animated "breathing bubble" on a screen or a physical Hoberman Sphere. Say, "Let's all be breathing buddies. Watch the ball get bigger as we breathe in through our noses, and see it get smaller as we breathe out of our mouths."
For Home (Ages 9-12): Introduce "Box Breathing" before homework or after a frustrating moment. Use a simple prompt: "Let's make a square with our breath. Breathe in for 4, hold for 4, breathe out for 4, and hold for 4. Let's trace the square in the air with our finger as we go."
For Teens: Encourage the use of guided meditation apps like Calm or Headspace for 5-10 minutes daily. Frame it as mental training for sports, academics, or managing social stress. Prompt: "Let's try a 5-minute guided session to hit reset before we start this next task."
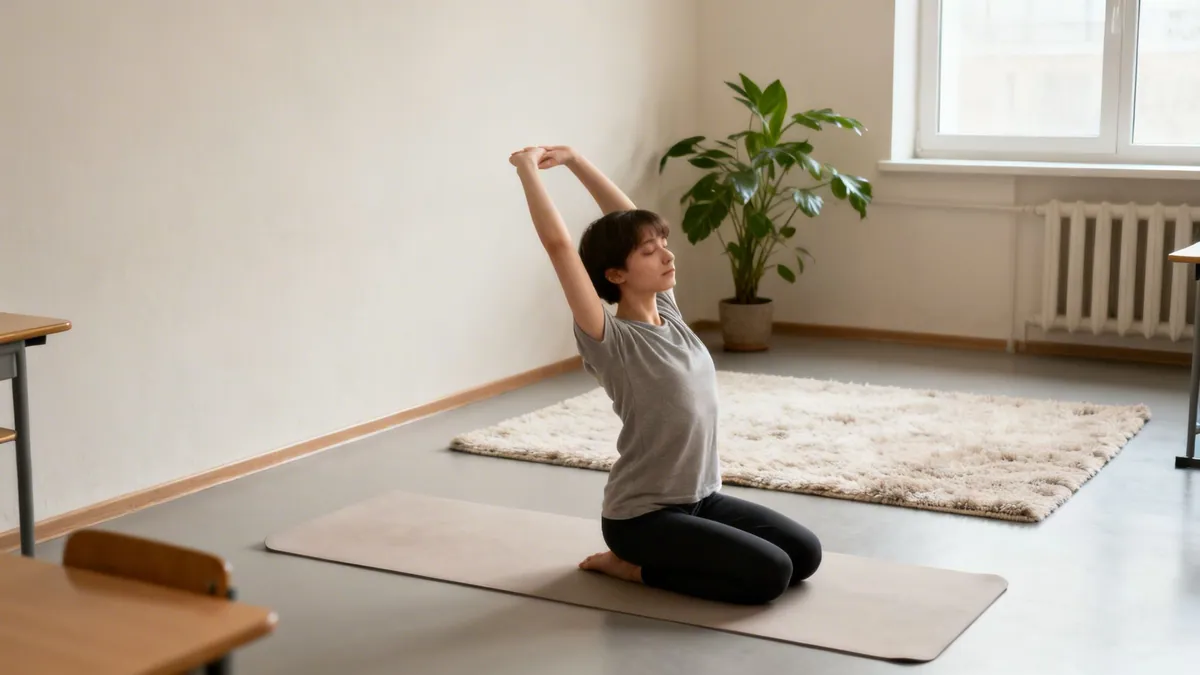
2. Mindful Movement and Body Scanning
Mindful movement integrates physical activity with present-moment awareness, helping individuals connect their minds and bodies. This practice is a powerful example of self-regulation as it teaches learners to notice physical sensations like tension, tightness, or relaxation without judgment. By paying attention to the body through simple stretches, yoga, or systematic body scanning, individuals gain conscious control over their physiological state and learn to release stored stress.
This approach is particularly effective because it addresses the physical manifestation of emotions. When we feel anxious or angry, our muscles often tense up. Mindful movement provides a direct pathway to interrupt this cycle, offering a physical outlet that simultaneously calms the nervous system. Whether through a "brain break" in the classroom or a guided relaxation session at home, it builds interoceptive awareness, the ability to sense what is happening inside your own body.
The belly breathing technique is one of the simplest, most powerful tools we have for calming the nervous system. It’s all about swapping shallow chest breathing for deeper, more efficient breaths that engage the diaphragm. By inhaling to expand the abdomen and exhaling to contract it, you kickstart the body’s natural relaxation response.
What Is Belly Breathing and Why Does It Work So Well
Diaphragmatic breathing, which we often call the belly breathing technique, is how our bodies are naturally designed to breathe. It’s what you see babies do instinctively. But as we get older, life’s stresses and constant tension often cause us to switch to shallow "chest breathing" without even realizing it.
When we feel anxious, rushed, or overwhelmed, our breathing tends to become quick and high up in the chest. This pattern sends a direct signal to our nervous system that we're on high alert, locking us into a state of "fight or flight." Belly breathing flips that switch. By intentionally slowing down and deepening your breaths, you send a message back to your brain that everything is okay.
The Power of Conscious Breathing
This simple act of focusing on your breath engages the diaphragm, a large dome-shaped muscle at the base of your lungs. When you inhale deeply, your diaphragm moves down, creating more room for your lungs to fill with air. This movement directly stimulates the vagus nerve, a crucial part of the parasympathetic nervous system—your body's "rest and digest" command center.
The real power of the belly breathing technique lies in its ability to serve as a physiological reset button. It’s not just about feeling calm; it's about actively changing your body's stress response from the inside out.
For parents and educators, this is a total game-changer. Imagine a child who can calm themselves down before a big test. Or a classroom that can smoothly transition from the chaos of recess to quiet, focused learning. This isn't just a nice idea; it's a trainable skill. For example, a teacher can lead a one-minute "Belly Buddy" session before starting a math lesson to help students settle their minds and bodies.
Historical Roots and Modern Benefits
This practice is anything but a new-age fad. A focus on deep, intentional breathing has roots going back centuries. In the 1800s, the explorer George Catlin observed that Native American communities who consistently practiced nasal breathing showed remarkable health, from strong jaws to overall vitality. He documented these observations in his book, 'The Breath of Life,' directly linking their wellness to how they breathed.
Before we dive into the "how-to," it’s helpful to get a bigger picture by understanding the critical differences between nasal and mouth breathing and how they affect our health. When you teach a child this foundational skill, you're giving them a tool they can use for life. It helps them to:
Reduce anxiety and stress by lowering cortisol levels.
Improve focus and attention, which is crucial in academic and social settings.
Foster emotional regulation and build self-control.
Mastering this one technique can set the stage for a more peaceful and productive environment, both at school and at home.
How to Guide Your Child Through Belly Breathing
Before you can teach the belly breathing technique to a child, it’s a good idea to get a feel for it yourself. We can't pour from an empty cup, after all. Modeling a sense of calm is always the first, most important step.
Find a comfortable spot, either sitting up straight or lying on your back. Place one hand on your chest and the other right on your belly, just below your ribs.
Now, take a slow, deep breath in through your nose. The goal is to feel the hand on your belly rise up, while the hand on your chest stays mostly still. As you exhale slowly, just feel your belly fall. That simple motion means you’re engaging your diaphragm. Once you can feel this in your own body, you'll be so much more confident and authentic when guiding a child.
Making Belly Breathing Fun for Kids
Let's be real—kids learn best through play and imagination. Dry, clinical instructions just won't cut it. To make the belly breathing technique stick, we need to turn it into a gentle, playful activity using visuals and language they can connect with.
Here are a few activities I’ve found work wonders at home or in the classroom.
The Breathing Buddy Activity
This is a classic for a reason—it’s fantastic for younger kids (think Pre-K to 2nd grade) because it makes the breath visible.
Practical Example: A parent can use this as part of a bedtime routine. After story time, say, "Let's put Teddy on our tummies and rock him to sleep." This creates a calm, focused transition toward sleep.
First, have the child lie down comfortably on their back, maybe on a rug or mat. Ask them to pick a small stuffed animal or a favorite lightweight toy to be their "Breathing Buddy."
Then, have them place their little buddy right on their tummy. Their one special job is to rock their buddy to sleep using only their breath.
You can guide them with a simple script: "Take a slow, quiet breath in and feel your tummy lift your buddy up toward the ceiling. Now, breathe out slowly and watch your buddy gently float back down." This turns an abstract feeling into a concrete result they can actually see.
Balloon Belly Breathing
This visualization is a game-changer for helping kids understand the idea of filling their abdomen with air. It’s effective for a wide age range, from kindergarteners all the way to older elementary students.
Practical Example: A teacher notices the class is getting restless during a long lesson. She says, "Okay everyone, hands on your bellies! Let's blow up our green balloons three times. Ready? Breathe in… and whoosh it out." This 30-second break resets the room's energy without disrupting the lesson plan.
Start by having them place their hands on their belly. Then, you can say something like, "Pretend there's a small, empty balloon deep inside your tummy. When you breathe in slowly through your nose, imagine you're filling that balloon up with air, making your belly get bigger and rounder."
"Now, as you breathe out slowly through your mouth, let all the air whoosh out of the balloon, making your tummy get smaller again." To make the imagery even more vivid, you can ask them to pick a color for their balloon. This gives a child a powerful tool to how to self-soothe in moments of big feelings or stress.
Teacher Tip: I love using this as a quick reset after a loud transition or a chaotic moment. Just three "Balloon Belly" breaths can help an entire class settle down and refocus their energy for the next lesson.
Simple Scripts and Visual Cues
Having a few go-to scripts in your back pocket makes it easy to introduce the belly breathing technique anytime, anywhere. Here are two of my favorites that work just as well one-on-one as they do in a group.
Smell the Flower, Blow Out the Candle
This sensory-based script is incredibly intuitive for most kids.
Practical Example: A child is getting upset because they can't get their shoes tied. The parent can kneel down and say, "Whoa, that's frustrating. Let's pause. Smell this beautiful rose with me… now blow out this birthday candle very slowly." This physical interruption breaks the frustration cycle.
For the inhale: "Imagine you're holding a beautiful flower. Bring it up to your nose and take a long, slow sniff to smell its wonderful scent. Let the air fill up your whole belly."
For the exhale: "Now, pretend you have a birthday candle in front of you. Purse your lips and blow the air out slowly and gently to make the flame flicker, but don't blow it all the way out just yet!"
That visual distinction between a sharp puff of air and a slow, controlled exhale is crucial. For kids struggling with emotional regulation, learning to extend their exhale is a powerful skill.
Belly Breathing Cues for Different Age Groups
The language we use matters. A cue that works for a second-grader might go right over a preschooler's head. It's helpful to have a few age-appropriate phrases ready to go.
Here are some simple, effective cues tailored for different developmental stages.
Age Group
Verbal Cue or Activity
Focus
Preschool (3-5)
"Let's pretend we're sleeping lions. Take a big, quiet breath in, then a long, sleepy sigh out."
Making it a game, connecting to familiar concepts (animals).
K-2nd Grade (5-8)
"Put your hands on your tummy. Can you make your hands go for a ride on your 'breathing wave'?"
Concrete, sensory feedback (feeling hands move).
3rd-5th Grade (8-11)
"Imagine your belly is a balloon. Breathe in to fill it up, breathe out to let the air out slowly."
Introducing simple visualization and control.
6th-8th Grade (11-14)
"Let's try 4-4-4 breathing. Inhale for 4, hold for 4, exhale for 4. Focus on the belly rising and falling."
Introducing structure and more advanced self-regulation techniques.
These are just starting points, of course. The best cue is always the one that resonates most with the child in front of you. Feel free to get creative and adapt the language to their interests
The Science Behind a Calmer Nervous System
Have you ever noticed how taking a few deep breaths can change your entire mood in seconds? It’s not just a feeling; it’s a powerful biological process at work. The belly breathing technique is like a direct line to your body's control center—the autonomic nervous system.
This system has two main modes. The first is the sympathetic nervous system, our "fight-or-flight" response, which kicks into high gear during stress. Then there's the parasympathetic nervous system, our "rest-and-digest" mode, which is all about calm and recovery.
When a child (or an adult, for that matter) feels stressed, anxious, or upset, their body is stuck in fight-or-flight. Their heart beats faster, breathing becomes short and shallow, and the body is flooded with stress hormones like cortisol. The belly breathing technique acts as a manual override for this entire response.
Engaging the Vagus Nerve
The secret ingredient here is the vagus nerve. It's the longest cranial nerve in the body and essentially runs the show for the parasympathetic nervous system. When you take a slow, deep breath that makes your belly expand, you're physically stimulating this nerve.
This simple action sends a signal straight to the brain: "It's safe to relax now." In response, the body gets the message to slow the heart rate, lower blood pressure, and ease up on cortisol production. It's a fascinating look into the mechanics of calming your nervous system through the vagus nerve.
By teaching a child this breathing technique, you are giving them a remote control for their own nervous system. It’s not a magic trick; it is a tangible, science-backed tool for self-management.
The Proven Impact on Respiratory Function
This isn't just theory; the physical benefits are real and measurable. Conscious, deep breathing makes our lungs work more efficiently. Over time, it can actually retrain the body to use a calmer, more effective breathing pattern even when at rest.
For instance, one four-month study with adolescents showed that regular practice led to a 10.96% increase in their tidal volume—that’s the amount of air moved with each breath. Their breathing frequency also slowed down by 11.47%, a clear shift away from rapid, shallow breathing. These findings show how consistent practice creates lasting change, and you can dig into the details in the full study on respiratory intervention outcomes.
Practical Examples in Action
Let’s see how this science plays out in a real school or home setting.
Before a Test: A student feels their heart pounding. The teacher says, "Okay class, before we start, let's take five deep belly breaths together." This activates their parasympathetic nervous system. Their heart rate slows, their mind clears, and they can finally access the information they studied instead of being blocked by test anxiety.
After Recess: A group of third-graders bursts into the classroom, loud and buzzing with energy. The teacher guides them through two minutes of "Balloon Belly" breathing. This collective sigh brings the energy down, cools off lingering playground squabbles, and gets their brains ready for focused learning.
Sibling Squabble: Two siblings are arguing over a toy. A parent intervenes and says, "Freeze. Everyone, let's do three Dragon Breaths." They inhale deeply and exhale with a loud 'whoosh.' The shared physical action breaks the tension, and they can address the problem more calmly.
These everyday moments are where the belly breathing technique proves its worth as a core emotional wellness tool. Learning to manage the body’s stress response is one of the most important self-regulation strategies for students we can possibly teach.
Weaving Belly Breathing into Daily Routines
The real power of the belly breathing technique isn’t in doing it once in a while; it’s in making it a habit. When kids practice consistently, they build a deep-rooted skill for self-regulation that they can turn to automatically. The goal is to make it as natural as brushing their teeth.
By weaving these quick exercises into existing schedules, you give children small pockets of calm throughout their day. This practice can be proactive—building resilience before stress hits—and reactive, offering instant relief in a tough moment.
Bringing Belly Breathing into the Classroom
Classrooms are busy places, full of transitions and shifting energy levels. A consistent belly breathing technique practice can anchor the day, creating a more predictable and focused atmosphere for everyone. It doesn't take much time, just a little intention.
Here are a few moments where you can easily slip it in:
Morning Meeting Kickstart: Start the day with just one minute of guided belly breathing. Practical Example: The teacher says, "Good morning, everyone! Let's start our day by waking up our bodies. Place a hand on your belly and let's take three slow breaths to get ready for a great day."
Post-Recess Reset: The jump from playground energy to quiet work can be a challenge. Use "Balloon Belly" breathing to help the class collectively exhale the chaos and settle their bodies.
Pre-Test Focus: Before a test or big assignment, lead the class through 3 to 5 deep belly breaths. This simple act can slow racing hearts, ease anxiety, and help students think more clearly.
By normalizing these brief pauses, you're not just managing classroom behavior; you're teaching a fundamental life skill. You're showing students that they have the power to manage their own energy and emotions.
Creating a Classroom Peace Corner
A designated "Peace Corner" or "Calm-Down Spot" gives students a safe, physical space to go when they need to practice their breathing skills. This isn’t a timeout for punishment. It’s a supportive spot for self-regulation.
Setting one up is simple:
Find a Quiet Spot: Look for a small, low-traffic area in your classroom.
Make it Comfy: Add a soft rug, a few cushions, or a beanbag chair.
Stock It with Tools: Include "breathing buddies" (small stuffed animals), laminated cue cards ("Smell the Flower, Blow Out the Candle"), or a glitter jar for focus.
Set Clear Expectations: Teach students that this is a place to go when they feel overwhelmed or upset. It’s a tool to help them reset before rejoining the group. Practical Example: A student who is visibly frustrated after a group activity can choose to go to the Peace Corner for two minutes to do "Breathing Buddy" breathing before re-engaging.
This small corner empowers students to take ownership of their emotional state. Knowing how to create these supportive environments is a key part of teaching mindfulness to children in a way that truly sticks.
Using Belly Breathing at Home
For parents, the belly breathing technique can transform challenging family moments and build deeper connection. It becomes a shared tool for navigating the inevitable ups and downs of life together.
Consider these opportunities to practice as a family:
Bedtime Wind-Down: Lying in bed is the perfect time to practice with a breathing buddy on the tummy. A few minutes of quiet belly breathing can ease the transition to sleep, especially for kids whose minds race at night.
Homework Frustration Breaker: When you see frustration building over a tricky math problem, pause everything. Say, "Let's take three dragon breaths together," and guide them through a slow inhale and a powerful "whoosh" exhale.
Pre-Game Jitters: Before a soccer game, recital, or any big performance, find a quiet moment to breathe together. Practical Example: In the car on the way to the recital, the parent can say, "I see you have some butterflies in your tummy. Me too! Let's tell them to calm down. Let's do three 'flower breaths' together."
When you model this yourself during your own moments of stress, you send a powerful message: this is a tool for everyone in the family.
We’ve all been there—listening to someone talk, but our minds are busy formulating a reply, offering a solution, or just waiting for our turn to speak. Empathetic listening asks us to do something different. It’s the art of tuning into the feeling behind the words, not just the words themselves.
This kind of listening is all about connection over correction. It’s about creating a safe space where someone can be truly heard.
Defining Empathetic Listening in Education
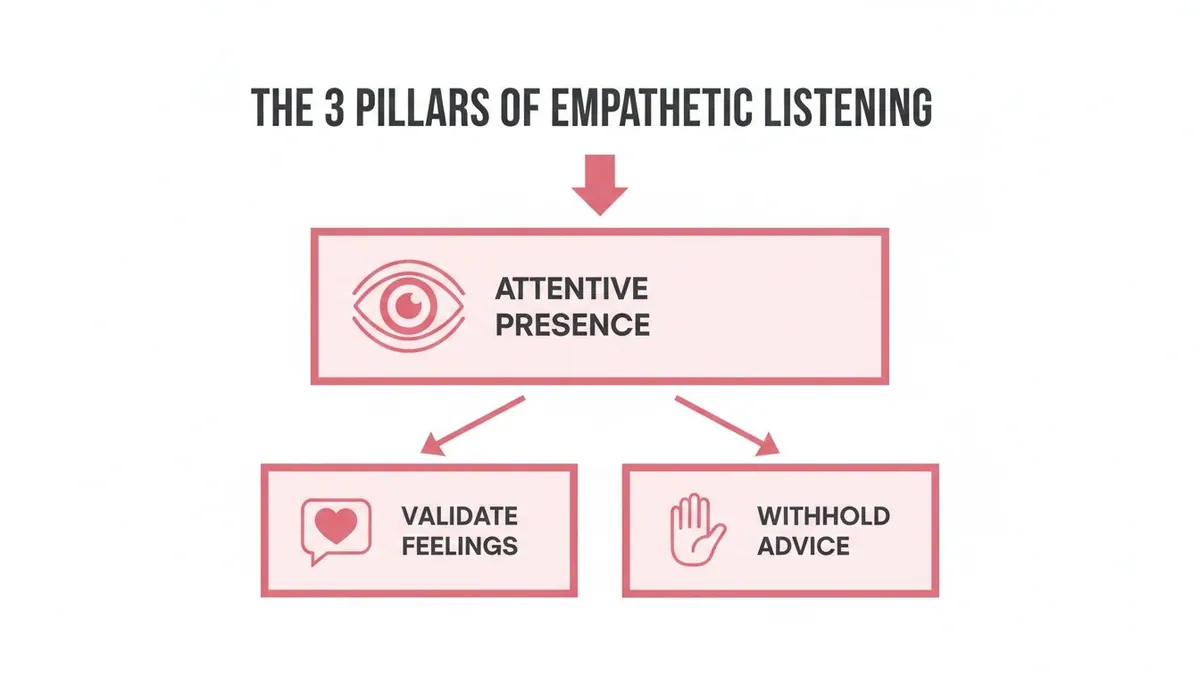
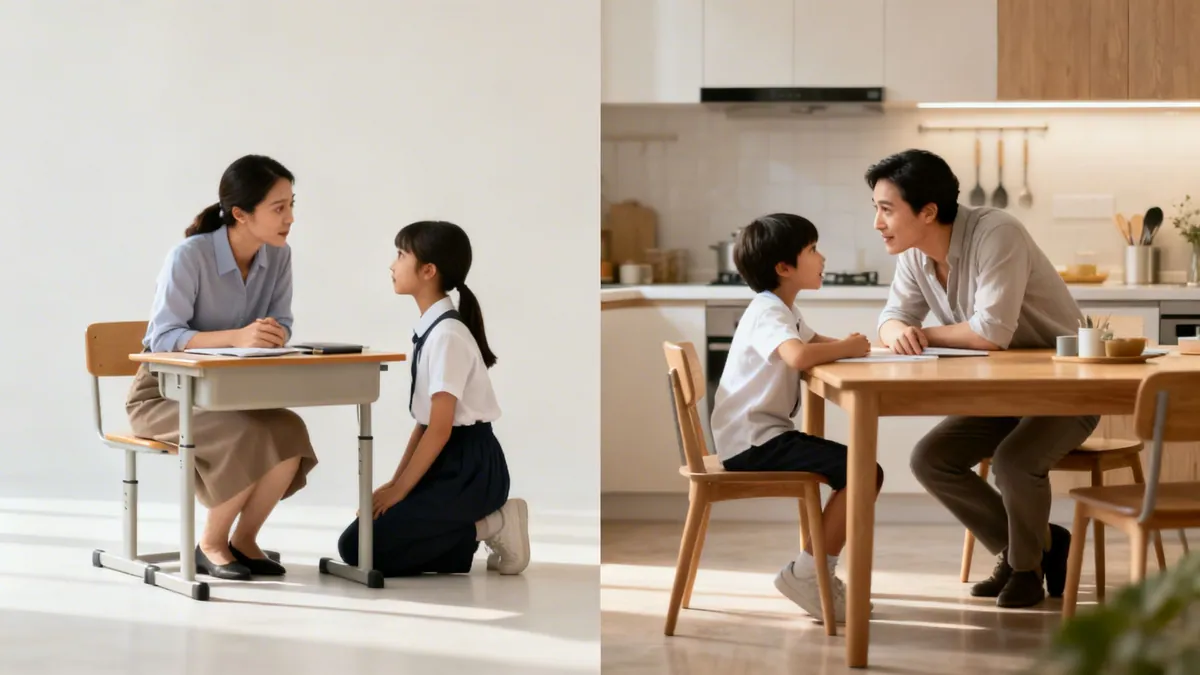
To really define empathetic listening, try thinking of yourself as an “emotional detective” instead of a “problem solver.” Your first job isn't to fix anything or give advice. It's simply to understand and acknowledge the speaker's emotional state, which is the secret to building trust and psychological safety.
This skill is a cornerstone of effective social-emotional learning (SEL). When students feel genuinely heard and understood, they’re far more likely to open up, take healthy risks, and form real relationships with their peers and the adults in their lives.
Listening to Connect, Not Just Comprehend
There’s a big difference between empathetic listening and other ways we listen. It isn’t passive listening (where we’re just hearing sounds) or even active listening (which often focuses on remembering facts to repeat back). Empathetic listening goes deeper, tuning into the feelings simmering just below the surface.
For educators and parents, getting this right is a game-changer for building strong relationships. The foundation of strong interpersonal skills is this kind of genuine understanding.
Think about this common classroom moment:
Student: "I'll never finish this history project. It's just too much work, and I don't even know where to start."
Active Listening Response: "So, you're saying the project feels too big and you need a plan. Let’s break it down into smaller steps."
Empathetic Listening Response: "It sounds like you're feeling really overwhelmed and maybe a little stuck. That’s a tough feeling when you're facing a big project."
See the difference? The active listening response is helpful, but it jumps right to solving the problem. The empathetic response first acknowledges the student’s feeling of being overwhelmed. This small act of validation shows the student their feelings matter, opening the door to more productive problem-solving later.
By validating the emotion first, you create a space where the student feels safe enough to be honest about their struggles. This is the cornerstone of trust between a teacher or parent and a child.
This shift turns interactions from transactional to relational. It creates an environment where children feel secure enough to express themselves fully. The focus moves from just managing behavior to truly nurturing a child’s emotional well-being, which in turn supports their academic and social growth.
The Three Pillars of Empathetic Listening
To really get what empathetic listening is, it helps to think of it as a skill built on three core pillars. When educators and parents master these, they shift from just hearing a child's words to truly connecting with the feelings underneath. Think of these pillars as the foundation holding up a bridge of trust between you and a student.
This isn't about being passive; it's about being fully present and responsive. Instead of jumping in with advice or criticism, you create a space of genuine emotional safety. This sense of trust is the bedrock for building belonging in any school community.
Pillar 1: Attentive Presence
The first pillar is all about attentive presence. This means giving a child your complete, undivided attention, showing them with your body language that they are the most important thing in that moment.
It’s putting your phone down. It's turning away from the laptop. It's making eye contact that says, "I'm with you." Small cues like nodding or leaning in signal that you are fully engaged and ready to hear what they need to share.
Parent Example: Your child walks in from school, shoulders slumped. Instead of multitasking while asking what’s wrong, you stop what you’re doing, sit with them, and just say, “You look like you had a tough day. I’m here if you want to talk about it.” This simple act shows they have your complete focus.
Teacher Example: A student is lingering after class, clearly wanting to talk. Instead of tidying your desk, you can pause, turn your body fully toward them, and say, "I have a few minutes. What's on your mind?" This signals that they are your priority.
Pillar 2: Validating Their Feelings
Next up is validating their feelings, and this might be the most powerful step of all. It involves figuring out the core emotion the child is expressing and reflecting it back to them without any judgment.
Your goal isn't to agree or disagree with the situation, but simply to show that you understand their emotional reality. This is a crucial part of building emotional intelligence, as it teaches kids that their feelings are real, valid, and deserve to be heard.
Teacher Example: A student slams their book shut, exclaiming, “This is impossible!” Instead of correcting their attitude, you can say, “It sounds like you’re feeling really frustrated and stuck right now.” This names the emotion and shows you get it.
Parent Example: Your child is crying because they weren't invited to a birthday party. Instead of saying, "There will be other parties," try validating their hurt: "It feels so painful to be left out. I'm sorry you're feeling so sad right now."
Pillar 3: Withholding Premature Advice
The final pillar is withholding premature advice. For many adults, this is the hardest one. Our natural instinct is to fix things and solve problems for the kids we care about.
But jumping in with a solution too quickly can feel like a dismissal. It sends the unintentional message that their feelings are just an obstacle to be cleared away, not a valid experience to be processed.
Teacher Example: A student says, "I don't think anyone in my group likes my ideas." A problem-solving response is, "Let's find you a new group." An empathetic response is to pause, then say, "That sounds really discouraging. It’s hard to feel like your voice isn’t being heard."
Parent Example: Your teen complains, "I have too many assignments and I can't keep up." Instead of immediately creating a schedule for them, try saying, "It sounds like you're completely buried in work. That must be so stressful."
When you pause before offering solutions, you give the child space to work through their own feelings and sometimes even discover their own answers. Once they feel heard and validated, they become much more receptive to guidance. This patient approach builds resilience and empowers them to become stronger problem-solvers down the road.
Empathetic Listening vs Active Listening Key Differences
Though people often use the terms interchangeably, empathetic listening and active listening are two very different tools. Knowing when to use each one is a game-changer for parents and educators. It can be the difference between a child feeling truly heard and supported, or simply feeling… managed.
Think of it like having a toolkit for communication. You wouldn’t use a hammer to turn a screw, right? Same idea here.
Active Listening: Listening to Comprehend
At its core, active listening is about understanding information. The goal is to accurately hear and confirm the facts. When you listen actively, your mind is zeroed in on the details. You summarize what you’ve heard and ask questions to make sure you got it right. It’s perfect for those straightforward, get-it-done conversations.
This is the skill you pull out when the goal is purely about comprehension. It shines when a student needs to understand the steps for a project or when a parent needs to confirm the logistics of a weekend plan. It’s all about getting the details straight.
Teacher Example: A student seems confused about a homework assignment. Using active listening, the teacher might say, “Okay, let me repeat that back to make sure we’re on the same page. You’ll choose a historical figure, write one page on their major accomplishment, and find a photo. Did I get that right?”
Parent Example: A child is explaining their after-school plan. The parent listens and confirms, “So you’re going to Maria’s house, her mom will drive you home at 5 PM, and you need to finish your math homework there. Is that the plan?”
Empathetic Listening: Listening to Connect
On the other hand, empathetic listening is about connecting with emotion. Here, the facts take a backseat. Your goal isn’t to solve a problem or absorb a list of details; it’s to understand what the other person is feeling. This is where you build trust, create emotional safety, and show someone their feelings are valid.
When a student is upset about a playground argument, they don't need a step-by-step solution right away. They need to feel understood. Empathetic listening is the tool for that job.
This is your cue to set your problem-solving brain aside for a moment. Instead of asking, "What happened?" you might gently ask, "How did that make you feel?" It’s a subtle but powerful shift from information to emotion. Diving into different communication approaches, like exploring the art of listening, can add so much depth to our interactions with kids.
Teacher Example: A student is sitting alone after being left out of a game. An empathetic response sounds like, “It looks like you’re feeling really sad right now. It hurts to be left out.”
Parent Example: A teen is stressing about a big test. Instead of jumping to advice like, "Just study more," an empathetic parent might say, "It sounds like you're under a lot of pressure. That must feel really overwhelming."
This simple diagram breaks down the three pillars of empathetic listening. It's all about being present, validating feelings, and—this is the hard part—holding back the urge to give advice.
Empathetic Listening vs Active Listening Key Differences
To make it even clearer, let's break down the two side-by-side. This table highlights the primary goals, focus areas, and outcomes of each approach, helping you decide which tool is right for the moment.
Aspect
Empathetic Listening
Active Listening
Primary Goal
To connect and build emotional safety.
To comprehend and confirm information.
Focus
The speaker's emotions and feelings.
The facts and details of what is being said.
Your Role
A safe harbor for emotions.
A fact-checker ensuring accuracy.
Key Question
"How does that feel?"
"Did I understand that correctly?"
Best For
Relational conversations; offering support.
Transactional conversations; giving instructions.
Outcome
The speaker feels understood, validated, and safe.
The speaker feels heard and confident the message was received.
Both listening styles are incredibly valuable. The real skill lies in recognizing what a child needs in a given moment—is it a solution, or is it support? Choosing the right one builds stronger, more trusting relationships.
If you're looking to practice these skills, check out our guide with a great active listening activity you can easily adapt for your classroom or home.
How Empathetic Listening Transforms School Communities
When we bring empathetic listening into our schools, it’s not just about improving one-on-one chats. It’s a powerful tool that changes the whole feel of the campus. It builds psychological safety—that sense of trust where students feel comfortable enough to take a chance on a tough question, ask for help, or just be themselves without worrying about being judged.
This feeling of safety has a direct effect on how kids treat each other. It’s one of the most effective tools we have for resolving conflict and even preventing bullying. When a child learns to truly hear a classmate's side of things, even when they disagree, they’re taking the first real step toward kindness.
Building Safer and More Engaged Schools
Schools that make a point to teach and model this skill see real, noticeable changes. It creates an environment where students feel seen and heard, which is directly tied to better behavior and a powerful sense of belonging. The more connected kids feel to their school, the more they want to be a part of its success.
This shift sends ripples through the entire community. Research from BetterUp found that empathetic listeners build trust 40% faster just by using simple cues like eye contact and asking follow-up questions. In U.S. schools, programs that focus on these skills are linked to a 32% drop in behavioral issues. We've seen it in our own work, too—partnerships like Soul Shoppe's with the Junior Giants Strike Out Bullying program have been shown to cut student isolation by 38%. You can discover more insights about building trust through listening on BetterUp's blog.
This practice also deepens the teacher-student relationship, making the classroom a more cooperative and engaged space. When that connection is strong, academic achievement naturally follows. You can explore a deeper dive into how to improve school culture with these strategies.
By fostering an environment of active understanding, empathetic listening lays the groundwork for holistic approaches such as client-centered care, fundamentally reshaping how schools operate.
From Understanding to Positive Action
The benefits don't just stay within the school walls. As students and staff get better at hearing the emotions behind the words, they’re also building lifelong skills in problem-solving and collaboration. That ability to connect on a human level is what holds a positive community together.
Think about these key outcomes:
Reduced Conflict: When students can understand a peer's feelings, they're far less likely to turn to aggression or exclusion.
Increased Participation: Kids who feel safe and respected are more willing to share their ideas and join in on class discussions.
Stronger Resilience: Feeling understood helps students navigate tough times and bounce back from setbacks with more confidence.
Ultimately, empathetic listening is what turns a school from a simple collection of individuals into a truly connected community—a place where everyone feels like they belong.
Empathetic Listening Examples for Teachers and Parents
Understanding the definition of empathetic listening is the easy part. The real work comes when you’re face-to-face with a frustrated child and have to put it into action. The secret is to resist the urge to jump in and solve the problem, and instead, focus on validating the feeling behind it.
Let's walk through a few real-world examples. Pay attention to how the empathetic responses avoid giving advice and instead focus on naming the child's emotion first. This simple shift is often the key to helping a child feel truly seen and heard.
Scenario 1: In the Classroom
Imagine a student slumped in their chair, pushing their math paper away. They’re visibly upset and mutter, “I’m just bad at math. I can’t do this.”
What to Avoid: "Don't give up, just try again. It's not that hard if you focus." This kind of response dismisses their frustration and can make them feel even more defeated.
What to Say Instead: "I can see how frustrating this problem is for you. It feels like you’ve hit a wall, and that's a really tough feeling." This response acknowledges their struggle and opens the door to connection and support.
When educators move from simply hearing to truly listening—asking things like, "What part feels impossible?"—it makes a massive difference. In fact, students who feel genuinely heard are 25% more likely to ask for help and stick with a challenge. Over Soul Shoppe's 20+ years of work, schools that adopt these methods have seen a 40% drop in student isolation reports. You can dive deeper into this topic by reading this insightful article from EdTechReview on teaching students to listen with empathy.
Scenario 2: At Home
Your child storms in after a fight with a friend over a toy. They slam their door and yell, “It’s not fair! Alex took my favorite car and wouldn’t give it back!”
The goal of empathetic listening is to communicate: "Your feelings make sense, and I am here with you." It doesn’t mean you agree with their behavior, only that you understand the emotion driving it.
This validation is everything. It shows them their feelings are legitimate, which helps calm their reactive brain and allows them to think more clearly about what happened.
Here’s how to handle it:
What to Avoid: "You two need to learn how to share. It's just a toy." This response minimizes their feelings and immediately jumps into a lecture, which almost guarantees they’ll shut down.
What to Say Instead: "It sounds like you're really angry because you felt it wasn't fair when Alex took the car. Is that right?" This reflects back their feeling (anger) and the reason for it (unfairness), showing them you’re connecting with their experience.
Once your child feels their anger has been heard and accepted, you can then gently guide them toward a solution. Try asking something like, "That sounds so frustrating. What do you think should happen next?" This approach not only empowers them to solve their own problems but also builds a stronger, more trusting relationship between you.
Simple Activities to Practice Empathetic Listening