Self-regulation is the cornerstone of learning, resilience, and emotional well-being. It is the core ability to manage emotions, thoughts, and behaviors to achieve a specific goal. But what does it actually look like in practice, especially in a busy classroom or a hectic home environment? For many parents and educators, moving from abstract theory to tangible action can feel like a significant challenge.
This guide is designed to bridge that gap. We will provide clear, actionable examples of self-regulation that work for students across different ages and settings. Instead of just theory, you'll get specific tactics you can implement immediately.
We will break down seven powerful techniques, from in-the-moment breathwork to long-term problem-solving skills. Each section includes practical scripts, quick implementation tips, and brief notes on how to teach or reinforce each skill. By the end of this article, you will have a toolkit of replicable strategies to help children build the emotional intelligence they need to handle challenges and succeed. Let's dive into the first powerful example of self-regulation.
1. Breathwork and Mindfulness (Deep Breathing, Box Breathing, and Present-Moment Awareness)
Breathwork and mindfulness are foundational self-regulation strategies that directly influence the body's physiological stress response. By consciously controlling our breathing, we can activate the parasympathetic nervous system, which slows the heart rate and creates a sense of calm. This technique is a powerful example of self-regulation because it provides an immediate, accessible tool for managing overwhelming emotions like anxiety, anger, or frustration.
Mindfulness expands on this by training the brain to focus on the present moment without judgment. It helps children and adults notice their thoughts and feelings as temporary events rather than getting swept away by them. This builds the mental muscle needed to pause before reacting, a core component of emotional control. Combining these two practices offers both an in-the-moment rescue tool (breathwork) and a long-term preventative skill (mindfulness).
Strategic Breakdown and Implementation
Why It Works: Deliberate, slow breathing sends a signal to the brain that there is no immediate danger, counteracting the "fight or flight" response. This is especially effective for children, whose nervous systems are still developing. Simple diaphragmatic breathing, often called belly breathing, is a great starting point. To learn more about this specific technique, you can explore this detailed guide on the belly breathing technique.
When to Use It:
Proactively: Before known triggers, like a test, a public speaking event, or a difficult conversation. For example, a teacher can lead the class in one minute of quiet breathing before a math quiz.
Reactively: When feeling overwhelmed, angry, anxious, or unable to focus. For example, a parent can say, "I see you're getting frustrated. Let's take three deep 'lion breaths' together."
Routinely: As a daily practice to build baseline resilience and emotional awareness. For example, starting each morning with "Five Finger Breathing" where a child traces their hand while breathing in and out.
Key Insight: The goal isn't to stop thoughts or eliminate feelings, but to notice them without getting stuck. Teach kids that their mind will wander-the "work" is gently bringing their attention back to their breath each time.
Actionable Examples and Prompts
For the Classroom (Ages 5-8): Use a visual like an animated "breathing bubble" on a screen or a physical Hoberman Sphere. Say, "Let's all be breathing buddies. Watch the ball get bigger as we breathe in through our noses, and see it get smaller as we breathe out of our mouths."
For Home (Ages 9-12): Introduce "Box Breathing" before homework or after a frustrating moment. Use a simple prompt: "Let's make a square with our breath. Breathe in for 4, hold for 4, breathe out for 4, and hold for 4. Let's trace the square in the air with our finger as we go."
For Teens: Encourage the use of guided meditation apps like Calm or Headspace for 5-10 minutes daily. Frame it as mental training for sports, academics, or managing social stress. Prompt: "Let's try a 5-minute guided session to hit reset before we start this next task."
2. Mindful Movement and Body Scanning
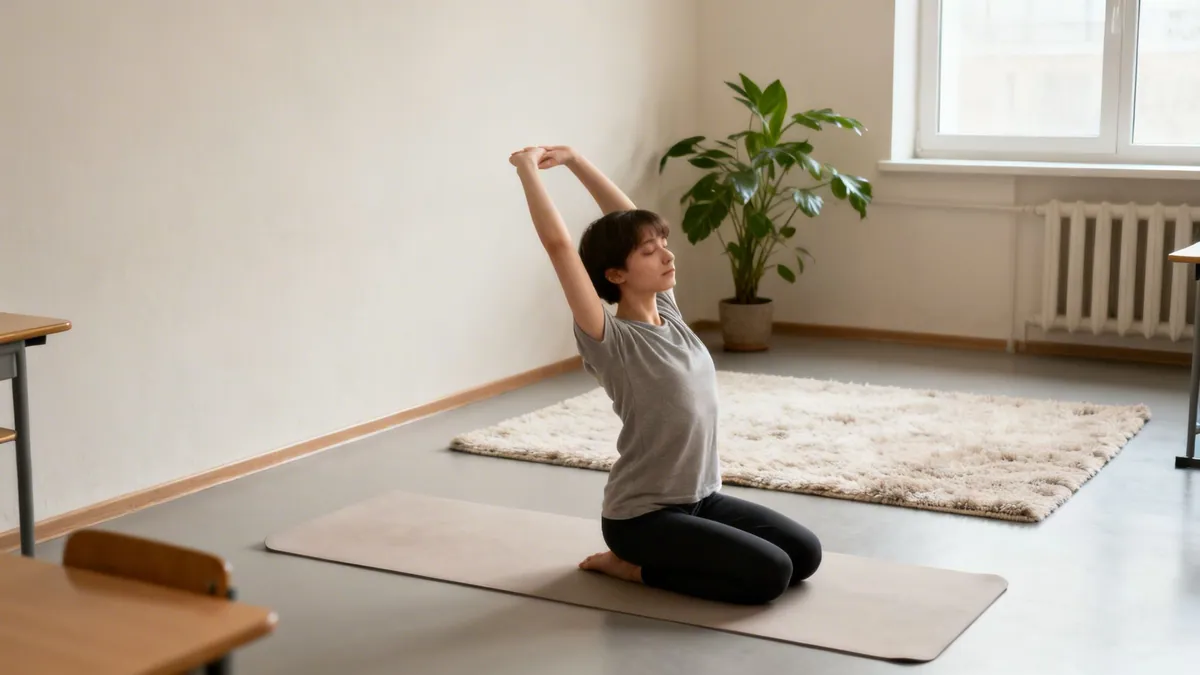
Mindful movement integrates physical activity with present-moment awareness, helping individuals connect their minds and bodies. This practice is a powerful example of self-regulation as it teaches learners to notice physical sensations like tension, tightness, or relaxation without judgment. By paying attention to the body through simple stretches, yoga, or systematic body scanning, individuals gain conscious control over their physiological state and learn to release stored stress.
This approach is particularly effective because it addresses the physical manifestation of emotions. When we feel anxious or angry, our muscles often tense up. Mindful movement provides a direct pathway to interrupt this cycle, offering a physical outlet that simultaneously calms the nervous system. Whether through a "brain break" in the classroom or a guided relaxation session at home, it builds interoceptive awareness, the ability to sense what is happening inside your own body.
Let's be real—getting kids to try a new calming technique isn't always smooth sailing. When you introduce the belly breathing technique, it’s perfectly normal to hit a few bumps. Some kids will feel silly, others will get distracted, and some might get frustrated if they feel like "it's not working" right away.
The secret sauce is always your own response. Your calm, patient, and encouraging attitude is the most powerful tool you have. If a child feels self-conscious, shift the energy. Instead of treating it like a serious chore, frame it as a quiet game or a secret superpower. You could whisper, "Let's see if we can make our breathing so quiet that no one even knows we're doing it!"
Troubleshooting Common Challenges
Sometimes, the physical part of the belly breathing technique is just tricky for little bodies to grasp. You'll see them trying really hard, but all you get is a puffed-out chest or even them holding their breath. This is incredibly common, but thankfully, it's also easy to address with a few simple tweaks.
If a child is struggling to feel their belly move, one of the best things you can do is have them lie down on their back. Gravity helps make the diaphragm's movement much more noticeable this way. This is the perfect time for the "Breathing Buddy" activity, where the rise and fall of a small stuffed animal gives them clear, visual proof that they're doing it.
Remember, the goal is always practice, not perfection. Create a supportive atmosphere where it’s safe to be a beginner. Celebrate the effort a child makes, not just the outcome.
Practical Fixes for Reluctant Kids
So, what happens when a child just flat-out refuses to practice? The key is to meet their resistance with curiosity and play, not force. Instead of a direct command, you'll need to pivot your approach.
Here are a few scenarios I've seen time and time again, along with solutions that work:
The Problem: A student loudly declares, "This is boring!"
The Solution: Turn it into a sensory game. Ask, "What color is your breath today? Can you imagine breathing in a cool, blue color and breathing out a warm, red one?" This gives their busy mind something interesting to focus on.
The Problem: A child is fidgety and just can't seem to stay still.
The Solution: Build gentle movement right into the practice. Try "Snake Breaths"—inhale deeply through the nose, then let out a long, slow, satisfying "hisssssss." This engages their body and naturally extends the exhale.
The Problem: A student insists, "I can't feel it!"
The Solution: Use tactile cues to make it concrete. Have them place their own hands on their belly. You can even gently place your hand over theirs and say, "Let’s see if we can make my hand go for a little ride."
Having a few of these playful strategies ready to go can help you navigate resistance and empower children to connect with the power of their own breath. These are just a few of the many simple but highly effective anxiety coping skills for kids that can make a profound difference.
Answering Your Top Belly Breathing Questions
Once you start introducing belly breathing, you’ll find that kids (and other adults!) have questions. That’s a great sign—it means they’re curious and engaged. Having some go-to answers ready will help you guide them with confidence, whether you’re a parent at home or an educator in a busy classroom.
One of the first questions that comes up is about timing. How long should we be doing this? For an in-the-moment reset—when feelings are big or stress is high—just three to five deep belly breaths can work wonders. It’s a quick and powerful way to calm the nervous system.
When you’re trying to build a new habit, the goal shifts a bit. Aim for a consistent daily practice, maybe for three to five minutes. The key is always consistency over duration. A few minutes every day is far more effective than one long session once a week.
Age and Practice Differences
Another common question is about the right age to start. You can introduce the belly breathing technique to kids as young as three or four, and you might be surprised at how quickly they pick it up! For little ones, keep it playful and concrete. The "Breathing Buddy" activity is perfect because they can see and feel it working.
As kids get older, you can start explaining more of the "why" behind the practice. Helping them understand how this simple breath can calm their bodies gives them a powerful tool for life. It’s a skill that scales beautifully from toddlers to teens.
So, how does this fit in with other mindfulness practices?
Belly breathing is a foundational breathwork technique. It focuses specifically on the physical mechanics of using the diaphragm to directly influence the nervous system and trigger a relaxation response.
While it’s definitely a form of mindfulness, other practices might involve a broader awareness of thoughts, feelings, or sounds without such a direct focus on the breath's mechanics. Think of belly breathing as the most direct physical tool in your mindfulness toolkit. It’s an incredible first step for teaching children how their bodies and minds are connected.
At Soul Shoppe, we believe in equipping children with practical tools for emotional well-being. Our programs help build resilient, empathetic school communities where every child can thrive. Learn more about bringing our social-emotional learning resources to your school.
In a world demanding more than just academic knowledge, social and emotional intelligence is no longer a 'nice-to-have'—it's a fundamental pillar of a child's success and well-being. The term 'social emotional learning strategies' can feel abstract, but at its core, it's about giving students tangible tools to navigate their inner worlds and build healthy relationships with others. For parents and educators, this means moving beyond generic advice and implementing practical, evidence-based practices that create environments where children feel safe, seen, and supported.
This comprehensive guide breaks down 10 powerful social emotional learning (SEL) strategies, offering a roundup of actionable steps, real-world examples, and age-appropriate modifications for K–8 students. Understanding the broader scope of social emotional learning, it’s crucial to recognize the importance of life skills education in fostering a child's complete development. From restorative circles in the classroom to emotion-naming exercises at home, each strategy is designed for immediate application.
Whether you're a teacher building a positive classroom culture, an administrator aiming to reduce behavioral issues, or a parent supporting your child's growth, this list provides a clear roadmap. We will explore specific, actionable techniques such as:
Mindfulness practices to improve self-regulation.
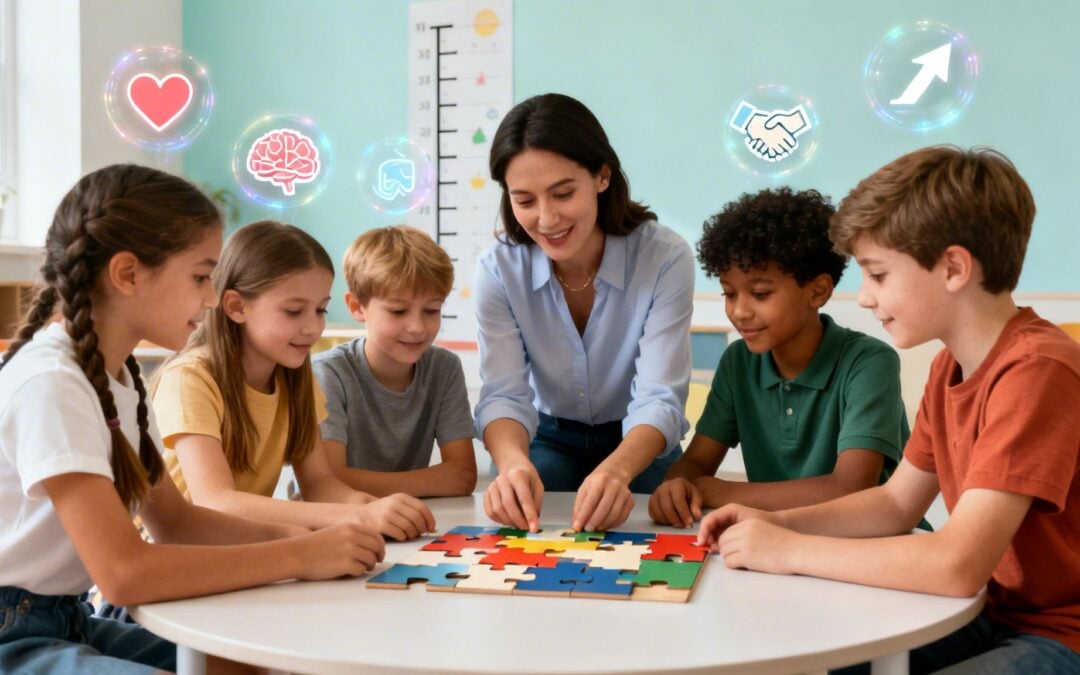
Collaborative group work to build social skills.
Conflict resolution frameworks to solve problems peacefully.
These strategies provide the "how" behind the "what," equipping you to nurture resilient, compassionate, and emotionally intelligent young people ready to thrive.
1. Mindfulness and Self-Regulation Practices
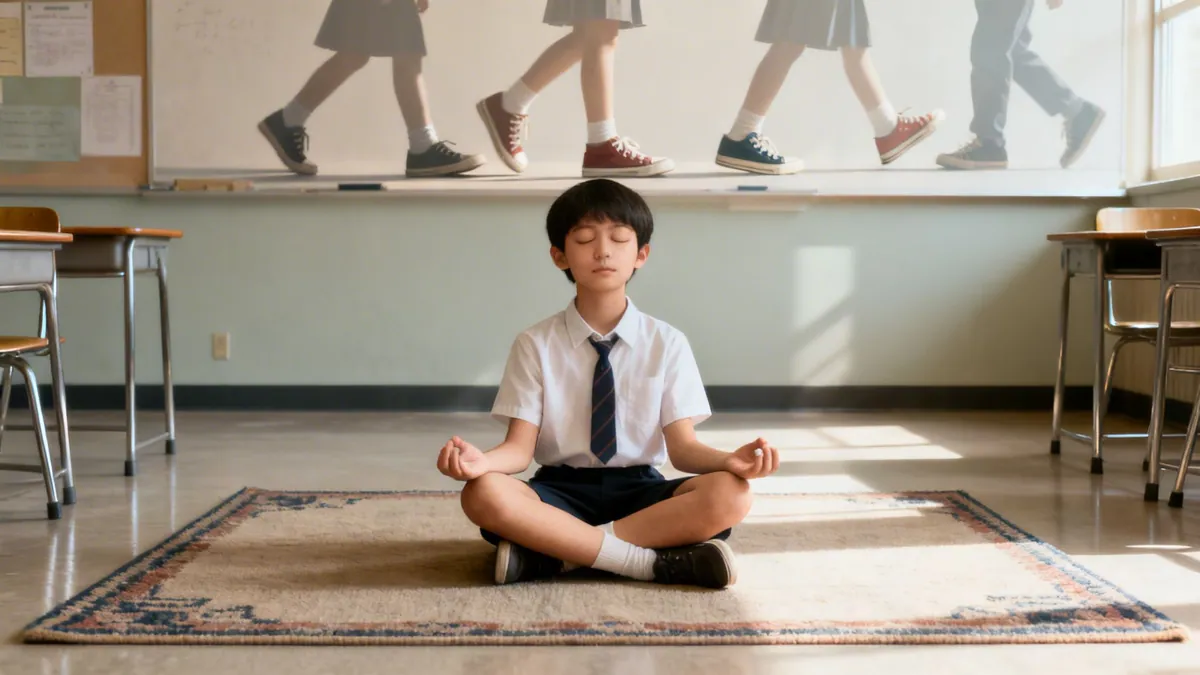
Mindfulness practices are structured exercises that guide students to pause, observe their thoughts and emotions without judgment, and build self-awareness. This foundational social emotional learning strategy involves simple techniques like focused breathing, body scans, and guided meditations. The goal is to help students move from a state of automatic reaction to one of thoughtful response, especially when facing emotional triggers like frustration or anxiety.
Research consistently shows that regular mindfulness practice reduces anxiety, improves focus, and builds emotional regulation skills. By incorporating these tools into the daily routine, educators and parents provide students with an internal toolkit for managing stress and navigating social challenges effectively. These are core competencies for thriving in school and life.
How to Implement Mindfulness
Successfully integrating mindfulness requires consistency and a supportive environment. Here are practical ways to bring these practices into your classroom or home:
During Transitions: Use a 2-minute "belly breathing" exercise when students return from recess to help them settle. Have them place a hand on their stomach and feel it rise and fall. Practical example: Tell students, "Let's all be balloon breathers. Breathe in slowly through your nose to fill your belly like a big balloon, then breathe out slowly through your mouth to let all the air out."
Morning Meetings: Start the day with a 'Mindful Monday' session. Play a short guided meditation from an app or lead a simple breathing exercise with a chime. Practical example: A teacher can say, "Let's start with three 'dragon breaths.' Breathe in deep, and on the exhale, stick out your tongue and let out a silent 'haaa' sound to breathe out all your morning worries."
Dedicated Calm Space: Create a "peace corner" or "calm-down spot" with soft pillows, calming visuals, and a few sensory items. Encourage students to use it when they feel overwhelmed. Practical example: A parent can set up a cozy chair at home and say, "This is your 'reset seat.' If you feel your frustration building, you can go there and squeeze this stress ball for a few minutes until you feel ready to talk."
Tips for Success
Start Small: Begin with very short practices (1-3 minutes) and gradually increase the duration as students become more comfortable.
Model the Behavior: Practice alongside your students and share your own experiences. Saying, "My mind was really busy today, but I noticed my breathing helped me feel a little calmer," normalizes the process.
Use Sensory Cues: A consistent sound like a bell, a visual anchor like a "breathing ball," or a simple verbal cue ("It's time for our mindful moment") can signal the start of the practice.
Offer Variety: To help students manage overwhelming emotions in the moment, teaching effective grounding techniques can provide immediate relief. Also, try different modalities, such as listening to calming music or focusing on a single object.
Restorative circles are facilitated conversations where students sit together to address conflicts, build community, and develop solutions collaboratively. This social emotional learning strategy shifts the focus from punitive consequences to repairing harm and strengthening relationships. Through peer conferencing and community-building circles, students learn to listen actively, express their needs, and practice perspective-taking in a safe, structured environment.
The core goal is to foster accountability, empathy, and community well-being. By giving students a voice in resolving issues, these practices build essential skills for communication and conflict resolution. Schools using restorative approaches often report fewer suspensions, reduced bullying, and a stronger sense of belonging among students.
How to Implement Restorative Circles
Effective implementation depends on creating a foundation of trust and consistency. Here are practical ways to introduce restorative practices:
Proactive Community Building: Begin with 'community circles' that are not tied to conflict. Use a talking piece and a simple prompt like, "Share one good thing that happened this weekend," to build trust and normalize the circle format. Practical example: At the start of class, a teacher can pass a small, smooth stone and say, "Whoever is holding the stone can share their favorite part of yesterday."
Response to Conflict: When a behavior incident occurs, a restorative conference can replace a traditional punishment. The facilitator guides students involved to answer questions like: "What happened?", "Who was affected?", and "What needs to be done to make things right?". Practical example: After two students argue over a game at recess, a teacher facilitates a circle where one student says, "When you took the ball, I felt angry because I was in the middle of a turn." The other student listens and then shares their side.
Daily Check-ins: Use morning circles in elementary classrooms for a quick connection. This provides a routine opportunity for students to share feelings and feel heard before the day’s lessons begin. Practical example: A second-grade class starts each day by going around the circle and sharing a "weather report" for their feelings (e.g., "sunny," "cloudy," "a little stormy").
By centering on dialogue and mutual understanding, these practices transform conflict into an opportunity for growth. This is one of the most powerful examples of prosocial behavior because it equips students with the tools to manage disagreements constructively, fostering a school culture rooted in empathy, respect, and community repair rather than retribution.
Practical Applications and Tips
To implement restorative practices, schools and parents can start with small, manageable conflicts and build capacity over time.
Start with Peer Mediation: Train a group of students as peer mediators to handle low-stakes conflicts. For example, two students arguing over a game could meet with a trained mediator who guides them to explain their perspectives and agree on new rules for sharing the game.
Establish Restorative Circles: Use restorative circles to address classroom-wide issues. If a student's property was damaged, the teacher could facilitate a circle where everyone, including the person responsible, discusses how it affected the class and what can be done to make things right. At home, a family meeting can resolve a sibling dispute over a shared toy.
Provide Comprehensive Training: Ensure teachers, administrators, and student mediators receive thorough training. A practical example is teaching them to use "I-statements" ("I felt hurt when…") instead of "you-statements" ("You were mean…") to de-escalate tension and create a safe environment for all participants. Learn more about the foundations of what restorative practices are in education.
6. Inclusive Friendship, Leadership, and Accessibility Advocacy
This advanced form of prosocial behavior moves beyond simple kindness to actively dismantling social and environmental barriers. It involves intentionally creating social opportunities, such as "lunch bunch" groups or shared-interest clubs, where students can develop friendship skills in a supported setting. More importantly, it empowers students, particularly those with disabilities or from marginalized groups, to become leaders who advocate for accessibility and inclusion, ensuring the school community is welcoming for everyone.
These initiatives combine direct social skill instruction with real-world advocacy. For example, a student accessibility committee might evaluate whether school events are sensory-friendly or a neurodiversity-affirming buddy system might pair students to navigate social situations together. This is one of the most impactful examples of prosocial behavior because it fosters both individual friendships and systemic change, creating a culture of genuine belonging.
Practical Applications and Tips
To cultivate this deep level of inclusion, educators must create structured opportunities that empower student voice and leadership.
Form Interest-Based Groups: Instead of labeling a group "social skills," a teacher can create a "Gaming Club" or "Art Crew." This recruits students based on genuine shared interests, reducing stigma and naturally fostering connection while a teacher provides social coaching on turn-taking and positive communication.
Empower Student Leadership: Create a student-led accessibility committee. Task them with conducting a "school walkthrough" to identify physical barriers (like a blocked ramp) or with creating a guide for inclusive recess games that kids in wheelchairs can play. This positions students as expert problem-solvers.
Teach and Model Advocacy: Provide students with sentence starters for advocating for themselves and others. A student can learn to say, "Could we try playing it this way so everyone can join?" or "I need a quiet space for a few minutes." A teacher models this by asking, "Is the music too loud for everyone?"
7. Gratitude and Appreciation Practices
Gratitude practices involve creating structured routines for students to notice and express appreciation for others' actions, character, or presence. From simple thank-you notes to daily gratitude circles, these habits shift focus toward recognizing the good in a community. This regular acknowledgment of others' contributions strengthens relationships, improves school climate, and helps students develop a more positive outlook.
These routines are powerful examples of prosocial behavior because they move beyond passive feelings of thankfulness and turn gratitude into an active, shared experience. When students consistently see and name the positive actions of peers and adults, it reinforces those behaviors and builds a culture of mutual respect and kindness.
Practical Applications and Tips
To cultivate gratitude, educators and parents can integrate simple, consistent practices into daily and weekly schedules.
Model Specific Thanks: Adults should model expressing genuine, specific gratitude. Instead of a generic "thanks," a parent could say: "Thank you, Sarah, for helping me carry in the groceries. That was really helpful and kind."
Create Gratitude Rituals: Establish a regular time for sharing. A teacher could create a "Harvest of Thanks" wall where students post gratitudes on paper leaves. At home, a family can start each dinner by having everyone share one good thing that happened that day.
Teach Meaningful Appreciation: Guide students to understand the difference between a general compliment and specific appreciation. A practical exercise is to have students write thank-you notes to a school custodian or lunch staff member, mentioning one specific thing they appreciate. For more ideas on how to foster this skill, explore these practical ways to show gratitude.
8. Peer Tutoring and Academic Support
Peer tutoring involves students providing academic help to their classmates, a process that merges teaching with relationship-building. This prosocial behavior not only boosts academic achievement for both the tutor and the tutee but also cultivates patience, empathy, and clear communication skills. Tutors often find they can explain concepts in a more relatable way, while also experiencing the personal reward of helping a peer succeed.
This practice is one of the most effective examples of prosocial behavior because it creates a supportive learning environment where students see each other as resources, not just competitors. When students teach students, they reinforce their own knowledge and build a stronger, more collaborative school culture.
Practical Applications and Tips
Educators and parents can create structured opportunities for peer tutoring to flourish, ensuring it's a positive experience for everyone involved.
Provide Tutor Training: Before starting, train tutors on more than just the subject matter. Teach them how to explain concepts in multiple ways, offer positive encouragement ("You're so close! Try it this way."), and practice patience. A simple role-play activity can help them practice.
Establish Clear Structures: Create formal programs like a "Homework Help Club" during lunch or after school. A great practical example is implementing "Buddy Reading," where a fourth-grade class partners with a first-grade class weekly to read books together and support literacy.
Recognize the Effort: Celebrate the contributions of tutors publicly. A teacher can acknowledge their hard work in a school assembly, a classroom newsletter, or with a "Tutor of the Month" certificate. This recognition validates their effort and encourages others to participate.
9. Community Service and Service-Learning Projects
Community service and service-learning projects involve student-led initiatives where young people address real community needs. These efforts go beyond simple volunteering by integrating meaningful service with structured reflection, directly connecting the prosocial action to specific learning outcomes. This approach helps students develop empathy for those they serve and a sense of personal agency in solving problems larger than themselves.
When students participate in a school-wide food drive or a neighborhood beautification project, they are not just helping; they are learning about social responsibility firsthand. These initiatives are powerful examples of prosocial behavior because they bridge the gap between abstract concepts like compassion and tangible, real-world action, building a foundation for lifelong civic engagement.
Practical Applications and Tips
To successfully implement service-learning, educators should focus on authentic needs and student ownership of the process.
Partner with Community Organizations: Connect with local groups to identify genuine needs. For instance, a class could partner with a local animal shelter to make chew toys for dogs or hold a blanket drive in the winter. This ensures the project has a real impact.
Encourage Student Leadership: Empower students to help identify the problem and design the solution. If students are concerned about litter on the playground, a teacher can help them research the issue, create posters, and organize a cleanup day.
Integrate Structured Reflection: Create consistent opportunities for students to discuss their experiences. Use journal prompts or classroom discussions after the activity. A teacher can ask, "How did it feel to help?" or "What did you learn about our community from this project?"
10. Mindfulness and Perspective-Taking Exercises
Mindfulness and perspective-taking exercises are structured practices that guide students to mentally place themselves in another person's situation. By using tools like guided visualization, literature discussions, and role-play, students can explore different viewpoints, feelings, and experiences. These activities help build the neural pathways necessary for empathy, allowing children to see beyond their own lens and reducing personal bias.
These skills are vital for developing a compassionate and inclusive mindset. When students regularly practice seeing the world from multiple viewpoints, they become more thoughtful and understanding peers. This makes it one of the most important examples of prosocial behavior because it directly cultivates the cognitive side of empathy, which is crucial for genuine connection.
Practical Applications and Tips
Educators and parents can integrate these exercises into daily routines to make perspective-taking a natural habit for children.
Model the Behavior: When a conflict arises, model curiosity about others' feelings. A parent can say, "I wonder what your brother was experiencing that made him get so upset," instead of assigning blame.
Use Literature and History: When reading a book, a parent or teacher can pause and ask, "What do you think that character is feeling right now? Why?" or "How would the story be different if it were told from the villain's point of view?"
Practice with Scenarios: Use social-emotional scenarios and ask probing questions. A teacher can present a situation like, "A new student is sitting alone at lunch." Then ask, "What might they be feeling?" and "What's one small thing you could do to help?" For more ideas, explore these powerful perspective-taking activities.
SEL lessons, literature/historical analysis, bias reduction work
Builds durable perspective-taking skills adaptable across contexts
Putting It All Together: Building a Culture of Prosocial Behavior
Throughout this article, we have explored a wide range of practical examples of prosocial behavior, from active listening in the classroom to community service projects that extend learning beyond the school walls. We've seen how simple acts, when intentionally taught and consistently reinforced, can build a foundation of empathy, cooperation, and respect. The journey from understanding these concepts to seeing them flourish in children is not about a single, grand gesture; it's about the cumulative power of small, consistent actions.
The examples provided, whether it's a second grader sharing their crayons without being asked or a seventh grader organizing a peer tutoring session, all point to a core truth: prosocial skills are not innate for everyone. They must be modeled, taught, and practiced. For educators and parents, this means creating an environment where these behaviors are the norm, not the exception.
Key Takeaways for Sustainable Change
Moving forward, the goal is to weave these threads into the fabric of your daily interactions. The most impactful strategies are those that become routine.
Consistency is Crucial: A one-off kindness assembly is a good start, but a daily gratitude circle at the beginning of class creates a lasting habit. When children see and experience prosocial actions every day, these behaviors become internalized.
Intentionality Drives Results: Don't just hope for kindness; plan for it. Structure a collaborative project with clear roles to teach cooperation. Explicitly teach conflict resolution steps instead of just intervening. Intentional teaching turns abstract virtues into concrete skills.
Modeling is Your Most Powerful Tool: Children are keen observers. When they see adults actively listening, admitting mistakes, and showing appreciation, they learn that this is how members of a community treat one another. Your actions provide the most compelling and memorable examples.
Start by selecting one or two strategies that feel manageable and relevant to your setting. Perhaps it's introducing a "buddy bench" on the playground or starting each family dinner by sharing one thing you are grateful for. As these small practices take root, they build momentum.
Strategic Insight: The most effective approach is creating a positive feedback loop. An act of kindness strengthens a relationship, which builds trust. A trusting environment makes children feel safe enough to take social risks, like offering help or standing up for a peer, which in turn generates more positive interactions. This cycle is the engine of a truly prosocial culture.
Ultimately, by providing children with a shared language for empathy and a toolbox of practical social skills, we do more than just improve classroom management or reduce bullying. We are equipping them with the essential tools for a connected, compassionate, and fulfilling life. These examples of prosocial behavior are not just items on a checklist; they are the building blocks of a better community and a more hopeful future.
Ready to bring a structured, engaging, and powerful social-emotional learning framework to your school? Soul Shoppe provides dynamic programs and practical tools designed to help students master the very skills discussed in this article, creating safer and more connected school communities.
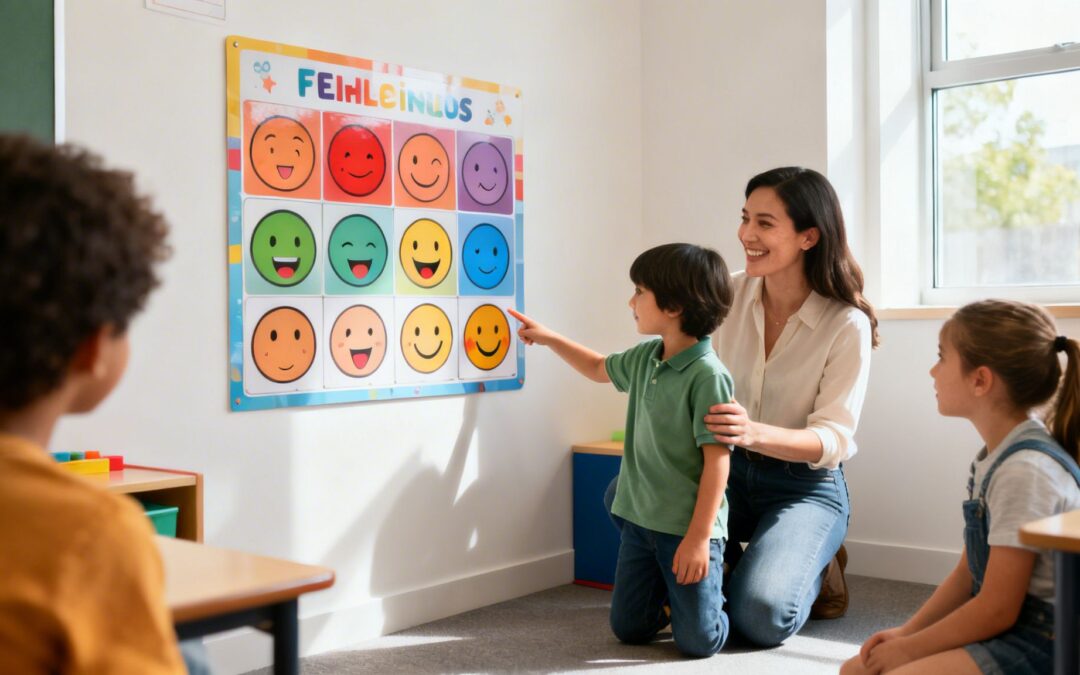
A feelings chart for kids is one of the simplest, most effective tools in the social-emotional learning (SEL) toolkit. You've probably seen them—posters with faces showing a range of emotions, from happy and excited to sad and frustrated. But they're so much more than just a piece of classroom decor.
A good feelings chart gives children a concrete way to identify, name, and begin to understand their own complex emotions. It provides a shared language for those big, messy internal experiences that can be so hard to put into words.
More Than a Poster: Why Feelings Charts Work
Think of a feelings chart as a bridge. It connects what a child is feeling on the inside to something tangible they can see, point to, and talk about. This simple act of giving an emotion a name and a face is a game-changer for building emotional intelligence.
When a child can match their internal storm to a word like "disappointed" or "worried," they take the first crucial step toward self-awareness. That feeling is no longer a scary, overwhelming force. It’s something real that can be understood and, eventually, managed.
Giving Kids the Words for Their Feelings
Imagine a first-grader with clenched fists and a scowl. They can't explain why they're upset. Maybe a friend didn't want to play, or they're struggling with a math problem. Without the right words, that frustration just builds.
This is where the feelings chart comes in.
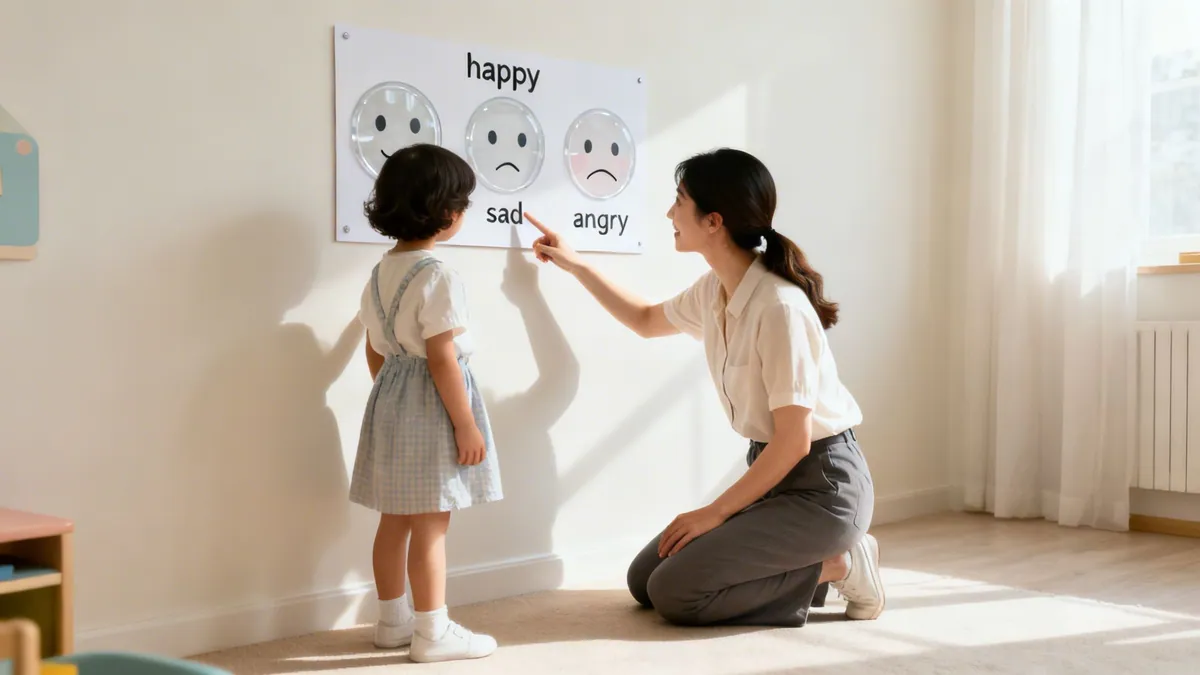
By gently guiding them to the chart, you can ask, "Can you show me which face looks like how you feel right now?" This one question opens the door. It helps the child shift from a reactive state of distress to a more expressive one. They're no longer just feeling the anger; they are starting to understand it.
The goal isn't just to get a label for the feeling—it's to validate it. When we acknowledge an emotion, we're telling a child, "What you're feeling is real, it's okay, and we can figure this out together." This builds the trust and psychological safety every child needs.
This growing vocabulary empowers kids to advocate for themselves. A child who once might have pushed or cried can begin to say, "I feel sad because I miss my mom," or "I'm worried about the assembly." You can learn more about naming feelings to help kids find the words they need in our dedicated guide.
Building a Foundation for Empathy and Self-Regulation
The benefits don't stop at self-awareness. When children get comfortable recognizing their own emotions, they get better at spotting them in others, too. This is the very foundation of empathy. They start to realize that their friends also have a rich, complex inner world.
For example, a teacher might say, "Leo pointed to 'frustrated' on our chart. Has anyone else ever felt frustrated when their block tower fell down?" This simple question helps other children connect Leo's experience to their own, building a shared emotional understanding.
This skill is absolutely vital for building a kind and connected community, whether at home or in the classroom. It's a bit startling, but recent studies suggest only about 36% of people globally score high in emotional intelligence. This highlights just how important it is to start early with simple tools like a feelings chart.
By building this foundational skill, we’re not just managing today's behavior—we're equipping kids for a lifetime of healthier relationships and greater well-being. You can explore the latest global findings on child well-being to see just how critical these early skills are.
Creating a Feelings Chart That Kids Will Actually Use
For a feelings chart to be more than just wallpaper, it needs to feel alive and relevant to a child. A generic, downloaded poster might work in a pinch, but the charts that truly make a difference are the ones kids feel a real connection to.
So, how do we create a feelings chart that children will be genuinely excited to use?
The secret is surprisingly simple: involvement. When children are part of the creation process, they develop a sense of ownership. It becomes their tool, not just another poster the adults put up.
Tailor Emotions to the Right Age
The first move is to choose emotions that match your kids' developmental stage. A chart that’s too simple will bore older kids, while one that’s too complex will just overwhelm the younger ones.
For Early Years (Ages 3-6): Start with the absolute basics. Stick to 4-6 core emotions that are easy to spot and happen often. Think happy, sad, mad, and surprised. The goal here isn't a huge vocabulary; it's about introducing the foundational language of feelings.
For Lower Elementary (Ages 7-9): Now you can start expanding their emotional world. Bring in more nuanced feelings like proud, frustrated, worried, and excited. Kids at this age are starting to grasp that they can feel more than one thing at a time, and your chart can begin to reflect that complexity.
For Upper Elementary (Ages 10-12): Older kids are ready for even more sophisticated words. You can introduce concepts like anxious, overwhelmed, lonely, jealous, and hopeful. For this group, a simple chart might evolve into a "mood meter" or a feelings wheel that shows a wider range of emotional states.
Visuals are the heart of any feelings chart, but they don't have to be limited to yellow smiley faces. In fact, the more personal and relatable the images are, the better.
A key insight from working with children is that they connect deeply with authenticity. Using photos of real human faces—or even their own—makes the concept of emotions feel much more real and less abstract than a cartoon character.
Here are a few powerful alternatives to consider:
Use Photographs of the Kids: With permission, of course, hold a "feelings photoshoot." Ask each child to show you their best "surprised face" or "frustrated face." Print these to create a chart that’s a true reflection of your specific group.
Draw Your Own Faces: Turn it into an art project. Give each child a paper plate and an emotion to illustrate. This kind of collaborative work builds community and gets buy-in from every single child.
Cutouts from Magazines: For a fun collage activity, have kids look through old magazines to find pictures of people showing different emotions. This sparks incredible conversations about how we read feelings in others' body language and facial expressions.
Get Creative with the Design
The format of the chart itself can be a game-changer. A static poster is good, but a dynamic, interactive tool is even better. This invites children to physically engage with the chart, turning the emotional check-in into an active experience rather than a passive one.
Here are a few practical examples to get your ideas flowing:
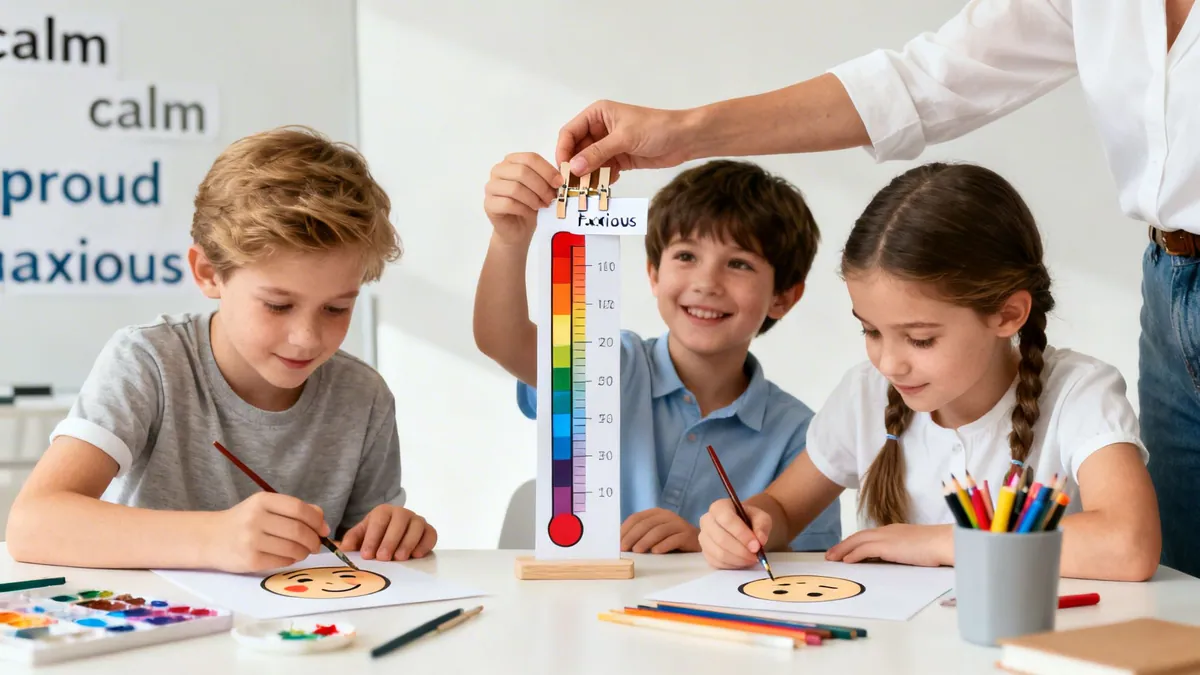
Feelings Thermometer A "feelings thermometer" is a fantastic way to help kids visualize emotional intensity.
Example for a 2nd Grade Classroom: Draw a large thermometer on poster board. Label the bottom "Cool & Calm" (in blue), the middle "Getting Warm" (yellow/orange), and the top "Hot & Angry" (red). Students can move a clothespin with their name up or down to show where they are, which helps them notice when their big feelings are starting to escalate.
Feelings Wheel with Clothespins This design is perfect for helping children pinpoint a specific feeling with more accuracy.
Example for a Home Setting: Make a wheel from a paper plate and divide it into wedges for different feelings like 'Peaceful,' 'Silly,' 'Worried,' and 'Disappointed.' Your child can clip a clothespin to the feeling that best describes their state, creating a natural and easy opening for a conversation.
Weaving the Feelings Chart into Your Daily Routine
A feelings chart hanging on the wall is a great start, but it's just a poster until you breathe life into it. Its real magic unfolds when it becomes a living, breathing part of your daily rhythm—as automatic as grabbing a snack or starting a lesson.
This isn’t about adding another task to your already full plate. It's about finding natural moments to connect and make checking in on emotions a normal, everyday habit. When you do that, the chart stops being just a piece of paper and becomes a powerful tool for building emotional awareness.
Creating Predictable Check-in Times
The secret to making the chart a habit is to build it into moments you already have. For kids, routines create safety, and a safe-feeling child is far more likely to open up and share what’s really going on inside.
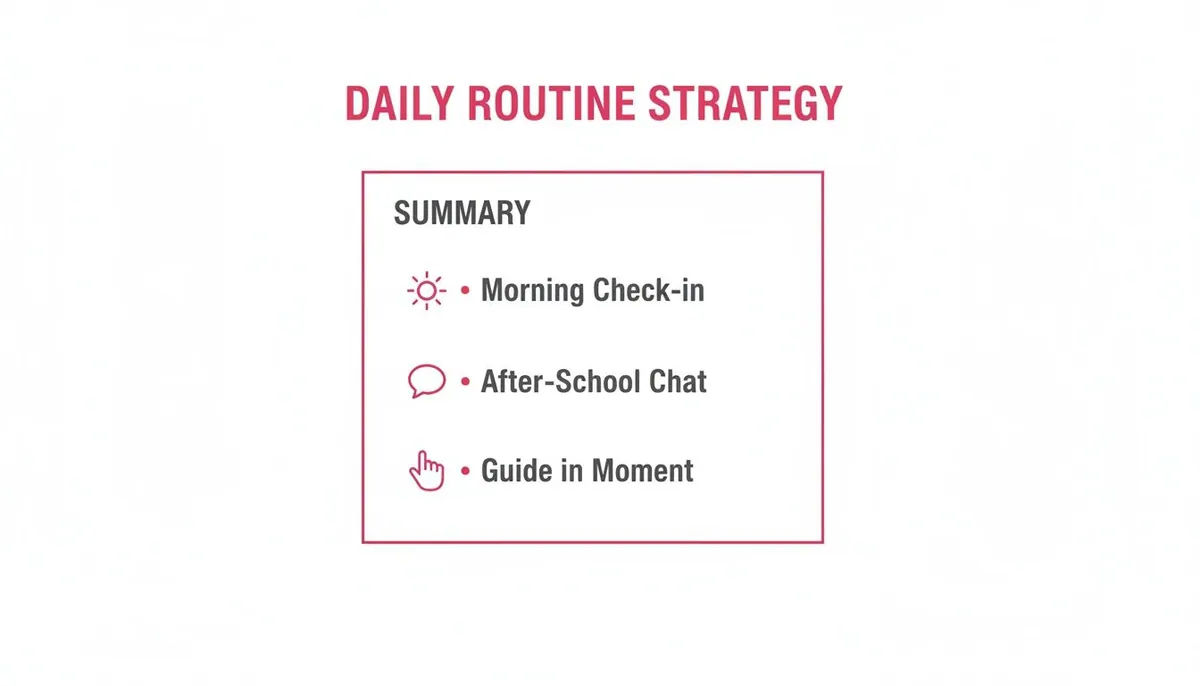
For teachers, the morning check-in is a perfect opportunity.
Here’s how it looks: As students come into the room and unpack, they can move a clothespin with their name to the feeling that fits their morning. One child might place their pin on "tired" after a restless night, while another puts it on "excited" for a friend's birthday party. This gives you a quiet, immediate snapshot of your classroom’s emotional temperature without ever putting a single child on the spot.
For parents, an after-school check-in can become a treasured ritual.
Here’s how it looks: As you’re both unpacking backpacks and settling in with a snack, you can simply ask, “Let’s see where our feelings landed after today.” A child might point to "proud" for acing a math quiz or "lonely" because recess was tough. This small gesture cracks the door open for bigger conversations about their day.
These simple, consistent touchpoints normalize talking about feelings. If you're looking for more ideas on building these kinds of structures, our guide on how effective routines for kids can help them feel emotionally grounded is a great resource.
Guiding Kids to the Chart in Real Time
Beyond your planned check-ins, some of the most powerful moments to use a feelings chart will be the unplanned ones—right when big emotions are bubbling over. The trick is to approach these moments with curiosity, not as a chance to discipline.
Instead of a reactive, "Stop crying!" try gently guiding them toward the chart. You can say something like, "Wow, that looks like a really big feeling. Can you show me on the chart what's happening inside you right now?"
This simple pivot does two amazing things at once:
It co-regulates. Your calm focus on the chart helps soothe their activated nervous system.
It empowers. You're giving them a tool to communicate when their words are lost in the emotional storm.
The most important rule of thumb? The chart must always be a safe, judgment-free zone. It’s a tool for understanding, not for correction. If a child points to "angry" or "jealous," the right response is always one of validation: "Thank you for showing me you feel frustrated. I get it."
This approach transforms a meltdown into a teachable moment, helping kids learn to identify and handle their feelings before they become overwhelming.
Connecting the Chart to Positive Outcomes
Using a feelings chart consistently does far more than just help a child name an emotion. It's a foundational skill in emotional intelligence (EI) that has a direct, measurable impact on their behavior and even their academics.
Research has shown that teaching EI with tools like feelings charts can dramatically reduce aggression and boost a child's chances of success in school. One study of over 400 primary students discovered a direct link between higher emotional intelligence and lower aggressive behaviors. In fact, the children with the highest EI scores showed 35% lower aggression rates.
For example, a school that implements a daily feelings check-in might see a drop in playground conflicts. A student who can identify feeling "annoyed" can then use a calm-down strategy, like taking five deep breaths, instead of shoving the person who cut in line. This proactive self-regulation, learned through the chart, directly reduces aggressive incidents.
This happens because naming an emotion is the first step toward taming it. A child who can point to "angry" is less likely to express that anger by hitting or yelling. This skill also pays off in the classroom, as children with higher EI have been found to have 25% better attention spans and form 40% more positive peer relationships. You can read the full research about these emotional intelligence findings and their impact on student behavior.
From Naming Feelings to Building Real Resilience
It’s a huge win when a child can confidently point to the "angry" or "sad" face on a feelings chart. That’s a massive step in self-awareness. But that’s only half the battle.
The real magic happens when we teach them what to do with that big, powerful emotion. This is how a simple feelings chart transforms from an identification tool into a powerful engine for problem-solving and resilience. The goal is to connect their feeling to an underlying need, empowering them to see emotions as helpful messengers, not something to be pushed away.
Connecting Feelings to Needs and Actions
When a child shares a big feeling, they’re opening a door for connection. By responding with gentle curiosity instead of judgment, you help them forge the neural pathways for self-regulation. You guide them from simply saying, "I feel," to discovering, "I need."
Here’s what this can look like in the moment:
When a child indicates 'Angry': "I see you're feeling angry. Thank you for showing me that. It looks like your fists are tight, too. Do you need a minute alone in the calm-down corner, or would you like to try that tough puzzle again with my help?"
When a child points to 'Sad': "You're feeling sad today. I'm so sorry you feel that way. Would a hug help right now, or would you rather draw a picture about what’s making you sad?"
When a child shows they're 'Worried': "It's okay to feel worried. I see you’re pointing to that feeling. Is it about the test later? Do you want to take five deep 'dragon breaths' with me, or would looking at our schedule help you know what's coming next?"
This simple routine can help you weave these check-ins into the fabric of your day.
These consistent touchpoints create a predictable structure where kids can safely practice moving from identifying an emotion to managing it constructively.
To make this even more concrete, we've found it helps to explicitly link common feelings to healthy coping strategies. The right strategy often depends on a child's developmental stage.
Taking deep "smell the flower, blow out the candle" breaths, holding a smooth "worry stone"
Making a list of what they can and can't control, practicing a 5-senses grounding exercise
Overwhelmed
Covering ears or eyes, shutting down, saying "I can't do it"
Going to a quiet "calm-down corner," looking at a sensory bottle
Taking a short break, breaking a big task into smaller steps, listening to a short guided meditation
This isn't about prescribing a single "fix," but rather expanding a child's toolkit. Over time, they'll start to recognize what works best for them, building genuine self-regulation skills.
Using the Chart to Grow Empathy
A feelings chart doesn't just build self-awareness; it’s a fantastic tool for cultivating a caring community. When one child's feelings are made visible in a safe way, it becomes an opportunity for everyone to learn how to show up for each other.
You can gently nudge this process by extending the conversation to the group.
Teacher Prompt: "Friends, I see that Sarah has her name on 'sad' this morning. Let's think. What is one kind thing our class could do to show Sarah we care?"
This simple question turns a personal emotion into a chance for collective kindness. The other kids might suggest drawing her a picture, inviting her to play a special game, or just offering a friendly wave. They learn to not only notice how others feel but to respond with compassion—a skill that will serve them for their entire lives.
Fostering Self-Esteem and Long-Term Well-Being
This emotional work does more than just manage tough moments; it lays the foundation for lasting self-esteem and resilience. When children feel seen and equipped to handle their feelings, their confidence grows. For more on this, check out these great tips for Raising Confident Kids.
This isn't just a nice-to-have. The World Happiness Report 2024 found that while 10-year-olds in Spain report high life satisfaction (8.25/10), these scores often plummet during adolescence. Kids with higher emotional intelligence are simply better equipped to navigate these turbulent years.
A 2023 OECD study backs this up, finding that self-awareness—the very skill a feelings chart builds—predicts 66% of the variance in a child’s empathy and social skills. Those with top scores are also 25% more collaborative. This work matters.