Soul Shoppe's work is made possible by donors and partners who care deeply about the young people in their communities! We can't do this work without you. Support our work in classrooms and on playgrounds across the nation by donating here.
The room is loud again. A class has just come back from recess, two students are still arguing about the kickball game, one child is under the table because math feels too hard, and everyone else is carrying that jangly, post-transition energy into the next lesson. At home, it can look different but feel the same. Homework tears, a slammed bedroom door, a child who says “I can’t” before they’ve even started.
In those moments, adults usually want something simple, fast, and realistic. Not a perfect mindfulness routine. Not another thing to prep. Just one tool that helps a child come back to center without turning the moment into a bigger struggle.
That’s where a box breathing visual earns its place. It gives kids something concrete to look at, trace, and follow when words aren’t landing. It also helps adults stay grounded enough to guide instead of react.
Your Guide to a Calmer Classroom and Home
A breathing strategy earns its keep when it still works in the middle of real life. A child is upset. A class is restless. A parent is trying to get through homework without another power struggle. In those moments, box breathing helps because the pattern is clear, repeatable, and easy to cue without a long explanation.
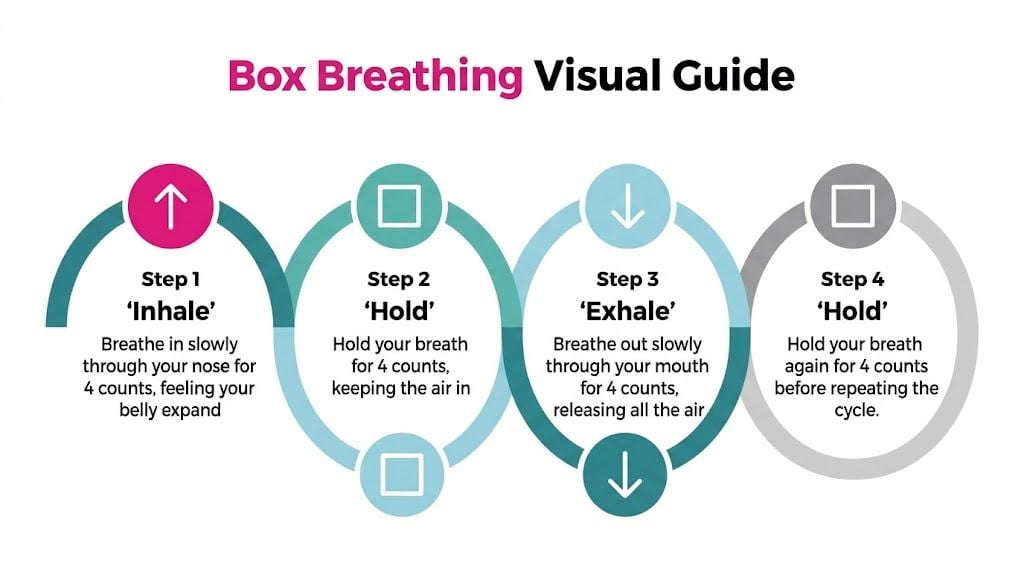
The basic rhythm is steady: inhale, hold, exhale, hold. Many adults know it as a four-count pattern, but with K-8 students, the exact number matters less than the pacing. Younger children often do better with shorter counts. Older students usually tolerate a longer hold and may respond well when the practice is framed as a focus skill, not just a calming tool. That distinction matters in school settings. A third grader may join because it feels like a game. A middle schooler is more likely to participate if it feels useful and age-respectful.
I have found that the visual is often what makes the routine stick. Children do not have to remember a script while they are already overloaded. They can follow the shape, keep their eyes on one spot, and borrow the adult’s calm until their body catches up.
When this helps most
A box breathing visual fits best into predictable stress points, especially before a child is fully overwhelmed. Common examples include:
At the start of the school day when students arrive dysregulated from the bus, a tough morning, or a rushed handoff
After transitions when the group needs a quick reset before instruction can begin
Before homework or reading practice when resistance shows up fast
Ahead of tests, presentations, or hard conversations when nerves are high
During repair conversations when everyone needs a pause before speaking clearly
The trade-off is simple. Box breathing is a strong regulation tool, but it is not magic. Some children will settle after one round. Others need movement first, a quieter space, or an adult to co-regulate beside them. The goal is not perfect calm. The goal is enough steadiness for the next workable step.
Language matters too. “Calm down” can feel like pressure. “Let’s do one square together” gives a child something concrete to do. In classrooms, that small shift reduces argument and preserves dignity. At home, it can lower the temperature before a routine goes off the rails.
The environment also supports the practice. A visible cue on the wall, a small card at a desk, or even calming decor can remind children what their body already knows how to do. For classrooms and family spaces that benefit from gentle visual reminders, a piece of South African designed artwork can reinforce that tone. If you want a few routines that pair well with breathing practice, these classroom mindfulness strategies are practical additions.
How to Use a Box Breathing Visual Step by Step
A box breathing visual works best when it stays simple. A square on paper, a poster on the wall, a card on a desk, or a screen-based guide can all work. The key is that the child can see the rhythm instead of trying to hold the pattern in their head.
A visual anchor isn’t just decorative. Research summarized in the Journal of Pharmaceutical Research International article reports that tracing a screen-based box improved focus retention by up to 95%, compared with 60% for mental-only counting. The same source describes significant improvements in lung function, including FVC and FEV1, after visually guided box breathing practice in healthy adults.
Set up the body first
Before the first breath, fix the posture. That one adjustment prevents many of the “this isn’t working” moments.
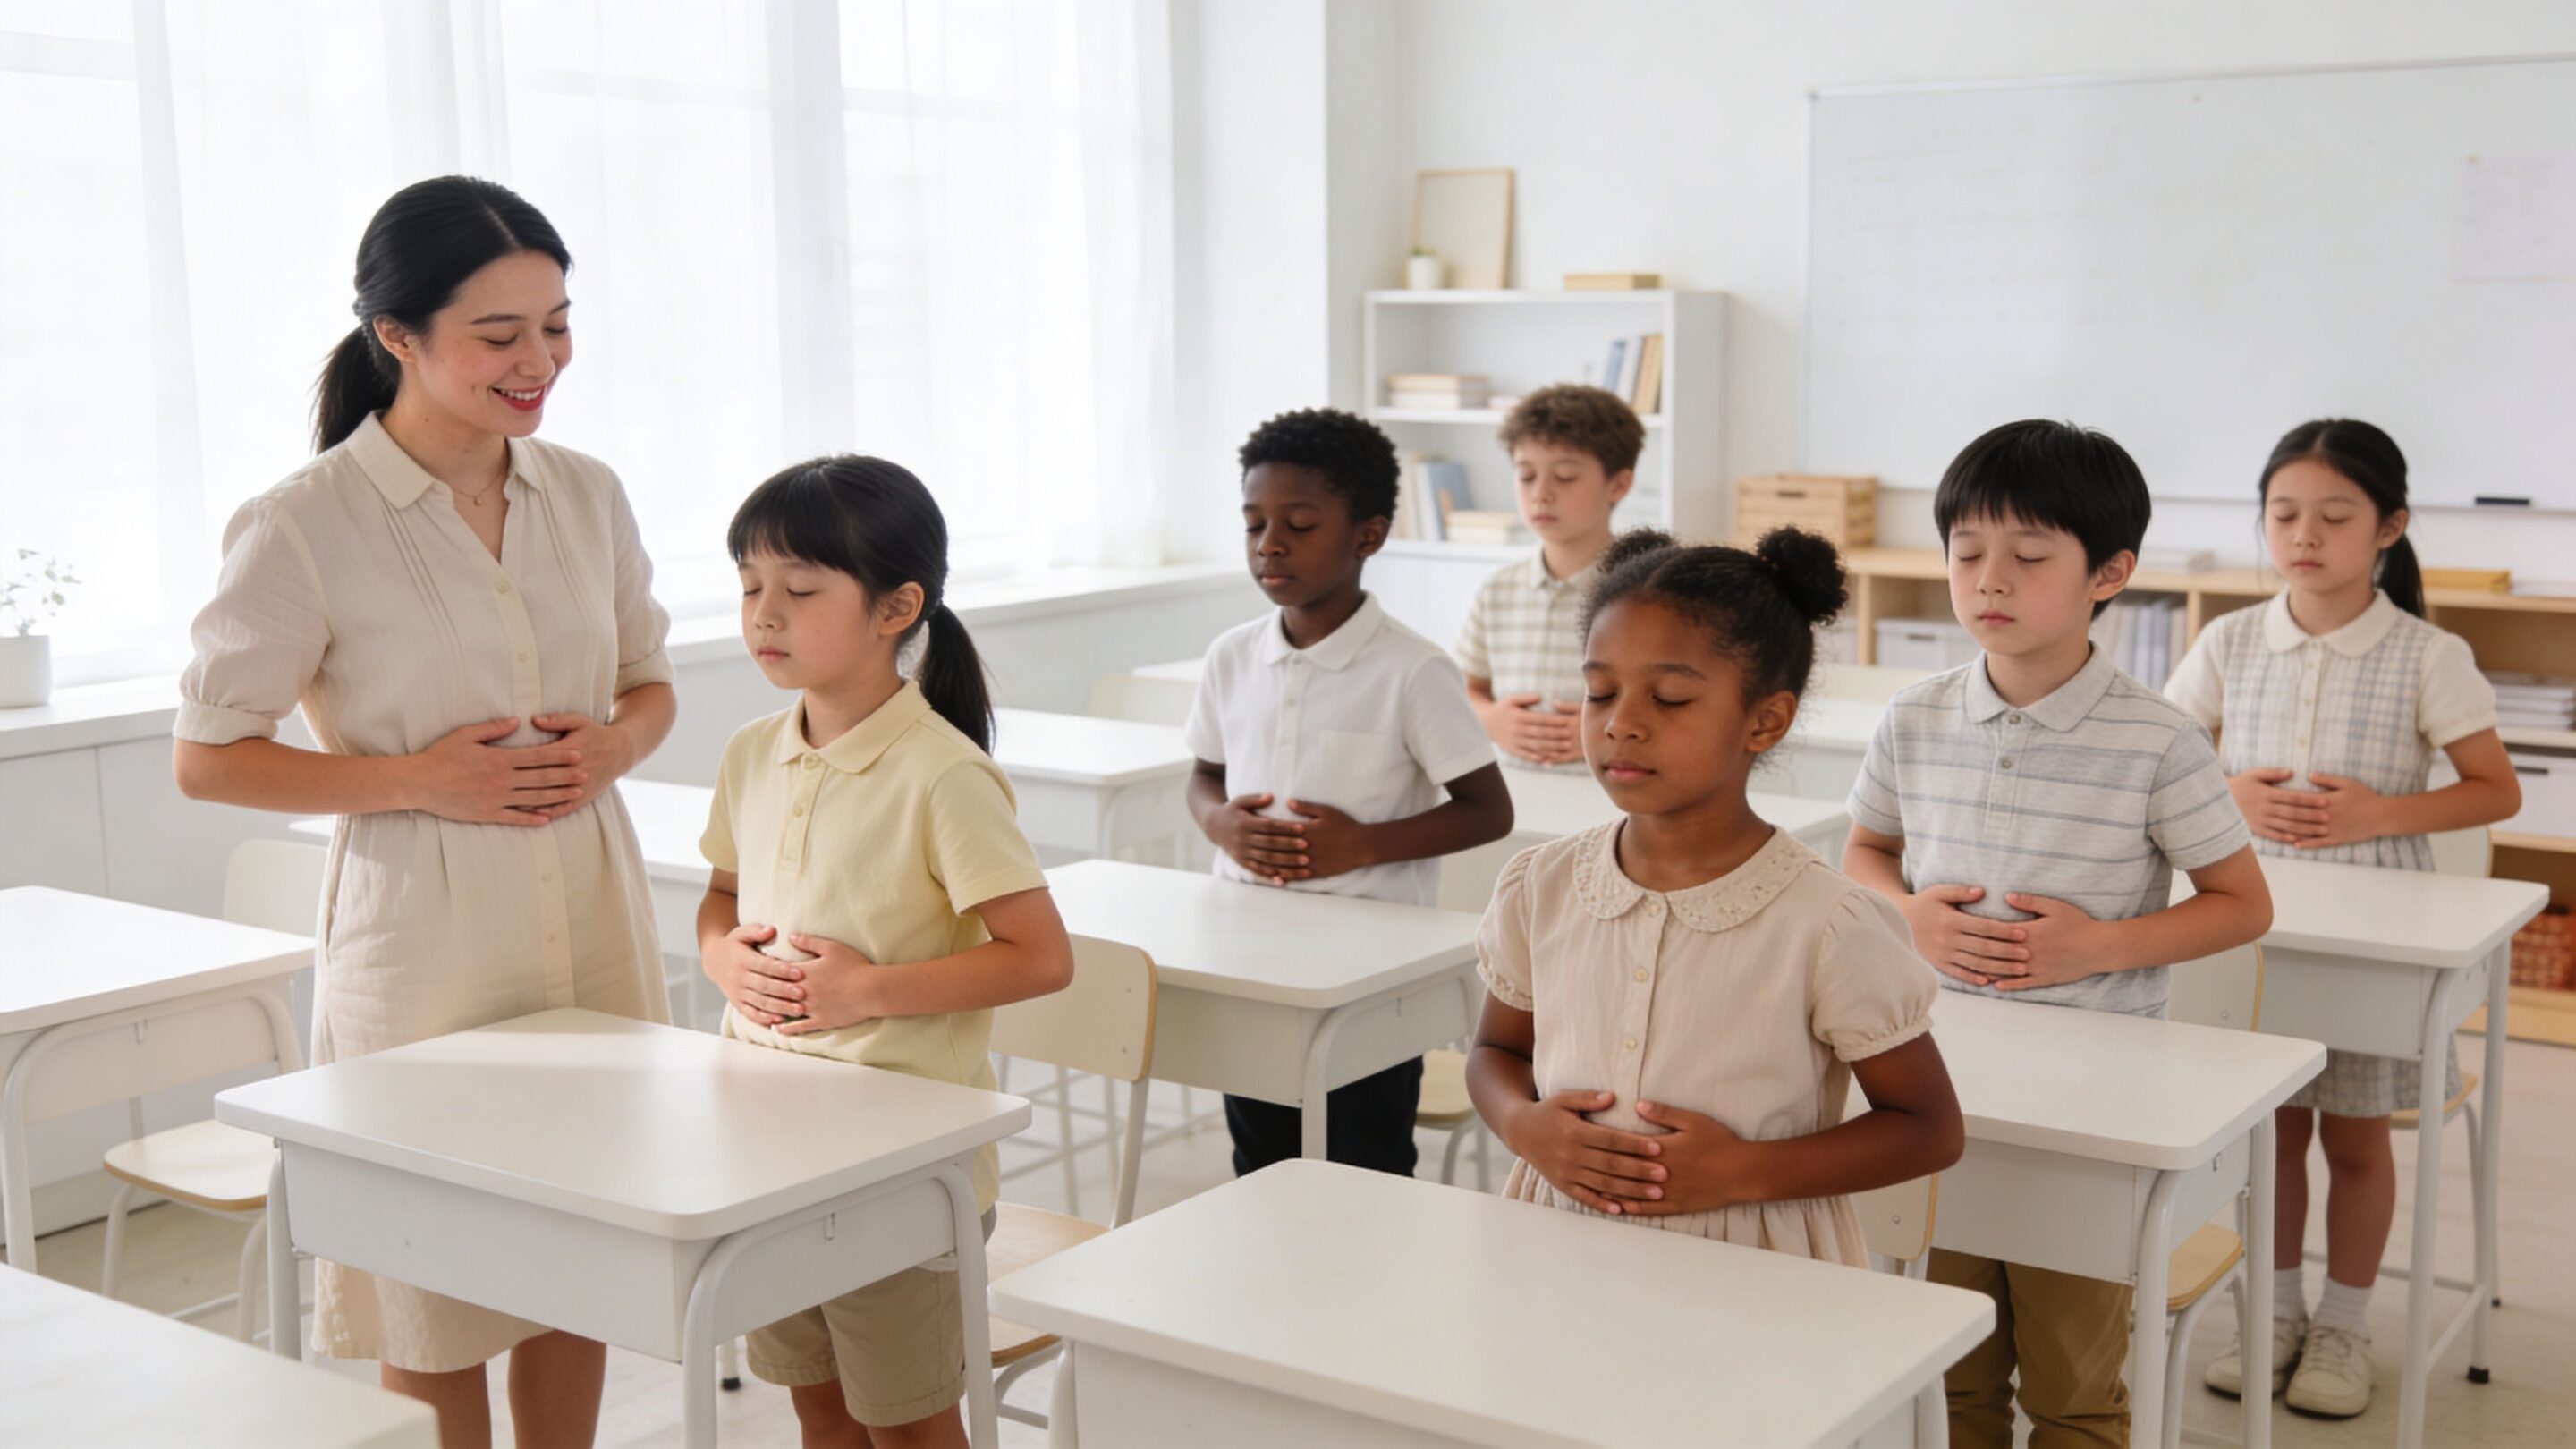
Ask the child to sit or stand tall, with shoulders soft rather than lifted. If they’re open to touch cues, have them place one hand on the belly. That gives immediate feedback about whether the breath is moving low and steady rather than staying high in the chest.
If you already teach belly breathing, this belly breathing technique guide pairs well with box breathing because the body mechanics are similar.
Follow the four sides of the square
The square gives each part of the breath a beginning and an end. That matters for children who get lost in open-ended directions.
Here’s a classroom-friendly way to lead it:
Inhale along the first side “Breathe in through your nose for four. Let your belly puff out a little.” A child may like “smell the flower” language. Older students often prefer direct language.
Hold on the second side “Keep the air in for four. Body still. Jaw soft.” The hold should feel gentle, not strained.
Exhale on the third side “Breathe out slowly for four, like you’re fogging a window or blowing through a straw.” This is often the part kids rush, so model it.
Pause on the fourth side “Rest before the next breath. Count four.” That final pause helps the rhythm feel complete.
Practical rule: If the count is making a child tense, slow the counting voice before changing the technique.
Use language that matches the age
The same box breathing visual can work across grade levels, but the script should change.
A younger child often responds to sensory cues:
Inhale: “Smell the soup.”
Hold: “Keep it safe.”
Exhale: “Cool it down.”
Hold: “Wait for the next bite.”
An upper elementary student may do better with performance language:
“Breathe in.”
“Hold steady.”
“Breathe out slow.”
“Reset.”
A middle school student usually wants brevity:
“In for four.”
“Hold four.”
“Out four.”
“Hold four.”
Keep the visual active
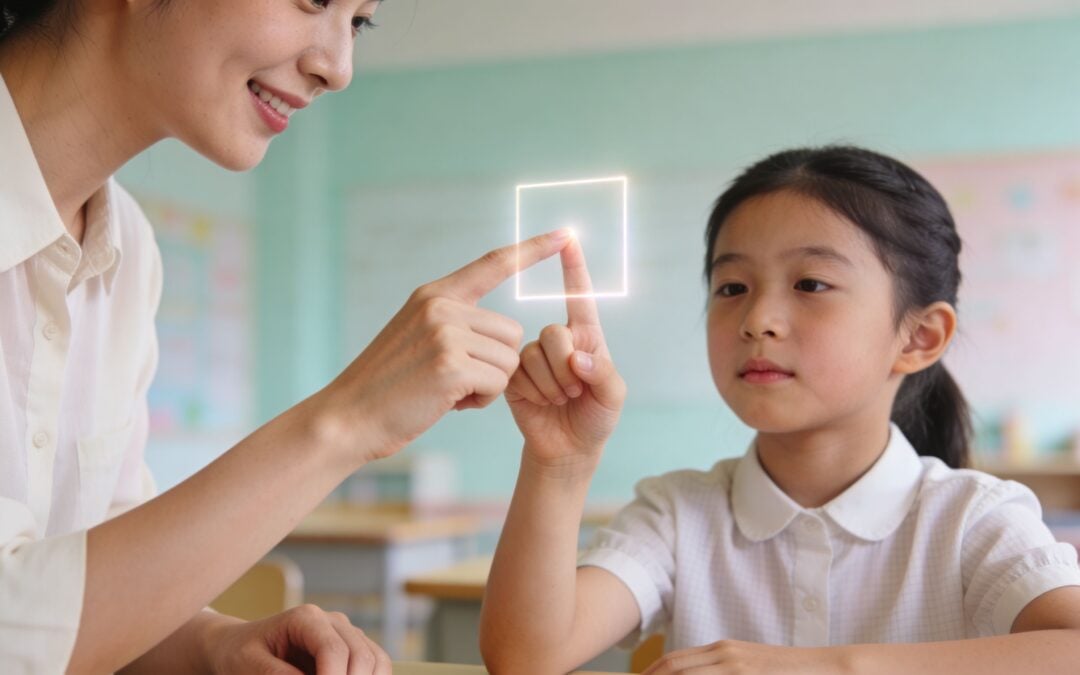
A lot of adults show the square and stop there. Kids usually need one more layer of engagement. Let them trace the box with a finger in the air, on a desk, on their leg, or on a laminated card. The movement gives the brain another anchor.
This is especially useful when a child says they “can’t focus.” They may not be resisting the practice. They may just need more sensory input.
A few practical options work well:
Setting
Visual method
Adult cue
Whole class
Poster at the front of the room
“Eyes on the square. Trace with me.”
Small group
Laminated table card
“Use one finger and go side by side.”
Home
Sticky note square on fridge or homework table
“Let’s do two boxes before we start.”
Hallway reset
Finger-traced square in the air
“You don’t need words. Just follow my hand.”
Start small and repeat
One or two cycles can help a child pause. A longer practice can help them settle more fully. In everyday school and home routines, short repetition works better than one long, forced session.
Try these examples:
Morning entry: two boxes before announcements
Homework launch: one box before opening the folder
Conflict repair: three boxes before either child speaks
Test prep: two quiet rounds at desks
If you want children to use box breathing when they’re upset, teach it when they’re calm.
That’s the part adults often skip. We introduce regulation tools during a meltdown, then decide the tool failed. Usually the timing failed.
Bringing Box Breathing into Your Classroom Routine
Teachers don’t need another complicated system. What works is a ritual that slides into moments you already have. A box breathing visual can become one of those rituals if students see it often, practice it when things are fine, and hear adults use the same language every time.
A 2021 study discussed here found that 30 days of box breathing led to significant improvements in lung function parameters tied to oxygenation and autonomic nervous system regulation. In practical school terms, that supports the bigger goal. Students need tools that help them return to learning, not just “behave better” in the moment.
Use it at predictable pressure points
The easiest way to build buy-in is to use box breathing before students are fully dysregulated. Think of it as a transition support, not an emergency-only intervention.
A few places where it fits naturally:
After recess “Feet on the floor. Eyes on the square. One breath in, hold, out, hold. We’re bringing our bodies back inside.”
Before a quiz or read-aloud “Give your brain one quiet minute. We’re not trying to be sleepy. We’re getting focused.”
During a hard task “If your body feels frustrated, pause and take one square breath before you ask for help.”
Before class meetings “Let’s arrive in our bodies before we use our words.”
Students use tools more often when the language is short and shared. The phrase matters. “Do your box” is easier to remember than a longer explanation.
You can also name it in a way that fits the age group:
Kindergarten and first grade: square breath, magic square, calm corners breath
Grades 2 to 5: box breathing, reset breath, focus square
A posted anchor chart helps. So does putting a small visual in the peace corner, on clipboards, or near the line-up spot by the door.
Show it, don’t overtalk it
Students learn this faster when the adult models instead of explaining for too long. If the class is escalated, fewer words work better.
A useful mini-script sounds like this:
“Watch my finger move around the square. Inhale. Hold. Exhale. Hold. Again.”
That script is brief enough to use in real time. It also keeps the adult regulated, which is half the intervention.
Here’s a quick video example you can use for staff modeling or for older students who like visual guidance.
Reflection prompts
After each role-play, ask:
What words helped lower the heat?
Where did the conflict get worse?
What would you try differently in a real situation?
This kind of practice is especially promising in digital and gamified environments too. Analysis of 16,597 players in the FLIGBY serious game found improvements in conflict recognition, decision-making, and self-awareness through simulated scenarios.
4. Social Emotional Learning Curriculum Integration
A familiar classroom moment. Two students argue over materials during science. The teacher helps them settle it, but by lunch the same pattern shows up again with different students, different words, same stuck cycle.
That is why conflict resolution grows faster when it lives inside the school day instead of sitting in a once-a-month lesson. Students need repeated practice, in real contexts, with the same language showing up across classrooms, recess, advisory, and family communication. Over time, those skills start to work like a shared map. Children know where to go when feelings rise.
Integrated SEL gives students more than a reminder to “be nice” or “use your words.” It teaches the building blocks underneath conflict. Naming feelings. Noticing body signals. Listening for the other person’s perspective. Asking for what you need without blame. Repairing harm after a hard moment.
What integration can look like across the day
In kindergarten, that might mean using picture cards for words like “frustrated,” “left out,” and “proud” during morning meeting, then returning to those same words during play-based conflicts.
In grades 3 to 5, a teacher might pause a group project and ask, “What skill would help this group right now. Taking turns, listening, compromise, or repair?” Students begin to connect the lesson to the moment, which is where transfer happens.
In middle school, advisory can become a steady practice space for friendship conflict, digital communication, boundary setting, and problem-solving scripts. The key is repetition with adult modeling, not a single polished lesson.
Programs such as Second Step, PATHS, and Responsive Classroom are often used this way. What matters most is that the adults share language, protect time for practice, and reinforce the same skills outside the SEL block. Soul Shoppe has seen this pattern across more than 20 years of building connected and safe school communities. Students use conflict tools more consistently when the whole campus treats SEL as part of how school works, not an extra program on the side.
Practical rule: If adults are not using the same phrases students are learning, students usually stop using them under stress.
A simple planning test can help. Ask, “Where will students learn this skill, where will they practice it, and where will they use it during a real problem?” If a school can answer all three, integration is taking root.
For schools comparing approaches, Soul Shoppe shares helpful implementation questions in its guide to social-emotional learning programs for schools. Research summarized by CASEL on schoolwide SEL points to stronger student relationships, better emotion management, and improved academic engagement when these skills are taught intentionally and reinforced across the school environment.
5. Conflict Resolution Think-Pair-Share and Discussion Protocols
Not every student is ready to process conflict out loud in front of a class. Think-pair-share gives them time to collect their thoughts first. That pause alone can prevent shutdown or escalation.
This strategy is simple. Students think privately, talk with one partner, then share with a larger group if they’re ready. Because the first step is quiet reflection, more students can participate thoughtfully.
Try this with a real conflict theme
Prompt: “Two students both think the other one was rude during partner work. What could each student say to start repairing the problem?”
Give students one minute to write or draw. Then ask them to turn to a partner and compare ideas. Finally, invite a few responses to the group and chart the language that sounds respectful and clear.
Useful protocols include:
Talking piece circles for equal turns
Fishbowl discussions where one group models while another observes
Dialogue rounds with one question and no interruptions
This works well after recess incidents, before group projects, or after reading a story with a conflict scene. It also helps multilingual learners and quieter students because they get rehearsal time.
Helpful prompts by age
K-2: “What can you say if someone grabs your crayon?”
3-5: “How can you disagree without being mean?”
6-8: “What’s the difference between honesty and public embarrassment?”
The teacher’s role is to model curiosity instead of rushing to a verdict. If a child says, “I’d tell them they’re selfish,” you can ask, “What message do you want them to hear, and what wording would make that more likely?”
6. Cooperative Learning and Team-Building Activities
A group project starts. One student grabs the markers, another goes quiet, a third complains that they always do all the work, and the fourth checks out before the task really begins. By the time the disagreement shows up out loud, the conflict has usually been building for several minutes. Sometimes for several weeks.
That is why cooperative learning matters in a conflict resolution toolkit. It gives students practice with shared responsibility, turn-taking, and repair during low-stakes tasks, so they have something to stand on when real tension shows up. In Soul Shoppe’s 20+ years of work with schools, we have seen this pattern again and again. Students handle conflict better when adults teach collaboration as a skill, not as a hope.
A team task works like a practice field. If the structure is loose, stronger personalities can take over and quieter students can disappear. If the structure is clear, students get repeated chances to use conflict resolution moves in real time.
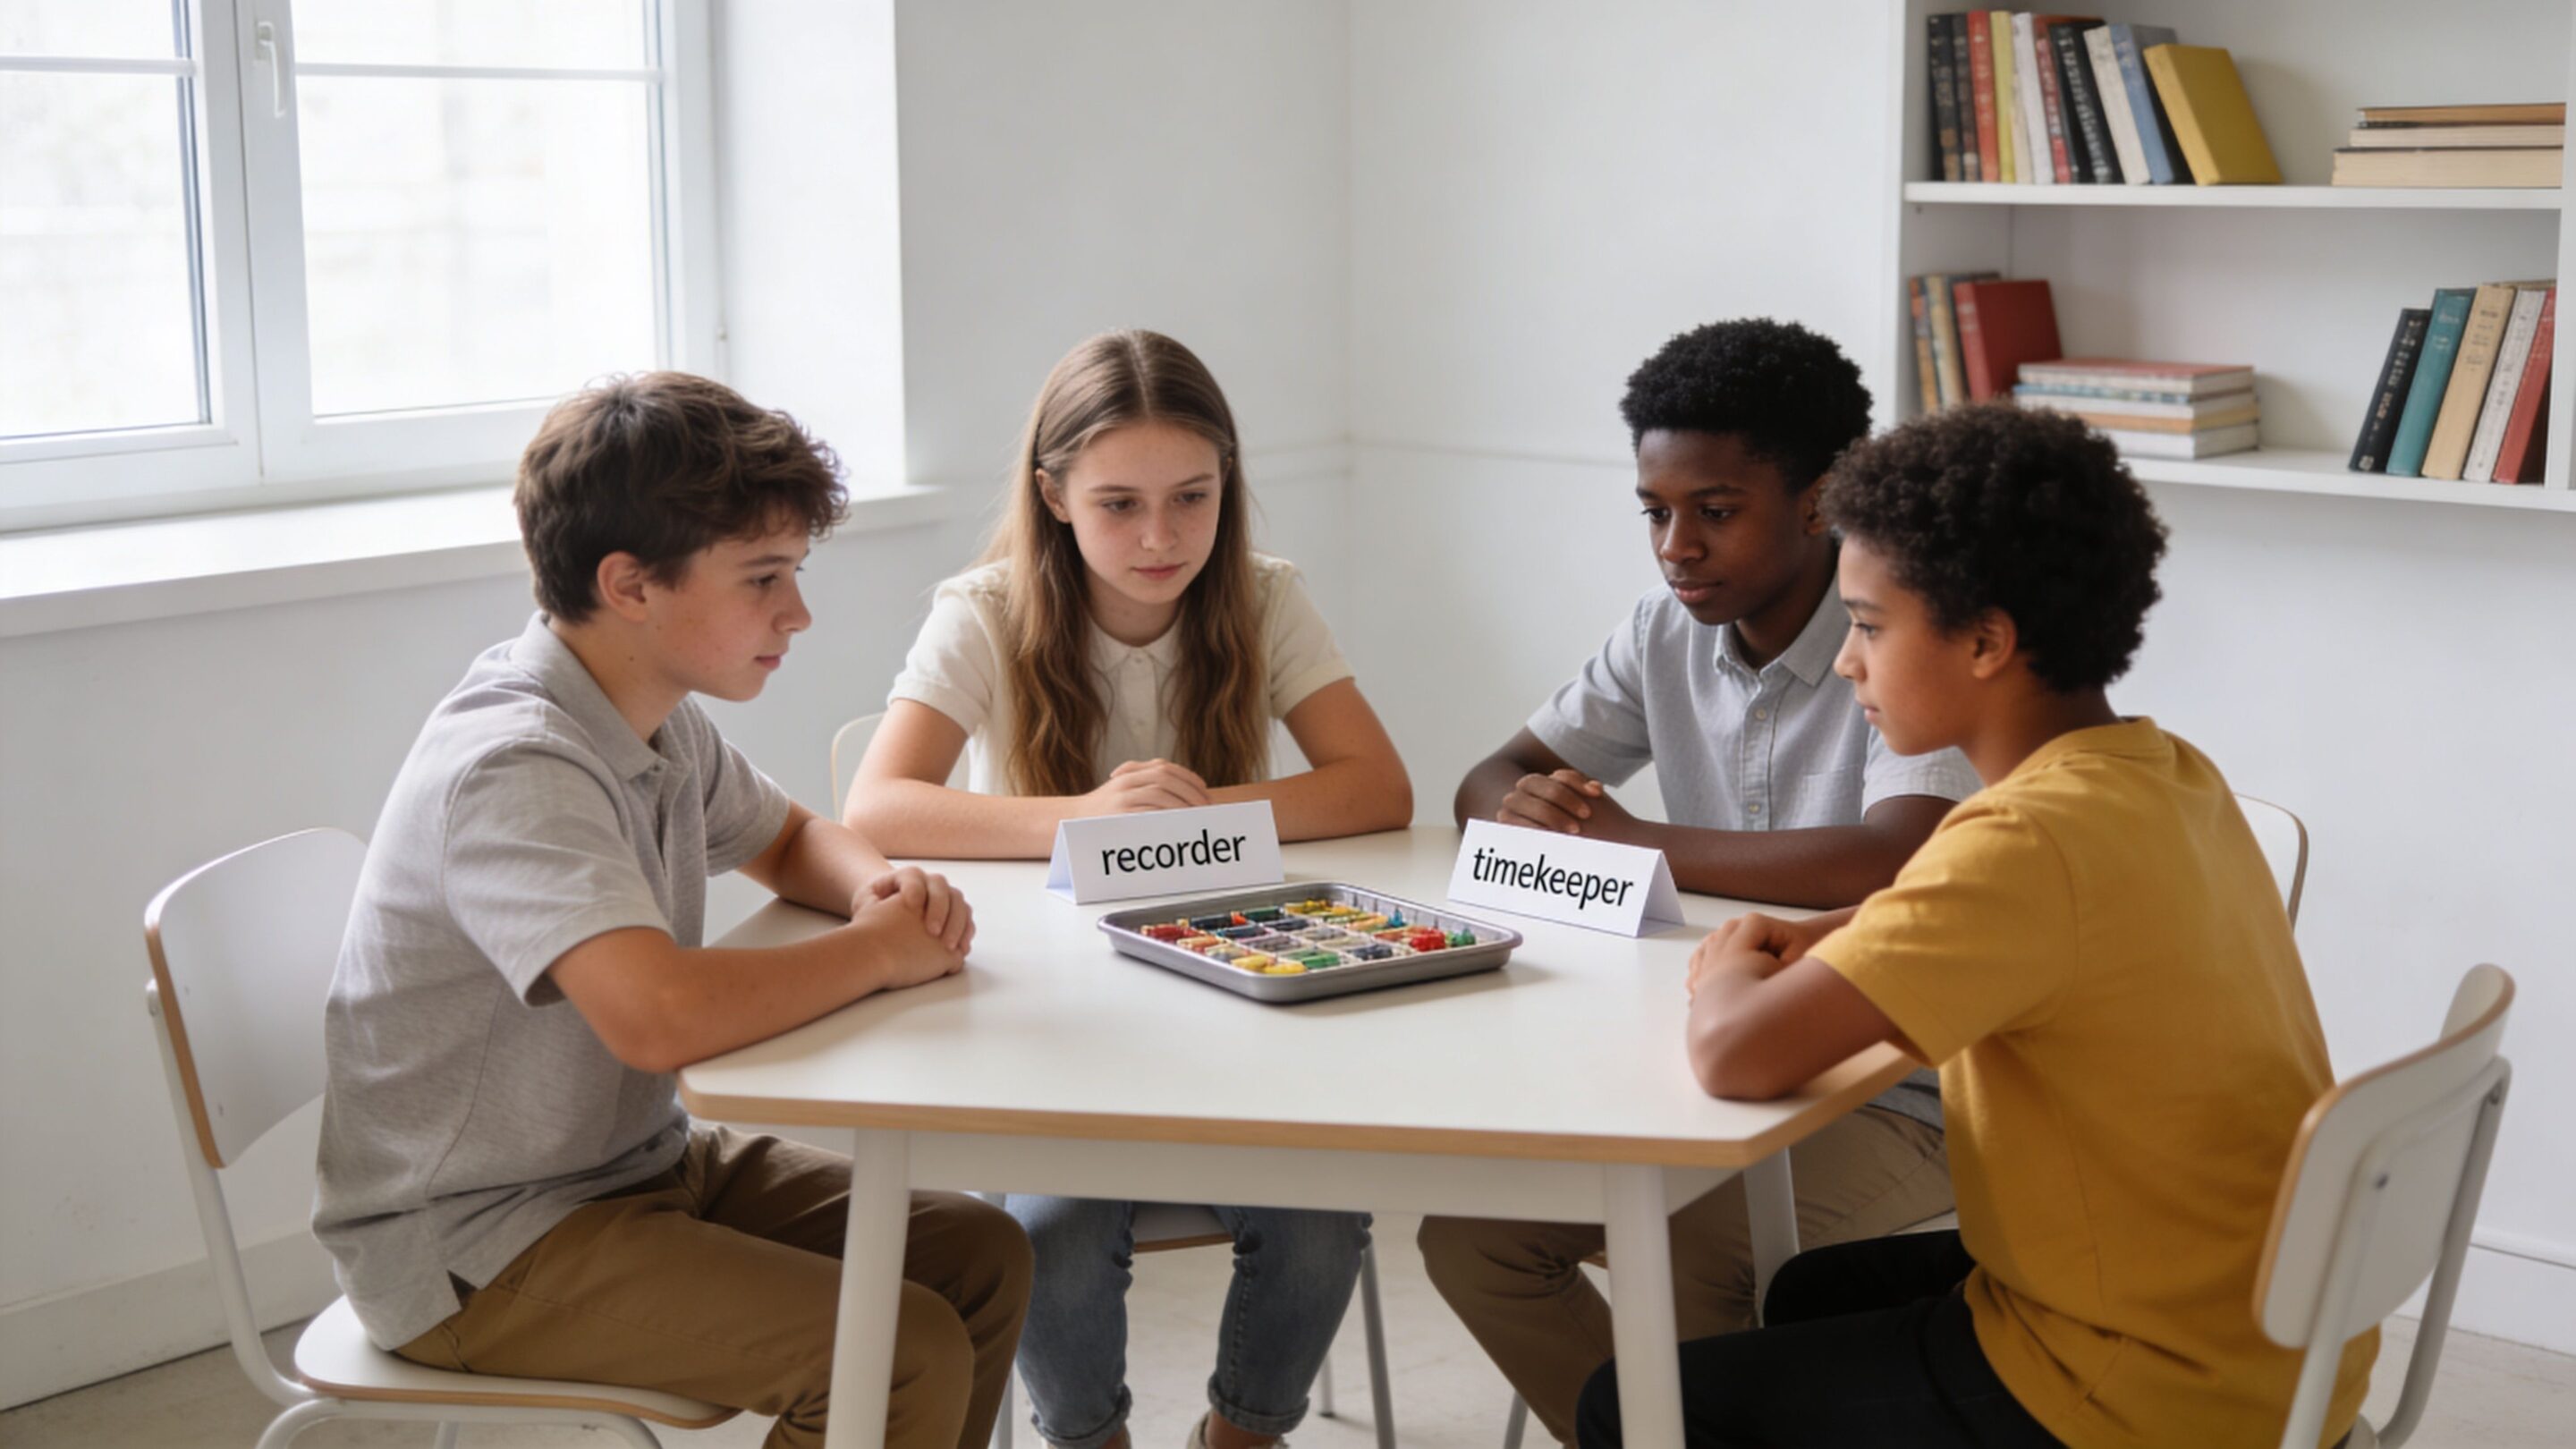
Start with roles that rotate:
facilitator
recorder
materials manager
timekeeper
inclusion checker
That last role often makes the biggest difference. The inclusion checker watches for who has spoken, who has been interrupted, and whether the group is making room for every voice.
Try a shared-challenge task
In a fourth grade classroom, give each team a building challenge with limited supplies. One student handles tape. One reads directions. One tracks time. One notices whether every idea gets heard before the group chooses a plan.
Then debrief the process, not just the product. That is where students learn how cooperation works.
Ask:
Who helped the group stay focused when opinions were different?
What did your team do when two ideas competed?
When did someone feel left out or unheard?
What sentence helped your group get back on track?
K-8 differentiation
K-2: Use short partner tasks with clear visuals and one shared material, such as one box of crayons for two students. Teach simple lines like, “My turn next, please,” and, “Let’s do it together.”
3-5: Add rotating jobs and a quick reflection sheet. Students at this age can start noticing patterns like interrupting, blaming, or deciding too fast.
6-8: Use longer group challenges with checkpoints. Older students benefit from naming group dynamics directly, such as social exclusion, sarcasm, unequal effort, or leadership struggles.
SEL script educators can use
Try a brief coaching script during group work:
“I’m noticing two strong ideas. Pause first. Let’s hear each one all the way through, then choose a plan together.”
If one student dominates, try: “Your ideas matter. Your job now is to make space for someone else’s idea too.”
If a student withdraws, try: “I want to make sure your voice is in the group. Do you want to share with a partner first, then bring your idea to the team?”
These prompts help students experience conflict as something they can handle, not something adults always have to fix for them.
Research on cooperative learning has found that well-structured group work can support stronger peer relationships and more positive academic and social outcomes, especially when students depend on one another to succeed. A helpful summary appears through the Education Endowment Foundation’s guidance on collaborative learning approaches. For playful practice beyond the classroom, some families and educators also use cooperative board games.
A simple reflection closes the loop: “How did we treat each other while we worked?” That question turns one activity into a repeatable strategy, which is exactly what helps a classroom grow from isolated conflict lessons into a steady culture of peace.
7. Mindfulness and Self-Regulation Practices
Some students know exactly what they should say in a conflict, but they can’t access that skill when they’re flooded. Their heart is racing, their jaw is tight, and their brain is locked on defense. Self-regulation practices help bridge that gap.
Mindfulness in schools doesn’t have to mean long silent meditation. It can be brief, concrete, and child-friendly. A breathing pattern. A body check. A hand on the heart. A “notice five things” reset before a hard conversation.
Use it before, during, and after conflict
Try this sequence:
Before conflict practice: “Take one slow breath and relax your shoulders.”
During conflict: “Pause. Name what you’re feeling before you answer.”
After conflict: “What is your body telling you now?”
For younger students, use visuals like “smell the flower, blow out the candle.” For older students, teach a private reset they can use without drawing attention to themselves, such as pressing their feet into the floor and counting breaths.
A child who can pause has a much better chance of listening.
Ask students, “What’s your early warning sign that you need a reset?” Common answers include hot cheeks, clenched fists, fast talking, or wanting to walk away. That awareness is a conflict resolution skill.
8. Nonviolent Communication and Feelings and Needs Vocabulary
Many students are fluent in blame. “You’re rude.” “You never let me play.” “He did it on purpose.” They need help turning those reactions into language another person can hear.
Nonviolent Communication offers a useful frame. Students learn to separate what happened from the story they’re telling about it. Then they identify a feeling, connect it to a need, and make a clear request.
A student-friendly formula
Try:
When…
I felt…
Because I needed…
Next time, I’d like…
Example: “When you laughed while I was reading, I felt embarrassed because I needed respect. Next time, I’d like you to wait until I finish.”
That’s very different from, “You always make fun of me.”
For younger children, shorten it: “When you took my block, I felt mad. I want a turn.”
Post a feelings chart, but don’t stop there. Students also need needs words: fairness, space, help, inclusion, calm, choice, respect, clarity. Once kids can name what they need, they’re more likely to problem-solve instead of attack.
A helpful routine is to model this language as adults:
“I’m feeling scattered. I need everyone’s eyes for one minute.”
“I felt concerned when voices got louder. We need a reset so everyone feels safe.”
When adults use the script naturally, students trust it more.
9. Empathy-Building Activities and Perspective-Taking Exercises
Students don’t resolve conflict well if they can’t imagine another person’s inner world. Empathy-building activities help them move past “I’m right” and toward “I can see how that felt for you.”
This can start with literature, art, and storytelling. You don’t always need to begin with a live conflict. Sometimes the safest entry point is a character in a book, a historical figure, or a classroom scenario that feels one step removed.
Strong empathy practices
Try these:
Character hot seat: One student speaks as a book character and answers classmates’ questions about motives and feelings.
Identity circles: Students reflect on parts of who they are, such as family role, language, hobbies, or traditions, and discuss what helps them feel respected.
Two-side journaling: Students write one paragraph from each person’s point of view in a conflict.
A third grader might read a story about exclusion and discuss how each character felt. A seventh grader might examine a rumor scenario and write from the perspective of the person who spread it, the person harmed, and the bystander.
The most important safeguard is choice. Students should never be pushed to disclose something personal in the name of empathy work.
“Use stories first, then invite personal connection if students want it.”
Reflection prompts
Ask:
What might this person have needed?
What did they possibly misunderstand?
What would help them feel dignity in the repair?
These questions train students to look below surface behavior, which often softens conflict before it hardens.
10. Problem-Solving and Decision-Making Frameworks
Two students are stuck. One says, “That was my idea.” The other says, “You never listen to me.” At that moment, they usually do not need a lecture. They need a process they can hold onto.
That is what a problem-solving framework gives them. It works like a trail map in the woods. Students may still feel upset, but they can see the next step instead of getting lost in the feeling.
Across Soul Shoppe’s 20+ years of helping schools build safer, more connected communities, one pattern shows up again and again. Students are more likely to use peaceful conflict skills when the adults teach one shared process, practice it often, and use it consistently across settings.
A school-friendly framework students can remember
The letters matter less than the routine. Your school might use STOP, PAUSE, or a teacher-created chart. What matters is that students hear the same sequence in the classroom, on the playground, and during problem-solving conversations.
A practical five-step model is:
Name the problem
Identify what each person needs
Brainstorm several possible solutions
Choose one solution and try it
Check back and adjust if needed
This approach adds something distinct to your conflict resolution toolkit. Peer mediation supports student-led repair. Restorative practices rebuild community after harm. Perspective-taking helps students understand each other. A decision-making framework teaches what to do next, especially in the small, everyday moments when students are upset, rushed, or unsure.
How to teach it so students actually use it
Start small. Teach the process during a calm part of the day, not in the middle of a conflict.
For younger students, use pictures, gestures, and repeated sentence frames. A first grade teacher might say, “First, tell me what happened. Next, tell me what you need. Now let’s think of two ways to fix it.” For older students, add written reflection or a quick problem-solving form they complete before a conversation.
Here are sample prompts you can use:
Name the problem: “What is the problem, in one sentence?”
Identify needs: “What do you need right now? What might the other person need?”
Brainstorm solutions: “What are three choices, even if one is not your favorite?”
Choose and try: “Which choice is fair, safe, and realistic?”
Check back: “Did that solution work for both people? If not, what needs to change?”
Students often rush past brainstorming and grab the first idea that feels good to them. That is a common sticking point. Slow them down there. The goal is not just agreement. The goal is a solution that is safe, workable, and respectful.
K-8 differentiation
K-2: Use visuals, puppets, and short oral prompts. Keep choices concrete. “Take turns,” “get a new marker,” or “ask for space.”
3-5: Add simple partner reflection sheets. Ask students to separate facts from feelings. That helps reduce “He always” and “She never” language.
6-8: Introduce trade-offs and consequences. Middle school students can compare options by asking, “What solves the problem now?” and “What prevents the same problem tomorrow?”
A lab dispute, group project disagreement, or recess argument can all use the same structure. That consistency helps the framework stick.
Make the framework part of daily classroom life
Students use what they can see and what adults repeat.
Post it: Keep the steps visible at student eye level.
Practice it: Use low-stakes examples before real conflict happens.
Model it aloud: Let students hear adults solve classroom problems with the same language.
Use portable tools: Desk cards, notebooks, and small cue cards help students remember the steps independently.
Reflect after use: Ask, “Which step helped most?” or “Which step was hardest?”
A good framework does not remove conflict. It gives students a repeatable way to handle it with more clarity, more responsibility, and more chance of repair.
Reflection prompts
Use questions like these after students try the process:
Which step felt easiest for you?
Where did you get stuck?
Did your solution meet both people’s needs, or only one person’s wants?
What would you do differently next time?
That is how a single activity grows into a schoolwide habit. Students stop relying only on impulse, and start building judgment.
Concrete step-by-step tool students can apply independently
From Activities to a Culture of Resolution
The class has just come in from recess. Two students are still upset about a kickball argument. One is talking over you. The other has shut down completely. A few classmates are watching to see what happens next. In that moment, conflict resolution is not a single activity you pull off the shelf. It is the set of routines, language, and shared expectations that tell students, "We know what to do with hard moments here."
That is the shift from activities to culture.
A strong conflict resolution approach works like a woven fabric. Each thread matters on its own, but its true strength comes from how the threads hold together. Peer mediation gives students leadership roles. Restorative practices create ways to repair harm and rebuild trust. Role-play lets students rehearse before the actual moment arrives. SEL lessons keep skills in daily use instead of limiting them to one advisory block. Discussion protocols, team tasks, regulation tools, feelings-and-needs language, empathy practice, and problem-solving steps all support the same goal. Students learn that conflict is a normal part of community life, and that there are clear, respectful ways to handle it.
That broader view is the unique value of this guide. These ten entries are not random ideas to try once and forget. They are ten connected strategies that reach from individual skill-building to schoolwide systems. Each one can become a mini playbook for your staff, with K-8 adjustments, simple SEL scripts, and reflection prompts that help students practice, reflect, and try again.
Start small, but start on purpose.
If students tend to react quickly, begin with self-regulation and a few shared sentence stems. If classroom tension grows during partner or group work, focus on cooperative structures and brief repair routines. If your school is ready to build stronger systems, peer mediation or restorative circles can give students and adults a common process across settings. In our experience at Soul Shoppe, schools make the most lasting progress when adults choose a manageable starting point and repeat it often enough that students can use the skill under stress, not only during a calm lesson.
This work supports more than behavior. Research summarized by the Collaborative for Academic, Social, and Emotional Learning (CASEL) connects SEL implementation with stronger relationships, more positive school experiences, and better conditions for learning. You can review that body of work through CASEL’s research overview. For educators, the practical takeaway is simple. When students have tools for handling conflict, classrooms spend less time stuck in repeated social injuries and more time returning to learning.
School culture changes when adults use the same habits in small, ordinary moments. A teacher prompts a student to restate a concern respectfully. A recess aide guides a quick repair conversation instead of handing out blame. A principal opens a meeting with a check-in circle so staff experience the same kind of belonging they want students to feel. These moments may look small, but together they set the norm. Conflict has a process. Repair is expected. Relationships matter here.
Students need visible supports for that process. Post sentence stems. Keep reflection questions short enough to use in real time. Model what an apology sounds like when it includes both accountability and a plan. Notice the student who takes a breath before responding, the pair that solves a disagreement with words, or the group that pauses to include a classmate who feels left out. Those are signs that a culture is taking root.
At Soul Shoppe, we have seen for more than 20 years that schools feel different when students and adults share practical tools for self-regulation, communication, empathy, and repair. Hallways grow calmer. Recess becomes more inclusive. Teachers recover instructional time because fewer conflicts spiral into long cycles. Soul Shoppe is one option schools use when they want experiential support through workshops, assemblies, coaching, and related SEL resources.
The deeper goal is not perfect behavior. It is helping children build confidence, belonging, and the ability to repair relationships after something goes wrong. Conflict is a little like friction in a classroom community. Left alone, it can create heat and damage. Guided well, it can become the pressure that helps students build social strength. That is the heart of conflict resolution strategies. It is also the heart of a school community where people feel safe enough to learn and brave enough to make things right.
If you want support bringing these practices to life across classrooms, recess spaces, and family partnerships, explore Soul Shoppe. Their programs and resources focus on helping school communities build connection, safety, empathy, and practical conflict resolution skills that students can apply.
A lot of schools are dealing with the same pattern right now. A disagreement starts at recess, follows students into the hallway, reappears during math, and ends with an office referral that doesn't really solve anything. The students feel wronged, the teacher loses instructional time, and the adults are left managing the same conflict in different forms all week.
That’s why conflict resolution for schools can’t live as a single lesson, a poster in the counseling office, or a once-a-year assembly. It has to be a system. When schools build shared language, predictable routines, tiered supports, and student leadership into daily practice, conflict becomes teachable instead of punishable.
Why a School-Wide Approach to Conflict Resolution Matters
A school rarely has a “behavior problem” in isolation. More often, it has a systems problem. Students move from classroom to playground to cafeteria to aftercare, and if each space handles conflict differently, children learn that resolution depends on which adult is closest, not on a skill they can use anywhere.
That inconsistency is expensive. It costs teaching time, emotional energy, and trust. It also sends a quiet message to students that conflict is something adults take over, rather than something children can learn to manage with support.
Discipline alone doesn’t teach replacement skills
A removal, a warning, or a consequence may stop a moment. It usually doesn’t teach what the student should do next time. If a child doesn’t know how to calm down, explain an upset, listen, repair harm, or re-enter a relationship, the same pattern returns with new players.
Schools that teach conflict resolution as part of daily practice tend to see broader gains. Research summarized by the Conflict Resolution Education report found that students in CRE programs ranked 12 percentile points higher in achievement than matched peers, while the same body of research found decreases in aggressiveness, discipline referrals, and suspension rates, along with improvements in school and classroom climate.
That matters because academic focus and emotional safety are connected. A classroom where students expect ridicule, retaliation, or constant adult rescue is not a classroom where deep learning holds.
Practical rule: If your conflict process only starts after a major incident, you’re already late.
A calm campus is built, not wished for
Leaders sometimes ask whether conflict resolution is “one more initiative.” In practice, it works better as an organizing principle for how adults respond, how students speak, and how relationships are repaired.
A school-wide model gives staff a common approach to questions like these:
What happens first: Does the adult separate students, coach them, or send them out?
What language is expected: Are students taught sentence stems, listening moves, and repair routines?
When does conflict become a support issue: Which students need more than universal instruction?
How do families hear about the work: Are they getting the same language children hear at school?
Schools already investing in social-emotional learning programs for schools usually find that conflict resolution becomes one of the clearest ways SEL shows up in visible, daily behavior.
What leaders should notice first
Before launching anything new, walk the campus and listen.
Look for repeated hotspots, repeated students, and repeated adult phrases. If one teacher says “use your words,” another says “stop arguing,” and a third says “go to the office,” the school is teaching three different conflict models at once.
A school-wide approach creates coherence. And coherence is what turns conflict from a drain on learning into part of how a school teaches children to live and learn together.
Laying the Foundation for a Peaceful School
Many programs fail because schools start with materials instead of agreements. They buy a curriculum, run a training, and hope the culture changes on its own. It usually doesn’t.
A peaceful school starts with adult clarity. Staff need to know what the school believes about conflict, when adults step in, what students are expected to practice, and how repair happens after harm.
Start with a clear operating belief
The most useful starting point is simple: conflict is normal, aggression is not, and resolution is teachable.
That belief changes the tone of the whole program. Instead of asking, “How do we stop kids from having conflict?” the school asks, “How do we teach students to handle conflict safely and skillfully?”
That difference shows up in policy language, referral practices, and classroom routines.
A short guiding statement can help. For example:
At our school, conflict is addressed through safety, regulation, communication, problem-solving, and repair. We teach students to resolve everyday disagreements with support, and we respond to harm in ways that protect the community and rebuild trust.
Build a representative team before you draft anything
Don’t assign this work to one counselor and hope it spreads. Build a small implementation team with enough range to catch blind spots.
Include:
A classroom teacher: Someone who knows what can realistically happen during a busy school day.
An administrator: Someone who can align discipline practice with the new approach.
A counselor or mental health staff member: Someone who can guide regulation, crisis response, and referral pathways.
A specials, recess, or lunch representative: Many conflicts happen outside core instruction.
A family voice: Parents often catch language gaps between school and home.
If your school serves students with high stress exposure, make sure your planning reflects trauma-informed care. Adults need to distinguish between willful harm, lagging skills, and nervous-system overload. Without that lens, schools can mistake dysregulation for defiance and over-punish children who need structure, co-regulation, and predictability.
Write a policy adults can actually use
The best conflict resolution policies are short enough to remember and specific enough to apply. A dense document nobody reads won’t change practice.
Your policy should answer five things:
What counts as classroom-manageable conflict
What requires immediate adult or administrative response
What process students are taught for everyday disagreement
How restorative repair happens after harm
How incidents are documented and reviewed
A workable policy often sounds like this in plain language:
Minor peer conflict: Staff coach students through the school’s shared process.
Repeated conflict: Teacher documents patterns and requests targeted support.
Safety concern or severe aggression: Adult secures safety first, then a restorative and support process follows when students are regulated.
Repair: Students rejoin community through accountability, not just time away.
Decide what adults will do consistently
Consistency doesn’t mean every teacher has the same personality. It means students get the same sequence.
For example, adults might agree to this response pattern:
Situation
Adult move
Heated but safe disagreement
Pause interaction, regulate, coach students through script
Ongoing repeated conflict
Track pattern, notify support team, involve family
Harmful incident with safety concern
Secure safety, separate, regulate, investigate, repair later
Classroom community impact
Use circle, class meeting, or restorative conversation
Plan for the first ninety days, not just launch day
Early implementation falls apart when schools ask adults to improvise. Give staff a narrow, manageable opening routine.
A practical rollout often includes:
Shared language posters in classrooms and common spaces
Short staff scripts for coaching student conflict
A referral pathway for students who need more support
A family communication plan that explains the approach in plain terms
A meeting cadence so the implementation team can adjust quickly
Schools sustain this work when adults stop treating conflict resolution as an add-on and start treating it as part of instruction, supervision, and relationship repair.
That’s the foundation. Without it, the rest becomes a set of disconnected tactics.
Designing Tiered Interventions for Student Support
Not every student needs the same level of help. Some children need daily modeling and simple scripts. Some need extra practice in small groups. A smaller number need individualized planning because conflict is tied to trauma, skill gaps, neurodivergence, persistent peer patterns, or significant emotional dysregulation.
That’s where a tiered model helps. It keeps schools from over-referring everyday conflict while still responding seriously when students need more.
Tier 1 is for every student, every day
Tier 1 is the core of conflict resolution for schools. This is what all students are taught, in all classrooms, whether they currently struggle with conflict or not.
For younger students, one of the clearest universal models is the NAEYC three-step approach. In that model, the teacher first states the behavior and identifies emotions, then explains the implications, and finally helps children address the problem and brainstorm solutions. The approach showed 85% efficacy in reducing incidents, and after 6 weeks of consistent use, 75% of children independently verbalized solutions, compared with 20% at baseline.
That kind of Tier 1 work looks simple, but it changes a lot. Instead of “Stop it,” students hear language like:
“You both want the same blocks.”
“You seem frustrated.”
“What could you say to tell him what you need?”
“What’s another way to solve this?”
What Tier 1 should include
A strong universal layer usually includes:
Common scripts: I-statements, listening stems, repair language
Visual supports: Posters in classrooms, playgrounds, and high-conflict spaces
Adult modeling: Staff using the same language with students and with each other
Re-teaching: Short refreshers after breaks, schedule changes, and difficult incidents
If you need examples of how conflict work connects to relationship skills more broadly, this guide on relationship conflict resolution is a useful companion for thinking about shared language across settings.
Tier 2 is for students who need more repetition and coaching
Some students understand the language during a lesson but can’t access it when emotions rise. Others get stuck in the same peer conflict patterns, even with classroom support. Tier 2 is where schools provide targeted, short-term help.
These supports might include check-in groups, lunch bunches, counselor-led social problem-solving groups, or planned rehearsal before high-risk times like recess or partner work.
A Tier 2 group might practice:
entering play
handling “no”
solving turn-taking problems
responding to teasing without escalation
repairing friendship conflict after exclusion
This layer works best when it’s practical, not abstract. Students need to rehearse the exact moments that keep tripping them up.
A student who can explain the steps in counseling but can’t use them on the blacktop doesn’t need more theory. They need rehearsal in context.
Tier 3 is individualized and coordinated
Tier 3 is for students with persistent, complex, or high-impact conflict needs. At this level, the question isn’t just “How do we stop the behavior?” It’s “What function is this conflict serving, what skills are missing, and what support plan will hold under stress?”
Tier 3 often includes individualized behavior plans, counseling support, family partnership, restorative re-entry after serious incidents, and close coordination across adults.
Individual plan, family meeting, restorative re-entry, coordinated supports
Student support team
The trade-off leaders need to accept
A tiered system requires discipline from adults. Schools often overuse Tier 3 responses for Tier 1 problems, or they under-respond to Tier 3 needs by repeating classroom reminders that clearly aren’t enough.
The right question is not “What consequence fits?” It’s “What level of instruction and support fits?”
When schools answer that well, staff stop feeling like every conflict is a crisis, and students stop getting mixed signals about what help is available.
Bringing Conflict Resolution into the Classroom
Teachers don’t need another abstract framework. They need language they can use at 10:12 a.m. when two students are both claiming the same marker, one child is near tears, and the rest of the class is watching.
That’s where classroom routines matter. The strongest conflict resolution programs give teachers a repeatable script, a physical place to regulate, and enough practice time that students don’t rely on adults for every disagreement.
Use one classroom protocol until students know it cold
The Responsive Classroom conflict resolution protocol is useful because it’s concrete. It teaches four steps: Calming down, Explaining the upset, Discussion, and Acknowledgment. In implemented classrooms, teachers reported a 70 to 80% reduction in teacher interventions for peer disputes after 3 months.
Those four steps are simple enough for young children and still useful with older elementary students when the language is adjusted.
A classroom version might sound like this:
Calming down “Pause. Take a breath. Step to the calm spot if you need it.”
Explaining the upset “Say, ‘I feel upset when ___ because ___.’”
Discussion “The listener says, ‘What I hear you saying is ___.’”
Acknowledgment “End with an agreement, a thank you, or another clear sign that the conflict is closed for now.”
A script teachers can use in the moment
Say two students are arguing over scissors during a project.
Teacher: “Both of you stop for a second. Nobody is in trouble. We’re going to solve it.”
Student A: “He grabbed them.”
Teacher: “First, calm your body. Two breaths.”
Student B: “But I had them first.”
Teacher: “You’ll both get a turn. A, use the sentence frame.”
Student A: “I feel mad when you take the scissors because I was still using them.”
Teacher: “B, say back what you heard.”
Student B: “You feel mad because I took the scissors when you were still using them.”
Teacher: “A, is that right?”
Student A: “Yes.”
Teacher: “Now B, your turn.”
Student B: “I felt frustrated because I thought you were done and I needed them.”
Teacher: “A, what did you hear?”
This kind of structure slows the moment down enough for learning to happen.
Set up a calm-down spot that actually works
A peace corner only helps if it’s a tool, not a punishment chair.
Include things students can use independently:
Breathing cards
A feelings chart
Sentence stems for conflict
Paper and pencil for drawing or writing
A visual of the class conflict steps
Place it where students can regulate without becoming a spectacle. Then teach how to use it during neutral times. Don’t wait until a conflict is already active.
If the first time students hear about the calm-down spot is during an argument, they’ll experience it as removal. If they practice with it ahead of time, they’ll use it as a tool.
Mini-lessons by grade band
K to 2 lesson idea
Read a story where two characters want the same object. Pause and ask:
“How is each character feeling?”
“What could one character say with an I-statement?”
“What would good listening look like?”
Then have students role-play with puppets or picture cards.
Grades 3 to 5 lesson idea
Give students a common school scenario: one student feels left out of a game, another says the teams were already set.
Ask pairs to practice:
speaker statement
listener paraphrase
solution brainstorm
closing acknowledgment
Middle grades adaptation
Use realistic conflicts: group work, social exclusion, rumor repair, seat disputes, digital misunderstandings that spill into school.
Students usually need less simplification and more credibility. Keep the process direct. Avoid babyish language.
Build it into classroom culture, not just crisis response
Teachers get better results when conflict resolution shows up before there’s conflict.
The classroom is where the system becomes real. If students only encounter conflict resolution language in assemblies or counseling sessions, they won’t use it when it counts.
Empowering Students with Peer Mediation and Restorative Practices
When adults handle every disagreement, students may comply, but they don’t become peacemakers. A school shifts culture when students learn that they can help hold the community together.
Peer mediation is one of the clearest ways to make that shift visible.
A well-run peer mediation program doesn’t ask children to manage unsafe situations or serious harm on their own. It gives trained students a role in resolving everyday disputes that are appropriate for peer support. That usually includes friendship tension, misunderstandings, line-cutting complaints, recess disagreements, and low-level social conflict.
The results are strong. A meta-analytic review summarized in the Civil Mediation Council report on resolving conflict in schools found a 93% agreement rate across 4,327 mediations. In schools with peer mediation programs, 77.5% reported less staff time spent sorting out conflict and 63.5% reported calmer playgrounds. One documented service managed 135 student conflict cases, and 59 of those could have led to permanent exclusion or prosecution without that support.
What student mediators need to learn
Peer mediators don’t need to sound like miniature lawyers. They need a few well-practiced habits.
Train students to do these things well:
Stay neutral: No taking sides, even when one student seems more persuasive.
Use a structure: Open, hear each side, identify the problem, brainstorm, agree on next steps.
Protect privacy: Explain what stays in mediation and what must be reported for safety.
Know limits: Unsafe behavior, threats, coercion, and severe bullying go to adults.
Close clearly: End with a specific agreement, not vague goodwill.
A simple student mediator opening script can be:
“I’m here to help both of you talk and listen. I’m not choosing who’s right. Each person gets a turn, and we’re looking for a solution you can both agree to.”
How to launch without overcomplicating it
Start smaller than you think. A pilot with a trained group of upper elementary or middle grade students is usually more sustainable than a schoolwide splashy launch with weak adult support.
Choose:
one coordinator
a quiet meeting space
a referral process
a short training sequence
a supervision routine
Restorative practices fit naturally here too. For a broader frame on how circles, repair conversations, and accountability can work alongside mediation, this overview of restorative practices in education is a helpful companion.
Here’s a short look at peer-led conflict support in action:
A simple problem-solving path
Children need a short sequence they can remember under stress. Long scripts fall apart in real moments.
Say the problem: “We both want the truck.”
Listen: Use a talking object so each child gets a turn.
Pick a solution: Trade, take turns, use a timer, or find another similar item.
Check back: “Did that work?”
Soul Shoppe shares helpful examples in these conflict resolution activities for kids, and the key is the same in preschool as in older grades. Children need repeated rehearsal before a real disagreement.
What doesn’t work is forcing apologies on demand. A child can say “sorry” and still have no idea what to do next time. What works is helping children name the problem, hear another person, and try a concrete next step.
“Use your words” is too vague for most preschoolers. Give them the actual words.
For inclusive practice, use picture cards showing options like wait, trade, ask, or help. For children who struggle with transitions, keep the same conflict routine every day and post it at child height.
Assessment: Notice whether a child can state the problem, wait for a turn to speak, or choose from two possible solutions.
Home extension: Share the same classroom script with families so children hear the same language at home.
5. Belonging and Classroom Community Building
If children don’t feel they belong, every other lesson gets harder. They’re less willing to speak, take risks, ask for help, or recover from mistakes. Community building isn’t extra. It’s part of classroom management, family engagement, and learning readiness all at once.
A strong belonging lesson can be as simple as a daily greeting choice board. Children choose a wave, fist bump, dance move, or verbal hello. Then they see their photo moved from “home” to “school” on an attendance board. That small ritual tells a child, “You’re seen. You matter here.”
Routines that help children feel included
The strongest routines are predictable and visible. They don’t depend on which adult is leading that day.
Name practice: Use every child’s name often and learn the correct pronunciation from family members.
Shared jobs: Give every child a real classroom role, not just the most confident children.
Cooperative play: Choose activities where children build or create together instead of competing.
Family presence: Display family photos at eye level and refer to them naturally during the day.
For a simple movement option, cooperative games for team building can be adapted for preschool with shorter turns and clear visual expectations.
One useful classroom project is a “We Belong Here” mural. Each child adds a handprint, photo, or drawing of something important to them. During circle, children introduce one piece of their section. That works better than generic “all about me” pages that end up on a wall without shared discussion.
Assessment: Watch who enters easily, who hangs back, who knows classmates’ names, and who joins group tasks with support.
Differentiation: Offer nonverbal greeting choices, visual job cards, and a quiet participation option for children who warm up slowly.
Home extension: Ask families to send a photo, favorite song, or short note about what helps their child feel safe.
6. Social Stories and Friendship Skills Curriculum
Some social skills have to be taught directly. “Be nice” doesn’t tell a child how to join a game, ask for a turn, or respond when someone says no. Social stories help because they break a social moment into clear, repeatable steps.
Pick one friendship skill and stay with it for several days. Joining play is a good starting point. Read a short homemade social story with photos of your classroom: “I see children playing. I can watch first. I can say, ‘Can I play?’ I can join gently.” Using real photos from your room makes the story easier to transfer into daily play.
One skill at a time works best
Children learn social routines through repetition and consistency. When adults switch language constantly, children don’t know what to hold onto.
Try a mini-cycle like this over one week:
Day one: Read the social story and model the skill.
Day two: Practice with puppets.
Day three: Rehearse in centers with adult support.
Day four: Notice and narrate real examples.
Day five: Review with photos of children using the skill.
This is especially helpful for neurodiverse learners and children who need more predictability around social expectations. Existing preschool planning resources often leave that adaptation gap wide open, even though inclusive classrooms need concrete modifications for sensory needs, transitions, and social communication support, as discussed in this overview of inclusive preschool education gaps.
What works is using the same short language across adults. “Watch, ask, join gently” is easier than a long lecture in the block area.
Assessment: Track whether a child can use one step independently, such as watching first or asking to join.
Differentiation: Use picture cue cards, peer models, and shorter practice bursts in low-stress settings.
Home extension: Send the social story home so families can rehearse the same script before playdates or sibling play.
7. Self-Awareness and Personal Strengths Discovery
Preschoolers benefit from hearing what they’re good at, but broad praise isn’t enough. “Good job” fades quickly. Specific reflection helps children build a more stable sense of self.
Create a weekly “strength spotlight” for one child. Use photos, a quote, and one or two teacher observations. “You kept trying to fit the puzzle piece even when it was tricky.” “You noticed Maya was sad and brought her a tissue.” That kind of feedback teaches children to connect actions with identity.
Make strengths visible and specific
This lesson works best when strengths include both academic and social qualities. Otherwise, children start to think only fast finishers or strong talkers have value.
Use a small display or binder page with prompts like:
I enjoy
I’m learning
My friends know me for
One thing I’m proud of
Children can dictate responses while you write. Revisit those statements later so they don’t become a one-time poster and disappear into wall décor.
A nice extension is a “teacher noticing board” near sign-in. Families can read one sentence about what their child did well that day. Keep it concrete and effort-based.
Children believe the stories adults repeat about them. Make those stories accurate, generous, and specific.
For differentiation, let children respond through pointing, drawing, choosing photos, or moving objects instead of speaking. For children who struggle with self-expression, start with preference language: “I like,” “I don’t like,” “I want,” and “I need.”
Assessment: Listen for whether children can name a preference, a strength, or a task they’re still learning.
Home extension: Invite families to share one strength they see at home so school and home language align.
What works: Documentation, photos, and child dictation.
What doesn’t: Empty praise that gives no usable information.
8. Listening and Respectful Communication Lessons
Listening has to be taught as a physical and social skill. Preschoolers don’t automatically know how to wait, track a speaker, or respond respectfully, especially in a busy room with noise, movement, and competing interests.
Begin with a game, not a lecture. Sound scavenger hunts work well. Ask children to close their eyes for a few seconds and identify what they hear: a bell, footsteps, a zipper, water running. Then connect that same body posture to listening to a friend.
Teach what listening looks like
A visual checklist helps because “listen” is invisible unless you make it concrete. Draw simple icons for eyes watching, body still, mouth quiet, and ears listening.
The progression can look like this:
Model: Teacher and assistant show good and poor listening in a playful way.
Practice: Children use a talking object during partner share.
Reflect: Ask, “What did listening help us do?”
For early childhood classrooms, this kind of communication practice belongs alongside academics. Preschoolers naturally gather and organize information through hand-raising counts, tallying, and classroom voting, and teachers can help them see those moments as real data work, according to Stanford’s DREME guidance on data in the preschool classroom. A simple example is voting on which song to sing, then listening while classmates explain their choice.
What doesn’t work is expecting long carpet discussions without scaffolds. What works is short turns, visible supports, and specific praise such as, “You waited until Ana finished.”
Assessment: Watch whether a child can wait for a turn, repeat back one idea, or face the speaker during a short exchange.
Differentiation: Use visual timers, partner talk before whole group, and movement breaks between speaking turns.
Home extension: Encourage families to use one listening game during car rides or meals.
9. Celebrating Diversity and Inclusive Community Practices
Children notice differences early. They notice skin tones, languages, family structures, mobility devices, hairstyles, food, and names. If the classroom stays silent, children still form ideas. Inclusive teaching means guiding those observations with respect instead of pretending everyone is the same.
Start by looking at the room itself. Do the books, dolls, puzzles, dramatic play items, and posters reflect the children you teach and the wider world? If not, the lesson begins with changing the environment.
Small classroom choices send big messages
Use books and materials that include many kinds of families, cultures, and abilities in everyday situations, not only in holiday units. Normalize difference through routine conversation. “Ayaan says hello to grandma in Arabic.” “Lena has two homes.” “Mateo uses headphones when the room feels loud.”
This area is often underdeveloped in common preschool planning resources. Much of the available content still centers academic themes while offering limited guidance for directly embedding social-emotional learning into daily instruction, including empathy, emotional regulation, and peer connection, as noted in this discussion of a social-emotional integration gap in preschool planning.
One practical activity is a family story share. Invite each family to contribute a photo, object, song, greeting, or favorite food tradition. Keep it simple so participation is realistic. A family doesn’t need to come in person to be included.
When bias shows up, respond calmly and clearly. Children need correction without shame and guidance without silence.
For differentiation, preview new cultural materials for children who need routine, and provide sensory alternatives during music, food, or celebration activities. Inclusion isn’t only representation. It’s also access.
Assessment: Notice whether children show curiosity respectfully, use classmates’ names correctly, and include peers whose backgrounds differ from their own.
Home extension: Ask families to share one word, ritual, or tradition they’d like honored in the classroom.
10. Teaching Resilience and Growth Mindset Through Challenge Activities
A good challenge activity is hard enough to require effort and manageable enough that children can still succeed with support. That balance matters. If the task is too easy, children don’t practice persistence. If it’s too hard, you get shutdown, avoidance, or frantic behavior.
Try a building challenge with recycled materials, blocks, tape, and clothespins. Ask children to make a bridge for a toy animal or a house that won’t fall when the table is gently tapped. Then pause halfway through and ask, “What are you trying now?” That question shifts attention from outcome to strategy.
How to teach persistence without pressure
Use growth-minded language all through the lesson. “You’re still figuring it out.” “That didn’t work yet.” “What else could you try?” Keep your tone matter-of-fact. If adults become overly excited or evaluative, children start performing for approval instead of staying with the task.
Children also benefit from early exposure to data and investigation through play. Researchers and teacher supports connected to early childhood data science describe a need for practical tools that help teachers bridge abstract ideas through concrete experiences like sorting, observing, and representing information in play-based ways, as explained in Adding Data Science to Preschool Math. In a resilience lesson, children can compare which building designs stood longer or sort strategies that helped.
A reflection circle after the challenge is where much of the learning lands. Ask, “What was tricky?” “What did you do when it got frustrating?” “Who changed their plan?”
Assessment: Notice whether a child stays with a task, asks for help, tries a second strategy, or recovers after a mistake.
Differentiation: Offer graduated materials, visual step cards, and a break option for children who become overwhelmed.
Home extension: Send home one challenge prompt using common household materials and encourage families to praise effort and strategy, not speed or perfection.
These preschool lesson plan ideas work because they treat social-emotional learning as daily instruction, not an add-on. Children don’t build empathy from one kindness poster. They build it by hearing feelings named, watching adults model repair, practicing scripts in real moments, and revisiting the same skills across the year. That repetition is what turns a lesson into a habit.
If you’re trying to improve your planning, start smaller than you think you should. Pick one routine and make it consistent. An emotion check-in at arrival. A breathing station after recess. A friendship script in the block area. A class kindness replay before dismissal. Most classrooms improve through steady practice, not through a giant reset.
That matters in modern early childhood settings because the academic side of preschool has gotten more complex. Preschool enrollment reached 58% of 3 to 5-year-olds in the United States by 2023, according to the measurement lesson plans overview citing NCES data. At the same time, teachers are being asked to support early math, language, behavior, inclusion, and family partnership. The most workable response isn’t to carve the day into disconnected programs. It’s to teach whole-child skills through what you’re already doing.
For example, graphing can become a feelings lesson when children sort how they feel at morning meeting. That connects naturally to early standards for organizing and interpreting category data. A collaborative art project can become a belonging lesson when each child contributes something personal and the class practices noticing one another’s ideas. Story time can become empathy practice when children pause to read facial expressions and suggest caring responses. The strongest preschool lesson plan ideas do double duty.
Teachers also need permission to notice trade-offs. Whole-group discussions build shared language, but some children will participate better with puppets, picture cards, or partner talk first. Open-ended activities encourage voice and creativity, but many children need clear visuals and repeated scripts before they can succeed in them. Calm corners help when they’re taught proactively. They don’t help much when they’re introduced only after a child is already dysregulated and feels sent away.
Inclusion has to stay at the center of this work. If a lesson depends on long verbal responses, children with language delays or social communication differences may get left out. If it depends on noisy sensory materials, some children will spend the lesson coping rather than learning. If it assumes all families can attend daytime events or send supplies, belonging becomes uneven. Good planning anticipates those barriers and offers more than one path into participation.
Keep assessment simple and useful. In preschool, the best assessment often looks like a clipboard note, a photo, or one sentence recorded after an interaction. Can the child name a feeling with support? Ask to join play? Recover after frustration? Wait for a turn? Use a calming strategy? Those observations tell you more than a polished final product.
There’s also real value in shared language across school and home. Children do better when teachers, counselors, administrators, and caregivers use the same short phrases for breathing, listening, problem-solving, and repair. That’s one reason many schools look for SEL partners that support adults as well as children. Soul Shoppe’s work is built around connection, safety, empathy, and practical tools that school communities can use, including research-based experiential programs delivered over more than 20 years.
The goal isn’t a perfect classroom with no conflict, no tears, and no noise. Preschool shouldn’t look like that. The goal is a room where children learn what to do with big feelings, mistakes, and differences. When SEL sits at the heart of your planning, the classroom becomes calmer, clearer, and more humane. Children don’t just learn letters, numbers, and routines. They learn how to live and learn alongside other people.
If you want support turning these ideas into shared schoolwide practice, Soul Shoppe offers practical SEL programs, workshops, and tools that help children and adults build empathy, communication, conflict resolution, and belonging in everyday classroom life.
It’s 9:12 a.m. A third grader is under a table because recess ended badly. Two students are arguing over who “started it.” One child is staring at a math page and hasn’t written a thing. The teacher is trying to move the lesson forward while also protecting the room’s emotional temperature.
Most K-8 educators know this moment. So do principals. So do parents at 6:30 p.m. when homework ends in tears over something that looks small on the surface but isn’t small to the child living it.
That’s where social emotional learning tools matter. Not as an extra program you squeeze in if time allows, but as the practical supports that help kids name feelings, manage impulses, repair harm, ask for help, and stay connected enough to learn. If you want calmer classrooms, fewer repeat conflicts, stronger student relationships, and better carryover between school and home, the tools you choose matter.
Why Social Emotional Learning Tools Are No Longer Optional
A lot of schools are trying to solve behavior, engagement, attendance, and belonging as if they’re separate problems. In practice, they overlap all day long.
A student who can’t identify frustration may shut down during writing. A child who doesn’t know how to re-enter play after conflict may spend the rest of recess isolated. A class with no shared language for feelings often swings between disruption and silence. Teachers then spend huge amounts of energy reacting instead of teaching.
That’s why social emotional learning tools are no longer nice-to-have materials. They’re the routines, prompts, assessments, discussion structures, visual supports, and family practices that help adults respond early, consistently, and with less guesswork.
Schools are treating SEL as core infrastructure
This isn’t a passing trend. The global SEL market was valued at approximately USD 5.3 billion in 2025 and is projected to reach USD 47.1 billion by 2035, a projected 24.3% CAGR, according to Future Market Insights’ SEL market report. That growth signals something educators already feel on the ground. Schools are investing because they need systems that support the whole child.
The important shift is this. SEL isn’t only about a weekly lesson on kindness. It’s about building a school ecosystem where students practice self-awareness before conflict escalates, use communication tools during conflict, and reflect afterward in a way that teaches a new skill.
Practical rule: If a tool only works during a scripted lesson but disappears during transitions, lunch, recess, or homework, it isn’t enough.
What leaders and teachers need now
New principals often ask, “Where do we even start?” Teachers ask, “Do I need a curriculum, an app, or just better routines?” Parents ask, “How do I support this at home without turning dinner into therapy?”
Those are the right questions.
A useful starting point is understanding the broader benefits of social emotional learning, then getting very concrete about which tools belong in classrooms, which belong in leadership systems, and which belong in family routines.
The schools that make progress usually do three things well:
Choose tools on purpose that match student needs and staff capacity.
Implement them consistently across classrooms and home communication.
Measure what changes so SEL stays tied to real outcomes, not wishful thinking.
Understanding Your SEL Toolkit
Think of SEL like a carpenter’s toolbox. You wouldn’t use one screwdriver for every repair in a building. In the same way, schools shouldn’t expect one app or one lesson series to carry the full emotional life of a campus.
A strong SEL toolkit includes different kinds of supports for different jobs. Some tools help students identify feelings. Others help them calm their bodies, repair peer conflict, or bring families into the same language.
Research on evidence-based elementary SEL programs gives us a helpful blueprint. Analysis found that components like identifying others’ feelings (100% of programs), identifying one’s own feelings (92.3%), and behavioral coping skills (91.7%) are foundational, as described in this systematic analysis of elementary SEL programs. That matters because it tells us what effective social emotional learning tools should teach.
Four kinds of tools most schools need
Some educators hear “SEL tools” and think only of digital platforms. That’s too narrow. The toolkit is broader.
Digital apps and platforms
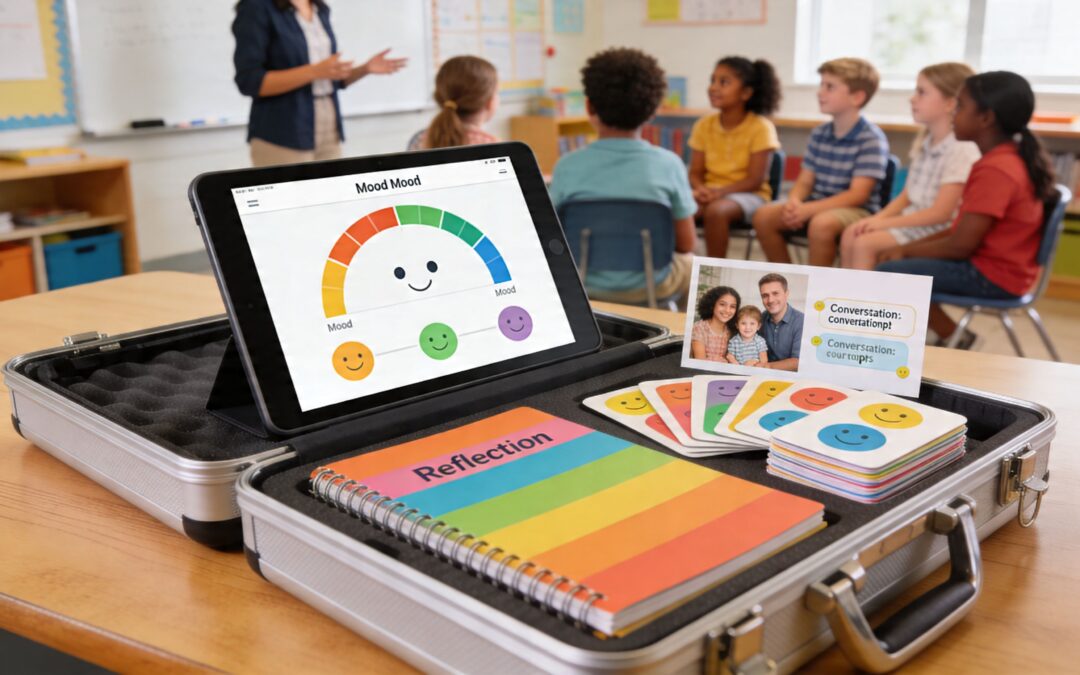
These tools help with check-ins, reflection, student self-assessment, mood tracking, or guided regulation.
A classroom example: a fifth grade teacher starts the day with a digital feelings check-in. Students select a feeling word and a readiness level before math. The teacher notices three students flagging frustration and pulls them for a quick preview before independent work starts.
At home, a parent might use a simple app-based mood check after school and ask, “Was that feeling about work, friendship, or energy?”
Digital tools are useful when you need:
Quick visibility into how students are doing
Consistent data collection across classrooms
Easy access for students, staff, and sometimes families
They’re less useful when staff haven’t built routines around what happens after the data comes in.
Formal curricula and programs
These are structured lesson sequences, often aligned to CASEL competencies, that teach skills such as empathy, self-regulation, listening, conflict resolution, and decision-making.
Example: a second grade class practices role-play around joining a game at recess. Students rehearse language like, “Can I join?” and “What role can I take?” That sounds simple, but for many children, direct practice changes what happens outside.
This category gets overlooked, even though it’s where SEL often becomes real. Morning meetings, calm corners, partner shares, repair circles, breathing routines, and transition scripts all count.
A kindergarten peace corner might include:
Feelings visuals so students can point before they have the words
Breathing prompts for body regulation
A reflection card with “What happened?” and “What do I need?”
A middle school advisory routine might open with, “What’s one challenge you handled well this week?” That builds reflection without forcing disclosure.
A tool becomes powerful when students can use it independently, not only when an adult prompts it.
Family engagement practices
If school and home use completely different language, students often don’t transfer skills well. Family engagement tools close that gap.
Examples include:
Dinner table prompts like “When did you feel included today?”
Take-home conflict scripts such as “I felt __ when __. Next time I need __.”
Brief family workshops where caregivers try the same calming routine students use at school
A fourth grader who learns “pause, breathe, say what you need” in class can use the same sequence before a sibling conflict at home if adults reinforce it.
Comparing Categories of Social Emotional Learning Tools
Tool Type
Primary Use Case
Pros
Cons
Digital Apps and Platforms
Check-ins, tracking, reflection, screening
Easy to scale, fast data access, useful across classrooms
Can become passive if staff don’t respond to results
Low cost, immediate impact, easy to embed into the day
Quality depends on adult consistency
Family Engagement Practices
Home-school carryover
Extends SEL beyond campus, helps parents reinforce skills
Needs simple communication and family-friendly design
A simple way to think about fit
If your biggest issue is constant peer conflict, don’t buy only a dashboard. If your staff lacks shared language, routines alone may not be enough. If families feel disconnected, a strong classroom plan still won’t travel home by itself.
Most schools need a mix. The goal isn’t to collect tools. It’s to build a system where each tool has a job.
How to Choose the Right SEL Tools for Your School
The wrong way to choose SEL tools is to start with the flashiest demo.
The better way is to start with your school’s friction points. Where are students getting stuck? Where are adults losing time? Which moments feel predictable in the worst way?
A principal might say, “Our classrooms are calm during lessons, but lunch and recess keep unraveling the day.” That school may need conflict-resolution routines, adult supervision scripts, and student practice with peer repair. Another school may say, “Our students can talk about feelings, but they fall apart during academic frustration.” That points more toward self-management tools and coping routines.
Match the tool to the problem
Before you purchase anything, name the problem in plain language.
Try prompts like these with your team:
Where do students struggle most? During transitions, partner work, unstructured time, or independent tasks?
What do students need more of? Emotion vocabulary, impulse control, empathy, conflict repair, or help-seeking?
What do adults need more of? Shared language, usable routines, clearer data, or family communication supports?
A practical example: if fourth graders keep escalating minor social misunderstandings into office referrals, a weekly empathy lesson alone probably won’t solve it. They may need sentence stems for disagreement, brief restorative routines after conflict, and adult coaching in the moment.
Developmental fit matters
Not every tool works for every age. A first grader needs concrete language, visuals, and repeated modeling. An eighth grader usually needs more privacy, more autonomy, and less “performing feelings” in front of peers.
Look for signs of developmental fit:
K-2 tools should be visual, repetitive, embodied, and brief.
Grades 3-5 tools should blend direct teaching with reflection and practice.
Grades 6-8 tools should respect dignity, choice, and social complexity.
For instance, a feelings chart works in first grade because it helps children locate emotion quickly. In middle school, a private reflection form or advisory prompt may work better because students don’t want to announce vulnerability publicly.
Capacity beats ambition
A school can buy a strong program and still fail if staff can’t use it consistently.
Ask hard questions early:
How much training does this require?
Can teachers use it inside a normal school day?
Will counselors, recess staff, and classroom teachers all understand it the same way?
Does it create one more initiative, or does it simplify what adults already do?
If your staff is stretched thin, low-burden options may be wiser. The Wallace Foundation has highlighted low-cost, low-burden SEL “kernels” as flexible strategies for specific behaviors, which is why schools under pressure should consider routines and short practices, not just full programs.
Equity cannot be an afterthought
Many schools make a costly mistake by choosing tools that appear neutral but don’t reflect students’ lived experience, community context, or the ways bias shapes behavior interpretation.
Black SEL raises an important challenge to standard programs. It argues that many mainstream approaches overlook systemic issues and cultural context, making culturally affirming approaches necessary for Black and marginalized students. That perspective is described on the Black SEL about page.
What does that mean in practice?
It means asking:
Whose communication style does this tool assume is “appropriate”?
Do examples, stories, and role-plays reflect our students and families?
Does the tool build belonging, or does it reward compliance without context?
A school serving diverse communities might adapt scenarios so students discuss real peer dynamics they recognize, not generic workbook conflicts. Family nights might include multilingual materials and examples that reflect actual home routines.
If students don’t see themselves in the tool, adults often misread resistance as lack of skill.
Don’t ignore low-cost options
A tight budget doesn’t mean you can’t do strong SEL work. Many high-impact practices are routines, scripts, and habits.
A school with limited funds might start with:
Daily check-in circles
Calm-down menus in every room
Peer conflict scripts posted at student eye level
Weekly family conversation prompts
Brief advisory lessons using existing staff
If you want classroom-ready ideas to pair with a broader plan, Kuraplan’s roundup of social emotional learning activities offers practical examples educators can adapt.
One example from the field: some schools use a conflict pathway tool so students can talk through what happened, how each person feels, and what repair looks like. Soul Shoppe offers a Peace Path with Tutorial that fits that kind of practical, skill-based conflict resolution approach.
A procurement checklist leaders can actually use
Bring this checklist into vendor meetings or planning sessions.
Problem fit Does this tool solve a problem we’ve clearly named?
Age fit Will our students use it, from primary grades through middle school where applicable?
Cultural fit Does it reflect our students’ identities, experiences, and community realities?
Staff fit Can teachers, counselors, and support staff use it without heavy overload?
Family fit Is there a simple way for caregivers to reinforce the same language at home?
Measurement fit Can we tell whether it’s helping through observations, assessments, or behavior patterns?
Sustainability Will this still work after the launch excitement fades?
Schools rarely need the most complicated option. They need the clearest one.
If your team is choosing among full-school approaches, this guide to SEL programs for schools can help frame the decision around implementation reality, not just features.
A Guide to Implementing SEL Tools School-Wide
The best SEL tool can still fail in a school that launches too fast, trains too little, or treats implementation like a one-time event.
School-wide SEL works when adults share a common approach, students experience it in predictable ways, and families hear language that matches what happens in classrooms.
Research gives leaders one more reason to stay committed. A thorough synthesis of SEL research found that students participating in SEL programs achieved an average 11 percentage point gain in academic performance compared with peers, as summarized in this SEL research synthesis article. For principals trying to balance behavior support with instructional goals, that matters.
Start with a small leadership team
Don’t put implementation on one counselor and hope for the best.
Build a team that includes:
An administrator who can align decisions and remove barriers
Classroom teachers from different grade bands
Student support staff such as counselors or psychologists
A family-facing voice such as a parent liaison or community coordinator
This group should answer practical questions. Where will SEL happen daily? Which routines are essential? What language will adults use during conflict? How will families hear about it?
A good launch feels organized, not crowded.
Train adults on use, not just philosophy
Teachers don’t need another abstract lecture on why emotions matter. They need language, modeling, and repetition.
Useful staff training sounds like this:
What do I say when two students interrupt each other in conflict?
How do I run a two-minute reset without losing the lesson?
What should a calm corner include?
How do I respond when a student refuses the SEL routine?
Practice the routine exactly as students will experience it. If the tool is a check-in, teachers should do the check-in. If the tool is a repair conversation, staff should role-play the script.
Adults need the same thing students need. Clear language, repeated practice, and a low-stakes chance to get it wrong before the real moment arrives.
Pilot before going school-wide
A pilot gives your school room to learn. Choose a grade span, a few classrooms, or one common setting like advisory or morning meeting.
During the pilot, watch for:
What students use independently
Which routines teachers can sustain
Where confusion shows up
What families understand right away and what needs translation into simpler language
For example, a pilot in grades 2 and 5 might reveal that younger students use feelings visuals easily, while older students respond better to journal prompts and partner processing.
That kind of feedback saves schools from rolling out something polished on paper but clumsy in real life.
Build SEL into the existing day
SEL works best when it’s embedded where students already are.
Try structures like these:
In classrooms
A teacher opens class with a one-minute emotional weather report. Students show “sunny,” “cloudy,” or “stormy” with fingers or cards. The teacher doesn’t turn it into a full discussion every time. The point is awareness.
During reading, students pause and ask, “What might this character be feeling, and what clues tell us that?” That turns literacy into empathy practice.
During conflict
A recess aide uses a short script:
What happened?
What were you feeling?
What do you need now?
What can repair look like?
The script matters because adults often improvise differently under stress. Students benefit when the process is predictable.
During transitions
A fourth grade class practices one shared reset. Feet still. One breath in. Long breath out. Eyes on the next task. The routine takes less time than repeated redirection.
If school climate is part of the larger goal, this article on how to improve school culture pairs well with implementation planning.
Bring families in early and simply
Parents and caregivers don’t need a stack of theory. They need a few doable ways to reinforce the same skills.
Good family implementation often includes:
A one-page SEL language guide with terms students are using
Take-home prompts for dinner or bedtime
Short workshops where caregivers try the routines themselves
Teacher messages that describe the tool in plain language
Example take-home prompt for K-2: “What was one feeling you had today? What helped you?”
Example for grades 4-8: “When did you disagree with someone today? How did you handle it?”
Later in the rollout, it helps to give families something concrete to watch and discuss.