Soul Shoppe's work is made possible by donors and partners who care deeply about the young people in their communities! We can't do this work without you. Support our work in classrooms and on playgrounds across the nation by donating here.
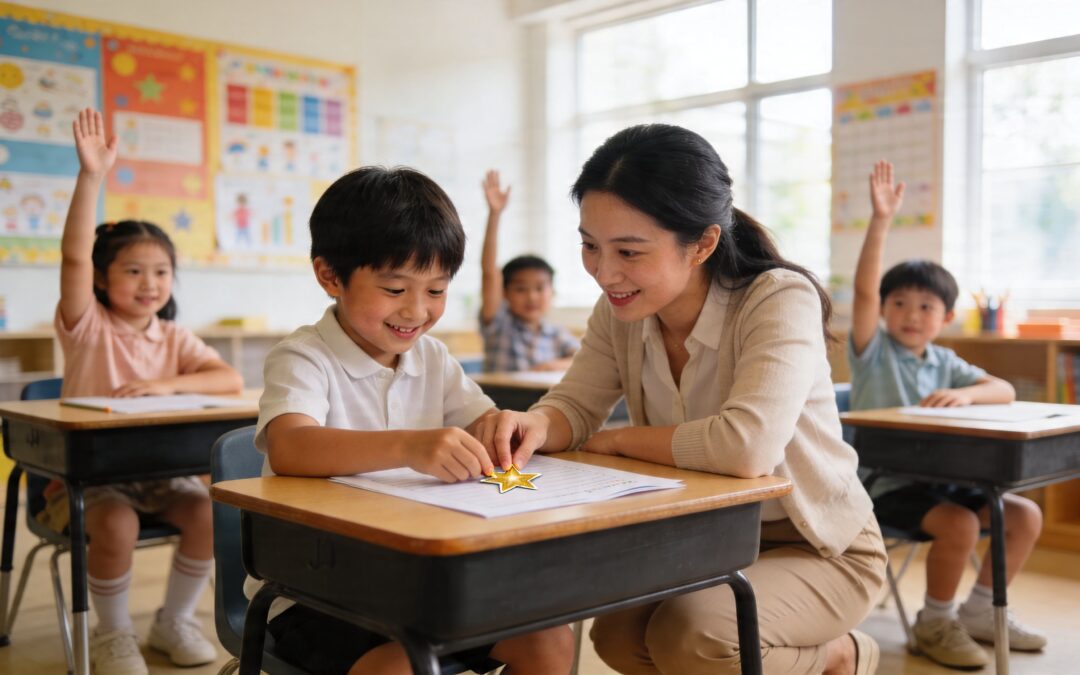
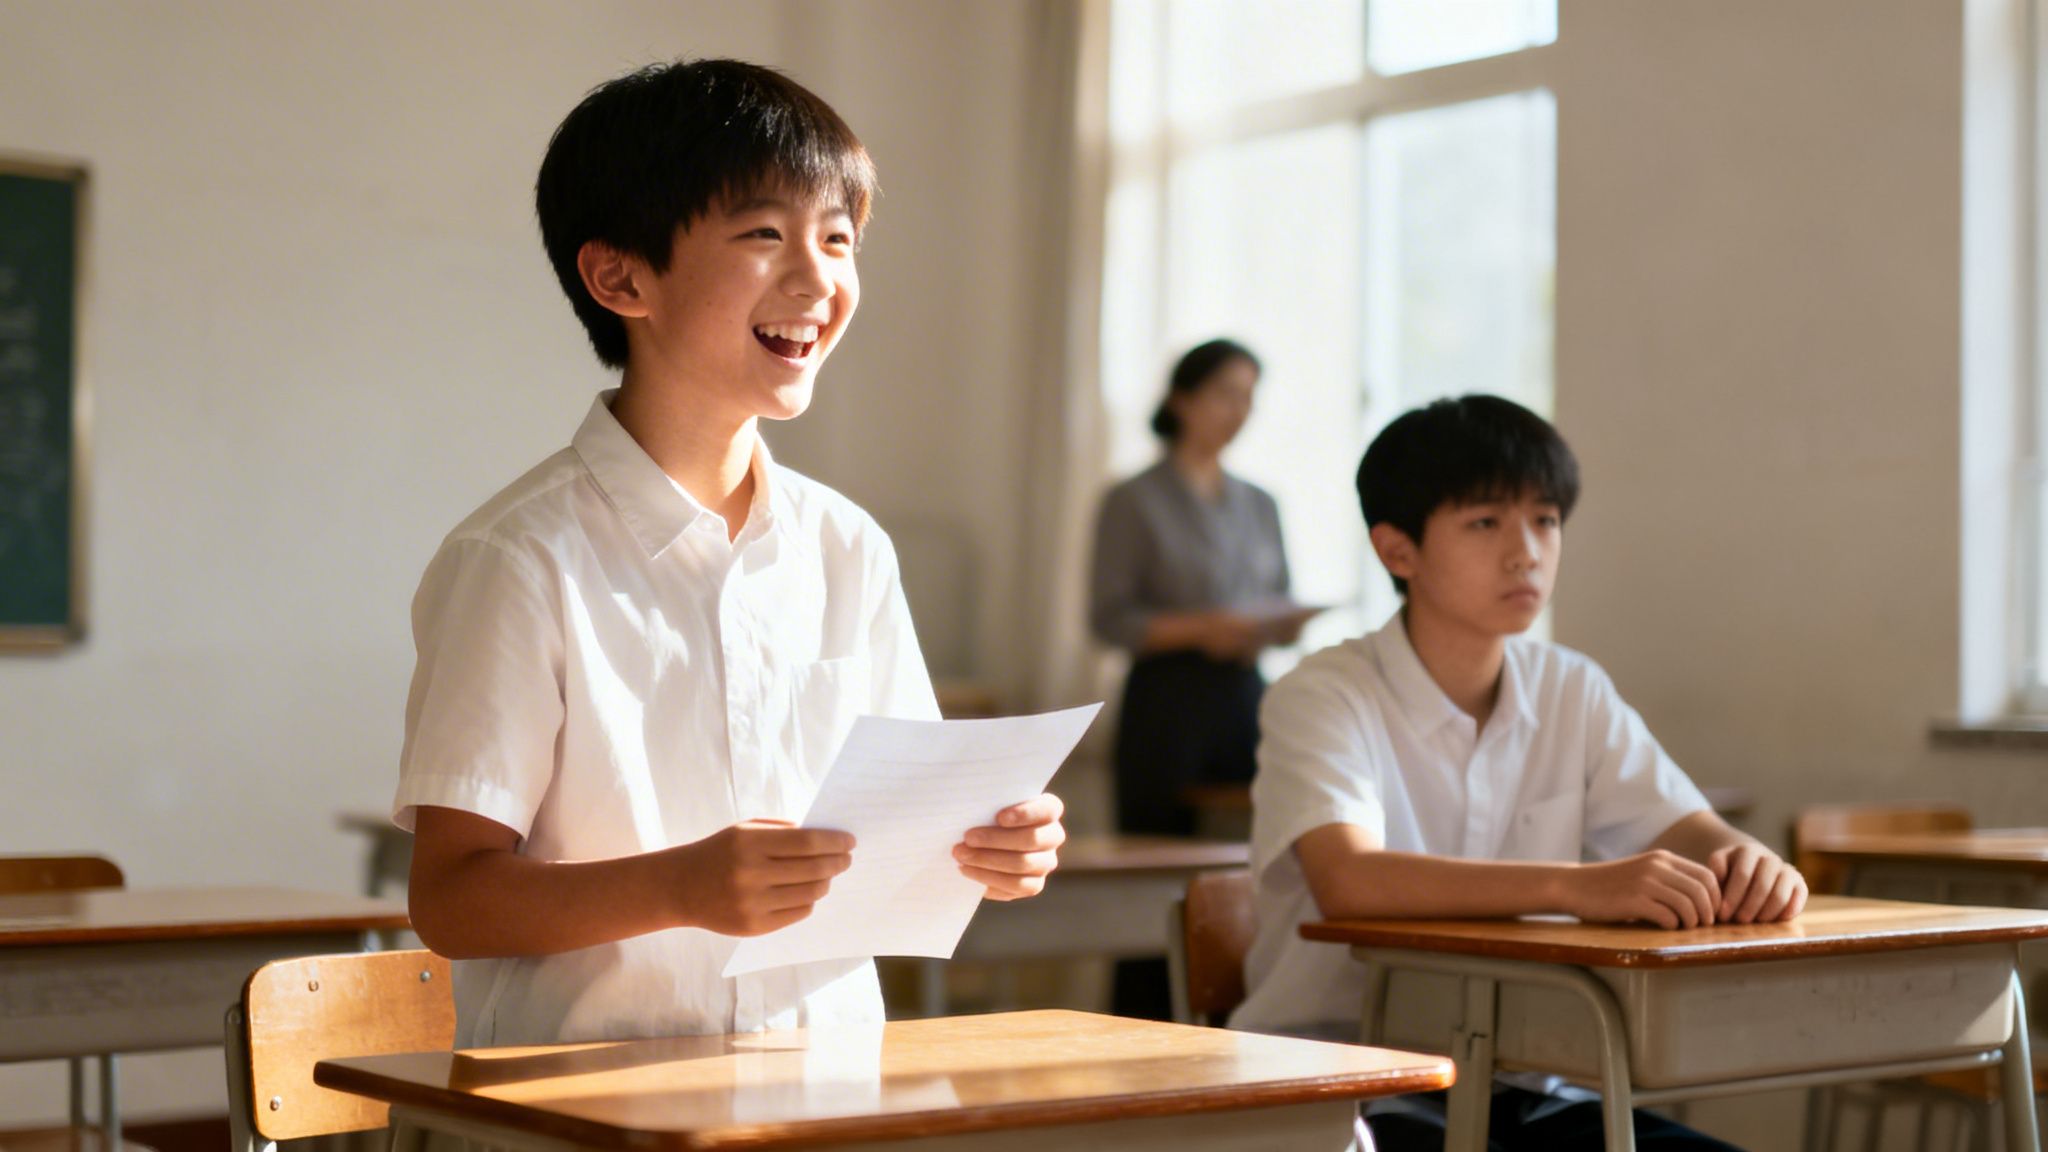
It’s 9:12 a.m. A third grader is under a table because recess ended badly. Two students are arguing over who “started it.” One child is staring at a math page and hasn’t written a thing. The teacher is trying to move the lesson forward while also protecting the room’s emotional temperature.
Most K-8 educators know this moment. So do principals. So do parents at 6:30 p.m. when homework ends in tears over something that looks small on the surface but isn’t small to the child living it.
That’s where social emotional learning tools matter. Not as an extra program you squeeze in if time allows, but as the practical supports that help kids name feelings, manage impulses, repair harm, ask for help, and stay connected enough to learn. If you want calmer classrooms, fewer repeat conflicts, stronger student relationships, and better carryover between school and home, the tools you choose matter.
Why Social Emotional Learning Tools Are No Longer Optional
A lot of schools are trying to solve behavior, engagement, attendance, and belonging as if they’re separate problems. In practice, they overlap all day long.
A student who can’t identify frustration may shut down during writing. A child who doesn’t know how to re-enter play after conflict may spend the rest of recess isolated. A class with no shared language for feelings often swings between disruption and silence. Teachers then spend huge amounts of energy reacting instead of teaching.
That’s why social emotional learning tools are no longer nice-to-have materials. They’re the routines, prompts, assessments, discussion structures, visual supports, and family practices that help adults respond early, consistently, and with less guesswork.
Schools are treating SEL as core infrastructure
This isn’t a passing trend. The global SEL market was valued at approximately USD 5.3 billion in 2025 and is projected to reach USD 47.1 billion by 2035, a projected 24.3% CAGR, according to Future Market Insights’ SEL market report. That growth signals something educators already feel on the ground. Schools are investing because they need systems that support the whole child.
The important shift is this. SEL isn’t only about a weekly lesson on kindness. It’s about building a school ecosystem where students practice self-awareness before conflict escalates, use communication tools during conflict, and reflect afterward in a way that teaches a new skill.
Practical rule: If a tool only works during a scripted lesson but disappears during transitions, lunch, recess, or homework, it isn’t enough.
What leaders and teachers need now
New principals often ask, “Where do we even start?” Teachers ask, “Do I need a curriculum, an app, or just better routines?” Parents ask, “How do I support this at home without turning dinner into therapy?”
Those are the right questions.
A useful starting point is understanding the broader benefits of social emotional learning, then getting very concrete about which tools belong in classrooms, which belong in leadership systems, and which belong in family routines.
The schools that make progress usually do three things well:
Choose tools on purpose that match student needs and staff capacity.
Implement them consistently across classrooms and home communication.
Measure what changes so SEL stays tied to real outcomes, not wishful thinking.
Understanding Your SEL Toolkit
Think of SEL like a carpenter’s toolbox. You wouldn’t use one screwdriver for every repair in a building. In the same way, schools shouldn’t expect one app or one lesson series to carry the full emotional life of a campus.
A strong SEL toolkit includes different kinds of supports for different jobs. Some tools help students identify feelings. Others help them calm their bodies, repair peer conflict, or bring families into the same language.
Research on evidence-based elementary SEL programs gives us a helpful blueprint. Analysis found that components like identifying others’ feelings (100% of programs), identifying one’s own feelings (92.3%), and behavioral coping skills (91.7%) are foundational, as described in this systematic analysis of elementary SEL programs. That matters because it tells us what effective social emotional learning tools should teach.
Four kinds of tools most schools need
Some educators hear “SEL tools” and think only of digital platforms. That’s too narrow. The toolkit is broader.
Digital apps and platforms
These tools help with check-ins, reflection, student self-assessment, mood tracking, or guided regulation.
A classroom example: a fifth grade teacher starts the day with a digital feelings check-in. Students select a feeling word and a readiness level before math. The teacher notices three students flagging frustration and pulls them for a quick preview before independent work starts.
At home, a parent might use a simple app-based mood check after school and ask, “Was that feeling about work, friendship, or energy?”
Digital tools are useful when you need:
Quick visibility into how students are doing
Consistent data collection across classrooms
Easy access for students, staff, and sometimes families
They’re less useful when staff haven’t built routines around what happens after the data comes in.
Formal curricula and programs
These are structured lesson sequences, often aligned to CASEL competencies, that teach skills such as empathy, self-regulation, listening, conflict resolution, and decision-making.
Example: a second grade class practices role-play around joining a game at recess. Students rehearse language like, “Can I join?” and “What role can I take?” That sounds simple, but for many children, direct practice changes what happens outside.
This category gets overlooked, even though it’s where SEL often becomes real. Morning meetings, calm corners, partner shares, repair circles, breathing routines, and transition scripts all count.
A kindergarten peace corner might include:
Feelings visuals so students can point before they have the words
Breathing prompts for body regulation
A reflection card with “What happened?” and “What do I need?”
A middle school advisory routine might open with, “What’s one challenge you handled well this week?” That builds reflection without forcing disclosure.
A tool becomes powerful when students can use it independently, not only when an adult prompts it.
Family engagement practices
If school and home use completely different language, students often don’t transfer skills well. Family engagement tools close that gap.
Examples include:
Dinner table prompts like “When did you feel included today?”
Take-home conflict scripts such as “I felt __ when __. Next time I need __.”
Brief family workshops where caregivers try the same calming routine students use at school
A fourth grader who learns “pause, breathe, say what you need” in class can use the same sequence before a sibling conflict at home if adults reinforce it.
Comparing Categories of Social Emotional Learning Tools
Tool Type
Primary Use Case
Pros
Cons
Digital Apps and Platforms
Check-ins, tracking, reflection, screening
Easy to scale, fast data access, useful across classrooms
Can become passive if staff don’t respond to results
Low cost, immediate impact, easy to embed into the day
Quality depends on adult consistency
Family Engagement Practices
Home-school carryover
Extends SEL beyond campus, helps parents reinforce skills
Needs simple communication and family-friendly design
A simple way to think about fit
If your biggest issue is constant peer conflict, don’t buy only a dashboard. If your staff lacks shared language, routines alone may not be enough. If families feel disconnected, a strong classroom plan still won’t travel home by itself.
Most schools need a mix. The goal isn’t to collect tools. It’s to build a system where each tool has a job.
How to Choose the Right SEL Tools for Your School
The wrong way to choose SEL tools is to start with the flashiest demo.
The better way is to start with your school’s friction points. Where are students getting stuck? Where are adults losing time? Which moments feel predictable in the worst way?
A principal might say, “Our classrooms are calm during lessons, but lunch and recess keep unraveling the day.” That school may need conflict-resolution routines, adult supervision scripts, and student practice with peer repair. Another school may say, “Our students can talk about feelings, but they fall apart during academic frustration.” That points more toward self-management tools and coping routines.
Match the tool to the problem
Before you purchase anything, name the problem in plain language.
Try prompts like these with your team:
Where do students struggle most? During transitions, partner work, unstructured time, or independent tasks?
What do students need more of? Emotion vocabulary, impulse control, empathy, conflict repair, or help-seeking?
What do adults need more of? Shared language, usable routines, clearer data, or family communication supports?
A practical example: if fourth graders keep escalating minor social misunderstandings into office referrals, a weekly empathy lesson alone probably won’t solve it. They may need sentence stems for disagreement, brief restorative routines after conflict, and adult coaching in the moment.
Developmental fit matters
Not every tool works for every age. A first grader needs concrete language, visuals, and repeated modeling. An eighth grader usually needs more privacy, more autonomy, and less “performing feelings” in front of peers.
Look for signs of developmental fit:
K-2 tools should be visual, repetitive, embodied, and brief.
Grades 3-5 tools should blend direct teaching with reflection and practice.
Grades 6-8 tools should respect dignity, choice, and social complexity.
For instance, a feelings chart works in first grade because it helps children locate emotion quickly. In middle school, a private reflection form or advisory prompt may work better because students don’t want to announce vulnerability publicly.
Capacity beats ambition
A school can buy a strong program and still fail if staff can’t use it consistently.
Ask hard questions early:
How much training does this require?
Can teachers use it inside a normal school day?
Will counselors, recess staff, and classroom teachers all understand it the same way?
Does it create one more initiative, or does it simplify what adults already do?
If your staff is stretched thin, low-burden options may be wiser. The Wallace Foundation has highlighted low-cost, low-burden SEL “kernels” as flexible strategies for specific behaviors, which is why schools under pressure should consider routines and short practices, not just full programs.
Equity cannot be an afterthought
Many schools make a costly mistake by choosing tools that appear neutral but don’t reflect students’ lived experience, community context, or the ways bias shapes behavior interpretation.
Black SEL raises an important challenge to standard programs. It argues that many mainstream approaches overlook systemic issues and cultural context, making culturally affirming approaches necessary for Black and marginalized students. That perspective is described on the Black SEL about page.
What does that mean in practice?
It means asking:
Whose communication style does this tool assume is “appropriate”?
Do examples, stories, and role-plays reflect our students and families?
Does the tool build belonging, or does it reward compliance without context?
A school serving diverse communities might adapt scenarios so students discuss real peer dynamics they recognize, not generic workbook conflicts. Family nights might include multilingual materials and examples that reflect actual home routines.
If students don’t see themselves in the tool, adults often misread resistance as lack of skill.
Don’t ignore low-cost options
A tight budget doesn’t mean you can’t do strong SEL work. Many high-impact practices are routines, scripts, and habits.
A school with limited funds might start with:
Daily check-in circles
Calm-down menus in every room
Peer conflict scripts posted at student eye level
Weekly family conversation prompts
Brief advisory lessons using existing staff
If you want classroom-ready ideas to pair with a broader plan, Kuraplan’s roundup of social emotional learning activities offers practical examples educators can adapt.
One example from the field: some schools use a conflict pathway tool so students can talk through what happened, how each person feels, and what repair looks like. Soul Shoppe offers a Peace Path with Tutorial that fits that kind of practical, skill-based conflict resolution approach.
A procurement checklist leaders can actually use
Bring this checklist into vendor meetings or planning sessions.
Problem fit Does this tool solve a problem we’ve clearly named?
Age fit Will our students use it, from primary grades through middle school where applicable?
Cultural fit Does it reflect our students’ identities, experiences, and community realities?
Staff fit Can teachers, counselors, and support staff use it without heavy overload?
Family fit Is there a simple way for caregivers to reinforce the same language at home?
Measurement fit Can we tell whether it’s helping through observations, assessments, or behavior patterns?
Sustainability Will this still work after the launch excitement fades?
Schools rarely need the most complicated option. They need the clearest one.
If your team is choosing among full-school approaches, this guide to SEL programs for schools can help frame the decision around implementation reality, not just features.
A Guide to Implementing SEL Tools School-Wide
The best SEL tool can still fail in a school that launches too fast, trains too little, or treats implementation like a one-time event.
School-wide SEL works when adults share a common approach, students experience it in predictable ways, and families hear language that matches what happens in classrooms.
Research gives leaders one more reason to stay committed. A thorough synthesis of SEL research found that students participating in SEL programs achieved an average 11 percentage point gain in academic performance compared with peers, as summarized in this SEL research synthesis article. For principals trying to balance behavior support with instructional goals, that matters.
Start with a small leadership team
Don’t put implementation on one counselor and hope for the best.
Build a team that includes:
An administrator who can align decisions and remove barriers
Classroom teachers from different grade bands
Student support staff such as counselors or psychologists
A family-facing voice such as a parent liaison or community coordinator
This group should answer practical questions. Where will SEL happen daily? Which routines are essential? What language will adults use during conflict? How will families hear about it?
A good launch feels organized, not crowded.
Train adults on use, not just philosophy
Teachers don’t need another abstract lecture on why emotions matter. They need language, modeling, and repetition.
Useful staff training sounds like this:
What do I say when two students interrupt each other in conflict?
How do I run a two-minute reset without losing the lesson?
What should a calm corner include?
How do I respond when a student refuses the SEL routine?
Practice the routine exactly as students will experience it. If the tool is a check-in, teachers should do the check-in. If the tool is a repair conversation, staff should role-play the script.
Adults need the same thing students need. Clear language, repeated practice, and a low-stakes chance to get it wrong before the real moment arrives.
Pilot before going school-wide
A pilot gives your school room to learn. Choose a grade span, a few classrooms, or one common setting like advisory or morning meeting.
During the pilot, watch for:
What students use independently
Which routines teachers can sustain
Where confusion shows up
What families understand right away and what needs translation into simpler language
For example, a pilot in grades 2 and 5 might reveal that younger students use feelings visuals easily, while older students respond better to journal prompts and partner processing.
That kind of feedback saves schools from rolling out something polished on paper but clumsy in real life.
Build SEL into the existing day
SEL works best when it’s embedded where students already are.
Try structures like these:
In classrooms
A teacher opens class with a one-minute emotional weather report. Students show “sunny,” “cloudy,” or “stormy” with fingers or cards. The teacher doesn’t turn it into a full discussion every time. The point is awareness.
During reading, students pause and ask, “What might this character be feeling, and what clues tell us that?” That turns literacy into empathy practice.
During conflict
A recess aide uses a short script:
What happened?
What were you feeling?
What do you need now?
What can repair look like?
The script matters because adults often improvise differently under stress. Students benefit when the process is predictable.
During transitions
A fourth grade class practices one shared reset. Feet still. One breath in. Long breath out. Eyes on the next task. The routine takes less time than repeated redirection.
If school climate is part of the larger goal, this article on how to improve school culture pairs well with implementation planning.
Bring families in early and simply
Parents and caregivers don’t need a stack of theory. They need a few doable ways to reinforce the same skills.
Good family implementation often includes:
A one-page SEL language guide with terms students are using
Take-home prompts for dinner or bedtime
Short workshops where caregivers try the routines themselves
Teacher messages that describe the tool in plain language
Example take-home prompt for K-2: “What was one feeling you had today? What helped you?”
Example for grades 4-8: “When did you disagree with someone today? How did you handle it?”
Later in the rollout, it helps to give families something concrete to watch and discuss.
A strong school-to-home connection creates shared language. When a child hears “pause, name it, choose your next step” at school and then hears a similar prompt at home, the skill sticks faster.
Keep the rollout calm
Not every classroom will look identical, and that’s fine. The goal is consistency in essentials, not robotic sameness.
Pick a few school-wide anchors:
One common check-in approach
One shared conflict repair process
One or two family-facing routines
A regular way for staff to reflect on what’s working
That creates enough structure for coherence and enough flexibility for teachers to sound like themselves.
Measuring the Impact of Your SEL Investment
Schools often measure SEL in one of two weak ways. They either rely only on anecdotes, or they chase numbers that don’t tell the story.
Better measurement combines both. You want to know what adults and students are experiencing, and you want to know whether patterns are shifting over time.
Start with what people notice
Qualitative data matters because SEL often shows up first in daily interactions.
Look for evidence in:
Teacher observation notes about student regulation, peer interaction, and participation
Student reflections or focus groups that reveal whether tools feel useful
Family feedback on home carryover
School climate surveys that surface belonging, safety, and connection
A teacher might report, “Students are using the conflict script without waiting for me.” A parent might say, “My child now tells me she needs a break instead of slamming the door.” Those aren’t soft signals. They’re signs that the skill is generalizing.
Pair stories with trackable indicators
Quantitative indicators help leaders see whether change is broad enough to matter across a school.
Common school indicators include:
Discipline referrals
Attendance patterns
Bullying or conflict reports
Classroom removal patterns
Participation trends
You don’t need to claim that every shift comes only from SEL. School life is more complex than that. But you can look for movement that aligns with your implementation. If a grade level uses a shared reset and conflict script consistently, do adults report fewer repeated escalations? Are students returning to learning more quickly?
Use assessment tools carefully
Some schools also need direct measures of student competency growth. That’s where structured SEL assessments can help.
ERB’s SelfWise Inventory is one example of a web-based self-assessment aligned to CASEL competencies. According to ERB’s overview of measuring and analyzing social-emotional skills, tools like SelfWise provide actionable data by measuring student self-perception on competencies and helping schools track progress and identify where interventions are needed.
That kind of tool is helpful when you want to answer questions like:
Are students reporting stronger self-awareness over time?
Which grade levels need more support with relationship skills?
Are classroom practices connecting to what students say about themselves?
Build a usable data routine
The mistake isn’t collecting too little data. It’s collecting too much and doing nothing with it.
A practical school routine might look like this:
Data Type
What to Review
What to Ask
Teacher observations
Use of calming and conflict tools
Are students using the skill independently or only with prompting?
Student self-assessments
Self-awareness, social awareness, relationship indicators
Which skills appear strongest, and where are gaps?
Behavior patterns
Referrals, repeated conflicts, removals
Are problem moments changing in frequency or intensity?
Family feedback
Carryover at home
Do caregivers understand and use the language?
Turn results into a story stakeholders understand
Boards, families, and staff need a simple narrative.
It might sound like this: “We introduced common check-in and repair routines, trained staff, and gave families matching language. Teachers report more student independence in problem-solving. Student self-assessment data points us to a continued need in relationship skills. Behavior incidents during unstructured time are where we’re watching next.”
Measure whether students can do something new, not just whether adults delivered the lesson.
That’s the essential return on investment. Better SEL measurement helps schools improve supports, protect time, and make future decisions with more confidence.
Real-World Examples from Thriving Schools
The schools below are fictional, but the situations are familiar. They reflect what many K-8 teams see when they put social emotional learning tools into daily use.
Jefferson Elementary and the reset that changed mornings
Jefferson’s primary classrooms started each day with scattered energy. Students came in carrying bus drama, family stress, and the rough edge of rushed mornings. Teachers spent the first block redirecting, soothing, and trying to get everyone ready to learn.
The school didn’t begin with a full new program. They started with two routines. A morning feelings check-in and a short class circle where students practiced naming one need for the day.
Within weeks, teachers noticed a shift in tone. Students who used to act out early were more likely to say, “I’m upset,” or “I need a minute.” The morning wasn’t perfect, but it became more predictable. Adults spent less time guessing what was wrong.
Oakwood Middle School and private stress tools
Oakwood had a different issue. Students didn’t want to talk publicly about feelings, especially before tests or presentations. Teachers knew anxiety was showing up, but whole-group discussions fell flat.
The school added a digital self-reflection routine during advisory. Students completed a quick private check-in and selected a coping option before high-stress academic moments. Advisors then knew which students needed a quiet nudge, a breathing prompt, or a quick one-on-one.
The key wasn’t the technology by itself. It was privacy plus follow-through. Students felt less put on the spot, and teachers had a clearer path to support.
Willow Creek and the family language bridge
Willow Creek’s staff felt good about classroom SEL, but parents said they weren’t sure how to continue it at home. Students used school language during the day, then lost it by evening when sibling conflict or homework stress hit.
So the school began sending home one family prompt each week. Nothing fancy. One question for the dinner table, one calming strategy, and one sentence stem for conflict.
A third grade parent later shared that “What do you need right now?” had replaced “What is your problem?” in their home. That one language shift changed the feel of hard moments.
What these examples have in common
None of these schools tried to fix everything at once.
They chose tools that matched the problem in front of them. They kept routines simple enough for adults to use under pressure. And they made sure students could practice the same skills in more than one setting.
That’s what thriving schools usually do. They make SEL visible in ordinary moments.
Your Next Steps in Building an SEL-Powered School
Strong SEL work follows a simple cycle. Choose carefully. Implement steadily. Measure accurately.
That sounds straightforward, but it requires discipline. Schools need tools that match real student needs, adults who can use them consistently, and a way to tell whether the work is changing daily life for kids.
For some schools, the next step is an audit. What tools are already in place, and where are the gaps? For others, it’s a pilot with one grade band, one shared conflict routine, or one family engagement practice. For others still, it’s getting clearer on measurement so SEL doesn’t stay stuck in the category of “good intentions.”
The most effective school leaders I’ve seen don’t ask, “Which tool will solve everything?” They ask, “Which tools will help our adults and students respond better in the moments that matter most?”
That’s where outside partnership can help. Organizations that focus on experiential SEL, educator coaching, and practical student tools can support schools that want to move from isolated lessons to a more connected school-wide approach.
If your team is serious about building a calmer, more connected, more teachable school environment, start small but start clearly. Pick one tool, one routine, and one measure of success. Then build from there.
If you want support turning these ideas into a school-wide plan, Soul Shoppe offers experiential SEL programs, educator coaching, and practical tools that help schools and families build shared language for self-regulation, communication, empathy, and conflict resolution.
By 10:15 a.m., the lesson hasn’t really failed, but it has started to fray. Two students are whispering. One keeps tapping a pencil. Another calls out without raising a hand. You redirect, then redirect again. By lunch, you’ve spent more energy stopping small problems than teaching.
Most K-8 educators know this feeling. The class isn’t “out of control,” but the steady drip of interruptions wears everyone down, including you. Students get more correction than connection. You leave school wondering why you talked so much about what not to do.
Positive reinforcement in the classroom offers a different path. It doesn’t mean ignoring behavior problems. It means teaching yourself to notice, name, and strengthen the behaviors you want to see more often.
At its simplest, positive reinforcement means this: when a student shows a helpful behavior, the adult responds in a way that makes that behavior more likely to happen again. That response might be praise, attention, a classroom privilege, a note home, or a simple nod at the right moment.
Punishment asks, “How do I stop this?” Positive reinforcement asks, “How do I grow this?”
That shift matters. It changes the emotional tone of the room. It also changes what students learn about themselves. Instead of hearing only what’s wrong, they begin hearing what’s working, what they’re capable of, and how they belong.
From Surviving to Thriving in the Classroom
Ms. Alvarez teaches fourth grade. Her students are bright, funny, and full of opinions. They also blurt, drift, poke at each other’s attention, and turn every transition into a negotiation. Nothing is dramatic enough for an office referral, but the room never settles for long.
She starts the day with reminders.
“Eyes up.”
“Stop talking.”
“Not now.”
“Please get started.”
By the end of the week, she’s exhausted. Her students are hearing her voice all day, but they aren’t absorbing the message she wants to send.
Then she makes one small change. Instead of opening independent work time with another warning, she starts narrating what’s already going well.
“I see Jayden opened his notebook right away.”
“Thank you, Mina, for getting your materials ready.”
“Table 3 is using quiet voices so everyone can think.”
Three minutes later, more students are working. Not because she offered a prize. Not because she became permissive. She changed where the spotlight went.
What positive reinforcement looks like in real life
In schools, positive reinforcement often gets reduced to sticker charts. Those can help, but the heart of the practice is bigger than stickers. It’s about building a classroom where students know adults are paying attention to effort, regulation, kindness, and repair.
That can sound like:
Naming effort: “You stuck with that tricky paragraph even when it felt frustrating.”
Highlighting routines: “You came in, hung up your backpack, and got started without a reminder.”
Reinforcing social skill: “I noticed you made space for your partner to share.”
Positive reinforcement works best when students feel seen, not managed.
This approach also supports the larger work of climate and belonging. A classroom gets calmer when students trust that adults will notice progress, not just mistakes. That same principle matters schoolwide, too, especially if you're thinking about how to improve school culture.
What it is not
Teachers sometimes hesitate because they worry this sounds like bribery. It isn’t. Bribery happens before a behavior in an attempt to stop a problem. Positive reinforcement happens after a desired behavior, so students can connect their action with a meaningful response.
It also isn’t fake cheerfulness. Students can tell when praise is inflated or generic. “Good job” repeated all day won’t carry much weight. Specific, grounded feedback will.
The Science of Encouragement and Student Engagement
Students repeat behaviors that bring connection, clarity, or success. That’s one reason positive reinforcement in the classroom works so well. It gives students a clear map: “This action helped. I can do it again.”
The idea comes from behavioral psychology, but you don’t need a textbook to use it. Imagine tending a garden. Whatever gets watered grows stronger. In classrooms, attention is water. If students get the most adult attention for disruption, disruption can spread. If they get meaningful attention for effort, regulation, and cooperation, those behaviors become easier to repeat.
What research tells us
A landmark study by Brigham Young University researchers observed 2,536 students and found that teachers’ use of positive reinforcement, such as praise, rewards, and attention, resulted in students focusing on tasks up to 30% more compared to control conditions without such strategies (Veracross summary of the study).
That finding matters because focus is not a small outcome. On-task behavior affects everything else. Students can’t practice reading strategies, solve math problems, or participate in discussion if they’re disconnected from the task.
Positive reinforcement also fits naturally with the kind of classrooms many educators already want to build. If you're using discussion, movement, partner work, and reflection, this overview of active learning in education is useful because active classrooms need more than compliance. They need students who can engage, recover, and contribute.
Why this connects to SEL
When reinforcement is done well, it does more than increase compliance. It helps students build internal skills.
A student hears, “You took a breath and asked for help instead of shutting down.” That message teaches self-awareness. Another hears, “You disagreed respectfully and explained your thinking.” That builds communication and emotional control.
Those are social-emotional competencies, not just behavior goals. They’re also part of what makes classrooms feel safe. Students learn that mistakes don’t erase their value. They learn they can repair, try again, and still belong.
Practical rule: Reinforce the behavior you want to become part of the student’s identity.
That might be persistence, honesty, turn-taking, flexible thinking, or courage. Over time, students stop hearing praise as random approval and start hearing it as information about who they’re becoming.
If your school is working to connect behavior supports with emotional growth, this piece on the benefits of social-emotional learning offers a helpful lens. The strongest reinforcement systems don’t just quiet a room. They build confidence, belonging, and trust.
Building a Reinforcement-Rich Classroom Routine
A good reinforcement system should reduce your mental load, not add a second job. The goal isn’t to praise every breath students take. The goal is to make positive feedback more intentional, more specific, and more consistent than it is on your hardest days.
Start with one behavior at a time
Pick one or two behaviors that would make the biggest difference if more students did them regularly.
For example:
During instruction: eyes on speaker, materials out, hand raised
During independent work: starting promptly, asking for help appropriately, staying with the task
During transitions: moving safely, cleaning up, following the first direction
Name the behavior in positive language. “Walk to the carpet” works better than “Don’t run.” “Use one voice at a time” works better than “Stop shouting.”
Use praise that teaches
Specific praise tells students exactly what worked. Generic praise tells them very little.
Here’s the difference:
Less helpful
More useful
Good job
You got your notebook open and started the warm-up right away
Nice work
You checked your answer and fixed your mistake without giving up
I’m proud of you
You included your quieter partner in the conversation
A simple sentence frame helps:
“I noticed you ___, and that helped ___.”
Examples:
“I noticed you waited until your partner finished, and that helped your group stay respectful.”
“I noticed you went back to the text for evidence, and that helped strengthen your answer.”
“I noticed you took a breath before responding, and that helped you stay in control.”
Keep a few low-lift reinforcers ready
Not every student responds to the same thing. Build a small menu.
Social reinforcement: specific praise, a smile, a thumbs-up, brief check-in, positive note home
Activity-based reinforcement: line leader, choice time, read-aloud seat choice, helping job, partner pick
Natural reinforcement: extra trust, leadership, more independence, sharing work with the class
The most sustainable systems often rely on social and activity-based reinforcement more than prizes.
A structured option can help if your class needs more visible support. You might use:
A simple point chart for table groups.
Individual punch cards for one target behavior.
A class marble jar tied to a shared celebration like extra game time or outdoor reading.
If you use tokens, connect them to effort and growth. Don’t reserve them only for perfect behavior.
Watch your praise-to-reprimand pattern
Many teachers have heard of a 3:1 or 4:1 praise-to-correction goal. The exact number matters less than building the habit of giving more positive feedback than you currently do. Research shows that when teachers maintain praise rates at least equal to reprimand rates, class performance can increase by 60-70%, and the key is intentional consistency in increasing positive feedback (Whole Child Counseling summary).
That doesn’t mean you count every sentence all day. Try a lighter version:
Morning check: Choose one period to track.
Tally marks: Put a small sticky note on your clipboard and mark praise and correction.
Reflection question: “Did I notice as much good as I corrected today?”
If your ratio is low, don’t chase perfection. Increase by a little and keep going.
A short video can help if you want to hear examples and see the tone in action.
Build it into your routine, not your mood
The strongest reinforcement systems are planned. They don’t depend on whether you remembered in the moment.
Try anchoring reinforcement to parts of the day:
Arrival: greet and notice one successful routine behavior
Mini-lesson: praise attention and participation
Work time: circulate and name effort, stamina, or collaboration
Transition: reinforce speed, safety, and teamwork
Closing circle: highlight one classwide strength
“Catch students early. The first two minutes of a task often decide the tone for the next ten.”
Some teams also use schoolwide supports or SEL tools to keep language consistent. For example, Soul Shoppe offers programs that teach shared language for self-regulation, communication, and conflict resolution, which can give adults common behaviors to reinforce in everyday moments.
Reinforcement Examples for Every Age and Situation
The most common question I hear is, “What do I say?” That’s the right question. Positive reinforcement becomes powerful when it sounds natural, specific, and age-appropriate.
In a four-week study in a first-grade classroom, researchers found a clear inverse relationship between teacher praise rates and disruptive behavior, which declined as praise frequency rose. Math test scores also increased during the intervention (USF abstract). That lines up with what many teachers notice. The language we use changes the emotional current of the room.
Positive Reinforcement Scripts for K-8 Classrooms
Grade Level
Target Behavior
Example Scenario & Reinforcement Script
K-2
Academic persistence
A student gets frustrated during handwriting and wants to quit. Teacher says, “You kept trying even when that letter felt hard. That’s how writers grow.”
K-2
Following routines
Students come in from recess loudly. One student hangs up their backpack and sits on the rug. Teacher says, “You came in, put your things away, and joined us quickly. That helps our class get ready to learn.”
K-2
Emotional regulation
A child starts to cry after losing a game but takes a breath and asks for help. Teacher says, “You were upset and you used your words. That was a strong choice.”
K-2
Peer kindness
A student shares crayons with a classmate. Teacher says, “You noticed your friend needed help and you shared right away. That was caring.”
3-5
Task initiation
Students begin independent reading. One student starts immediately instead of chatting. Teacher says, “You opened your book and got started without a reminder. That shows responsibility.”
3-5
Productive struggle
A student erases, tries again, and solves a multi-step problem. Teacher says, “You didn’t rush to the answer. You checked your thinking and kept going.”
3-5
Group collaboration
During science, a student invites a quieter peer to speak. Teacher says, “You made sure everyone had a voice. That helped your group work better together.”
3-5
Repair after conflict
A student interrupts, then later apologizes and restarts respectfully. Teacher says, “You went back and fixed it. Repairing a mistake takes maturity.”
6-8
Respectful disagreement
In discussion, a student says, “I see it differently because…” Teacher says, “You challenged the idea without attacking the person. That’s strong discussion.”
6-8
Organization
A student has materials ready and uses class time well. Teacher says, “You planned ahead, and now you’re ready to work instead of scrambling.”
6-8
Self-advocacy
A student quietly asks for clarification instead of shutting down. Teacher says, “You spoke up when you needed support. That’s a skill strong learners use.”
6-8
Leadership
A student redirects peers during cleanup without bossing. Teacher says, “You helped your group get focused in a respectful way. That’s leadership.”
When students don’t want public praise
Some students light up when you notice them. Others shrink. Older students, especially, may not want attention in front of peers.
Try quieter reinforcement:
A sticky note on the desk: “You came prepared today. I noticed.”
A brief private comment: “You handled that frustration differently today.”
A nonverbal signal: nod, thumbs-up, hand on heart, check mark on a clipboard
The point is still the same. You’re naming a behavior worth repeating. You’re just matching the delivery to the student.
Scripts for moments teachers often miss
Here are a few high-value opportunities:
After a rough start: “You reset after that moment and joined us. That matters.”
For a student who rarely participates: “You shared your thinking even though you seemed unsure. That took courage.”
For cleanup time: “This side of the room finished quickly and helped others without being asked.”
For recess conflict recovery: “You both came back ready to try again. That shows self-control.”
Students don’t need endless praise. They need clear feedback about the choices that help them succeed.
Parents can use the same language at home. Instead of “Good job getting ready,” try “You packed your folder and shoes without a reminder.” That kind of feedback travels well between school and home.
Ensuring Equity and Avoiding Common Pitfalls
Positive reinforcement can help every student feel more successful. It can also go sideways if we use it carelessly.
The biggest mistake is rewarding only the students who already know how to “do school.” If the same quiet, organized, compliant students get most of the positive feedback, other children learn that reinforcement isn’t for them. They may stop trying, or they may seek attention in less helpful ways.
Reinforce growth, not just ease
Look for progress that might be invisible to others.
A student with ADHD who starts work within two minutes may deserve reinforcement even if another child starts in ten seconds. A student with a trauma history who asks for a break instead of flipping a desk is making a major positive move. A student learning English may be taking a social risk just by joining a partner conversation.
Equity doesn’t mean using the same response for every child. It means each student gets meaningful support toward shared expectations.
Be careful with generic praise
For high-need students, research from Incredible Years shows that specific, immediate feedback on effort is essential. The same research warns that over-reliance on verbal praise alone can backfire if it isn’t paired with relationship-building activities, because at-risk kids often respond better to guided connection than generic “good job” comments (Incredible Years).
That’s a critical nuance. Some students don’t trust praise yet. Some hear it as pressure. Some have learned that adult attention comes and goes.
For those students, relationship comes first.
Try:
Shared activity: brief game, drawing moment, classroom helper role
Predictable check-ins: greeting at the door, end-of-day recap
Specific acknowledgment: “You kept your body safe during a hard moment”
Choice and agency: “Would you like me to say that privately or write it down?”
Watch for these common traps
Only praising compliance: Reinforce curiosity, honesty, repair, creativity, and kindness too.
Praising one group more than others: Reflect on who you notice first. Gender, race, disability, language, and behavior history can all shape adult attention.
Giving delayed feedback: Younger students especially need quick connection between action and response.
Over-talking: Too many words can weaken the moment. A short, clear statement lands better.
Forcing public recognition: Some students prefer privacy. Respect that.
A fair system doesn’t ask every child to respond to the same reinforcer. It helps each child access success with dignity.
If you’re supporting students with different sensory, communication, or regulation needs, this piece on how SEL supports neurodiverse students offers a useful perspective.
A Lasting Impact Beyond the Classroom
Positive reinforcement in the classroom isn’t about creating reward-dependent kids. It’s about helping children connect their actions to competence, belonging, and trust.
Used thoughtfully, it changes more than behavior. It changes identity. Students start to see themselves as capable of persisting, calming down, solving problems, including others, and repairing mistakes. Those are life skills, not just classroom skills.
Research also suggests that positive reinforcement, when applied as a structured intervention, can increase student focus by up to 30% and foster self-regulation skills like time management and goal-setting that contribute to long-term academic success and increased attendance (Minnesota State University Moorhead thesis).
That’s why this practice belongs in conversations about SEL, school climate, and equity. A calm classroom is good. A connected classroom is better. When students feel noticed for what they’re building, not only corrected for what they’re breaking, they’re more likely to take healthy risks and stay engaged.
For teachers and parents, the work starts small. One specific comment. One quieter redirection. One decision to notice effort before error. Repeated over time, those moments shape a classroom where students feel safe enough to learn and strong enough to grow.
If you want more practical SEL tools for building connection, empathy, and psychological safety in schools and at home, explore Soul Shoppe. Their resources, programs, and training support the everyday adult moves that help kids feel seen, regulated, and ready to learn.
A student crumples a math paper, shoves the pencil to the floor, and says, “I can’t do this.” The room tightens. Another child stares. A teacher has about five seconds to decide whether this is defiance, avoidance, embarrassment, or pure overload.
Most of us have lived some version of that moment.
When I think about emotional intelligence in education, I do not think first about theory. I think about those ordinary school-day moments when a child’s feelings either block learning or open the door to it. I think about the student who looks “unmotivated” but is really afraid of getting it wrong, the child who grabs a marker because they do not yet have language for frustration, and the adult who wants to help but is running on empty.
Emotional intelligence gives us a workable path. It helps children notice what they feel, name it, regulate it, and respond in ways that protect both learning and relationships. It also helps adults create classrooms where students feel safe enough to try again. The work becomes practical here. Not abstract. Not one more initiative. Practical.
Why Emotional Skills Are the New Foundation for Learning
A second grader loses a game at recess and comes back furious. He bumps his chair, snaps at a classmate, and refuses to open his reading folder. If we only look at behavior, we may see disrespect. If we look one layer deeper, we often see a child whose nervous system is still stuck in the loss from ten minutes ago.
That is why emotional skills matter so much. They are not extra. They are the conditions that help academic instruction land.
A child who cannot settle after disappointment will struggle to listen to directions. A child who does not know how to ask for help may avoid work altogether. A child who assumes every correction means “I’m bad at school” will start protecting themselves instead of taking risks.
What this looks like in real school life
Teachers see it every day:
During independent work: A student shuts down after one mistake.
During partner work: Two children argue because neither knows how to disagree calmly.
During transitions: Noise, crowding, and uncertainty push a student into tears or anger.
During assessment: Anxiety takes over, even when the student knows the material.
Parents see the same pattern at home.
At homework time: “This is stupid” really means “I feel overwhelmed.”
After school: Meltdowns often come after a full day of holding it together.
With siblings: Grabbing, yelling, or blaming can signal weak self-regulation, not bad character.
Emotional intelligence gives adults a way to respond with both compassion and clarity. We can teach skills instead of just reacting to symptoms.
A useful reframe for adults is this. “What skill is missing right now?” That question often leads to better support than “What punishment fits this behavior?”
Children do not become resilient because we ask them to “calm down.” They become resilient because we repeatedly show them how.
Understanding Emotional Intelligence in an Educational Context
Emotional intelligence is a child’s ability to recognize feelings, understand what those feelings are signaling, manage emotional responses, and relate well to other people. In school, I like to describe it as an emotional toolkit.
A strong toolkit helps a student do things like:
notice “I’m getting frustrated”
pause before blurting out
recover after a mistake
read a classmate’s facial expression
ask for help without shame
solve a conflict without making it bigger
IQ and emotional intelligence are not competitors. They work together. IQ may help a student understand the lesson. Emotional intelligence helps the student stay present long enough to use what they know.
Why it matters for academics
This is not just a feel-good idea. A 2025 Frontiers in Education study found that trait emotional intelligence, alongside academic engagement, accounted for 49.9% of the variance in academic achievement. The same study found a positive effect of trait EI on engagement and achievement, pointing to the role of self-regulation, interpersonal skills, and stress management in student success (Frontiers in Education study on trait emotional intelligence and academic achievement).
That matters because many readers get stuck on one common question. “Isn’t emotional intelligence separate from real school performance?” In practice, it is strongly connected.
A student may know how to multiply fractions. But if panic shows up during a quiz, that knowledge can disappear behind stress. A student may have rich ideas about a novel. But if group work feels socially threatening, those ideas may never get spoken.
A simple way to explain EI to children
Try an internal weather forecast.
You can say:
“What is your weather right now? Sunny, foggy, stormy, windy?”
“What does your body feel like when the storm starts?”
“What helps your weather shift?”
This gives children a concrete way to talk about inner states before those states turn into conflict.
What EI is not
Emotional intelligence does not mean:
never feeling angry
always being agreeable
avoiding hard conversations
lowering expectations for behavior
It means helping children handle big feelings in ways that support learning, safety, and connection. That is a high expectation, and a teachable one.
The Research-Backed Benefits of Nurturing EI in Schools
When schools invest in emotional intelligence, the benefits show up at several levels at once. The student changes. The classroom changes. Over time, the whole school climate changes.
A major reason educators keep returning to emotional intelligence in education is that the impact does not stay confined to one counseling lesson or one morning meeting. It spreads through daily routines.
For individual students
A landmark 2019 meta-analysis of over 42,000 students found that students with higher emotional intelligence earned better grades and achievement test scores, even after controlling for IQ. The analysis also noted that managing test anxiety, boredom, and disappointment was a key part of that academic advantage (Education Week coverage of the 2019 emotional intelligence meta-analysis).
That research matches what many teachers observe.
A student with stronger emotional skills is more likely to:
recover after a wrong answer
stay engaged through a tedious task
handle feedback without collapsing
keep trying when work gets hard
Those are learning behaviors, not just “soft skills.”
For the classroom climate
One child’s regulation affects everybody else. So does one adult’s regulation.
When students can identify feelings and use shared language, conflict becomes easier to interrupt early. Instead of a shouting match, you hear: “I felt left out when you changed the groups.” Instead of silent resentment, you hear: “Can we start over?”
Teachers often notice classroom shifts such as:
Less escalation: Students catch frustration earlier.
Better partner work: Children have words for turn-taking, repair, and disagreement.
More academic risk-taking: Students feel safer making mistakes in front of peers.
Stronger belonging: Children see that feelings are manageable, not shameful.
If you want a broader view of how SEL supports school life, this overview of the benefits of social-emotional learning connects emotional growth to everyday student outcomes.
Emotional intelligence does not remove hard moments from a classroom. It gives students and adults better moves during those moments.
For the school community
School culture is built from repeated interactions. Hallway corrections. Cafeteria conflicts. Front office conversations. Family meetings. All of those exchanges either reinforce dignity or erode it.
When a school teaches emotional intelligence consistently, children get more than a lesson. They get a shared operating system.
That can support:
calmer transitions across settings
more respectful problem-solving
stronger student-adult trust
fewer peer conflicts turning into lasting social damage
a more inclusive environment for students who are easily overwhelmed
Why this matters to leaders
Administrators often ask whether this work is worth doing at scale. The answer is yes, if the goal is better learning conditions.
Emotional intelligence supports attention, persistence, communication, and recovery after setbacks. Those are not side benefits. They are part of the foundation schools depend on every day.
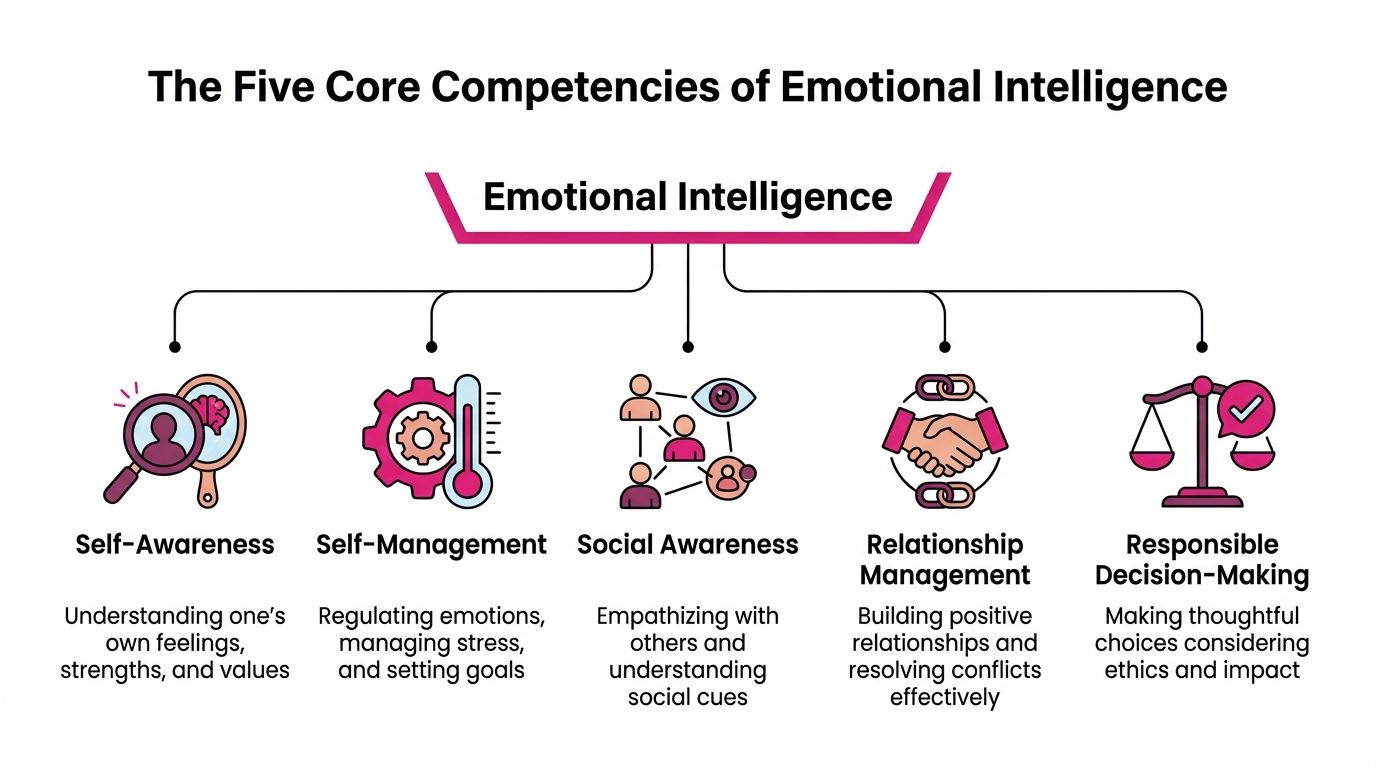
The Five Core Competencies of Emotional Intelligence
In K-8 settings, emotional intelligence becomes easier to teach when we break it into visible, coachable skills. The most practical framework for many schools includes five core competencies: self-awareness, self-management, social awareness, relationship skills, and responsible decision-making.
These competencies are easier to understand when we attach them to behavior we can see.
What each competency means
Self-awareness means noticing your own feelings, triggers, strengths, and needs.
Self-management means handling emotions, impulses, and stress in ways that help rather than harm.
Social awareness means reading the room, noticing how others may be feeling, and responding with empathy.
Relationship skills means communicating clearly, listening well, resolving conflict, and building trust.
Responsible decision-making means making choices that consider safety, fairness, consequences, and impact on others.
A child does not master these all at once. They grow over time, with repetition and support.
Age-Appropriate Emotional Intelligence Competencies in K-8
Competency
What It Looks Like (Grades K-2)
What It Looks Like (Grades 3-5)
What It Looks Like (Grades 6-8)
Self-Awareness
Names basic feelings like mad, sad, excited, worried. Can point to where a feeling shows up in the body.
Identifies mixed feelings and simple triggers. Can say, “I’m frustrated because this feels hard.”
Reflects on patterns, triggers, and identity. Can recognize stress, embarrassment, jealousy, or pressure before behavior escalates.
Self-Management
Uses a taught strategy such as deep breathing, counting, squeezing hands, or asking for a break.
Chooses from several regulation tools and can return to learning with support.
Uses coping strategies more independently, delays impulses, and plans ahead for stressful situations.
Social Awareness
Notices when a peer is crying or left out. Begins to understand that others feel differently.
Reads tone, body language, and group dynamics with growing accuracy.
Considers perspective, context, and social pressure. Can discuss fairness and impact in more nuanced ways.
Relationship Skills
Takes turns, uses simple feeling words, practices apology and repair with adult coaching.
Uses I-statements, listens to another viewpoint, and works through minor conflict with prompts.
Handles disagreement with more maturity, sets boundaries, collaborates, and repairs harm with less adult mediation.
Responsible Decision-Making
Chooses between simple options like “grab or ask.” Understands basic classroom rules and safety.
Thinks through consequences and can explain why a choice was kind, fair, or unsafe.
Weighs peer influence, ethics, and long-term consequences before acting.
What adults sometimes misunderstand
Adults often expect older students to have a skill just because they can explain it. A sixth grader may know the words “I need to calm down” and still slam a locker when embarrassed. Knowledge is not the same as embodied skill.
That is why practice matters.
A first grader may role-play asking for a turn with a marker. A fourth grader may rehearse what to say when a friend excludes them from a game. A seventh grader may practice how to disagree in a group project without shutting down or taking over.
A quick way to use this framework
Pick one competency for two weeks and make it visible.
For example, if the focus is self-management:
post three calming strategies
model when you use one yourself
praise the process, not just the outcome
give students a sentence stem such as “I need a reset, then I can rejoin”
Children grow faster when adults name the exact skill they are using. “You noticed you were frustrated and asked for space.” That is more helpful than “Good job.”
Once adults start looking through this lens, student behavior becomes more readable. And when behavior becomes more readable, teaching gets more precise.
Practical Classroom Strategies and Lesson Examples
The most effective emotional intelligence practices rarely require a separate hour-long block. They work best when they are woven into the day children already have.
A classroom can teach emotional intelligence from the first greeting to the final pack-up.
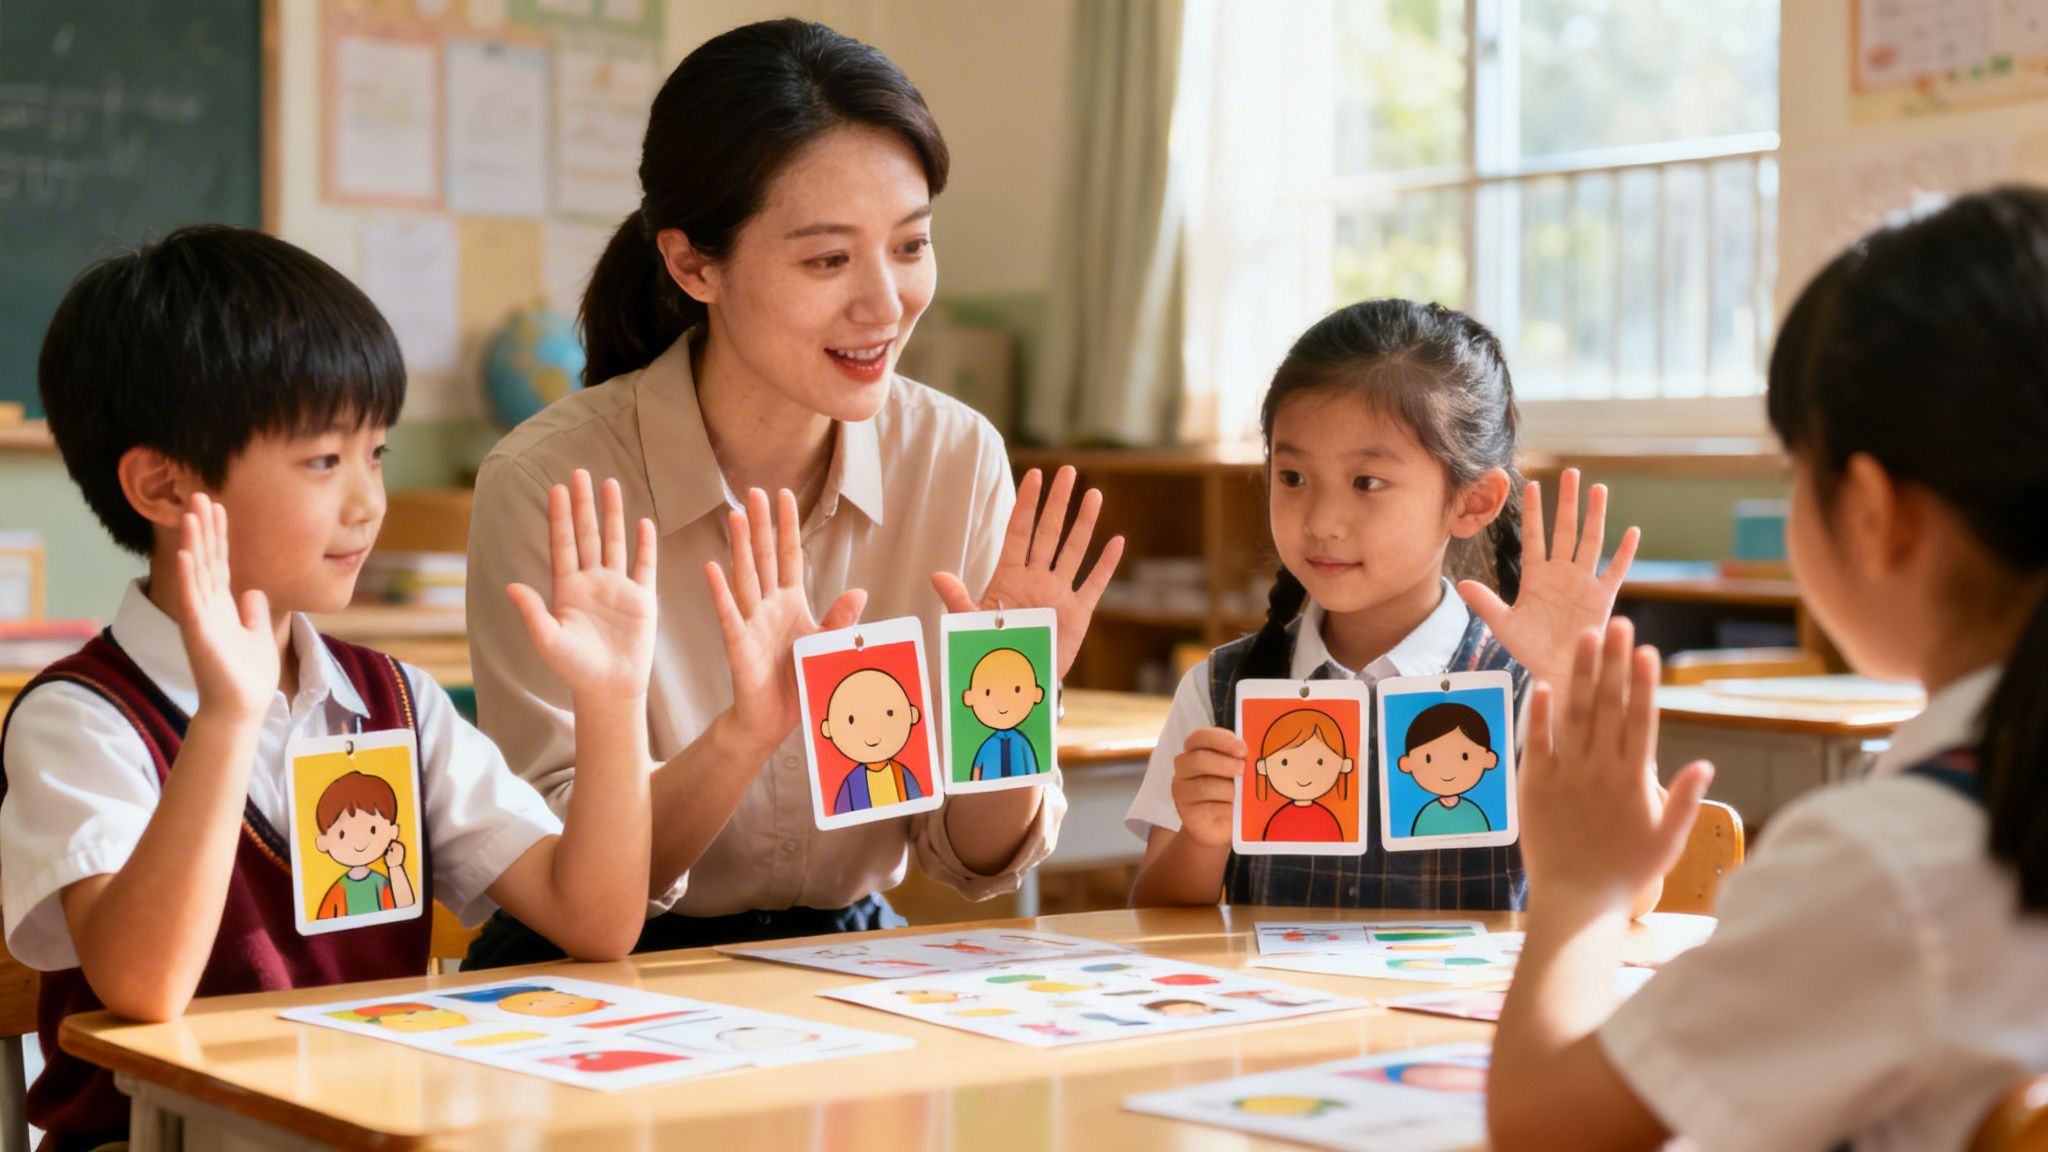
Start the day with emotional visibility
In many classrooms, the first useful move is a quick check-in.
A student places their name on a mood meter. Another circles “ready,” “tired,” or “worried” on a clipboard. Younger students point to a face card. Middle schoolers may respond to a journal prompt such as, “What kind of support do you need from yourself today?”
This helps in two ways. Children practice self-awareness, and adults get early information before a hard moment explodes.
A teacher might notice:
one student picked “frustrated” before math
another chose “lonely” after a friendship issue
three students marked “tired” after a late school event
That information shapes how we teach.
Build regulation into normal routines
A calm-down corner works best when it is not treated like punishment. It should feel like a place for regulation, not exile.
Keep it simple:
Visual tools: Feeling cards, breathing prompts, or a short reset checklist
Sensory options: A soft object, coloring sheet, or quiet fidget
Re-entry language: “I’m ready to come back and try again”
For younger students, I like brief scripts. “My body is too fast. I need to slow it down.” For older students, a reflection card can help. “What happened, what am I feeling, what do I need next?”
Use conflict as instruction, not interruption
Two children argue over who got the last turn on the swing. Later, the same pattern appears over markers at a table. That is not bad luck. It is curriculum.
A simple conflict tool like a Peace Path can guide students through:
what happened
how each person feels
what each person needs
what repair looks like
For example:
“I felt mad when you cut in front.”
“I thought you were done. I should have checked.”
“Next time ask me first.”
“Okay. Do you want the next turn?”
Children need many rounds of this before it becomes natural. That repetition is the point.
Teach empathy through stories and the arts
A 2025 analysis argued that emotional intelligence should be integrated with the humanities and arts so it does not become a set of “hollow skills.” In that analysis, some CRP-EI hybrid models increased student agency by 20-30%, using narrative and history to build ethical empathy (Inside Higher Ed analysis on emotional intelligence, humanities, and student agency).
That idea is especially helpful in K-8 classrooms.
When students discuss a character’s fear, exclusion, pride, or regret, they practice perspective-taking in a safer space. In art, drama, and storytelling, they can explore emotion with less defensiveness.
Try prompts like:
“Why do you think this character hid the truth?”
“What might this scene feel like from another person’s view?”
Here is a short video that can support classroom discussion and staff reflection.
One realistic school-day example
A fourth-grade class starts with a check-in board. During writing, one student gets stuck and mutters, “I’m dumb.” The teacher kneels beside him and says, “That sounds like frustration talking. Tell me what part feels hard.” He points to the blank page.
She offers two supports. First, a one-minute reset with three slow breaths. Then a sentence starter. He writes one line. Not a miracle. Just progress.
At recess, two students return upset about a game dispute. Instead of launching into blame, the teacher walks them through the same conflict routine they have practiced all month. One student apologizes. The other asks for space. They rejoin later.
That is emotional intelligence in education at work. Small moments. Repeated often. Taught like any other skill.
One example of a structured approach is Soul Shoppe, which offers experiential tools that teach self-regulation, mindfulness, communication, and conflict resolution in school communities. The value in approaches like this is the consistency of shared language across students and adults.
Building an Emotionally Intelligent School Culture
A single teacher can shift a classroom. A whole staff can shift the felt experience of a campus.
School culture changes when emotional intelligence is not confined to one counselor, one assembly, or one enthusiastic grade-level team. It changes when adults agree on language, routines, and expectations.
Start with adults, not posters
Students notice adult regulation more than adult slogans.
If staff members are expected to teach calm problem-solving but spend the day rushed, unsupported, and reactive, children feel that mismatch. So a schoolwide effort should begin with how adults communicate, de-escalate, and repair.
Leadership teams can ask:
How do adults respond when students are dysregulated?
Do staff members use shared language for feelings and conflict?
Are families hearing the same messages students hear?
Do discipline systems include restoration, not only removal?
Build a shared language across settings
A school culture becomes more coherent when kindergarten, fifth grade, recess staff, and front office staff all use similar terms.
That does not require a script. It requires alignment.
Examples of shared language:
“Take a reset.”
“Name the feeling.”
“Use an I-statement.”
“What do you need to repair this?”
“Are you ready to problem-solve?”
When students hear the same phrases in the classroom, cafeteria, and playground, they are more likely to use the skills independently.
Why a whole-school approach matters
An experimental study found that a targeted emotional intelligence curriculum led to significant gains in student EQ scores, with a mean increase of nearly 10 points, and those gains strongly correlated with higher final project grades even after controlling for prior GPA (experimental study on EI curriculum, EQ gains, and grades).
For school leaders, the practical takeaway is simple. These skills are teachable. They are not fixed traits that some students have and others do not.
That is one reason many leaders start looking at broader school culture work alongside SEL instruction. This guide on how to improve school culture offers useful thinking about alignment across staff, students, and families.
A school does not become emotionally intelligent because it adopts a program name. It becomes emotionally intelligent because adults practice the skills publicly, consistently, and respectfully.
A realistic example of campus-wide alignment
A school partner might begin with a student assembly that introduces common language for feelings, conflict, and repair. Teachers then reinforce those tools during class meetings. Counselors use the same phrases in small groups. Family workshops help caregivers try the same sentence stems at home.
The power is not in any single event. The power is in repetition across environments.
A child who hears “pause, name it, choose your next step” from a teacher, a playground aide, and a parent begins to internalize that pattern. Over time, emotional intelligence moves from lesson content to community habit.
Four leadership moves that help
Train all adults: Include teachers, aides, office staff, and supervisors.
Protect practice time: Use staff meetings for role-play, not only announcements.
Align policies: Build reflection and repair into behavior systems.
Involve families: Share the same tools in accessible language.
School culture is built in the small moments people repeat. Leaders shape those moments by deciding what adults will model, teach, and reinforce.
Measuring Success and Planning Next Steps
Schools often ask a fair question. How do we know whether emotional intelligence work is helping?
The answer should be balanced. Do not rely only on a feeling that “things seem better,” and do not reduce everything to a spreadsheet. Good measurement includes both lived experience and observable trends.
What to look for in classrooms and homes
Start with qualitative signs.
Notice whether students:
recover more quickly after frustration
use feeling language with less prompting
solve minor conflicts before adults step in
show more willingness to participate after mistakes
describe their needs more clearly
Teachers and families can document these changes through short notes, check-in forms, or quick reflection prompts.
What schools can track
Use school-level indicators that already exist in many systems.
Examples include:
Behavior referrals: Are recurring conflict patterns changing?
Bullying reports: Are students using earlier intervention and repair?
Attendance patterns: Do students seem more connected to school?
Student voice: What do surveys or listening circles reveal about safety and belonging?
Staff observations: Are adults seeing stronger peer interactions and calmer transitions?
A systematic review found that prioritizing educator emotional intelligence training reduces teacher stress and burnout while creating safer classroom environments that can boost student academic achievement by an average of 11 percentage points. The same review noted that scalable virtual training remains underexplored (systematic review on educator EI training, well-being, and student outcomes).
That finding is a strong reminder to begin with adults.
A practical first 90 days checklist
For school leaders, I recommend a short runway.
Pick a shared vocabulary Choose a few core phrases for emotions, conflict, and repair.
Train staff in short routines Practice check-ins, reset options, and basic conflict coaching.
Identify visible classroom tools Mood meters, calm-down spots, or reflection sheets can make skills concrete.
Create one family handout Send home simple language and one or two routines families can use.
Choose a few measures Track what matters most for your setting without overcomplicating it.
Review after one quarter Ask staff and students what is working, what feels awkward, and what needs reinforcement.
Schools looking for structured implementation support can explore different SEL programs for schools and compare which format best fits their schedule, staffing, and goals.
If you are unsure where to begin, begin small and stay consistent. One shared routine used daily is more powerful than a complicated plan no one can sustain.
Frequently Asked Questions for Educators and Families
Is emotional intelligence just another name for being nice
No. Nice can be performative. Emotional intelligence is skill-based. It includes recognizing feelings, setting boundaries, handling stress, repairing harm, and making thoughtful choices. Sometimes an emotionally intelligent response is kind. Sometimes it is firm.
What if my school or family has very little time
Start with one routine. A daily check-in, one calming strategy, or one conflict sentence stem is enough to begin. Repetition matters more than quantity.
Can emotional intelligence help with bullying
Yes. It supports early intervention by teaching empathy, boundary-setting, bystander language, and repair. It also helps adults respond before exclusion or teasing becomes a larger pattern.
How can parents and teachers stay aligned
Use the same simple phrases in both places. For example, “Name the feeling,” “What do you need?” and “How can you repair this?” Children do better when the language is familiar across settings.
What if a child refuses to talk about feelings
Talking is only one path. Some children respond better to drawing, role-play, movement, stories, or choosing from feeling cards. The goal is expression and regulation, not forced disclosure.
How do I support a child without lowering expectations
Pair warmth with structure. You can say, “I see you’re upset, and I will help you calm down. The expectation is still that we solve this safely.” Children need both compassion and limits.
If you want practical support for bringing these skills into classrooms, schools, and homes, Soul Shoppe offers social-emotional learning programs, workshops, digital tools, and family resources designed to help school communities build connection, safety, empathy, and everyday emotional intelligence.
It’s easy to use the words “emotion” and “mood” interchangeably, but in the world of social-emotional learning, they mean very different things. Think of it this way: an emotion is like a sudden, intense rain shower—it hits hard but passes quickly. A mood is more like the weather for the entire day—a lingering sense of sunniness or a persistent gray gloom that colors everything.
Understanding the Key Difference Between Emotion and Mood
For educators and parents, telling them apart is the key to supporting a child’s well-being effectively. Whether a student is navigating a fleeting emotion or a persistent mood changes everything—how you respond, the words you use, and which strategies will actually help. This awareness is a cornerstone of building strong social-emotional skills.
Let’s look at a real-world example. Imagine Maria aces a tough math test she studied hard for. That immediate burst of pride and joy she feels? That’s an emotion. It’s a direct, powerful reaction to a specific event—the good grade—and it will probably fade as she heads to her next class.
Now, think about David, who comes to school feeling irritable and just plain "blah." He can’t pinpoint why; he just feels off. This low-grade, generalized feeling that follows him all morning is a mood. It acts as a background filter, making him less patient with friends and less able to focus during lessons. A teacher might notice he's sighing a lot, dropping his pencil, and not engaging in a class discussion he'd normally enjoy.
This distinction is critical. We respond to a brief emotional flare-up differently than we do a lingering, undefined mood. One requires in-the-moment validation, while the other calls for a broader look at potential underlying factors.
Understanding this difference empowers you to give more targeted, effective support. Instead of a one-size-fits-all approach, you can tailor your response to what the child is actually experiencing. This helps children learn to identify and manage their inner worlds, a vital skill for resilience. This ties directly into the bigger picture of a child’s growth, which you can learn more about in our guide to what social-emotional development is.
Emotion vs Mood A Quick Comparison Guide
To help you quickly tell the difference in the moment, we’ve put together a simple guide. Think of this as your cheat sheet for understanding a child’s inner state.
Characteristic
Emotion
Mood
Cause
Caused by a specific, identifiable event or trigger.
Often lacks a clear, specific trigger; can be general.
Duration
Short-lived, lasting from seconds to a few minutes.
Longer-lasting, persisting for hours, days, or more.
Intensity
High intensity; a strong and powerful feeling.
Lower intensity; a more subtle, background feeling.
Awareness
We are usually aware of the emotion and its cause.
We may not be aware of the mood or its origin.
Having this breakdown handy makes it easier to pause and assess what's really going on, allowing for a much more thoughtful and helpful response.
A Deeper Comparison of How Feelings Work
While the definitions are a great start, the real magic happens when we can see the difference between an emotion and a mood in a child’s daily life. It helps to have a handle on concepts like what emotional regulation entails, because this knowledge lets us read a student’s inner world with more accuracy and compassion.
By looking at four key areas—the cause, the timeline, the intensity, and what’s happening in the body—we can get a much clearer picture and learn how to spot the difference in our students.
The Cause: Was There a Trigger?
The most straightforward way to tell an emotion from a mood is to look for a specific trigger. Emotions are almost always a direct reaction to something that just happened.
Emotion Example: A fifth-grader feels a sharp pang of disappointment (emotion) right after learning the class field trip was canceled. The cause is obvious and immediate. The teacher can directly link the student's sad face to the announcement they just made.
Mood Example: A seventh-grader is quiet and withdrawn all afternoon. He can't name one single thing that's wrong, but he just feels a general sense of gloominess (mood). This could be from a poor night’s sleep or the slow build-up of stress over the week. His parent might notice he's been dragging his feet and sighing since he woke up.
An emotion answers the question, "What just happened?" A mood often leaves a child wondering, "Why do I feel this way?" This distinction is your first clue for figuring out how to help.
The Timeline: How Long Does It Last?
The lifespan of a feeling is another huge clue. Emotions are like a flash of lightning—intense but quick. Moods are more like the day's weather forecast; they tend to settle in and hang around for a while.
Emotion Example: A student's flash of anger when a classmate accidentally knocks over their project is powerful, but it's also short-lived. Once the mess is cleaned up and an apology is made, the anger usually fades within minutes.
Mood Example: A child might wake up feeling irritable and carry that low-grade frustration all the way from breakfast to their after-school activities, affecting everything they do. At school, a teacher notices they are snippy with friends during group work, and at home, a parent sees them slam their bedroom door for no apparent reason.
The Intensity: How Loud Is the Feeling?
When it comes to the difference between emotion vs mood, think about volume. Emotions are loud. They're often too big to ignore. Moods are more like a low hum in the background.
Emotion Example: The burst of joy a student feels when they’re picked for the team is powerful and all-consuming in that moment. You'll see it in a huge smile, a fist pump, or them excitedly telling a friend. The spike of fear right before a presentation demands their full attention.
Mood Example: A student in a contented mood has a gentle sense of well-being that makes it easier to learn and get along with others. A child in a melancholy mood might just feel "blah," without the energy or drive to really participate. A teacher might observe them doodling instead of taking notes or staring out the window.
The Body: What Are the Physical Signs?
Finally, emotions and moods show up differently in our bodies. Emotions often trigger immediate, noticeable physical reactions that are easy for anyone to see.
Emotion (Fear): A child's heart starts racing, their breathing gets shallow, and their palms might get sweaty right before they have to perform. A parent might see their child wringing their hands before a piano recital.
Emotion (Embarrassment): A student’s face flushes bright red after they answer a question wrong. The physical reaction is involuntary and immediate.
Moods have more subtle physical tells. It's less about a big, dramatic reaction and more about a general state of being.
Mood (Anxious): A student might be restless and fidgety for hours, with a constant feeling of being on edge. A teacher might notice them tapping their pen, shaking their leg, or asking to go to the bathroom repeatedly.
Mood (Sluggish): A child might complain about being tired, move more slowly than usual, or have a hard time focusing. They might rest their head on their desk or respond to questions with a delay.
By paying attention to these four aspects, we can move beyond just putting a name to a feeling. We start to understand how it works, which is the first step toward offering support that truly helps.
How to Spot the Difference in Children and Teens
Is your student just having a bad moment, or is it a bad day? Knowing the difference between a passing emotion and a lingering mood is one of the most important skills we can have as parents and educators. It changes everything about how we respond.
Think of it this way: a student’s sharp, quick burst of frustration after losing a game is an emotion. It’s a direct, fiery reaction to something specific that just happened. But a student who is quiet, disengaged, and sighing through the entire school day? That’s likely a mood. The feeling is running in the background, coloring their whole experience without a single, obvious trigger.
Spotting the difference helps us respond with more empathy and precision. It's the first step in making a child feel truly seen and understood.
Recognizing Expressions Across Different Age Groups
How kids show their inner worlds changes dramatically as they grow. Younger children tend to wear their feelings on the outside, physically and immediately. Older students, on the other hand, often turn inward, making our observations a bit more like detective work.
For Younger Students (Kindergarten – 2nd Grade):
Emotions are physical: When a kindergartener’s favorite crayon breaks, their anger might look like a full-body tantrum—crying, stomping, or even throwing the broken pieces. Their joy is just as big and physical, with jumping, clapping, and happy shouts after winning a game.
Moods drain their energy: A low mood often shows up as unusual quietness during circle time. A teacher might notice they lose interest in things they usually love, like recess, or start complaining about being tired. A parent might see them pushing food around their plate at dinner instead of eating. They don't have the words for "I feel down," but their body language is shouting it.
For Older Students (3rd – 8th Grade):
Emotions get more verbal: A fourth-grader might slam their textbook shut and mutter, “This is so unfair!” after a disagreement with a friend. The reaction is still tied to an event, but now it’s expressed with more words and less physical drama.
Moods become more internal and social: An eighth-grader’s bad mood can look like social withdrawal—headphones on during lunch, one-word answers to a parent's questions, and avoiding friends in the hallway. It can also manifest as a persistent irritability or a cynical attitude that hangs around for days.
A child psychologist might say, "Pay attention to the pattern, not just the single event. A single outburst is data, but a week of quiet withdrawal is a story. Nuanced observation is about learning to read that story."
Key Observational Cues for Adults
To get better at telling an emotion from a mood, the biggest clue is time. How long does it last? According to the work of psychologist Paul Ekman, emotions are like quick sparks—lasting just seconds or minutes. They’re often ignited by a clear trigger, like getting praised by a teacher or having a conflict on the playground. Moods, however, can stretch for hours or even days, often without a single cause you can point to. They can be influenced by bigger things like stress, sleep, or even the weather. You can read more from Paul Ekman about this distinction on his website.
Here are a few practical questions to ask yourself:
Look for the Trigger: Can you connect the behavior to something that just happened (e.g., a friend took their toy)? If yes, you’re probably looking at an emotion. If not, it could be a mood.
Check the Clock: Did the behavior start and end fairly quickly (within minutes)? That’s an emotion. Has it been hanging around all morning, or for a few days? That’s a mood.
Assess the Impact: Is the feeling disrupting a single moment or activity (e.g., they cried but then rejoined the game)? That’s likely an emotion. Is it affecting their friendships, their focus, and their overall engagement in school (e.g., they've been sitting alone at lunch all week)? That points to a mood.
When you consistently use these observational filters, you’ll get much better at figuring out what a child is experiencing. This also helps you guide them toward building their own self-awareness, an essential skill we explore in our article on helping kids find the words they need for their feelings.
Practical Strategies for Responding at School and Home
Once you’ve spotted the difference between a fleeting emotion and a persistent mood, you can finally tailor your response to be truly helpful. The way we support a child in a sudden flash of anger is worlds away from how we help one navigating a week of gloominess. The right strategy at the right time is what empowers students to build genuine resilience.
Think of it this way: responding effectively comes down to whether you're addressing the "in the moment" feeling or the "over time" feeling. That distinction between emotion and mood is your guide. One requires immediate, focused tools, while the other needs broader, more holistic support.
Strategies for Immediate Emotions
When a child is in the grip of a powerful emotion, our goal is to help them move through it safely—without ever dismissing the feeling itself. Your role is to be a calm anchor in their storm.
Validate the Feeling: The first and most critical step is to simply acknowledge what you see. This isn't about agreeing with their reaction, but about showing you recognize their internal state. It’s about connection before correction.
Practice Co-Regulation: Young children, and even older students, often need an adult to help them find their calm. This means staying calm yourself, using a soft tone, and offering a steady, reassuring presence. For a young child, this might mean getting down on their level.
Use Quick Mindfulness Exercises: Simple, in-the-moment exercises can help a child reset. These don’t need to be long or complicated—just enough to break the emotional spiral.
The core principle for responding to emotions is validation before problem-solving. Saying, "I can see you're really frustrated with that puzzle," is far more effective than, "It's just a puzzle, don't get so upset."
Example Conversation Starter (Teacher): "Leo, I see your fists are clenched and your face is red. It looks like you’re feeling really angry that your tower fell. Let’s take three deep 'lion breaths' together, and then we can talk about what to do next."
Example Conversation Starter (Parent): "It seems like you're incredibly disappointed that the sleepover was canceled. I get it. It’s okay to feel sad about that. Let's sit together for a minute."
These quick-response tools are essential for managing those emotional spikes. You can find more practical, in-the-moment tools in our guide to self-regulation strategies for students.
Strategies for Persistent Moods
Managing a lingering mood requires a totally different, more investigative approach. Since moods often lack a clear, single trigger, the goal is to play detective, identify patterns, and introduce positive influences over time.
This flowchart is a great tool for helping you and the students you work with start to untangle what’s going on inside.
Here are some proactive ways to address those persistent moods:
Encourage Journaling: A simple notebook where a child can write or draw their feelings can reveal surprising patterns. For a younger child, this might be a "feelings weather chart" where they draw a sun, cloud, or raincloud each day to show how they feel.
Discuss Underlying Factors: Open a gentle, non-judgmental conversation about potential causes. You can ask about sleep ("I've noticed you seem extra tired lately, how has your sleep been?"), friendships, schoolwork, or screen time without trying to "fix" anything immediately. Just listen.
Introduce Mood-Boosting Activities: Intentionally integrate activities that are known to improve mood. This could mean scheduling regular physical exercise, setting aside time for creative pursuits like painting or music, or simply spending more time outdoors. For a student, this might be a five-minute "brain break" with music.
Example Conversation Starter (Teacher): "Hey, Sam. I've noticed you've been pretty quiet this week, which is a little different for you. Everything okay? I'm here if you want to talk about anything at all, big or small."
Example Conversation Starter (Parent): "I've sensed you've been in a bit of a gloomy mood lately. I get that way sometimes too. I was thinking we could go for a bike ride this weekend to get some fresh air. What do you think?"
Building Emotional Literacy with Proven SEL Tools
It’s one thing to understand the difference between an emotion and a mood. It’s another thing entirely to know what to do about them in the middle of a chaotic school day. This is where the real work of emotional literacy begins—when students and staff have a shared, practical vocabulary and concrete tools to navigate their inner worlds.
Soul Shoppe programs are designed to bridge that exact gap, moving past definitions to offer real-world resources for managing both the flash of an emotion and the lingering weight of a mood. By embedding these tools into the school day, we help create a space where every child feels seen, heard, and ready to handle their feelings constructively.
Tools for In-the-Moment Emotions
When a big, powerful emotion like anger or frustration erupts from a conflict, kids need a clear path forward. A shared script and a physical process can turn a moment of conflict into a powerful learning opportunity, de-escalating the situation while teaching vital problem-solving skills.
One of our most effective tools for this is the Peace Path.
Think of it as a roadmap for resolving conflict. When two students have a disagreement on the playground—a clear trigger for strong feelings—a teacher or peer leader guides them to the Path. They walk through designated steps, each designed to help them talk, listen, and find a resolution together. The structure gives them the safety to process their anger or hurt, practice using "I-statements" ("I felt sad when you said you wouldn't play with me"), and take responsibility for their part.
The immediate emotion is handled, the conflict gets resolved, and most importantly, the students walk away with a repeatable skill for the next time a big feeling shows up.
Tools for Tracking Long-Term Moods
Dealing with a persistent, low-grade mood is a different challenge. It’s not about a single event but about building self-awareness over time. Students, especially as they get older, need ways to identify and understand the patterns behind why they might feel "blah" or irritable for days on end.
The goal isn't to eliminate bad moods but to understand them. When a student can connect their low mood to a lack of sleep or stress about a project, they gain a sense of control and can make positive changes.
For this, we find that guided journaling can be incredibly powerful. Our digital programs use prompts designed to help middle schoolers track their moods in a way that encourages reflection, not just venting.
A student might get a prompt like, “On a scale of 1-5, what’s your energy level today? What's one thing that might be affecting it?” or “Describe your ‘inner weather’ today. Is it sunny, cloudy, or stormy? Why?” A teacher could use this as a quick morning check-in to get a sense of the room's overall climate.
Over time, this simple practice helps students connect the dots between their moods and other factors like sleep, friendships, or school stress. This is metacognition in action, and it’s a cornerstone of developing high-level emotional intelligence and how we teach it.
By equipping a school with tools like these, Soul Shoppe helps create a supportive ecosystem where feelings are not just felt, but understood. To keep the learning going, incorporating varied and engaging Social Emotional Learning Activities is a great way to reinforce these skills.
When everyone—from the principal to the students—is using the same language and strategies, navigating the complex world of feelings becomes a shared and empowering journey.
Of course. Here is the rewritten section, crafted to match the specified human-written style, tone, and formatting.
Knowing When a Child Might Need More Support
Understanding the difference between an emotion and a mood is a huge step in supporting our kids. But what do we do when a child's low mood just won't lift, or their emotional reactions feel consistently dialed up to eleven?
Knowing when to ask for more help is a critical part of being a caring adult in a child's life. This isn't about sounding the alarm for every off-day. It’s about recognizing patterns that tell us something more might be going on, allowing us to step in before a struggle becomes a crisis.
Clear Signs That More Support Is Needed
Every child is unique, but some signs are universal signals that a child needs a closer look. This goes beyond the simple emotion vs. mood debate and into the territory of duration, intensity, and impact.
Here are a few specific things to watch for, both at home and in the classroom:
Persistent Moods: A sad, irritable, or worried mood that sticks around for more than two weeks without a break is a major flag. For example, a student who has been withdrawn and weepy most days for three weeks, not just after a specific sad event.
Significant Behavioral Changes: Has a once-social butterfly started spending recess alone? Has a curious student lost all interest in their favorite subjects? A parent might notice their normally talkative teen now gives only one-word answers at dinner every night.
Disproportionate Emotional Reactions: We're talking about a pattern of meltdowns or outbursts that are way out of proportion to the trigger. A minor mistake like spilling water leading to inconsolable crying on a regular basis is a sign.
Impact on Daily Functioning: The child’s emotional state is getting in the way of their life. This could mean they’re having trouble sleeping, eating, getting to school, or keeping up with their friendships. A teacher might hear from a parent that their child is having stomachaches every morning before school.
Remember, you are an expert on your child or student. If your gut tells you something is fundamentally different and has been for a while, listen to it. Trust what you're seeing.
A Step-by-Step Guide for What to Do Next
If you're noticing these signs, the idea of taking action can feel overwhelming. Try to see it not as a crisis, but as a loving, proactive step toward getting your child what they need. Asking for professional guidance is a sign of strength.
Here is a clear process to follow:
Document Your Observations: Before you make a call, spend a few days jotting down what you see. Be specific and non-judgmental. Note the behavior, time of day, and context (e.g., "For the past three weeks, Leo has refused to join friends at recess and has been tearful after school most days"). This kind of log is incredibly helpful for professionals.
Speak with the School Counselor: For teachers, the school counselor is your first stop. For parents, they are an invaluable partner. Share your documented notes and work together on a plan for in-school support and monitoring.
Consult with a Pediatrician: It's always a good idea to connect with your child's doctor. They can help rule out any underlying medical issues that might be causing the mood or behavior changes. Don't forget to bring your notes to this appointment.
Seek a Child Therapist or Psychologist: If concerns continue, your pediatrician or school counselor can refer you to a mental health professional who specializes in working with kids. They can provide a formal assessment and teach your child targeted skills to cope with their feelings and address what's going on underneath the surface.
Answering Your Questions About Emotions and Moods
It’s a journey to truly get the nuances between emotions and moods, especially when you’re trying to help a child navigate them. We often hear these questions from teachers and parents, so we’ve put together some answers to help you feel more confident in supporting the kids in your life.
Can a Big Emotion Turn into a Lingering Mood?
Absolutely. Think of it this way: when a powerful feeling isn't processed, it doesn't just disappear. It can hang around, coloring the rest of the day.
Practical Example: A student gives a presentation and fumbles their words, feeling a sudden flash of embarrassment (emotion). If there's no space to shake it off or get a little reassurance from the teacher, that fleeting feeling can curdle into a withdrawn, anxious mood that lasts all afternoon. They might avoid eye contact and refuse to participate in other classes, the original trigger long past. This is exactly why having tools to handle emotions in the moment is so vital.
How Do I Explain Moods to a Little Kid?
The best way is to use simple, concrete comparisons that they can immediately grasp. The abstract idea of a "mood" is really tricky for young minds.
Practical Example: A great place to start is with a weather analogy. You could explain that an emotion is like a big, loud clap of thunder—it’s powerful and grabs your attention, but it’s over pretty quickly. A mood, on the other hand, is like a long, drizzly gray day that makes everything feel a bit slower and heavier. You could even create a "feelings forecast" chart together, where they can point to a sun, cloud, or raincloud to show their "inner weather" each morning.
When you give kids a simple metaphor like the weather, you’re handing them a language to talk about a complex inner world. It makes the experience less intimidating and much easier to manage.
Is It a Feeling or Just a Behavior I’m Seeing?
This is such an important distinction to make. Behavior is what we can see on the outside, but the feeling is what's driving it from the inside. We have to look past the action to understand the emotion behind it.
Practical Example: Imagine a child who rips up their drawing after making one small mistake. Tearing the paper is the behavior. The emotion fueling it could be intense frustration, disappointment, or even anger at themselves. If we only address the behavior ("We don't rip our things"), we miss the real teaching moment.
Instead, try to validate the feeling first: "It's so frustrating when your drawing doesn't look the way you want it to. I get it. Let's take a deep breath together before we try again." This approach teaches them how to manage the feeling, not just suppress the action.
At Soul Shoppe, we believe that giving students and educators a shared language for feelings is the first step toward building a thriving, supportive community. Explore our programs to bring these powerful, practical skills to your school.
When we talk about mindfulness in the classroom, we're not asking kids to empty their minds. It's much more practical than that. We're teaching them how to pay attention to the present moment with a sense of kindness and curiosity, training their brains to focus and better manage the big waves of thoughts and emotions that can be so distracting.
The result? A calmer, more focused, and more productive learning environment for everyone.
Why Mindfulness in the Classroom Is Essential
So many of our students walk through the school doors already feeling overwhelmed. They're navigating a world of constant pings, pressures, and stimulation that can leave them feeling stressed and anxious before the first bell even rings. When a child's nervous system is on high alert, it's incredibly difficult for them to focus, learn, or build positive relationships.
This is exactly why mindfulness in the classroom is no longer a "nice-to-have." It's a foundational tool for both academic success and emotional well-being. Think of it less as another thing on your endless to-do list, and more as a powerful strategy that primes the brain for learning, making every other minute of instruction that much more effective.
Creating a Foundation for Focus
Picture this: your third-graders tumble back into the classroom after a chaotic recess. They're buzzing with energy, a few are still bickering over a game, and starting the afternoon math lesson feels almost impossible. Instead of trying to talk over the noise, you dim the lights and ring a small chime.
"Okay, friends," you say softly. "Let's take two minutes to settle our bodies. Put your hands on your desk, feel your feet on the floor, and just listen until you can't hear the chime anymore." That simple, two-minute reset is enough to interrupt the chaos and guide your students back into a learning mindset.
This is mindfulness in action, and it directly supports academics. When students learn to notice their own restlessness and are given tools to find their calm, they are much better prepared to:
Improve Attention: Mindfulness literally strengthens the brain's ability to focus and tune out distractions. For example, a student who practices noticing sounds can better tune out hallway noise during a test.
Enhance Emotional Regulation: Kids learn to recognize big feelings like frustration or excitement without letting those feelings take over. A practical example is a student who feels angry after a disagreement using a "breathing buddy" technique to calm down before shouting.
Boost Working Memory: It's simple—a calmer mind is better able to hold on to and process new information. After a mindful minute, a student is more likely to remember a multi-step instruction you give them.
Responding to a Growing Need
This shift isn't just happening in a few classrooms; it's a global movement in education. The mindfulness in education market is on track to surge from $1.4 billion in 2024 to an estimated $5.3 billion by 2033. This incredible growth isn't a fluke. It's a direct response to rising concerns over student anxiety and a wave of compelling neuroeducation research that links mindfulness to better focus and emotional intelligence.
By teaching students to pause and notice their inner world, we give them a lifelong skill for navigating challenges. It’s about building self-awareness, not just about being quiet.
This internal skill set is a huge piece of the social-emotional development puzzle. When a child can identify what's happening inside them, they get much better at understanding the feelings of others. This is how we build empathy. In fact, you can explore the powerful connection between inner awareness and social skills by reading about the benefits of social-emotional learning.
Ultimately, weaving mindfulness into the school day helps create resilient, emotionally intelligent learners who are ready to take on a complex world.
Your Implementation Plan For School-Wide Mindfulness
Bringing mindfulness to an entire school can feel like a huge undertaking. But a thoughtful, step-by-step approach can make it not only manageable but truly sustainable. The secret? A successful school-wide rollout isn't a top-down mandate. It begins with genuine buy-in and a focus on the well-being of the adults in the building first.
The most effective mindfulness in the classroom programs always start by supporting the teachers. When educators feel the personal benefits of mindfulness themselves—less stress, more presence—they become the most authentic and powerful champions for their students.
Start Small and Build Momentum
The key is to avoid overwhelming your staff. Instead of a massive, all-at-once launch, think about creating a ripple effect that starts with a core group of enthusiastic people.
Form a Wellness Team: Find a few passionate staff members—teachers, counselors, or administrators—to lead the charge. This small team can pilot practices, gather feedback, and help guide the process.
Conduct a Needs Assessment: Don't assume you know what the biggest stressors are. Use a simple, anonymous survey to ask staff and students what they're struggling with. For example, a question could be: "When do you feel most stressed during the school day? (a) Before a test, (b) During lunch/recess, (c) Transitions between classes."
Identify Pilot Classrooms: Invite a handful of interested teachers to try a few simple practices for a month. Support them with resources and regular check-ins, creating a low-stakes space to experiment.
This gradual approach builds a foundation of success stories and hands-on experience, which makes the whole idea much more appealing to hesitant staff members down the road.
This flow shows the simple but powerful path that mindfulness creates, moving us from a state of stress to one of calm, focused attention.
The goal isn't to eliminate stress completely—that's impossible. It's about developing the skills to navigate it effectively, which leads to greater mental clarity and calm.
Provide Robust Professional Development
Great training is the engine of a successful program. The quality of teacher preparation is directly tied to student outcomes. And the data backs this up.
Of the over 7,000 adults trained to deliver mindfulness to more than 200,000 young people, 92% of teachers reported personal benefits like reduced stress. This personal growth has helped fuel an explosion in youth meditation, which jumped from just 0.6% in 2012 to 5.4% in 2017. As you can see from these findings on teacher training and student outcomes, when teachers are well-supported, the social improvements in students are much more likely to stick.
When introducing the idea at a staff meeting, start with an experience. Don’t just talk about mindfulness—lead a one-minute breathing exercise. Let them feel the shift from chaos to calm firsthand.
To make sure your program is truly effective, it's essential to Master Instructional Design Principles when creating your PD sessions. Your training should be experiential, ongoing, and practical, not just a one-off workshop.
Weave Mindfulness into the School Day
Look for small openings to embed short, simple practices into routines you already have. This helps mindfulness become a natural part of the school culture, not just another thing on the to-do list.
Practical Examples for School-Wide Integration:
Morning Announcements: Start the day with a school-wide "Mindful Minute." The principal can guide students in a moment of quiet breathing or ask them to notice one sound in the building.
Script: "Good morning, everyone. Before we begin our day, let's take a moment to arrive. Feel your feet flat on the floor, take a slow breath in, and a long breath out. Have a wonderful day of learning."
Classroom Transitions: The moments between activities are perfect for a quick reset. Use a chime, a song, or a simple breathing exercise to signal a shift in focus.
Teacher Tip: After a lively activity, you could say, "Let's practice 'Stoplight Breathing.' We'll take one deep breath for the red light to pause, one for the yellow light to notice, and one for the green light to get ready for what's next."
By integrating these small moments, you build a consistent practice across campus. This approach reinforces mindfulness as a core piece of your school's support system, just like other effective SEL programs for schools. The goal is to make these tools second nature for both students and staff.
Practical Mindfulness Activities For Every Grade Level
The best way to bring mindfulness into the classroom isn't through long, complicated lessons. It's about weaving short, simple practices into the natural rhythm of the school day. The trick is picking activities that are right for each age group, ensuring a technique meant to bring calm doesn't just create confusion or a case of the giggles.
The goal is to give students a mental toolkit they can reach for anytime—before a test, after a disagreement on the playground, or just when their brain feels a little too "buzzy." Below are some of my favorite, road-tested examples for different grades, complete with scripts to help you guide them with confidence.
Activities For Early Learners (Grades K-2)
With our youngest students, mindfulness has to be tangible, playful, and connected to things they can see and feel. We use imagination and physical sensations to make big ideas like "attention" and "calm" feel real.
Belly Buddies
This is a classic for a reason—it makes mindful breathing visible and fun. It's perfect for settling the class down after recess or as a quiet start to your morning meeting.
How it works: Students lie on their backs (a rug or mat is great) and place a small stuffed animal or a beanbag on their belly.
Sample Script: "Find a comfy spot on your back and let your Belly Buddy rest on your tummy. Without talking, let's see if we can rock our buddies to sleep. Take a slow, quiet breath in through your nose and feel your belly lift your buddy way up. Now, breathe out slowly and watch your buddy float back down. Let's take a few more sleepy breaths together."
Weather Reports
This activity is a game-changer for building emotional literacy. Instead of a child having to say "I'm angry," they can learn to say "I feel stormy inside." This creates a little bit of distance, making the feeling less overwhelming.
How it works: During your morning meeting, ask students to check in with their "internal weather."
Sample Script: "Let's be weather reporters for our feelings. What's the weather like inside you today? Is it sunny and bright? Maybe a little cloudy and quiet? Or are there some rumbly storm clouds? There's no right or wrong weather; we're just noticing what's there."
Exercises For Middle Grades (Grades 3-5)
Upper elementary students are ready for practices that are a bit more structured. They can start to grasp the connection between where they put their attention and how they feel inside.
Mindful Listening
This practice is fantastic for sharpening focus and pulling students into the present moment using sound. It's one of my favorite ways to transition between subjects and reset the room's energy.
How it works: You'll need something that makes a long, resonant sound, like a singing bowl, a chime, or even a simple bell.
Sample Script: "Let's practice our mindful listening. I'm going to make a sound. If you're comfortable, you can close your eyes and listen as carefully as you can. Put a thumb up when you can't hear the sound anymore. Let's see how long we can follow the sound with our ears."
Thought Surfing
This exercise introduces a huge idea: thoughts come and go, and we don't have to get swept away by every single one. It’s an early step in learning to think about our own thinking.
This teaches a core principle of mindfulness: we are not our thoughts. Just as a surfer rides a wave, we can learn to observe our thoughts as they rise and fall without letting them knock us over.
How it works: This works well as a short, guided visualization.
Sample Script: "Imagine you are sitting by a gentle stream. Every thought that pops into your head is like a leaf floating by on the water. You don't have to grab the leaf or follow it down the stream. Just notice it as it floats into view, and then watch as it floats away."
For educators just starting out, finding high-quality 5 minute guided meditation scripts can be a fantastic resource for these short, effective breaks.
Techniques For Older Students (Grades 6-8)
Middle schoolers are not only capable of more introspection, but they also appreciate understanding the "why" behind what they're doing. The best practices for this age group help them navigate the specific social and academic pressures they face every day. You'll find many more ideas to support this age group in our guide to mindfulness activities for kids.
Mindful Walking
For students who have a hard time sitting still, mindful walking is a lifesaver. It channels that restless energy into a focused, grounding practice. It’s a great tool to use before a big presentation or after a tense moment with a friend.
How it works: Students can walk slowly and silently around the classroom or in a hallway, putting all their focus on the physical feeling of walking.
Sample Script: "We're going to take a slow, mindful walk. As you take each step, just notice the feeling of your foot lifting off the floor, moving through the air, and connecting with the ground again. Feel the heel, the arch, the ball of your foot. If your mind starts wandering to other things, gently bring your attention back to the feeling of your feet on the floor."
To make it even easier to find the right activity at the right time, here’s a quick-start guide you can use as a reference.
Mindfulness Quick-Start Activities By Grade Level
This table summarizes some simple and effective mindfulness exercises you can tailor for different developmental stages in your K-8 classroom.
Grade Level
Activity Name
Core Skill
Best Time to Use
K-2
Belly Buddies
Mindful Breathing
After recess, start of day
K-2
Weather Report
Emotional Awareness
Morning meeting, check-ins
3-5
Mindful Listening
Focused Attention
Transitions, before a test
3-5
Thought Surfing
Metacognition
When students seem distracted
6-8
Mindful Walking
Grounding, Focus
Before presentations, for restless energy
6-8
Body Scan
Body Awareness
End of day, after PE
Remember, the goal isn't perfection; it's about offering consistent opportunities for students to connect with themselves. Starting with just one or two of these simple practices can make a world of difference.
Creating A Trauma-Informed Mindfulness Practice
We all see the clear benefits of mindfulness in the classroom, but jumping in with a one-size-fits-all plan can backfire. For a student who has experienced trauma, some of the most common instructions—like closing their eyes or sitting perfectly still—can feel anything but calm. In fact, it can feel deeply unsafe and trigger the exact vulnerability we're trying to soothe.
A trauma-informed practice isn't about perfectly following a script. It’s about putting safety, choice, and connection first. It’s a shift from asking for compliance to building trust, making sure every single student feels secure enough to explore these tools on their own terms.
The Power of Invitation and Choice
Our words matter immensely. The simplest, most powerful shift you can make is moving from commands to invitations. This small change hands the control back to the student, reinforcing that they are in charge of their own body and their own experience.
Here’s what that looks like in the classroom:
Use Invitational Language: Instead of, "Close your eyes," try offering a gentle choice: "I invite you to close your eyes if that feels comfortable, or you can just soften your gaze and look down toward your desk."
Always Offer Options: A child who feels anxious sitting still might do better with a different sensory focus. You could say, "We're going to try a quiet breathing exercise. You can do that at your desk, or if your body needs to move, you can do a silent, slow stretch instead."
Honor the Opt-Out: Make it clear that choosing not to participate is perfectly okay. A student who opts out can be given a quiet alternative, like drawing or reading, without any sense of punishment. This respects their boundaries and shows them you can be trusted.
This way, mindfulness stays a tool for self-regulation, not a task to be graded or a new way to get in trouble. When we punish a student for not "doing mindfulness correctly," we shatter the trust it's meant to build. For a deeper look, check out these essential trauma-informed teaching strategies.
From Stillness to Movement
A huge piece of the trauma-informed puzzle is realizing that stillness isn't always the goal. For a child whose body is humming with the energy of stress or trauma, being forced to be still can actually spike their anxiety. Sometimes, movement is the most direct path to regulation.
Think about this scenario: During quiet reading, you see Alex fidgeting constantly. He's tapping his pencil, shifting in his seat, and just can't seem to settle. The old-school response might be to correct him for being disruptive.
But a trauma-informed lens sees this behavior as communication. Alex isn't trying to be difficult; his body is telling you he needs to release energy. Instead of demanding stillness, you could quietly offer him a chance to move.
Example Scenario in Action
Teacher: (Kneeling beside Alex's desk) "Hey, it looks like you have a lot of energy right now. Would it help to take a two-minute 'heavy work' break? You could help me carry these books to the library."
Result: Alex gets a valid, helpful way to move his body and reset his nervous system. He comes back to his desk a few minutes later, far more ready to focus.
This approach validates the student's inner world and teaches them how to recognize what their body needs and find a healthy way to meet that need. It turns mindfulness from a rigid exercise into a flexible, responsive toolkit for life.
Engaging Parents in Your School's Mindfulness Journey
The amazing work you do with mindfulness in the classroom can feel like a game-changer for your students. But what happens when the school day ends? When we bring parents into the fold, those classroom practices blossom into genuine life skills.
Creating that school-to-home connection is everything. It turns a "school thing" into a "family thing," making the tools of mindfulness stick. It's all about clear, friendly communication and giving families simple, no-stress ways to practice together.
Let's be honest, for many parents, the word "mindfulness" might sound a little fuzzy or even intimidating. Our job is to cut through the noise, skip the jargon, and show them how practical and beneficial these skills are for their kids.
Communicating The What and Why
I've found the best way to start is by framing mindfulness as simple "attention training." It's a skill, just like learning to ride a bike. This framing helps parents see it as a secular, science-backed tool that leads to outcomes they deeply care about: better focus, calmer kids, and more kindness.
Practical Communication Tips:
Newsletter Snippets: Don't overwhelm them. Just add a tiny, recurring "Mindful Minute" section to your weekly newsletter. Share one quick idea, a fun fact about how focus works, or a link to a 2-minute breathing exercise. For example: "This week in class, we learned 'Belly Breathing'! Ask your child to show you how they use their 'belly buddy' to calm down."
Parent Night Presentations: This is your moment to show, not just tell. Lead parents through a simple, 60-second breathing exercise. When they feel that subtle shift from scattered to centered themselves, they get it. The lightbulb goes on.
Address Concerns Head-On: It's common for some parents to worry if this is a religious practice. Be ready to explain that school-based mindfulness is completely secular. It’s all about the science of attention and helping our kids learn to manage big feelings and stress.
Simple Activities for Family Engagement
The secret to getting families on board is to offer activities that are genuinely fun, easy, and fit into the chaos of family life. We're not asking them to add another "to-do" to their list.
The most powerful home-based activities don't feel like another chore. They are small, intentional shifts in awareness during everyday routines that help families connect with each other.
Here are a few ideas I've seen work wonders. Share them with parents to get the ball rolling:
Mindful Meals Challenge families to eat just one meal a week with a little more awareness. No screens! For the first few bites, everyone can silently notice the colors, smells, and tastes of their food. A fun way to start is asking: "Without talking, what's one thing you notice about the crunch of your carrot?"
Family Gratitude Jar This is a classic for a reason—it works. All you need is a jar. Family members write down things they're thankful for on little slips of paper throughout the week. Reading them aloud together on a Sunday evening? A truly powerful ritual for connection and positivity.
"Rose and Thorn" Check-In This is a fantastic routine for dinnertime or bedtime. Each person shares their "rose" (something great that happened that day), and their "thorn" (something that was tough). It's a simple structure that builds emotional vocabulary and gives kids a safe, predictable way to open up about their struggles.
When you offer easy, concrete examples like these, you pull back the curtain on mindfulness in the classroom. You show parents they already have everything they need to be incredible partners in their child's emotional growth.
How Do You Know Your Mindfulness Program Is Working?
So, you’ve put in the time and energy to bring mindfulness into your classrooms. Fantastic! But how can you be sure it's actually making a difference? Measuring the impact doesn't require a mountain of spreadsheets. It’s really about weaving together the clear, simple data with the powerful stories of change you see and hear in your hallways every single day.
The idea is to get a real sense of what’s working, what needs a little tweaking, and how to show the value of this work to your entire school community. This means looking at both the numbers and the narratives.
Seeing the Whole Picture: Data and Stories
The most compelling proof of success comes from mixing "hard data" with what I like to call "heart data." One tells you what changed, while the other tells you how and why it truly matters.
Think about it: a drop in office referrals is a great metric on its own. But it becomes so much more powerful when you pair it with a teacher’s story about a student who once escalated every conflict, but now takes a few deep breaths before responding. That’s where the magic is.
Here are a few practical ways to capture both:
Simple Student Check-Ins: Use student-friendly surveys at the beginning and end of a semester. Keep the language simple. Ask questions like, "When I feel frustrated, I have a tool I can use to calm down," with answers ranging from "Not Yet" to "Almost Always."
Look at Behavioral Trends: Keep an eye on your school’s data for office referrals, playground incidents, and classroom disruptions. A noticeable decrease over time is a strong sign that students are starting to use their new self-regulation skills.
Gather the "Wins": Create a super-simple way for teachers to share quick success stories—maybe a shared digital document or even a physical box in the staff lounge. A practical example would be a teacher sharing: "Today, before the math test, I saw three students doing 'square breathing' on their own without any prompt from me." Capturing these anecdotes is essential.
Fidelity Checks as Supportive Coaching
To make sure these practices are landing well and being used consistently, administrators can use a fidelity checklist during classroom walk-throughs. The key here is that this isn't an evaluation tool; it's a way to offer supportive coaching.
A checklist helps you spot the little things. Are teachers using invitational language? Are students using calming strategies on their own? Does the classroom feel more connected? This helps you see exactly where a teacher might need an extra resource or just a bit of encouragement.
A quick walk-through can tell you so much. You might see a teacher leading a 30-second breathing exercise or notice a student independently using a "peace corner." These moments are your data.
And the data backs this up on a larger scale. Research shows that over 1 million elementary students in the U.S. have been part of school-based mindfulness programs, with incredible results. One study showed students were 40% more likely to show prosocial behaviors, while another found a 35% improvement in executive functions like focus and planning. You can explore more of these important findings on mindfulness and student development.
Choosing Your Assessment Tools
The right measurement tools will depend on your school's goals and what you have the capacity for. Here’s a quick breakdown to help you decide on the right mix for your community.
Assessment Method
What It Measures
Best For
Student Surveys
Self-awareness, perceived stress, use of skills
Gauging student self-perception and emotional literacy.
Behavioral Metrics
Office referrals, incident reports, attendance
Tracking changes in school-wide climate and safety.
Teacher Anecdotes
Classroom climate, student empathy, skill transfer
Capturing rich, qualitative stories of impact.
Fidelity Checklists
Program consistency, quality of implementation
Providing targeted coaching and support for teachers.
By blending a few of these methods, you can build a comprehensive, convincing, and authentic story about the positive force of mindfulness in the classroom. It’s how you prove the value of this work for your students, your staff, and your entire school culture.
Frequently Asked Questions About Mindfulness in Schools
As mindfulness becomes a more familiar part of the school day, questions from teachers, leaders, and parents are bound to come up. And they’re good questions. Getting clear, honest answers is the first step to building the trust needed to bring these powerful skills to your community.
We get it. We’ve heard these same questions from schools we work with, and we want to tackle them head-on.
Isn't Mindfulness a Religious Practice?
This is one of the first and most important questions we hear. Let’s be clear: the mindfulness we practice and teach in schools is 100% secular.
We approach it as "brain training" or "attention practice." It's all about understanding the science of our brains. The focus is on practical skills—like mindful breathing or noticing sounds—that help students manage their focus and emotions. These are universal human abilities, not tied to any single belief system.
For example, a teacher might say, "Let's all listen and see how many different sounds we can hear in the next 30 seconds." This is an exercise in auditory focus, not a spiritual ritual. We are incredibly careful with our language, keeping it inclusive and centered on shared human experiences like stress, focus, and kindness.
How Can I Justify This When My Students Are Behind Academically?
We hear you. This is a real and valid concern for so many educators. With the pressure to catch students up, how can you possibly make time for something else?
The key is to shift your perspective: mindfulness isn't time taken from academics, it's an investment in academic readiness. Think about it—a calm, focused student is a student who is ready to learn. A dysregulated classroom is where instructional time truly gets lost.
Research—and our own experience in thousands of classrooms—shows that even 3-5 minutes of practice can settle a group, sharpen focus, and reduce the kinds of disruptions that pull you away from teaching.
A simple one-minute breathing exercise after a chaotic lunch break or between subjects can be the very thing that makes the next lesson stick. You're not losing a minute; you're gaining a much more productive and settled 45.
What if a Student Refuses to Participate?
First and foremost, participation is always an invitation, never a mandate. If you try to force a child to be mindful, you’ve already undermined the entire goal of creating safety and self-awareness. Our aim is to build a classroom culture where it’s okay to opt out respectfully.
Here are a few ways we coach teachers to handle this:
Offer Quiet Alternatives: A student who opts out can be invited to do another quiet, solo activity. This could be reading a book, doodling, or simply resting their head on their desk. The goal is quiet, not compliance.
Model, Don't Preach: Your consistency is the most powerful tool. When you lead the practice without pressure or judgment, resistant students almost always get curious. Over time, they see it’s a safe and even pleasant activity, and they often choose to join in on their own.
Keep it Light and Playful: Especially for younger kids, framing it as a game works wonders. We use exercises like pretending to smell a flower and then blow out a birthday candle. Acknowledging that it can feel a little silly or strange at first also gives kids permission to be human and helps normalize the whole experience.
At Soul Shoppe, we believe in building these skills with practical, on-the-ground support for your entire school community. Discover how our programs create calmer, more connected classrooms at https://www.soulshoppe.org.