Soul Shoppe's work is made possible by donors and partners who care deeply about the young people in their communities! We can't do this work without you. Support our work in classrooms and on playgrounds across the nation by donating here.
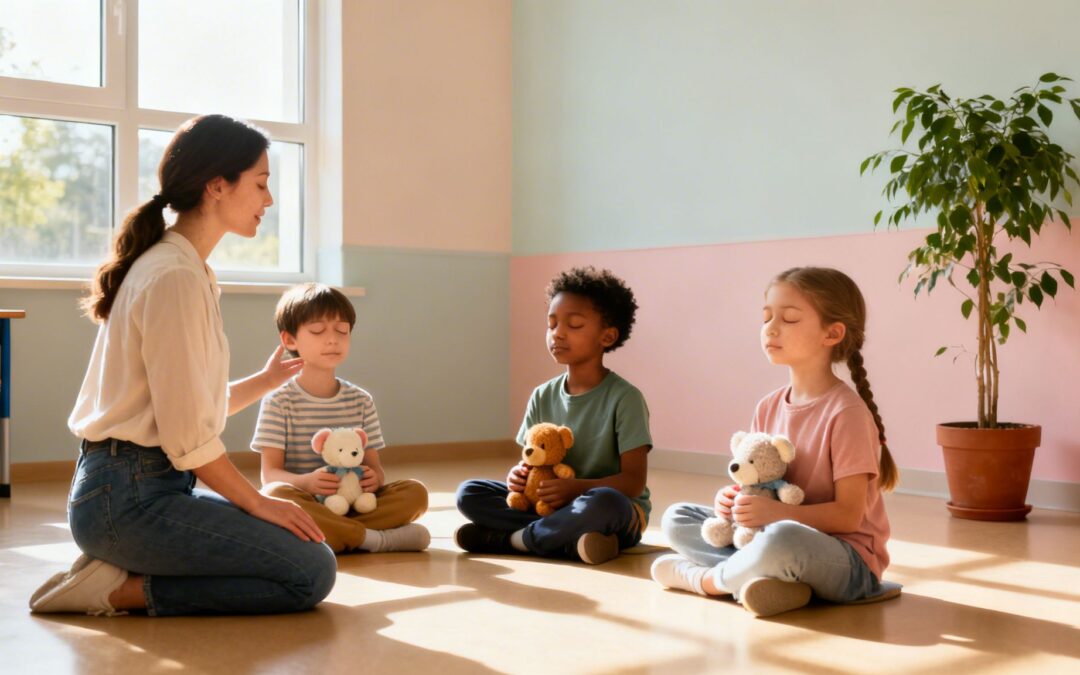
A child is under the table. Another is crying because the math page feels impossible. At home, your own child is yelling that their socks feel wrong, their brother touched their stuff, and now everything is too much.
Those moments don't need a lecture first. They need a bridge back to calm.
One of my favorite tools for that bridge is a glitter sensory bottle. It looks simple, and that’s part of its power. A sealed bottle with water, glue, and glitter gives a child something concrete to hold when their feelings are anything but. Their eyes track the swirling sparkle. Their hands stay busy. Their breathing often begins to slow without anyone demanding, “Calm down.”
That’s why this tool has stayed in classrooms, counseling spaces, and family homes for years. It isn’t just a cute craft. It’s a practical support for self-regulation, transitions, mindfulness, and emotional language.
More Than a Craft The Power of a Simple Glitter Bottle
I remember offering a glitter bottle to a student during a rough transition after recess. He wasn't ready to talk. He wasn't ready to problem-solve. He was only ready to say, “Everyone is too loud.”
So we didn’t start with words. I handed him the bottle, sat nearby, and said, “Watch until the glitter settles. I’ll stay with you.”
That was enough to interrupt the spiral.
A glitter sensory bottle works because it gives children an outside object that matches their inside experience. When feelings are scattered, the glitter is scattered too. When the motion slows, children can see what settling looks like.
Why this simple tool matters
Glitter sensory bottles became popular in early childhood education and therapy in the early 2010s, with tutorials appearing on educational websites by 2015. That growth lined up with wider school interest in social-emotional learning. According to Children's Learning Centers of Fairfield County, citing CASEL, SEL programs reached 27% of U.S. students by 2017, up from 3% in 2011.
That rise matters in everyday practice. Schools needed tools that were easy to introduce, easy to repeat, and simple enough for children to understand.
A bottle like this can support:
Big feelings: anger, frustration, disappointment, or sensory overload
Transitions: entering class, leaving recess, moving to homework, bedtime, or car rides
Quiet reset routines: calm corners, counselor offices, reading nooks, and family reset spaces
Mindfulness lessons: making breathing visible and concrete for children who don't connect with abstract instructions
A child doesn't need to explain everything before they can start regulating.
Where families and teachers often get stuck
Many adults dismiss this tool because it seems too small. They think, “It’s just glitter in a bottle.” I understand that reaction.
But children often need regulation strategies that are visible, repeatable, and low-pressure. A glitter bottle checks all three boxes. It gives the nervous system something predictable to follow.
If you're building a calm corner or looking for other engaging craft activities for kids, this kind of hands-on project fits beautifully because it isn't only about making something. It's about creating a tool children can use later, when emotions rise and words disappear.
The Science of Calm Developmental and SEL Objectives
When a child watches glitter drift downward, a few helpful things happen at once. Their eyes focus on one moving target. Their body gets a cue to pause. Their brain shifts from reacting outward to noticing inward.
That’s why this tool can work even when a child isn’t ready to talk.
A visual anchor for a busy nervous system
Children in distress are often dealing with too much input at once. A glitter sensory bottle narrows attention. Instead of tracking every sound, face, and demand in the room, they track one slow visual event.
That matters in both classrooms and homes. Predictable movement can reduce the pressure to respond right away. It offers a nonverbal path toward regulation.
In therapeutic contexts, the effect has been measured. A 2022 study referenced by the National Autism Center included sensory tools like these in 40% of effective behavior plans, with a 45% decrease in agitation episodes when used as a 2 to 3 minute visual timer. The same source explains that the settling time can mirror calming deep breathing cycles. That finding is summarized by Cultivate BHE’s overview of glitter sensory bottles for autism support.
How this connects to SEL skills
A glitter bottle isn't the lesson by itself. It's a support for the lesson.
When adults pair the bottle with simple reflection, children begin to build core SEL capacities:
Self-awareness: “My body feels tight.” “My thoughts are racing.”
Self-management: “I can pause before I yell.”
Attention control: “I can stay with one thing until I feel steadier.”
Emotional language: “My feelings were stormy. Now they’re quieter.”
For educators who want shared language around development, social-emotional development in children gives a helpful frame for understanding how these skills grow over time.
Why neurodivergent children often respond well
For many children with ADHD, autism, sensory processing differences, or high anxiety, verbal directions can add pressure during a hard moment. “Use your words” may be too much too soon.
A glitter sensory bottle can help because it asks very little at first. Watch. Hold. Breathe. Wait.
That simplicity makes it useful as a co-regulation tool. The adult doesn’t have to fix everything immediately. They can sit nearby and offer a calm rhythm.
Practical rule: Use the bottle before the child is fully escalated whenever possible. Early support works better than emergency support.
The metaphor children understand quickly
One reason this works so well in SEL lessons is that the metaphor is easy to grasp.
You can say:
“When we shake the bottle, it looks like our thoughts when we’re upset.”
“The glitter isn’t bad. It’s just moving fast.”
“Your feelings can be big and still settle.”
That kind of language is respectful. It doesn't shame the child for being dysregulated. It normalizes the experience and gives them a picture for what regulation feels like.
For older elementary and middle school students, I often add one sentence: “Calm doesn’t mean no feelings. It means your body is ready to think again.”
How to Make a Perfectly Mesmerizing Glitter Bottle
A good glitter bottle should do one thing well. It should move slowly enough to hold attention, but not so slowly that it turns into murky sludge.
Most first attempts go wrong for a simple reason. People guess the ratios.
The best results come from understanding what each ingredient does.
The master recipe
Experiments with sensory bottle recipes show that the glue-to-water ratio shapes the settling speed. According to The Craft-at-Home Family’s clear-glue sensory bottle experiment, a 3:1 water-to-clear-glue ratio yields a benchmark 3-minute settling time, and using clear school glue instead of pre-mixed glitter glue can create up to 4 times longer glitter suspension.
That means clear glue gives you more control over the calming effect.
Here’s the setup I recommend most often.
What to gather
A clear plastic bottle: Choose a sturdy bottle that feels solid in small hands. Smooth-sided plastic bottles work well in classrooms.
Warm water: Warm water helps the glue dissolve more smoothly.
Clear school glue: Clear glue usually gives a cleaner, slower visual effect than glitter glue.
Fine glitter: Fine glitter stays in motion longer. A little chunky glitter can add visual interest.
Optional food coloring: One or two drops are enough if you want tint.
A funnel and spoon: These cut down on frustration and spills.
Strong adhesive for the lid: Super glue is a common choice for the threads.
If you're working on a sensory unit, 5 senses activities for kids can pair nicely with the bottle-making process because children can talk about what they see, hear, and feel as they create.
How to build it
Fill the bottle with warm water first. Don’t fill it all the way. Leave room for the glue and the glitter to move.
Add clear glue. Aim for that 3:1 water-to-clear-glue ratio if you want a slower, calming descent.
Pour in glitter. Start modestly. You can always add more. Too much glitter can make the bottle visually crowded.
Add color if you want it. A drop or two of food coloring is plenty.
Close the lid temporarily and shake. Watch the movement before you seal it for good.
Adjust if needed. If the glitter drops too fast, add more clear glue. If it barely moves, add a little more water.
A short demonstration can help if you want to see the process in action.
What each ingredient is doing
Children love making these, but adults need to know why the recipe works.
Ingredient
Job in the bottle
What happens if you use too much
Warm water
Helps mix the contents smoothly
Bottle may settle too fast if there’s too much water
Clear glue
Slows the glitter and creates that floating effect
Bottle can become thick and cloudy
Fine glitter
Gives the visual tracking effect
Can become dense if overloaded
Food coloring
Adds theme and visual appeal
Can darken the bottle too much
Adhesive on lid
Keeps the bottle classroom-safe
Without it, leaks are much more likely
The step people skip
The lid has to be sealed as if a determined child will test it. Because they will.
I apply adhesive on the lid threads, screw the lid on tightly, wipe the rim, and let it cure fully before the bottle goes into a calm corner. If I’m making a class set, I test each bottle by turning it upside down over a sink first.
If the bottle is meant for school use, don't send it into circulation until you've tested for leaks.
A few first-try fixes
The glitter falls too fast: Add more clear glue, shake again, and retest.
It looks muddy: Use less coloring and less filler next time.
It feels boring: Mix fine glitter with a small amount of chunky glitter for contrast.
The bottle is too full: Pour out a little liquid. Motion needs space.
A successful glitter sensory bottle should feel soothing, not chaotic. When you shake it, the movement should invite watching. If it makes your eyes jump around or if everything drops immediately, keep adjusting.
Creative Variations for Different Ages and Goals
Once you’ve made one reliable bottle, you can start matching the design to the child and the moment. That’s when this tool becomes much more than a generic calm-down jar.
Different fillers create different experiences. Some bottles are best for quiet recovery. Others work better for short transitions, focus resets, or sensory curiosity.
How movement changes the goal
Advanced recipes can be tuned by changing the liquid base. A Day in Our Shoes explains that adding 25% baby oil or mineral oil creates layered movement, while 10% to 20% glycerin can slow glitter descent by 2 to 4 times. The same source notes that a drop of dish soap can reduce glitter clumping by over 90%.
Those adjustments give you options.
A faster bottle can support a child who needs a brief reset and then wants to get back to work. A slower bottle can support a child who needs more help staying with one calm activity.
Sensory Bottle Recipes and Their SEL Purpose
Bottle Type
Key Ingredients & Adjustments
SEL Objective
Ideal for Ages
Classic Calm Bottle
Water, clear glue, fine glitter
Self-regulation during upset moments
K-5
Deep Breathing Bottle
Add glycerin for slower drift
Pacing breaths and extending calm
K-8
Ocean Bottle
Blue tint, baby oil or mineral oil for layered flow, ocean-themed fillers
Younger children usually do best with a cleaner visual field. Too many sequins, beads, and novelty items can make the bottle feel busy instead of soothing.
Older children often enjoy a bottle that feels less “babyish.” I’ve had good success with:
Ocean themes: especially when tied to science or habitats
Galaxy themes: great for writing, art, or quiet reflection
School-color bottles: useful when students help make a shared set for the classroom calm corner
Simple examples from real use
A kindergarten teacher might keep an ocean bottle near the rug area and say, “Take one minute to watch the waves settle before we start.”
A fourth-grade teacher might use a darker galaxy bottle before a test and say, “Eyes on the glitter. Shoulders down. Slow breath in, slow breath out.”
At home, a parent might hand a child a feelings-themed bottle during sibling conflict and ask, “What color matches your body right now?”
The best variation isn't the prettiest one. It's the one a child will use.
Keep the design purposeful
When adults get excited, bottles can become overdecorated. I say that with love because I’ve made those bottles too.
If your goal is calm, keep these design choices in mind:
Choose one visual focus: Too many fillers compete for attention.
Use color intentionally: Softer or cooler tones often feel less activating.
Test movement before sealing: A beautiful bottle that settles poorly won’t get used.
Label the purpose: “Breathing Bottle,” “Transition Bottle,” or “Peace Corner Bottle” helps adults stay consistent.
The strongest classroom sets usually include a few different styles, not one bottle for every situation.
Integrating Sensory Bottles into Your Classroom and Home
A glitter bottle helps most when adults introduce it before a child is in full distress. If the first time a child sees it is during a meltdown, it can feel like one more demand.
Treat it like any other SEL tool. Teach it when everyone is calm. Practice it when no one urgently needs it. Then it’s available when emotions spike.
In the classroom
A glitter sensory bottle belongs best in a defined space. That might be a peace corner, a calm-down spot, a counselor table, or a quiet chair near the library area.
The key is this. The bottle should feel like a support, not a consequence.
I introduce it with language like:
“This is a tool for helping your brain and body get steady. It is not a punishment spot. It is one choice you can make when you need a reset.”
That script matters. Children quickly notice whether a regulation space is respectful or controlling.
A simple routine that works
Many teachers overcomplicate calm-down procedures. Keep it short.
Notice the early sign. “I see your hands are tight.”
Offer the tool. “Do you want the glitter bottle or a quiet seat first?”
Stay nearby if needed. Some children regulate better when an adult remains physically present.
Reflect after the settle. “What does your body need next?”
That last step is where the SEL learning happens. A physical tool is useful, but reflection helps the child build transfer.
Research supports that pairing. A 2025 study in the Journal of School Psychology found that when sensory tools were used within SEL programs with guided reflection, they reduced student dysregulation by 28%. That finding is summarized in this discussion of sensory tools and guided reflection.
If you're building out a broader practice around regulation, teaching mindfulness to children offers a useful companion approach.
A glitter bottle meditation
Here’s a script I’ve used with students from early elementary through middle school:
“Shake the bottle once.”
“Watch the glitter move.”
“Let your eyes stay with one part of the bottle.”
“Breathe in slowly.”
“Breathe out slowly.”
“When the glitter settles, notice if your body changed at all.”
For younger children, I shorten it even more. “Shake. Watch. Breathe. Wait.”
For older students, I add, “You don’t have to force calm. Just observe.”
In morning meetings, circles, and group spaces
A glitter bottle can also support shared emotional language.
Try these uses:
Feeling check-in: Pass the bottle around. Each student names one feeling word.
Transition to listening: One shake, then everyone gets quiet before instructions.
Conflict repair pause: Use it as a settling object before peers talk through a disagreement.
Writing prompt: “If your mind looked like this bottle today, what would it show?”
These routines help students see regulation as normal and teachable.
At home
Families often need practical uses, not theory.
A glitter sensory bottle can help during:
Before homework: a short reset after school
Sibling conflict: a pause before discussing what happened
Bedtime: a steady visual cue for slowing down
Leaving the house: a transition ritual when mornings are rough
Here’s a parent script that works well: “Your body looks overwhelmed. Let’s watch the bottle first, then we’ll talk.”
That sequence respects timing. Children can’t always process conversation and regulate at the same moment.
What not to do
A good tool can lose its value if adults misuse it.
Avoid these common mistakes:
Don’t force it: An offered tool works better than a demanded one.
Don’t use it as exile: “Go sit over there with the bottle” can feel shaming.
Don’t expect magic: It supports regulation. It doesn't replace relationship.
Don’t skip repair: After calm returns, children still need help naming what happened and what comes next.
Troubleshooting Common Glitter Bottle Problems
Even experienced teachers make a bottle that flops sometimes. Usually the issue is easy to fix once you know what you’re looking at.
The glitter sinks too fast
This is the most common problem. The liquid is usually too thin.
Add a little more clear glue, shake again, and retest. If you want the bottle to become part of a child’s regular calming routine, it can also help to pair the visual pause with other self-soothing strategies for kids.
The glitter clumps together
Clumping usually means the fillers are sticking or the mixture needs a small adjustment.
Try adding a drop of dish soap if the bottle hasn’t been permanently sealed yet. Swirl gently and watch whether the glitter begins to spread more evenly.
Sometimes the fix is tiny. One small adjustment can change the whole feel of the bottle.
The bottle looks cloudy
Cloudiness often comes from overmixing, too much color, or ingredients that don’t blend cleanly.
Let the bottle sit for a while before deciding it failed. If it still looks muddy, rebuild with less food coloring and fewer fillers.
The bottle leaks
If the lid leaks, retire the bottle until you can fix it properly.
Dry the lid and threads completely, reapply strong adhesive, close it firmly, and let it cure fully. I always test repaired bottles upside down over a sink before handing them back to children.
The bottle is too busy to feel calming
A glitter sensory bottle should draw the eye, not overwhelm it.
If there are too many sequins, beads, or competing colors, start over with a simpler recipe. In regulation tools, less is often more.
Frequently Asked Questions About Glitter Sensory Bottles
Are glitter sensory bottles safe for toddlers?
They can be, if adults use a sturdy plastic bottle, seal the lid securely, and supervise use. For very young children, avoid sharp fillers or anything that could become unsafe if the bottle opened.
Do I have to use glitter?
No. Some children prefer beads, sequins, pom-poms, or themed confetti. If you're trying to reduce mess or avoid traditional glitter, you can still create a visually engaging bottle with other fillers.
How do I clean the outside?
Wipe the outside with a damp cloth and dry it well. If little hands have made it sticky, a mild soap on the cloth usually does the job. Keep water away from the lid seam if the seal is aging.
How long does a glitter sensory bottle last?
A well-made bottle can last a long time if it stays sealed and is handled with care. In classrooms, I check bottles regularly for cloudiness, leaks, or cracked plastic. If the contents stop moving well, I rebuild rather than trying to save a bottle that no longer works.
What age is best for a glitter sensory bottle?
They can work across a wide age range. Younger children often use them for sensory soothing and transition support. Older students may use them more intentionally for mindfulness, focus, and emotional reset.
Should I make one bottle or several?
Start with one strong, reliable bottle. Use it. Observe who responds to it and when. Then make additional versions for different needs, such as a slower breathing bottle or a simpler transition bottle.
If you want more practical tools for helping children build empathy, self-regulation, communication, and psychological safety, explore Soul Shoppe. Their work supports schools, families, and communities with experiential social-emotional learning that children can apply in real life.
The belly breathing technique is one of the simplest, most powerful tools we have for calming the nervous system. It’s all about swapping shallow chest breathing for deeper, more efficient breaths that engage the diaphragm. By inhaling to expand the abdomen and exhaling to contract it, you kickstart the body’s natural relaxation response.
What Is Belly Breathing and Why Does It Work So Well
Diaphragmatic breathing, which we often call the belly breathing technique, is how our bodies are naturally designed to breathe. It’s what you see babies do instinctively. But as we get older, life’s stresses and constant tension often cause us to switch to shallow "chest breathing" without even realizing it.
When we feel anxious, rushed, or overwhelmed, our breathing tends to become quick and high up in the chest. This pattern sends a direct signal to our nervous system that we're on high alert, locking us into a state of "fight or flight." Belly breathing flips that switch. By intentionally slowing down and deepening your breaths, you send a message back to your brain that everything is okay.
The Power of Conscious Breathing
This simple act of focusing on your breath engages the diaphragm, a large dome-shaped muscle at the base of your lungs. When you inhale deeply, your diaphragm moves down, creating more room for your lungs to fill with air. This movement directly stimulates the vagus nerve, a crucial part of the parasympathetic nervous system—your body's "rest and digest" command center.
The real power of the belly breathing technique lies in its ability to serve as a physiological reset button. It’s not just about feeling calm; it's about actively changing your body's stress response from the inside out.
For parents and educators, this is a total game-changer. Imagine a child who can calm themselves down before a big test. Or a classroom that can smoothly transition from the chaos of recess to quiet, focused learning. This isn't just a nice idea; it's a trainable skill. For example, a teacher can lead a one-minute "Belly Buddy" session before starting a math lesson to help students settle their minds and bodies.
Historical Roots and Modern Benefits
This practice is anything but a new-age fad. A focus on deep, intentional breathing has roots going back centuries. In the 1800s, the explorer George Catlin observed that Native American communities who consistently practiced nasal breathing showed remarkable health, from strong jaws to overall vitality. He documented these observations in his book, 'The Breath of Life,' directly linking their wellness to how they breathed.
Before we dive into the "how-to," it’s helpful to get a bigger picture by understanding the critical differences between nasal and mouth breathing and how they affect our health. When you teach a child this foundational skill, you're giving them a tool they can use for life. It helps them to:
Reduce anxiety and stress by lowering cortisol levels.
Improve focus and attention, which is crucial in academic and social settings.
Foster emotional regulation and build self-control.
Mastering this one technique can set the stage for a more peaceful and productive environment, both at school and at home.
How to Guide Your Child Through Belly Breathing
Before you can teach the belly breathing technique to a child, it’s a good idea to get a feel for it yourself. We can't pour from an empty cup, after all. Modeling a sense of calm is always the first, most important step.
Find a comfortable spot, either sitting up straight or lying on your back. Place one hand on your chest and the other right on your belly, just below your ribs.
Now, take a slow, deep breath in through your nose. The goal is to feel the hand on your belly rise up, while the hand on your chest stays mostly still. As you exhale slowly, just feel your belly fall. That simple motion means you’re engaging your diaphragm. Once you can feel this in your own body, you'll be so much more confident and authentic when guiding a child.
Making Belly Breathing Fun for Kids
Let's be real—kids learn best through play and imagination. Dry, clinical instructions just won't cut it. To make the belly breathing technique stick, we need to turn it into a gentle, playful activity using visuals and language they can connect with.
Here are a few activities I’ve found work wonders at home or in the classroom.
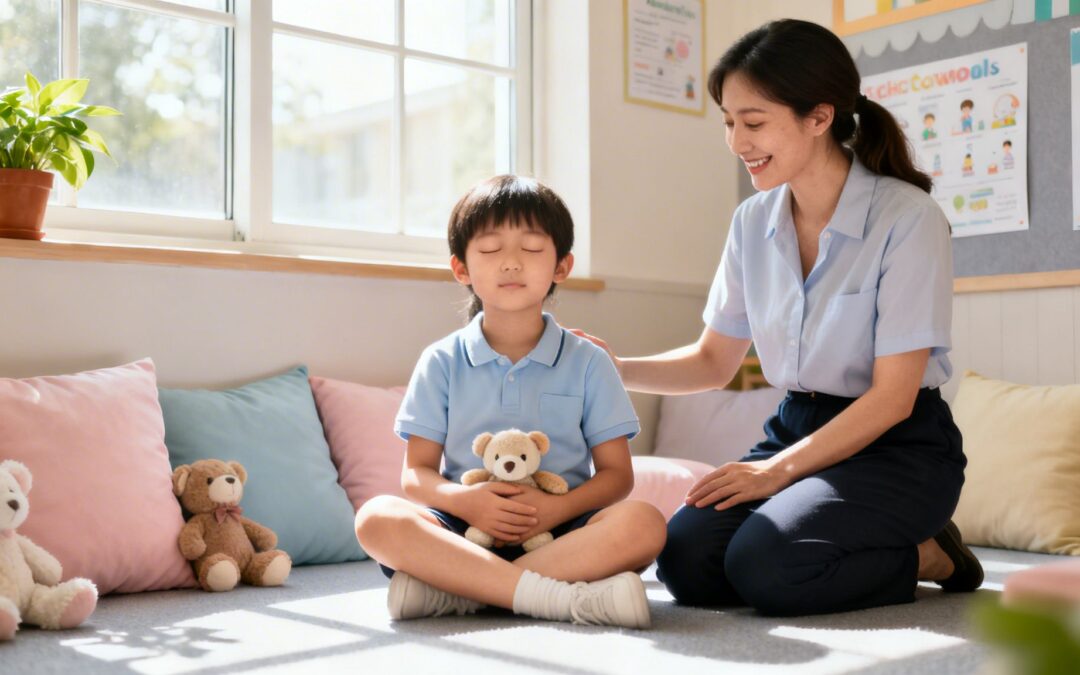
The Breathing Buddy Activity
This is a classic for a reason—it’s fantastic for younger kids (think Pre-K to 2nd grade) because it makes the breath visible.
Practical Example: A parent can use this as part of a bedtime routine. After story time, say, "Let's put Teddy on our tummies and rock him to sleep." This creates a calm, focused transition toward sleep.
First, have the child lie down comfortably on their back, maybe on a rug or mat. Ask them to pick a small stuffed animal or a favorite lightweight toy to be their "Breathing Buddy."
Then, have them place their little buddy right on their tummy. Their one special job is to rock their buddy to sleep using only their breath.
You can guide them with a simple script: "Take a slow, quiet breath in and feel your tummy lift your buddy up toward the ceiling. Now, breathe out slowly and watch your buddy gently float back down." This turns an abstract feeling into a concrete result they can actually see.
Balloon Belly Breathing
This visualization is a game-changer for helping kids understand the idea of filling their abdomen with air. It’s effective for a wide age range, from kindergarteners all the way to older elementary students.
Practical Example: A teacher notices the class is getting restless during a long lesson. She says, "Okay everyone, hands on your bellies! Let's blow up our green balloons three times. Ready? Breathe in… and whoosh it out." This 30-second break resets the room's energy without disrupting the lesson plan.
Start by having them place their hands on their belly. Then, you can say something like, "Pretend there's a small, empty balloon deep inside your tummy. When you breathe in slowly through your nose, imagine you're filling that balloon up with air, making your belly get bigger and rounder."
"Now, as you breathe out slowly through your mouth, let all the air whoosh out of the balloon, making your tummy get smaller again." To make the imagery even more vivid, you can ask them to pick a color for their balloon. This gives a child a powerful tool to how to self-soothe in moments of big feelings or stress.
Teacher Tip: I love using this as a quick reset after a loud transition or a chaotic moment. Just three "Balloon Belly" breaths can help an entire class settle down and refocus their energy for the next lesson.
Simple Scripts and Visual Cues
Having a few go-to scripts in your back pocket makes it easy to introduce the belly breathing technique anytime, anywhere. Here are two of my favorites that work just as well one-on-one as they do in a group.
Smell the Flower, Blow Out the Candle
This sensory-based script is incredibly intuitive for most kids.
Practical Example: A child is getting upset because they can't get their shoes tied. The parent can kneel down and say, "Whoa, that's frustrating. Let's pause. Smell this beautiful rose with me… now blow out this birthday candle very slowly." This physical interruption breaks the frustration cycle.
For the inhale: "Imagine you're holding a beautiful flower. Bring it up to your nose and take a long, slow sniff to smell its wonderful scent. Let the air fill up your whole belly."
For the exhale: "Now, pretend you have a birthday candle in front of you. Purse your lips and blow the air out slowly and gently to make the flame flicker, but don't blow it all the way out just yet!"
That visual distinction between a sharp puff of air and a slow, controlled exhale is crucial. For kids struggling with emotional regulation, learning to extend their exhale is a powerful skill.
Belly Breathing Cues for Different Age Groups
The language we use matters. A cue that works for a second-grader might go right over a preschooler's head. It's helpful to have a few age-appropriate phrases ready to go.
Here are some simple, effective cues tailored for different developmental stages.
Age Group
Verbal Cue or Activity
Focus
Preschool (3-5)
"Let's pretend we're sleeping lions. Take a big, quiet breath in, then a long, sleepy sigh out."
Making it a game, connecting to familiar concepts (animals).
K-2nd Grade (5-8)
"Put your hands on your tummy. Can you make your hands go for a ride on your 'breathing wave'?"
Concrete, sensory feedback (feeling hands move).
3rd-5th Grade (8-11)
"Imagine your belly is a balloon. Breathe in to fill it up, breathe out to let the air out slowly."
Introducing simple visualization and control.
6th-8th Grade (11-14)
"Let's try 4-4-4 breathing. Inhale for 4, hold for 4, exhale for 4. Focus on the belly rising and falling."
Introducing structure and more advanced self-regulation techniques.
These are just starting points, of course. The best cue is always the one that resonates most with the child in front of you. Feel free to get creative and adapt the language to their interests
The Science Behind a Calmer Nervous System
Have you ever noticed how taking a few deep breaths can change your entire mood in seconds? It’s not just a feeling; it’s a powerful biological process at work. The belly breathing technique is like a direct line to your body's control center—the autonomic nervous system.
This system has two main modes. The first is the sympathetic nervous system, our "fight-or-flight" response, which kicks into high gear during stress. Then there's the parasympathetic nervous system, our "rest-and-digest" mode, which is all about calm and recovery.
When a child (or an adult, for that matter) feels stressed, anxious, or upset, their body is stuck in fight-or-flight. Their heart beats faster, breathing becomes short and shallow, and the body is flooded with stress hormones like cortisol. The belly breathing technique acts as a manual override for this entire response.
Engaging the Vagus Nerve
The secret ingredient here is the vagus nerve. It's the longest cranial nerve in the body and essentially runs the show for the parasympathetic nervous system. When you take a slow, deep breath that makes your belly expand, you're physically stimulating this nerve.
This simple action sends a signal straight to the brain: "It's safe to relax now." In response, the body gets the message to slow the heart rate, lower blood pressure, and ease up on cortisol production. It's a fascinating look into the mechanics of calming your nervous system through the vagus nerve.
By teaching a child this breathing technique, you are giving them a remote control for their own nervous system. It’s not a magic trick; it is a tangible, science-backed tool for self-management.
The Proven Impact on Respiratory Function
This isn't just theory; the physical benefits are real and measurable. Conscious, deep breathing makes our lungs work more efficiently. Over time, it can actually retrain the body to use a calmer, more effective breathing pattern even when at rest.
For instance, one four-month study with adolescents showed that regular practice led to a 10.96% increase in their tidal volume—that’s the amount of air moved with each breath. Their breathing frequency also slowed down by 11.47%, a clear shift away from rapid, shallow breathing. These findings show how consistent practice creates lasting change, and you can dig into the details in the full study on respiratory intervention outcomes.
Practical Examples in Action
Let’s see how this science plays out in a real school or home setting.
Before a Test: A student feels their heart pounding. The teacher says, "Okay class, before we start, let's take five deep belly breaths together." This activates their parasympathetic nervous system. Their heart rate slows, their mind clears, and they can finally access the information they studied instead of being blocked by test anxiety.
After Recess: A group of third-graders bursts into the classroom, loud and buzzing with energy. The teacher guides them through two minutes of "Balloon Belly" breathing. This collective sigh brings the energy down, cools off lingering playground squabbles, and gets their brains ready for focused learning.
Sibling Squabble: Two siblings are arguing over a toy. A parent intervenes and says, "Freeze. Everyone, let's do three Dragon Breaths." They inhale deeply and exhale with a loud 'whoosh.' The shared physical action breaks the tension, and they can address the problem more calmly.
These everyday moments are where the belly breathing technique proves its worth as a core emotional wellness tool. Learning to manage the body’s stress response is one of the most important self-regulation strategies for students we can possibly teach.
Weaving Belly Breathing into Daily Routines
The real power of the belly breathing technique isn’t in doing it once in a while; it’s in making it a habit. When kids practice consistently, they build a deep-rooted skill for self-regulation that they can turn to automatically. The goal is to make it as natural as brushing their teeth.
By weaving these quick exercises into existing schedules, you give children small pockets of calm throughout their day. This practice can be proactive—building resilience before stress hits—and reactive, offering instant relief in a tough moment.
Bringing Belly Breathing into the Classroom
Classrooms are busy places, full of transitions and shifting energy levels. A consistent belly breathing technique practice can anchor the day, creating a more predictable and focused atmosphere for everyone. It doesn't take much time, just a little intention.
Here are a few moments where you can easily slip it in:
Morning Meeting Kickstart: Start the day with just one minute of guided belly breathing. Practical Example: The teacher says, "Good morning, everyone! Let's start our day by waking up our bodies. Place a hand on your belly and let's take three slow breaths to get ready for a great day."
Post-Recess Reset: The jump from playground energy to quiet work can be a challenge. Use "Balloon Belly" breathing to help the class collectively exhale the chaos and settle their bodies.
Pre-Test Focus: Before a test or big assignment, lead the class through 3 to 5 deep belly breaths. This simple act can slow racing hearts, ease anxiety, and help students think more clearly.
By normalizing these brief pauses, you're not just managing classroom behavior; you're teaching a fundamental life skill. You're showing students that they have the power to manage their own energy and emotions.
Creating a Classroom Peace Corner
A designated "Peace Corner" or "Calm-Down Spot" gives students a safe, physical space to go when they need to practice their breathing skills. This isn’t a timeout for punishment. It’s a supportive spot for self-regulation.
Setting one up is simple:
Find a Quiet Spot: Look for a small, low-traffic area in your classroom.
Make it Comfy: Add a soft rug, a few cushions, or a beanbag chair.
Stock It with Tools: Include "breathing buddies" (small stuffed animals), laminated cue cards ("Smell the Flower, Blow Out the Candle"), or a glitter jar for focus.
Set Clear Expectations: Teach students that this is a place to go when they feel overwhelmed or upset. It’s a tool to help them reset before rejoining the group. Practical Example: A student who is visibly frustrated after a group activity can choose to go to the Peace Corner for two minutes to do "Breathing Buddy" breathing before re-engaging.
This small corner empowers students to take ownership of their emotional state. Knowing how to create these supportive environments is a key part of teaching mindfulness to children in a way that truly sticks.
Using Belly Breathing at Home
For parents, the belly breathing technique can transform challenging family moments and build deeper connection. It becomes a shared tool for navigating the inevitable ups and downs of life together.
Consider these opportunities to practice as a family:
Bedtime Wind-Down: Lying in bed is the perfect time to practice with a breathing buddy on the tummy. A few minutes of quiet belly breathing can ease the transition to sleep, especially for kids whose minds race at night.
Homework Frustration Breaker: When you see frustration building over a tricky math problem, pause everything. Say, "Let's take three dragon breaths together," and guide them through a slow inhale and a powerful "whoosh" exhale.
Pre-Game Jitters: Before a soccer game, recital, or any big performance, find a quiet moment to breathe together. Practical Example: In the car on the way to the recital, the parent can say, "I see you have some butterflies in your tummy. Me too! Let's tell them to calm down. Let's do three 'flower breaths' together."
When you model this yourself during your own moments of stress, you send a powerful message: this is a tool for everyone in the family.
Overcoming Common Breathing Practice Hurdles
Let's be real—getting kids to try a new calming technique isn't always smooth sailing. When you introduce the belly breathing technique, it’s perfectly normal to hit a few bumps. Some kids will feel silly, others will get distracted, and some might get frustrated if they feel like "it's not working" right away.
The secret sauce is always your own response. Your calm, patient, and encouraging attitude is the most powerful tool you have. If a child feels self-conscious, shift the energy. Instead of treating it like a serious chore, frame it as a quiet game or a secret superpower. You could whisper, "Let's see if we can make our breathing so quiet that no one even knows we're doing it!"
Troubleshooting Common Challenges
Sometimes, the physical part of the belly breathing technique is just tricky for little bodies to grasp. You'll see them trying really hard, but all you get is a puffed-out chest or even them holding their breath. This is incredibly common, but thankfully, it's also easy to address with a few simple tweaks.
If a child is struggling to feel their belly move, one of the best things you can do is have them lie down on their back. Gravity helps make the diaphragm's movement much more noticeable this way. This is the perfect time for the "Breathing Buddy" activity, where the rise and fall of a small stuffed animal gives them clear, visual proof that they're doing it.
Remember, the goal is always practice, not perfection. Create a supportive atmosphere where it’s safe to be a beginner. Celebrate the effort a child makes, not just the outcome.
Practical Fixes for Reluctant Kids
So, what happens when a child just flat-out refuses to practice? The key is to meet their resistance with curiosity and play, not force. Instead of a direct command, you'll need to pivot your approach.
Here are a few scenarios I've seen time and time again, along with solutions that work:
The Problem: A student loudly declares, "This is boring!"
The Solution: Turn it into a sensory game. Ask, "What color is your breath today? Can you imagine breathing in a cool, blue color and breathing out a warm, red one?" This gives their busy mind something interesting to focus on.
The Problem: A child is fidgety and just can't seem to stay still.
The Solution: Build gentle movement right into the practice. Try "Snake Breaths"—inhale deeply through the nose, then let out a long, slow, satisfying "hisssssss." This engages their body and naturally extends the exhale.
The Problem: A student insists, "I can't feel it!"
The Solution: Use tactile cues to make it concrete. Have them place their own hands on their belly. You can even gently place your hand over theirs and say, "Let’s see if we can make my hand go for a little ride."
Having a few of these playful strategies ready to go can help you navigate resistance and empower children to connect with the power of their own breath. These are just a few of the many simple but highly effective anxiety coping skills for kids that can make a profound difference.
Answering Your Top Belly Breathing Questions
Once you start introducing belly breathing, you’ll find that kids (and other adults!) have questions. That’s a great sign—it means they’re curious and engaged. Having some go-to answers ready will help you guide them with confidence, whether you’re a parent at home or an educator in a busy classroom.
One of the first questions I always get is about timing. How long should we be doing this? For an in-the-moment reset—when feelings are big or stress is high—just three to five deep belly breaths can work wonders. It’s a quick and powerful way to calm the nervous system.
When you’re trying to build a new habit, the goal shifts a bit. Aim for a consistent daily practice, maybe for three to five minutes. The key is always consistency over duration. A few minutes every day is far more effective than one long session once a week.
Age and Practice Differences
Another common question is about the right age to start. You can introduce the belly breathing technique to kids as young as three or four, and you might be surprised at how quickly they pick it up! For little ones, keep it playful and concrete. The "Breathing Buddy" activity is perfect because they can see and feel it working.
As kids get older, you can start explaining more of the "why" behind the practice. Helping them understand how this simple breath can calm their bodies gives them a powerful tool for life. It’s a skill that scales beautifully from toddlers to teens.
So, how does this fit in with other mindfulness practices?
Belly breathing is a foundational breathwork technique. It focuses specifically on the physical mechanics of using the diaphragm to directly influence the nervous system and trigger a relaxation response.
While it’s definitely a form of mindfulness, other practices might involve a broader awareness of thoughts, feelings, or sounds without such a direct focus on the breath's mechanics. Think of belly breathing as the most direct physical tool in your mindfulness toolkit. It’s an incredible first step for teaching children how their bodies and minds are connected.
At Soul Shoppe, we believe in equipping children with practical tools for emotional well-being. Our programs help build resilient, empathetic school communities where every child can thrive. Learn more about bringing our social-emotional learning resources to your school.
Engaging a child's five senses is more than just a fun classroom activity; it's a powerful gateway to social-emotional learning (SEL). When we guide students to intentionally see, hear, touch, taste, and smell, we help them build the foundational skills for self-awareness, self-regulation, and empathy. A well-designed 5 senses activity isn't just about sensory input. It's about processing that input to understand ourselves and our connections to others better.
For parents and educators, these activities are practical tools for creating moments of calm and deep learning. To fully grasp how sensory play can foster these skills, it's beneficial to first understand What Is Emotional Intelligence and its significance. This article moves beyond generic ideas to provide a curated roundup of five powerful, research-backed sensory experiences.
Each activity is designed for K-8 settings and homes, complete with step-by-step instructions, specific SEL connections, and practical tips for implementation. We'll explore how to turn simple sensory exploration into profound lessons in emotional intelligence, creating the kind of safe, connected environments where every child can thrive. You'll find actionable strategies to help students connect colors to feelings, sounds to gratitude, and textures to empathy.
1. Color Emotion Mapping (Sight)
Color Emotion Mapping is a visual sensory activity that helps individuals connect colors to their feelings. Participants choose colors that represent their current emotional state, creating a visual map of their internal world. This simple yet profound exercise makes it easier to talk about complex feelings, especially for those who struggle to find the right words. By focusing on the sense of sight, this 5 senses activity provides a concrete way to explore abstract emotions.
Popularized by social-emotional learning (SEL) programs like the Zones of Regulation curriculum, the activity is grounded in color psychology. It gives students and adults a shared, non-verbal language for expressing how they feel, fostering greater self-awareness and empathy within a group.
How to Implement Color Emotion Mapping
This activity requires minimal materials and can be adapted for various ages and settings.
Suggested Time: 15-25 minutes
Appropriate Ages: Kindergarten through 8th Grade (and beyond)
Materials: Colored paper, markers, crayons, colored pencils, or even digital color palettes. A blank sheet of paper or a pre-drawn body outline for each participant.
Step-by-Step Directions:
Introduce the Concept: Explain that colors can be connected to feelings. For example, a teacher could ask a K-2 class, "If your happiness was a color, what color would it be? What about feeling grumpy?" For older students (grades 6-8), you might ask, "What color represents feeling stressed? What color feels like calm?"
Provide Materials: Give each participant a blank paper and access to a wide range of colors.
Prompt for Reflection: Ask participants to quietly think about how they are feeling right now. They can think about their body, their thoughts, and their overall mood.
Create the Map: Instruct them to choose colors that match their current feelings and draw or color on their paper. They can fill the whole page, draw abstract shapes, or color inside a body outline to show where they feel sensations. For example, a student might color their stomach red to show anxiety or their head blue to show sadness.
Facilitate Sharing (Optional): Invite volunteers to share their color map. Use gentle, open-ended questions like, "Can you tell me about the colors you chose?" or "What does blue mean for you today?"
Key Insight: The goal is not to interpret the colors for the student but to create a safe space for them to assign their own meaning. Emphasize that there are no "wrong" colors for any emotion.
Actionable Tips for Educators and Parents
You can integrate Color Emotion Mapping into daily routines to build emotional literacy.
Classroom Check-In: Use it during morning meetings. A second-grade teacher could have a "Color of the Day" chart where students place a colored sticky note next to their name to show how they are starting their day. This gives the teacher a quick visual of the classroom's emotional climate.
Conflict Resolution: When students have a disagreement, a school counselor can use this activity to help them identify the feelings underneath the conflict. For example, two middle school friends in an argument might both use gray to represent feeling misunderstood, which can be a starting point for finding common ground.
Journaling Prompt: After creating a color map, provide a follow-up journal prompt: "Write about a time you felt this color before." or "What could help you move from this color to a different one?"
At-Home Temperature Check: A parent can keep a set of colored markers on the fridge. During a busy evening, they can ask their child, "Can you draw me a quick shape showing the color of your day?" This opens a low-pressure conversation about their experiences.
For a deeper look at how colors and feelings are discussed with children, this video offers a simple, engaging explanation.
Mindful Sound Listening is a guided auditory practice where participants focus their full attention on sounds, either from their immediate environment or a specific instrument like a singing bowl. This 5 senses activity trains the brain to stay in the present moment, sharpens listening skills, and promotes a state of calm. By concentrating on the sense of hearing, it helps individuals quiet internal chatter and regulate their nervous system.
This method is central to programs like the Mindfulness in Schools Project (MiSP) and Calm Classroom, which use sound as an anchor for attention. The predictable, resonant tone of a bell or bowl can signal a transition, reset a classroom's energy, and create psychological safety. It’s a powerful tool for building foundational self-regulation and focus, especially in busy school environments.
How to Implement Mindful Sound Listening
This auditory activity is highly adaptable and requires only a single sound-making tool to start.
Suggested Time: 2-10 minutes
Appropriate Ages: Kindergarten through 8th Grade (and beyond)
Materials: A singing bowl, a small bell, chimes, or a digital recording of one of these sounds.
Step-by-Step Directions:
Introduce the Activity: Explain that you will be practicing listening with full attention. Say, "We're going to use our sense of hearing to listen to a special sound. Your only job is to listen until you can't hear the sound anymore."
Prepare for Listening: Invite participants to find a comfortable but alert posture. They can sit upright in their chairs with their feet on the floor or lie down. They might close their eyes or look softly at the floor.
Create the Sound: Ring the bell or play the singing bowl once, letting the sound resonate.
Guide the Listening: Instruct participants to raise a hand quietly when they can no longer hear the sound. This helps them maintain focus.
Facilitate Reflection (Optional): After the sound has completely faded, ask students to notice what they are feeling. You can invite them to share what the experience was like, what other subtle sounds they noticed, or what thoughts came up. For example, a student might share, "After the bell stopped, I heard the clock ticking and the fan humming."
Key Insight: The goal isn't silence of the mind but rather a gentle redirection of attention. If students report that their minds wandered, congratulate them for noticing. That act of noticing is mindfulness in action.
Actionable Tips for Educators and Parents
You can easily integrate sound-based mindfulness into daily routines to foster a calmer, more focused environment.
Signal Transitions: A first-grade teacher can ring a chime to signal the end of "center time" and the start of "clean-up time." The sound becomes a predictable, non-verbal cue that helps students switch tasks peacefully, replacing loud verbal reminders.
Start the Day: Use a gratitude bell during a morning meeting. A school counselor leading a small group could ring a bell, and each student could share one thing they are grateful for when it's their turn. This combines mindfulness with positive reflection.
Pre-Test Reset: Before a test or a challenging academic task, a fifth-grade teacher can lead a one-minute listening exercise with a singing bowl. This helps students settle their nerves and focus their minds for the work ahead.
Bedtime Routine: A parent can use a recording of a singing bowl on their phone as part of a bedtime routine. The child's task is to lie still and listen until the sound is gone, helping them wind down and prepare for sleep.
3. Texture Exploration & Tactile Empathy Building (Touch)
Texture Exploration is a hands-on activity where participants investigate various textures like smooth, rough, bumpy, and soft. By focusing on the sense of touch, this 5 senses activity builds sensory awareness and connects tactile input to emotions. The exercise helps individuals recognize that just as people have different comfort textures, they also have different emotional needs and sensitivities.
This activity is often used in occupational therapy and sensory-friendly classrooms to promote self-regulation and emotional understanding. It provides a concrete way to discuss abstract concepts like empathy and acceptance, creating a space where differences are explored with curiosity rather than judgment. For example, a student might use a 'texture bag' with a favorite soft fabric as a calming tool during a stressful test.
How to Implement Texture Exploration
This activity can be easily adapted for different age groups and requires simple, accessible materials.
Suggested Time: 20-30 minutes
Appropriate Ages: Kindergarten through 8th Grade
Materials: A collection of items with distinct textures (e.g., sandpaper, cotton balls, smooth stones, bubble wrap, corduroy, foil, sponges). Blindfolds or "mystery bags" are optional.
Step-by-Step Directions:
Introduce the Concept: Explain that you will be exploring the sense of touch. Start with an open exploration, allowing participants to see and feel the different items.
Guided Exploration: Ask participants to close their eyes or use a blindfold (if comfortable). Hand them one textured item at a time.
Prompt for Description: Ask them to describe what they feel. Use sensory-focused questions like, "Is it rough or smooth? Soft or hard? Warm or cold?" For example, when feeling sandpaper, a student might say "It feels scratchy and bumpy."
Connect to Feelings: Once they've described the texture, ask how it makes them feel. For instance, "Does this bumpy texture feel surprising? Does the soft one feel calming?" A student might say the soft cotton ball "feels like a fluffy cloud and makes me feel sleepy."
Facilitate a Discussion: After exploring several textures, lead a group conversation about their experiences. Discuss how some people loved the rough texture while others preferred the smooth one, linking this to personal preferences and needs.
Key Insight: The main goal is to build a bridge between physical sensations and emotional responses. Emphasize that there is no "right" way to feel about a texture, which teaches acceptance of diverse perspectives.
Actionable Tips for Educators and Parents
You can integrate texture-based activities into daily routines to foster empathy and self-regulation.
Create a Texture Palette: A third-grade teacher could set up a "sensory station" with a 'texture palette' where students can go to touch different materials when they feel overwhelmed or need a brain break. This gives students a tangible self-regulation strategy.
Use Texture Metaphors: During conflict resolution, a school counselor can ask students to describe the situation using textures. A student might say, "Their words felt like sandpaper," helping them articulate the emotional impact in a new way.
Design 'Comfort Kits': Help students identify a personal "comfort texture" they can keep at their desk, like a smooth stone or a small piece of faux fur. This becomes a discreet calming tool during anxious moments. A parent can help a child create a similar kit at home for homework time.
Empathy Building Exercise: In an anti-bullying lesson, a fourth-grade teacher could have students pass around a piece of rough sandpaper and a smooth stone. Then, they can discuss which texture unkind words feel like and which texture kind words feel like, making the concept of emotional impact more concrete.
4. Mindful Tasting & Gratitude for Nourishment (Taste)
Mindful Tasting is a sensory activity that uses a small piece of food to anchor attention to the present moment. Participants slowly eat an item like a raisin or apple slice, focusing intently on the taste, texture, and aroma. This foundational mindfulness exercise turns the simple act of eating into a powerful 5 senses activity, building self-awareness and regulation skills. By slowing down, students learn to notice details they usually miss and develop a sense of gratitude for their food.
This practice is a cornerstone of established mindfulness programs like Mindfulness-Based Stress Reduction (MBSR) and is widely used in social-emotional learning (SEL) curricula. It provides students with a tangible tool to calm an anxious mind, focus their attention, and connect with their bodies in a positive way.
How to Implement Mindful Tasting
This activity requires very few materials and can be a quiet, calming experience for any group. Crucially, always check for food allergies and sensitivities beforehand.
Suggested Time: 5-15 minutes
Appropriate Ages: Kindergarten through 8th Grade (and beyond)
Materials: A small food item for each participant. Good options include a single raisin, a small piece of dark chocolate, a cranberry, a thin apple slice, or a pretzel.
Step-by-Step Directions:
Introduce the Concept: Explain that you will be exploring a piece of food using all your senses, as if for the very first time. Frame it as a fun experiment to see what you can notice.
Provide Materials: Give one food item to each participant. Ask them not to eat it yet.
Guide the Sensory Exploration: Lead students through a slow, deliberate process using gentle prompts.
Sight: "Look at the item in your hand. Notice its color, its shape, and the tiny lines or wrinkles on its surface." (e.g., "Look at how the light shines on the raisin.")
Touch: "Feel its texture between your fingers. Is it rough, smooth, sticky, or hard?"
Sound: "Hold it up to your ear. Does it make a sound if you roll it between your fingers?"
Smell: "Bring it to your nose and take a slow breath in. What do you smell? Is it sweet, earthy, or something else?"
Taste: "Slowly place it in your mouth but don't chew yet. Notice the sensation on your tongue. Now, take one slow bite and notice the burst of flavor. Chew slowly and see how the taste and texture change."
Facilitate Reflection: After everyone has finished, ask open-ended questions like, "What was that like for you?" or "Did you notice anything surprising about your raisin?"
Key Insight: The goal is not to rush but to experience each moment of eating. Remind students there is no right or wrong thing to notice; the practice is simply about paying attention. Offer a "dignified opt-out" where students can choose to just observe.
Actionable Tips for Educators and Parents
You can use Mindful Tasting to create moments of calm and build gratitude in various settings.
Classroom Transition: Use this activity to help students settle down after recess or before a test. A third-grade teacher could lead a three-minute mindful tasting with a small pretzel to help the class transition from a noisy lunchroom to quiet independent reading time.
Anxiety Regulation: A school counselor can guide an anxious student through a mindful chocolate tasting. The intense sensory focus on the melting chocolate can ground the student in the present, interrupting a cycle of worried thoughts.
Dinner Time Routine: At home, a parent can start a meal by mindfully eating the first bite. For example, with spaghetti, everyone can silently taste the first forkful, noticing the texture of the pasta and the tangy flavor of the sauce before starting their conversation.
Gratitude Practice: After the tasting, extend the reflection. A teacher could ask a class after eating an apple slice, "Let's thank the tree that grew the apple, the sun that made it sweet, and the farmer who picked it." This connects the simple act of eating to a larger system of nourishment.
5. Scent Journeys & Emotional Anchoring (Smell)
Scent Journeys & Emotional Anchoring is a guided sensory activity where individuals explore different scents to build olfactory awareness and create powerful connections between smell and emotional states. Because the olfactory system links directly to the brain's memory and emotion centers, this 5 senses activity uses scent as a potent tool for emotional regulation and creating psychological safety. Participants learn to use specific scents as portable self-regulation tools, helping them manage stress or anxiety in real-world situations.
This approach is supported by neuroscience research on olfaction and emotion, as well as practices from trauma-informed care and mindfulness programs. It recognizes that scent can be an "emotional anchor," a sensory cue that helps ground a person in a feeling of calm or focus. For example, a student might learn to associate the smell of lavender with deep breathing exercises, creating a reliable shortcut to a calmer nervous system.
How to Implement Scent Journeys
This activity can be a calming group experience or a personalized tool for individual students. Always prioritize safety and be mindful of potential sensitivities.
Suggested Time: 10-20 minutes
Appropriate Ages: Kindergarten through 8th Grade
Materials: Cotton balls or fabric scraps, small containers, and a variety of mild, natural scents such as lemon peels, lavender buds, fresh mint leaves, or drops of vanilla extract.
Step-by-Step Directions:
Introduce the Concept: Explain that our sense of smell is strongly connected to our memories and feelings. Ask, "Have you ever smelled something that reminded you of a person or a place, like cookies baking at home?"
Prepare the Scents: Place a few drops of an essential oil or a small piece of the scented item (e.g., a mint leaf) onto a cotton ball and put it in a container. Prepare several different scents.
Guide the Exploration: Pass one scent around at a time. Instruct participants to close their eyes, take a gentle sniff, and notice what thoughts, feelings, or sensations come up.
Facilitate Discussion: Ask open-ended questions like, "What does this scent make you think of?" or "How does this smell make your body feel- energized, relaxed, or something else?" For example, smelling cinnamon, a student might say, "It reminds me of my grandma's house at Christmas and makes me feel warm."
Create an Anchor (Optional): Guide students to choose a scent they find particularly calming or focusing. Pair the scent with a simple breathing exercise, creating a personal "scent anchor" for future use.
Key Insight: The power of this activity comes from personal association. Respect individual preferences and aversions, as a scent that is calming for one person may be overstimulating for another. Always offer the choice to opt out.
Actionable Tips for Educators and Parents
You can integrate scent-based regulation into daily routines to support emotional well-being.
Calm-Down Corner: A school counselor can stock a calm-down corner with a few approved scents (like lavender or chamomile) on cotton balls in sealed jars. Students can choose one to smell while practicing their coping strategies.
Focus Tool: During independent work, a third-grade teacher might use a diffuser with a drop of peppermint or lemon scent for a short period to help students feel more alert and focused.
Transition Support: A parent can use a consistent, pleasant scent during a transition that is often challenging, like getting ready for school. A spritz of a calming room spray can signal it's time to get dressed, creating a predictable and soothing morning ritual.
Personal Regulation Kit: Help students create their own portable scent anchor. A student who experiences anxiety before tests could carry a small cloth with a drop of their chosen calming scent (like lavender) to smell discreetly at their desk, helping to ground them in the moment. You can also use scented products like aromatic mixer melts at home to create a consistent calming or invigorating atmosphere.
5-Senses Mindful Activities Comparison
Activity
Implementation complexity
Resource requirements
Expected outcomes
Ideal use cases
Key advantages
Color Emotion Mapping (Sight)
Low — simple setup but needs guided reflection
Low — colored paper, markers, paint
Builds emotional vocabulary, visual records of feelings, nonverbal expression
Strong neurological tie to emotion, highly personalizable, portable tools
Putting It All Together: Weaving Sensory SEL into Your Daily Routine
Throughout this guide, we've explored five distinct yet interconnected pathways for building social-emotional skills through sensory engagement. From mapping our feelings with Color Emotion Mapping to grounding ourselves with Mindful Sound Listening, each 5 senses activity offers a practical tool for K-8 students. We’ve seen how Texture Exploration can build tactile empathy, how Mindful Tasting cultivates gratitude, and how Scent Journeys can create powerful emotional anchors for self-regulation.
The true value of these practices, however, lies not in their occasional use but in their consistent integration into the fabric of your classroom or home. This isn't about adding another complex item to your already packed schedule. It’s about reframing moments you already have into powerful opportunities for connection, self-awareness, and growth.
Making Sensory SEL a Sustainable Habit
Integrating any new 5 senses activity successfully hinges on starting small and building momentum. The goal is to create a sustainable routine that becomes second nature for both you and your children or students.
Consider these practical starting points:
Transition Times: Use a gratitude bell or a brief Mindful Sound Listening exercise to signal the end of one activity and the beginning of another. This creates a moment of calm, helping students reset their focus instead of carrying chaotic energy into the next task.
Morning Meetings or Check-Ins: Begin the day with a Scent Journey. Pass around a cotton ball with a calming scent like lavender and ask students to share one word about how it makes them feel. This simple ritual starts the day with mindfulness and emotional sharing.
Snack or Lunch Time: Introduce Mindful Tasting once a week. Instead of a formal, lengthy exercise every day, choose one day to guide students through mindfully eating the first bite of their snack, noticing the texture, taste, and smell.
Art & Creative Writing: Weave Color Emotion Mapping directly into your existing art curriculum. When studying a painting, ask, "What emotions do you think the artist was feeling based on these color choices?" This connects art history to personal emotional expression.
Key Insight: The most effective implementation doesn't feel like a separate "SEL lesson." It feels like a natural part of how your group communicates, solves problems, and supports one another. A consistent, simple 5 senses activity done daily has a greater impact than a complex one done sporadically.
By embedding these sensory tools into daily routines, you create a shared language and a predictable structure for emotional exploration. Students learn that their feelings are valid and that they possess tangible strategies to manage them. This consistency builds a foundation of psychological safety, empowering them to take emotional risks, practice empathy, and build resilience. You are not just teaching them an activity; you are giving them lifelong skills for a more connected and self-aware existence.
Ready to build a more connected and compassionate school culture? For over two decades, Soul Shoppe has helped schools implement practical, student-centered tools that reduce conflict and build empathy, much like the sensory activities discussed. Explore our programs and see how we can help your students thrive at Soul Shoppe.
When we talk about teaching mindfulness to children, we’re talking about giving them simple, practical tools to pay attention to the present moment without judgment. This can be as easy as a few focused breaths or a game that hones their sensory awareness. The goal is to help them regulate their emotions, improve focus, and build resilience in a way that just makes sense to them.
Why Teaching Mindfulness to Children Matters Now More Than Ever
Let’s be honest: managing a child’s big emotions, whether in a bustling classroom or a busy home, can be a daily challenge. Kids today are swimming in a sea of constant stimulation, academic pressure, and tricky social situations. This environment is fueling a noticeable rise in https://soulshoppe.org/blog/2022/01/29/stress-in-children/, making it harder for them to focus, connect with others, and simply manage their feelings.
Mindfulness isn’t about forcing kids to sit still and be quiet. It’s about handing them a toolkit for life. It gives them the foundational skills to understand their own inner world, creating that all-important pause between a feeling and a reaction. For example, instead of a child immediately shoving a classmate who takes their toy, mindfulness helps them notice the anger, pause, and maybe use their words instead.
The Research-Backed Benefits in Action
When we introduce mindfulness to children, we’re not just hoping for the best. We’re teaching skills with proven, positive outcomes that go far beyond a few moments of calm. These benefits show up in real, tangible ways in their behavior and learning.
So what does this look like in practice? Here are a few core benefits you can expect to see blossom with a consistent mindfulness routine.
A Quick Look at Mindfulness Benefits for K-8 Students
This table breaks down the research-supported benefits you can expect to see when you bring mindfulness into your students’ lives.
Benefit Area
What It Looks Like in a Child
Impact on Learning
Improved Focus
A child can gently bring their attention back to the lesson, even with distractions around them.
Students absorb new material more easily and stay engaged for longer periods.
Emotional Regulation
Instead of an outburst, a student learns to recognize anger and says, “I need a minute.”
Fewer classroom disruptions and a more positive, supportive atmosphere for everyone.
Increased Empathy
A child understands their own feelings better, so they can recognize and respond to their peers’.
Conflicts on the playground decrease, and students build stronger, kinder relationships.
Reduced Stress
A student uses a breathing technique before a test instead of feeling overwhelmed by anxiety.
Kids feel more confident and capable, which frees up mental energy for academic challenges.
Greater Resilience
A child can bounce back from a mistake or social hiccup with a more balanced perspective.
Students are more willing to take academic risks and persevere through difficult assignments.
Ultimately, by equipping students with these tools, we create psychologically safer environments where they feel seen, heard, and understood. This sense of security is the bedrock of any thriving learning community.
This approach aligns beautifully with the philosophy behind the Montessori method of teaching, which emphasizes child-led learning and fostering curiosity within a prepared environment. Both mindfulness and Montessori empower children by giving them tools for self-direction and deep concentration.
A Growing Movement Supported by Evidence
Mindfulness in schools is far from a fleeting trend. A massive body of research backs up its effectiveness, with systematic reviews showing consistent positive effects on mental health, cognitive skills, and social-emotional growth.
The data also reveals a powerful truth: when educators practice mindfulness themselves, the benefits for students are significantly amplified.
And the support is overwhelming. With global parental support for school-based programs at 93%, there is a clear mandate to weave these essential skills into our educational fabric. By teaching mindfulness, we aren’t just adding another subject to the day. We are investing in their long-term well-being and giving them skills to navigate a complex world with greater awareness, compassion, and resilience.
Age-Appropriate Mindfulness Activities You Can Use Today
The best way to get started with mindfulness is by doing, not just explaining. We want these practices to feel like a natural part of the day, not another chore. Instead of demanding perfect stillness, we can meet kids where they are with playful, sensory activities that match their developmental stage.
The real key is to keep it simple, engaging, and short, especially in the beginning. I’ve found that a one-minute mindful activity done consistently is far more powerful than a long, infrequent session that everyone dreads.
Here are some practical, age-appropriate activities you can try today, complete with scripts and tips I’ve picked up from years in the classroom.
Engaging Early Learners: Grades K-2
For our youngest students, mindfulness needs to be a sensory experience. It should be playful and concrete. Abstract ideas won’t land nearly as well as activities that involve their bodies, their favorite toys, and the world right in front of them. We’re building the most basic awareness skills here.
Buddy Breathing
This simple breathing exercise is a classroom favorite. It uses a stuffed animal to make an invisible process—the breath—visible and real. It’s a wonderfully calming activity for transitions or settling down after a rowdy recess.
How to do it: Invite the kids to lie down comfortably on their backs. Have them place a small stuffed animal or “breathing buddy” on their belly.
Script: “Let’s give our buddies a gentle ride. When you breathe in, watch your buddy rise up toward the ceiling. As you breathe out, see your buddy slowly float back down. Just notice your buddy going for a quiet ride, up and down, with each breath.”
Pro-Tip: I like to play some soft, instrumental music in the background. If a child is extra wiggly, reframe it. Encourage them to notice how their buddy is having a “bumpy ride” today. This turns it into an observation, not a failure.
Sound Safari
This one is fantastic for sharpening listening skills and practicing focused attention. It uses the sounds already in your environment and turns the simple act of listening into a fun adventure.
How to do it: Ask students to sit comfortably and close their eyes if they want to. I use a small chime to signal the start and end of our “safari.”
Script: “We’re going on a Sound Safari! Our ears are our superpowers. For the next minute, let’s listen for as many different sounds as we can. What can you hear inside our room? What can you hear outside? What sounds are quiet? What sounds are loud?”
Pro-Tip: When the minute is up, have students share the sounds they “collected.” This validates their experience and creates a great sense of shared discovery.
Building Awareness: Grades 3-5
As kids get into the upper elementary years, they’re ready to start grasping more abstract ideas and doing a bit of self-reflection. Activities for this age can focus more on identifying internal states—like thoughts and emotions—and connecting them to what’s happening in their bodies.
Weather Report Check-In
This metaphor gives students a simple, non-judgmental way to name and share how they’re feeling. Just like the weather, emotions come and go. They aren’t permanent, and they aren’t “good” or “bad.”
How to do it: Introduce the idea that our feelings are like the weather inside us. I have a visual chart on the wall with different weather types (sunny, cloudy, rainy, stormy, windy).
Script: “Let’s check in with our internal weather today. You don’t have to change it, just notice what it is. Are you feeling sunny and bright? A little cloudy or foggy? Maybe it feels rainy with some sad tears, or even stormy with some big, loud feelings. Take a quiet moment and see what your weather is right now.”
Pro-Tip: Let students share by pointing to the chart or writing it on a sticky note. This lets them communicate their feelings without needing to find complicated words. It’s a quick and powerful emotional check-in.
Mindful Walking
This practice is great for grounding kids in their bodies and the present moment. It turns a simple walk across the room into an exercise in focus and serves as an excellent “brain break” between subjects.
How to do it: Ask students to stand and find their own space. Then, instruct them to walk around the room in slow motion.
Script: “Let’s try some ‘turtle walking.’ As you walk very, very slowly, can you feel your foot lifting off the floor? Can you feel your heel touching down, then the rest of your foot? Just notice the feeling of your feet connecting with the ground. What does the floor feel like under your feet?”
Pro-Tip: Start with just 30-60 seconds. As they get used to it, you can have them notice other things, like the air on their skin. These embodiment exercises are powerful tools for self-regulation; for more ideas, you might be interested in our guide on embodiment practices for kids in school and at home.
The goal here isn’t to get rid of the wiggles or stop all thinking. It’s to build the muscle of awareness—that ability to notice what’s happening, inside and out, without immediately getting swept away by it.
Empowering Middle Schoolers: Grades 6-8
By middle school, students are dealing with complex social situations and intense academic pressure. They’re also capable of more sophisticated metacognition—thinking about their own thinking. Mindfulness for this age group can offer real, practical tools for navigating difficult thoughts and building self-awareness.
Thought Surfing
This technique uses a surfing metaphor to help students relate to their thoughts in a new way. Instead of getting pulled under by a difficult thought, they learn to “ride the wave” of it—observing it as it rises, crests, and falls away.
How to do it: Explain that thoughts are like waves in the ocean; they come and go. We can’t stop the waves, but we can learn to surf.
Script: “When a strong or tricky thought comes up, like ‘I’m going to fail this test,’ imagine it as a wave. Acknowledge it’s there. Instead of fighting it, try to ride it. Notice how the thought feels in your body. Notice its peak, and then watch as it starts to lose energy and fade, just like a wave on the shore.”
Pro-Tip: This is about changing the relationship to thoughts, not suppressing them. Encourage students to name the thought (“Ah, the ‘I’m not good enough’ wave is here again”) to create some distance and reduce its power.
Mindful Journaling Prompts
Journaling offers a structured, private space for middle schoolers to practice self-reflection. Giving them specific, mindful prompts can help them move beyond just listing events to actually exploring their inner experience.
How to do it: Provide a journal and set aside 5-10 minutes of quiet time. I usually offer a few prompts on the board for them to choose from.
Examples of Prompts:
“Describe a moment today when you felt completely present. What were you doing? What did you notice with your senses?”
“Think of a challenging moment from your week. What emotion did you feel most strongly? Where did you feel it in your body?”
“Write about one small thing you’re grateful for today and why. It could be a song, a food, a person, or a sunny spot in the room.”
Pro-Tip: I always emphasize that there are no right or wrong answers, and that spelling and grammar don’t matter. The journal is for their eyes only. This creates a safe space for honest reflection without the pressure of being graded.
Weaving Mindfulness into Your Daily Routine
The real magic happens when mindfulness isn’t just another lesson but becomes a natural, seamless part of the day. When you weave small, consistent moments of awareness into existing routines, you help create a classroom culture where focus and calm are the default settings. It’s about turning those chaotic transitions into opportunities for a collective deep breath.
This approach makes mindfulness feel easy and sustainable. Instead of trying to carve out a new 30-minute block, you infuse it into the seconds and minutes you already have. These small, repeated actions are what build lasting habits and a genuine culture of awareness.
From Morning Chaos to Mindful Arrival
The first few minutes of the school day can set the tone for the next several hours. A frantic, rushed entry often leads to a scattered, unfocused class. But what if you could swap that chaotic energy for a simple, two-minute “Mindful Arrival”? This is a game-changer for grounding students and preparing their minds for learning.
Here’s what that shift can look like in practice:
The Old Way: The bell screams, kids flood the room, bags drop with a thud, and chatter fills the air while you try to get everyone’s attention for announcements.
The Mindful Way: As students enter, soft, instrumental music is playing. They know the routine: put their things away and find their seats. Once most are settled, you ring a small chime to signal the start of a one-minute mindful moment.
Mindful Arrival Script: “Good morning, everyone. Let’s start our day together. As you settle into your seat, can you feel your feet flat on the floor? Take a slow breath in… and let it all the way out. For the next minute, let’s just listen to the quiet sounds in our room.”
This simple change doesn’t add time to your day; it reclaims it. It acts as a powerful reset, allowing the entire class to start on the same calm page. Building these simple, predictable moments is key to helping children feel emotionally grounded. You can find more ideas in our guide to creating emotionally grounding routines for kids.
Integrating Mindfulness into Your Curriculum
You don’t need a separate curriculum to teach mindfulness. In fact, the most powerful way to do it is by embedding these practices directly into the subjects you already teach. This reframes mindfulness as a practical tool for learning, not just another “thing” to do.
I hear from a lot of teachers who worry kids will find these practices “boring.” But my experience—backed by research—is that when they’re woven in thoughtfully, kids are incredibly receptive. A 2023 feasibility study on school-based interventions had a remarkable 96% retention rate in a program run during class hours. It just goes to show that when the activities are interactive and supported by the teacher, kids are all in. You can read the full research on this effective school integration.
Here are a few ways this can look in different subjects:
Science: During a nature observation, add a mindful step. Before students start classifying a leaf or a rock, ask them to spend one minute simply observing it with all their senses. “What do you see? What does it feel like? What do you smell?”
Language Arts: When reading a story, pause after a key emotional moment. You could ask: “Where do you think the character is feeling that sadness in their body? Where do you feel big emotions in your own body?”
History: After learning about a difficult historical event, use a quiet, reflective prompt. “Take a quiet moment to think about one feeling that came up for you during this lesson. You don’t have to share it, just notice it.”
Math: When a student is stuck on a tough problem, suggest a “Math Brain Break.” Say, “Okay, let’s pause. Everyone close your eyes and take three slow ‘balloon breaths’—breathe in deep to fill your belly like a balloon, and breathe out slow to let the air out. Now, let’s look at the problem again with fresh eyes.”
As kids get older, these practices can evolve, moving from simple sensory exercises to more reflective techniques.
As you can see, the journey builds on itself. It starts with concrete, body-based activities for our youngest learners and grows into more introspective practices for older students.
Using Micro-Practices for Transitions and Resets
Some of the best opportunities for mindfulness are hidden in the “in-between” moments. Think about the transition from math to reading, the lull before lunch, or the restlessness after a long assembly. These are perfect times for a “Mindful Minute.”
These quick one-minute resets act like a mental palate cleanser, helping students shift gears and release any lingering stress or excitement. A great example is a ‘Starfish Breath’: have kids spread their hand like a starfish. They trace up one finger while breathing in, and trace down the other side while breathing out, continuing for all five fingers.
The Gratitude Share
A wonderful way to close the day is with a brief “Gratitude Share.” This simple practice helps students leave on a positive, reflective note.
Set the Tone: Gather students in a circle or have them turn to a partner.
The Prompt: Ask them to think of one small thing from their day they are grateful for. It could be learning something new, a kind word from a friend, or the sunshine during recess.
Share (Optional): Invite a few students to share their gratitude aloud if they feel comfortable. This simple act of sharing amplifies the positive feeling in the room.
It’s these small, consistent practices, woven into the fabric of the school day, that truly build a lasting foundation of awareness, focus, and emotional well-being for every child.
Partnering With Families to Build a Mindful Community
When we teach mindfulness in the classroom, the practices truly come alive when they become a shared language between school and home. Bridging this gap creates a supportive ecosystem that reinforces these essential life skills, helping transform classroom exercises into deeply rooted family habits.
Let’s face it, though—most families are incredibly busy and might not be familiar with mindfulness at all. The key is to make your communication simple, inviting, and practical. Start by clearly explaining what you’re doing in the classroom and, just as importantly, why it matters for their child.
Sharing Your “Why” Through Newsletters
Your regular class or school newsletter is the perfect place to start. You don’t need to write a long essay. Just keep the blurbs short, positive, and focused on the benefits for their child. Avoid jargon and always offer one simple thing they can try at home.
Here’s a little blurb you can adapt for your own newsletter:
This Week’s Mindful Moment: Listening Ears
Hello Families! This week in class, we’ve been practicing “Mindful Listening”—a fun game where we pause and notice all the quiet sounds around us. This simple activity helps students improve their focus and calm their bodies. You can try it at home for just one minute! Ask your child: “What sounds can you hear right now?” It’s a great way to settle down before bed.
These small, consistent updates demystify the practice and empower parents to become partners in your work.
Host a Family Mindfulness Night
For a more immersive experience, think about hosting a family mindfulness night. This can be virtual or in-person, and it’s not about sitting in silence for an hour! It’s about playful connection, shared learning, and giving families tangible tools they can use right away.
Structure the evening around fun, interactive activities:
Buddy Breathing: Ask each family to bring a favorite stuffed animal. Lead them through the same breathing exercise you use in class so parents can experience it firsthand.
Mindful Tasting: Use a simple snack like a raisin or a small piece of chocolate. Guide families to explore it with all their senses before eating. It’s always a hit.
Create ‘Calm Down Jars’: This is a wonderful hands-on activity. Provide jars, water, glitter, and glue, and let families create a visual tool they can take home for when big emotions arise.
This kind of shared experience builds real community and shows parents that mindfulness is an activity for connection, not just for quiet time. Positive parenting is all about connection, and you can explore more strategies by reading our guide on positive parenting tips to nurture your child’s growth.
Launch a Home-and-School Mindfulness Challenge
A weekly or monthly challenge can be a fantastic, low-pressure way to encourage consistent practice. Create a simple, downloadable sheet with fun activities that families can do together.
The impact of these school-led initiatives can be huge. In the ‘World’s Largest Mindful Moment’ event, an impressive 67% of parents reported practicing mindfulness at home with their kids afterward. A staggering 96% saw clear benefits, including children getting better at handling emotions (63%), becoming calmer (42%), and showing more empathy (28%). This highlights the powerful ripple effect of your work. You can discover more about these powerful family engagement findings.
Here are some sample weekly challenges you could include:
Week 1 – Mindful Munching: Practice ‘Mindful Eating’ with one snack this week. Eat without screens and talk about the tastes, smells, and textures.
Week 2 – Rose, Thorn, Bud: At dinner one night, share your “rose” (a positive moment), “thorn” (a challenge), and “bud” (something you’re looking forward to).
Week 3 – Mindful Steps: Take a three-minute walk together, inside or out. Walk in silence and just notice the feeling of your feet on the ground.
Week 4 – Gratitude Jar: Write down one thing you’re thankful for each day and add it to a jar. Read them all at the end of the week.
By making families your partners, you multiply the impact of your efforts. You’re not just teaching a skill; you’re helping to build a truly mindful community where every child is supported.
Wrestling with the Hurdles and Spotting Real Wins
Even with the best game plan, bringing mindfulness into a classroom isn’t always a walk in the park. Let’s get real about the bumps you’ll hit along the way. The good news? These challenges are totally normal, predictable, and you can absolutely navigate them with a little creativity and a lot of heart.
When you first introduce mindfulness, you’re almost guaranteed to hear, “This is boring!” or “This is so silly.” It’s a rite of passage, especially with older students. The trick is to not let it get under your skin. Instead, get curious. More often than not, that pushback comes from feeling self-conscious or just not getting why you’re doing it.
Getting Past “This is Boring”
The best way to flip skepticism on its head is to reframe the whole thing. Tie mindfulness directly to stuff they already care about—like leveling up in a video game, nailing a free throw, or not panicking during a test. You can even call it “attention training” to help them get focused and stay cool under pressure.
Another game-changer is tweaking your language. If a kid is squirming in their seat, don’t rush to label them “unfocused.” Try using their wiggles as part of the practice.
Here’s what that sounds like: Instead of saying, “You need to sit still,” try something like, “I notice your body has a lot of energy right now. That’s totally okay. For just a moment, let’s see if we can notice that ‘body energy’ without needing to fix it. Is it a buzzy feeling? Or maybe a jumpy one?”
This little shift validates what they’re feeling and turns their restlessness into an object of curiosity, not a behavior problem. It’s a subtle but powerful move from judgment to awareness.
Finding Time in a Jam-Packed Day
“I just don’t have the time.” We hear this from teachers and parents all the time, and it’s a valid concern. But here’s the secret: you don’t need to find a new 30-minute block in your day. It’s all about using the little pockets of time you already have. This is where “micro-practices” become your secret weapon.
These are super-short, 30- to 60-second mindfulness hits you can sprinkle throughout the day. They’re amazing for hitting the reset button without derailing your entire schedule.
Right Before a Test: Lead a 30-second “cool the pizza” breath. “Okay, let’s pretend we have a super hot slice of pizza. Breathe in and smell that yummy pizza… now blow out nice and slow to cool it down.”
Lining Up for Recess: Try a quick “sound safari.” “While we’re waiting, let’s close our eyes for a minute and see how many different sounds we can hear. Go!”
Switching Between Subjects: Use a one-minute mindful walk. “Let’s walk to our reading spots in super slow motion. See if you can feel your feet on the floor with every single step.”
When you weave in these tiny moments, mindfulness stops feeling like another thing to do and just becomes part of the classroom rhythm. It proves you don’t need a ton of time to make a huge difference.
Measuring What Really Matters
While it’s great to see data on improved test scores or focus, the most profound signs of success aren’t usually found on a spreadsheet. Real progress shows up in how kids talk to themselves, how they treat each other, and how they handle their big feelings.
So, what are you looking for? Success isn’t about kids sitting in perfect silence with empty minds. It’s about their growing awareness.
Qualitative Signs of Success
What You Might See
What It Really Means
Self-Regulation
A student says, “I’m getting frustrated, I need a minute,” instead of melting down. They’re noticing an emotion and choosing how to respond. That’s a huge win.
Empathy & Kindness
You spot fewer squabbles on the playground or see a child comforting a friend who’s upset. This shows they’re tuning into how others feel, not just their own world.
Home Connection
A parent emails you to say their child used a breathing exercise to calm down before bed or started talking about their “internal weather” at home. This is the gold standard—it means the skills are sticking.
These are the moments that tell you the practice is truly taking root. It shows that kids aren’t just doing mindfulness exercises; they’re starting to live more mindfully. Every time a child shows a little more patience, a bit more self-awareness, or an ounce more kindness, you’re witnessing real, tangible success.
Got Questions About Teaching Mindfulness?
When you’re just starting to bring mindfulness to kids, it’s natural for a few common questions to pop up. Whether you’re a teacher or a parent, you’re not alone in wondering about the practical side of things. Let’s walk through some of the most frequent ones I hear from educators just like you.
How Do I Introduce Mindfulness Without Touching on Religion?
This is a big one, and the answer is simpler than you might think: keep it secular and grounded in brain science. I always advise teachers to frame mindfulness as “attention practice” or “brain training.” The focus is on concrete, observable benefits like better focus and a calmer way to handle stress.
Use simple, universal language. Instead of words that might feel spiritual, try phrases like:
“Let’s notice our breath.”
“We’re going to pay attention on purpose for a minute.”
“Let’s check in with our feelings right now.”
The goal is to teach a life skill for mental well-being, just like P.E. class teaches students how to care for their bodies. A “Mindful Minute” isn’t a spiritual ritual; it’s a tool for getting ready to learn.
The most successful school programs I’ve seen all have one thing in common: they treat mindfulness as a mental fitness exercise. You’re helping kids train the muscle of attention—a skill every single child can benefit from, no matter their family’s personal beliefs.
I’m a Teacher. What’s the Single Most Important First Step for Me?
Before you teach anyone else, start your own practice. Seriously. It doesn’t have to be a huge commitment—even five minutes a day can make a world of difference. Study after study shows that students get significantly more out of mindfulness when their teacher has a personal practice.
You don’t need to become a meditation guru overnight. The point is to understand what you’re teaching from the inside out. This is what allows you to teach with authenticity.
It lets you troubleshoot from experience and, most importantly, model a calm, present demeanor for your students. When a child says, “I can’t stop thinking!” you’ll be able to nod and say with genuine empathy, “I know what you mean, my mind gets super busy too! Let’s just watch those thoughts go by like clouds in the sky.” Your own practice is the bedrock of a truly mindful classroom.
How Can I Start If I Have Zero Budget for SEL Programs?
Great news: many of the most powerful mindfulness activities are completely free. You can start today. The most important investment isn’t money; it’s your consistent time and energy.
Here are a few zero-cost ideas to get you started:
Breathing Buddies: Grab some stuffed animals for a simple “Buddy Breathing” exercise where kids watch the animal rise and fall on their belly. Or try “Cool the Pizza” breathing to teach slow, intentional exhales.
Mindful Listening: Ring a chime, a bell, or just use the sounds already in your classroom for a “Sound Safari.” The goal is just to notice.
One-Minute Resets: Squeeze in a quick, one-minute “Mindful Reset” during transitions between subjects. It’s a perfect way to help students shift gears and bring their focus back.
Start small. Keep a simple log of the positive changes you see—maybe fewer disruptions or kids being a little kinder to each other. This kind of real-world evidence can build a powerful case for getting a budget for more formal social-emotional learning programs down the road.
At Soul Shoppe, we believe that every child deserves the tools to build a kind and connected world, starting from within. Our programs provide students and educators with the shared language and practical skills to cultivate empathy, resilience, and psychological safety in schools. Ready to bring these powerful social-emotional learning tools to your community? Explore our programs and see how we can help your school thrive.
Anxiety coping skills are the tools we give children to help them navigate feelings of worry, fear, and stress. Think of them as emotional first aid—things like grounding techniques, deep breathing exercises, and simple ways to reframe scary thoughts. They equip kids to handle emotional bumps in the road in a healthy, constructive way.
Understanding Childhood Anxiety in Today’s World
Before we jump into specific strategies, it’s important to get a clear picture of what anxiety actually looks like in children today. We’re not just talking about the occasional butterflies before a school play. For many kids, it’s a much more persistent response to a world packed with academic pressure, tricky social dynamics online, and the echoes of global uncertainty.
For a child, anxiety often feels different than fear. Fear is usually a reaction to a clear and present danger, like a dog barking loudly. Anxiety, on the other hand, is that nagging sense of dread about something that might happen down the road. For example, a child might feel fear when seeing a spider (an immediate threat), but they feel anxiety when lying in bed worrying that a spider might be in their room.
Distinguishing Normal Worries from Heightened Anxiety
It’s completely normal for a child to worry about a test or feel shy on the first day of school. These are just part of growing up. But when those worries become so big and persistent that they get in the way of daily life—school, friendships, sleep—it might signal a need for more support. You can learn more about the specific signs of stress in children and how to spot them.
Here’s how anxiety can show up differently than typical worries:
Intensity: A child might worry about a spelling test. But a child struggling with anxiety might lose sleep for a week straight leading up to it, feel sick to their stomach, or refuse to go to school on test day.
Duration: Everyday worries tend to pass quickly. Anxious feelings can hang around for days or even weeks, casting a shadow over everything. For example, a typical worry about a sleepover ends once the child has fun, but anxiety might cause them to worry about the next sleepover weeks in advance.
Physical Symptoms: Anxiety often brings real physical complaints. Think frequent stomachaches, headaches, or constant tiredness that isn’t linked to any medical illness. A child might consistently ask to go to the nurse’s office on Mondays before a math test they find difficult.
It’s a tough reality, but the global prevalence of anxiety disorders in children has become a major concern. About 14% of children worldwide experience some form of mental health challenge, with anxiety being one of the most common, especially for older kids and teens.
Why Coping Skills Are a Core Life Skill
Teaching children how to manage anxiety is as fundamental as teaching them to read or tie their shoes. It’s not about trying to get rid of worry completely—that’s not realistic or even healthy. The goal is to give them the tools to work with their feelings so their feelings don’t run the show.
When we reframe anxiety as a signal from their bodies, not a character flaw, we empower them to listen and respond in a helpful way. For more support and information on children’s well-being, exploring general resources for mental health awareness can be incredibly valuable.
Creating emotionally safe spaces, both at home and in the classroom, is the absolute first step. This means building an environment where kids feel seen, heard, and validated when they share what’s scaring them.
For example, if a child is afraid of the dark, instead of saying, “There’s nothing to be scared of,” try something like, “I hear that you’re feeling scared when the lights are out. It feels pretty lonely in the dark sometimes. What could we do to make it feel a little safer?” This simple shift from dismissal to empathy opens the door for a child to build true resilience.
Tangible Coping Skills for Young Children (Grades K-2)
When you tell a kindergartener to “just relax,” you might as well be speaking another language. For young children in grades K-2, abstract ideas about feelings are confusing. Their brains are wired for concrete, physical experiences, so our strategies for teaching anxiety coping skills need to be tangible—something they can see, touch, and do.
The goal is to connect their big feelings to simple, physical actions. This process builds a kind of emotional muscle memory, turning an overwhelming internal state into a manageable, hands-on task. By making coping skills sensory-based and even playful, we give them tools they can actually understand and use on their own.
Create a Calm-Down Corner
One of the most powerful tools in my experience is a designated “Calm-Down Corner” or “Peace Corner.” This isn’t a timeout spot for bad behavior; it’s a safe, cozy space a child can choose to visit when they feel overwhelmed. The space itself should feel like a warm hug, creating a positive association with self-regulation.
To make it effective, fill it with sensory items that help soothe an agitated nervous system. These tools give all that anxious energy a place to go.
Soft Textures: A fuzzy blanket, a soft rug, or a few large pillows are perfect.
Squishy Toys: Stress balls, textured fidgets, and squishy toys help release physical tension in their hands.
Weighted Items: A weighted lap pad or a heavy stuffed animal can provide a grounding, calming pressure that feels incredibly secure.
Practical Example: A teacher might notice a student getting wiggly and frustrated during math. She could quietly say, “It looks like your body needs a break. Would you like to spend five minutes in the Calm-Down Corner with the weighted lizard?”
Deep breathing is a game-changer for anxiety, but telling a young child to “take a deep breath” often leads to quick, shallow gasps that do more harm than good. We have to make the process visual and interactive. It needs to feel less like a chore and more like a gentle game.
This simple process flow shows how we can guide a child from recognizing an anxious signal to using a skill with our help.
This visual reminds us that our job is to help kids first notice the Signal (their body’s clue that they’re anxious), offer loving Support, and then guide them toward a tangible Skill. This framework builds their confidence and independence over time.
A fantastic way to practice this is with “Stuffed Animal Breathing.” Have the child lie down and place a favorite stuffed animal on their belly. Then, guide them with a soft, gentle voice.
Example Script: “Let’s give your teddy bear a slow ride. Take a big breath in through your nose and make your belly rise up high, like a balloon. 1… 2… 3… Now, breathe out slowly through your mouth and let the teddy bear float back down. 1… 2… 3… 4…”
Watching the toy rise and fall gives them a concrete visual for the rhythm of deep, calming breaths. It transforms a complex concept into a simple, observable action they can control.
Introduce Worry Monsters and Worry Boxes
Young children often can’t find the words for their anxieties. Giving their worries a physical form makes them feel less scary and much more manageable. This is where tools like a “Worry Monster” or a “Worry Box” can be magical.
A Worry Monster is just a special puppet or a decorated tissue box with a big mouth. Introduce it as a friendly creature that loves to eat worries for lunch.
Here’s how it works: If a child is anxious about a parent leaving at drop-off, you can say, “It sounds like you have a big worry about saying goodbye. The Worry Monster is really hungry today. Let’s draw a picture of that worry and feed it to him so he can gobble it all up!”
The child can draw or write what’s bothering them on a small piece of paper, then physically “feed” it to the monster. This simple, symbolic act helps them externalize the fear, giving them a real sense of control and relief.
To help you get started, here are a few simple, age-appropriate skills you can introduce in the classroom or at home.
Core Coping Skills for Grades K-2
Coping Skill
Classroom or Home Activity
What It Teaches
Belly Breathing
Stuffed Animal Breathing: Lie down, place a toy on the belly, and watch it rise and fall with each deep breath. Flower & Candle: Pretend to smell a flower (breathe in) and blow out a candle (breathe out).
Body awareness and how to slow down the nervous system.
Grounding
5 Senses Game: Name 5 things you can see, 4 you can touch, 3 you can hear, 2 you can smell, and 1 you can taste. Chair Push-Ups: While seated, push hands down on the chair to feel the strong muscles in your arms.
Pulls focus away from anxious thoughts and back to the present moment.
Externalizing Worries
Worry Monster/Box: Draw or write down a worry and “feed” it to a special box or puppet.
Makes abstract fears tangible and provides a sense of control over them.
Sensory Soothing
Calm-Down Corner: Use a designated space with soft blankets, squishy toys, or weighted lap pads.
How to self-soothe using sensory input to calm the body.
These activities are more than just distractions; they are the building blocks of lifelong emotional regulation. By weaving these simple practices into daily routines, we normalize the process of managing emotions and empower kids with skills they’ll use for years to come.
Helping Older Elementary Kids Understand Their Worries (Grades 3-5)
By the time kids hit the upper elementary grades, their minds are making some incredible leaps. They’re starting to think more abstractly, which is fantastic for learning but can also open the door to more complex worries. While the sensory tools we use with younger kids are still great to have on hand, students in grades 3-5 are ready for some real cognitive strategies.
This is the perfect age to pull back the curtain and teach them about the fascinating mechanics of their own brains. Giving them this knowledge is empowering—it helps them understand what’s happening inside when big feelings take over.
This shift couldn’t come at a better time. Diagnosed anxiety among children has been climbing, with 2022–2023 data showing that 11% of U.S. children ages 3-17 have received a diagnosis. But that might just be the tip of the iceberg. Global research suggests as many as 20.5% of young people experience significant anxiety symptoms, hinting that the official numbers don’t capture the full picture.
The Upstairs vs. Downstairs Brain
One of the most powerful analogies for this age group is the “upstairs brain” and the “downstairs brain.” It’s a simple, sticky way to explain a complex process.
You can frame it like this: the upstairs brain (the prefrontal cortex) is our “Wise Owl” or “Thinking Brain.” It’s the part that helps us make smart choices, solve problems, and calm ourselves down.
Then there’s the downstairs brain (amygdala and limbic system), which is our “Guard Dog” or “Feeling Brain.” Its job is to sniff out danger. When it senses a threat—whether it’s a real emergency or just a scary thought—it starts barking. And when it barks really loud, it can cause us to “flip our lid.”
When a child “flips their lid,” the connection between the calm upstairs brain and the reactive downstairs brain temporarily snaps. The Guard Dog takes over completely, making it almost impossible to think clearly or listen to reason. Explaining this helps kids see their intense reactions not as a personal failure, but as a normal (and temporary) brain state.
Try This: A hand model makes this concept click instantly. Make a fist with your thumb tucked inside. Your wrist is the brainstem, your tucked-in thumb is the “downstairs brain,” and your fingers wrapping over the top are the “upstairs brain.” When you’re calm, it’s a connected fist. But when you flip your lid, your fingers fly up, leaving the thumb (downstairs brain) exposed and in charge. You can practice this with a child after a difficult moment, saying, “It looks like your Guard Dog was in charge then. What can we do to help your Wise Owl come back online?”
The 5-4-3-2-1 Grounding Trick
When a child’s mind is caught in a spiral of “what ifs,” grounding techniques are the lifeline that pulls them back to the present moment. The 5-4-3-2-1 method is a go-to because it methodically engages all five senses, forcing the brain to focus on the here and now instead of future fears.
Walk them through it gently. No rush. Practical Example: A student is frozen with test anxiety. A teacher can kneel beside them and whisper:
See: “Okay, quietly look around and name 5 blue things you can see in the classroom.” (The poster, Maya’s shirt, the recycling bin…)
Feel: “Great. Now, can you tell me 4 things you can feel? Wiggle your toes in your shoes. Feel the desk under your hands.” (My feet in my shoes, the smooth desk, my soft sweater…)
Hear: “Good job. Now listen closely. What are 3 things you can hear right now?” (The clock ticking, someone turning a page, the fan humming…)
Smell: “Almost there. Take a sniff. What are 2 things you can smell?” (The pencil shavings, the dry-erase marker…)
Taste: “Last one. What is 1 thing you can taste?” (The mint from my toothpaste this morning.)
This technique works because it interrupts the anxiety cycle by redirecting the brain’s attention. Of course, having the words for their feelings is a huge help, too. Building a rich feelings vocabulary is key, and you can find some great ideas in our guide to teaching emotional vocabulary for kids.
Becoming a Thought Detective
Another game-changer for this age group is “thought challenging.” This skill teaches kids to be detectives of their own minds, investigating their worries instead of just accepting them as fact. When we learn to question our anxious thoughts, we can build resilience in children and help them navigate life’s inevitable bumps.
Start by helping a student catch their “worry thought.” Then, you can gently prompt them to put it on trial with one simple but powerful question: “Is my worry 100% true?”
Here’s How It Looks in Action:
A student is completely panicked about giving her book report.
Worry Thought: “Everyone is going to laugh at me. I just know I’m going to mess up and fail.”
Challenge Question: “Okay, let’s investigate. Is it 100% true that everyone will laugh? Have you ever seen the entire class laugh at someone’s report before? What’s a more likely thing to happen? What’s one thing you know you did well when you practiced?”
Balanced Thought: “I feel really nervous, and that’s okay. Some kids might not be listening, but probably no one will laugh. I practiced my first page a lot, so I know I can start strong. I’m just going to do my best.”
This simple process is incredibly empowering. It shows kids they can talk back to their anxiety, shifting them from feeling like a victim of their worries to being a resourceful problem-solver. It’s a foundational skill for a healthy inner dialogue that will serve them for years to come.
Advanced Self-Advocacy Skills for Middle Schoolers (Grades 6-8)
The middle school years bring a whole new flavor of anxiety. Suddenly, the social world gets way more complicated, the academic stakes feel higher, and students are in the thick of figuring out who they are. For this age group, basic breathing exercises aren’t always enough. We need to introduce them to metacognition—the powerful ability to think about their own thinking.
As students navigate this tricky period, their capacity for self-awareness is actually growing. This is the perfect time to introduce more advanced strategies that empower them to become their own best advocates. We can guide them not just to manage their anxiety, but to understand it, question it, and communicate their needs effectively.
And the need for these skills is urgent. The ripple effects of the pandemic have revealed some troubling patterns in kids’ mental health. Researchers at Boston University found that childhood anxiety spiked in 2020 and hasn’t returned to pre-COVID levels. As one researcher noted, the core drivers of anxiety, like intolerance for uncertainty, just “haven’t come back down.” It’s a clear signal that we need to equip kids with robust coping tools.
Teaching the Fact vs. Feeling Check
A middle schooler’s brain can easily blur the line between an emotional reaction and what’s actually happening. A game-changing metacognitive tool is the “Fact vs. Feeling” check. It helps students step back from an intense emotion and analyze the situation like a detective, separating what they feel from what they know.
Let’s walk through a classic middle school scenario:
A student sees a group of friends whispering in the hallway and feels a surge of panic. You can guide them with these prompts:
The Feeling: “Okay, what’s the feeling right now? Name it.” (They might say: “They’re talking about me. I must have done something wrong. They hate me.”)
The Facts: “Got it. Now let’s be detectives. What are the facts we know for sure? What did you see with your eyes?” (They might say: “I saw my friends talking. I have no idea what they were saying. One of them smiled when she looked over. I don’t have any actual evidence that it’s about me.”)
The Reframe: “So the feeling is ‘they hate me,’ but the fact is ‘I saw them talking.’ Can we hold both? The feeling is real, but it might not be true.”
By guiding them through this process, we’re teaching them to challenge their brain’s automatic negative thoughts. It’s not about invalidating their feelings; it’s about putting them in perspective. This technique builds a habit of critical thinking that can short-circuit an anxiety spiral before it really takes off.
The Mind-Body Connection in Middle School
Middle schoolers are finally old enough to grasp that their daily habits directly impact their mental state. This opens the door for some really powerful conversations about the link between physical health and emotional well-being.
Instead of just nagging them to “get more sleep,” we can frame it as a concrete strategy for managing anxiety.
Sleep: Explain that when they’re tired, the “Guard Dog” part of their brain is way more reactive. Getting 8-10 hours of sleep helps the “Thinking Brain” stay in charge. Example: “I notice you seem more on edge on days after you stay up late gaming. Let’s try an experiment: for one week, we’ll shut down screens at 9 PM and see if you feel less anxious in the mornings.”
Nutrition: Talk about how sugary foods can cause energy spikes and crashes that feel a lot like the physical symptoms of anxiety. Eating balanced meals helps keep both their blood sugar and their mood more stable. Example: “Let’s pack a snack with some protein, like cheese and crackers, for that mid-afternoon slump. It will give you more steady energy than a cookie and might help you feel less jittery before soccer practice.”
Screen Time: Discuss how constant notifications and the social media comparison game can keep their nervous systems on high alert. Encourage designated “unplugged” times to give their brains a chance to rest and reset. Example: “Let’s all put our phones in this basket during dinner so we can actually connect. It gives our brains a break from all that buzzing.”
Teaching students that they have agency over their anxiety by making healthy choices is a massive step toward self-empowerment. It shifts their perspective from feeling helpless to feeling capable and in control of their own well-being.
Empowering Students with Sentence Starters
The final, crucial piece is self-advocacy—giving students the actual words to use when they need help. So many tweens feel anxious but have no idea how to ask for support without feeling awkward or embarrassed. Providing them with simple, respectful sentence starters can be a total game-changer.
This skill is all about teaching them how to be assertive, not aggressive. You can dive deeper into this important distinction in our guide on teaching assertiveness vs. aggressiveness.
Encourage them to practice these scripts so they roll off the tongue more naturally when needed:
For Academic Confusion: “Can we review the instructions again? I’m feeling unsure about where to start.” (Practice this by role-playing with a confusing homework assignment at home.)
When Feeling Overwhelmed: “I’m feeling a little overwhelmed by this assignment. Could I have a few minutes to take some deep breaths before I dive in?” (Suggest they write this on a sticky note and keep it in their binder.)
For Social Situations: “When you said that, it made me feel anxious. Could you help me understand what you meant?” (Role-play a scenario with a friend who makes a joke that doesn’t land well.)
When Needing a Break: “My brain feels really full right now. I’m going to use a coping skill for a minute and then I’ll be ready to focus.” (Identify a non-verbal signal they can give a teacher, like placing a specific colored card on their desk.)
Equipping middle schoolers with these advanced skills helps them build a strong foundation of self-awareness and self-advocacy that will support them long after they’ve left your classroom.
Creating a Supportive Environment at School and Home
Teaching kids individual anxiety coping skills is a huge step, but those skills truly take root when they’re practiced in a consistent and reassuring environment. A child is far more likely to remember deep breathing or grounding techniques when the adults in their life are modeling and encouraging them. Creating this kind of supportive ecosystem—at both school and home—is what transforms coping from an isolated activity into a shared cultural value.
The goal is to build a world where talking about feelings is normal and using a coping skill feels as natural as brushing their teeth. This consistency chips away at uncertainty, which is a major anxiety trigger, and gives children a predictable foundation to stand on when their inner world feels shaky. When school and home are in sync, kids get a clear, powerful message: your feelings are valid, and you have the tools to manage them.
This alignment is crucial. It creates a seamless experience for a child, reinforcing that all the grown-ups in their life are a united team working for their well-being.
Integrating Coping Skills Into the School Day
For educators, the most effective approach is to weave coping skills right into the fabric of the classroom routine, rather than treating them as a separate lesson. This normalizes self-regulation and gives students frequent, low-stakes opportunities to practice. The key is to keep these moments brief, predictable, and positive.
Here are a few practical ways to embed these skills seamlessly:
Start with a Mindful Minute: Kick off the day or transition after recess with just 60 seconds of quiet. Example: “Okay class, before we start math, let’s have a Mindful Minute. Everyone put your hands on your desk, feel your feet on the floor, and let’s listen for any sounds outside our classroom. Go.”
Use Emotion Check-Ins: During morning meetings, add a quick emotional check-in. Students can point to a “feelings wheel” or just hold up a number from 1 to 5 to show where they’re at emotionally. This builds emotional vocabulary and gives you a quick read on who might need extra support.
Create Predictable Routines: Unpredictability can be a huge source of anxiety. Post a clear daily schedule and do your best to stick to it. If things have to change, give as much advance notice as possible to help students prepare mentally. Example: “Team, I just found out the assembly is moved to 10:00 AM today, which means we’ll do our reading block after lunch. I’ve updated it here on the board for us.”
Building a predictable classroom environment is one of the most effective, yet simple, strategies to reduce ambient anxiety. When students aren’t spending mental energy wondering what’s next, they have more capacity for learning and emotional regulation.
Modeling Healthy Coping at Home
At home, parents and caregivers are the primary role models for emotional regulation. The “do as I say, not as I do” approach just doesn’t work when it comes to anxiety. Kids learn how to handle stress by watching how you handle your own. This doesn’t mean being perfectly calm all the time—in fact, it’s more powerful when they see you navigate stress in a healthy, real way.
A huge part of this is verbalizing your own internal process. Instead of just quietly taking deep breaths when you’re stressed, you narrate the experience for them.
What This Looks Like in Real Life:
Stuck in traffic: “Ugh, this traffic is making me feel really frustrated. I can feel my shoulders getting tight. I’m going to take three slow, deep ‘lion breaths’ to help my body relax. Want to do them with me? Big breath in… ROAR!”
During a tricky task: “I’m having a tough time putting this shelf together, and I’m starting to feel angry. I think I’ll take a five-minute break to get a glass of water and come back to it with a clearer head.”
Before a big event: “I’m feeling a little nervous about my big meeting tomorrow. I’m going to look over my notes one more time and then listen to some calming music to help me unwind.”
This kind of modeling does two critical things. First, it validates their own feelings by showing them that adults get frustrated, angry, and nervous, too. Second, it gives them a real-life script for how to connect a feeling to a constructive action.
By creating a shared family language around emotions and building predictable daily routines, you construct a safe harbor for your child. It becomes a place where they feel secure enough to name their worries and practice their new skills without fear of judgment.
Common Questions About Kids’ Anxiety Coping Skills
As you start putting these anxiety coping skills into practice, you’re bound to run into some real-world questions. It’s one thing to read about a technique, but it’s another thing entirely to use it when a child is feeling completely overwhelmed.
This section gets into the nitty-gritty, tackling the most common concerns we hear from parents and educators. Think of it as your field guide for navigating those tricky moments with a bit more confidence. Knowing what to expect makes all the difference.
When Is It Normal Worry vs. a Potential Disorder?
This is probably the biggest question on everyone’s mind. The short answer? All kids worry. It’s a healthy, normal part of growing up. The line gets crossed when that worry starts getting in the way of their day-to-day life.
The key things to look for are the intensity, duration, and impact of their anxiety.
Normal Worry: A child is nervous before their first piano recital. They feel butterflies, but they still go on stage and perform. The feeling fades afterward.
Potential Disorder: Weeks before a piano recital, a child has trouble sleeping, complains of stomachaches, and has meltdowns during practice. They might ultimately refuse to perform. The worry is disproportionate to the event and significantly impacts their functioning.
If a child’s anxiety is consistently keeping them from doing age-appropriate things—like going to school, making friends, or sleeping through the night—that’s a clear signal it’s time to seek some professional guidance.
A great rule of thumb is to consider the “Three Fs.” Is the anxiety impacting their Functioning (at school, home, or with activities), their Friendships, or their Family life? If you see a major negative shift in any of these areas, that’s your cue to talk with a school counselor, pediatrician, or another mental health professional.
What If My Child Resists Trying a Coping Skill?
This happens all the time. When a child is in the middle of a big, anxious moment, their logical “upstairs brain” is offline. Trying something new feels impossible. The most important thing to remember here is to lead with patience, connection, and choice.
First off, never try to force a skill when anxiety is high. It will only backfire. Instead, just model it yourself. You could say something like, “Wow, this is a really big feeling. I can see you’re having a hard time. I’m going to take a few slow breaths to help my own body calm down.” Your calm presence is the most powerful tool you have. Through co-regulation, you’re helping their nervous system sync up with yours.
Later, when things are calm, you can bring it up again. But frame it as a game and give them options.
Here’s what that might look like:
Instead of demanding, “You need to do your belly breathing,” try this later in the day: “Hey, remember those big feelings from earlier? Let’s practice for next time so we feel stronger. Do you want to give our teddy bear a ride on our belly, or should we draw our worries and feed them to the Worry Monster? You pick.”
Giving them that sense of control makes them so much more willing to try. The goal is low-pressure practice outside of the stressful moment.
How Can I Adapt These Skills for Neurodivergent Children?
This is such an important consideration. For neurodivergent kids, including those with autism or ADHD, the core principles of calming the nervous system are the same, but the approach often needs to be more concrete, sensory-based, and built around their unique needs.
Simply talking about “calming down” is often too abstract to be helpful. Many neurodivergent children are visual and sensory thinkers.
Make it Visual: A visual timer can show them exactly how long a calming activity will last. A “choice board” with pictures of different coping skills lets them point to what they need when words are hard to find. Example: Create a laminated card with pictures of a weighted blanket, headphones, and a squishy toy. When they’re overwhelmed, you can show them the card and ask them to point to what their body needs.
Lean into Sensory Needs: For a child who seeks out sensory input, a big, deep-pressure hug or a weighted blanket might be a game-changer—far more effective than deep breathing. For a child who gets easily overstimulated, noise-canceling headphones in a quiet corner might be the essential first step.
Use Their Interests: Connect coping strategies to whatever they’re passionate about. If a child loves trains, you could call deep breathing “chugging like a train”—a slow “choo” on the inhale and a long, drawn-out “chooooo” on the exhale. If they love superheroes, you can call grounding “activating your spidey-senses” to notice things in the room.
The best strategy is to observe what already soothes them and build from there. Their self-soothing behaviors (often called “stims”) are their natural way of regulating. Instead of trying to stop them, see how you can incorporate them into a more structured coping strategy.
At Soul Shoppe, we believe every child deserves the tools to navigate their inner world with confidence. Our programs are designed to help schools and families build supportive environments where children can learn, practice, and master the social-emotional skills they need to thrive. Explore our K-8 programs to bring these vital tools to your community at https://www.soulshoppe.org.