“I-statements” are a simple but incredibly effective communication tool that helps kids voice their feelings without pointing fingers. Think about the difference between a child saying, “You made me mad,” versus, “I feel mad when you take my toy.” That tiny shift is a cornerstone of social-emotional learning, empowering kids to own their feelings and start a conversation instead of a fight.
The Power of ‘I Feel’ Over ‘You Did’
When a child feels hurt or wronged, the first instinct is often to blame. You’ll hear phrases like “You’re so mean!” or “You always ruin everything!” While these words definitely get the frustration across, they also immediately put the other person on the defensive. Conflict escalates, and resolution feels impossible.
This is where teaching I-statements becomes a total game-changer.
The whole idea is to switch from accusation to expression. By starting with “I feel,” a child is sharing their internal experience—something that’s undeniably true for them—rather than passing judgment on someone else. This simple change helps build several key skills:
Builds Self-Awareness: It forces a pause, helping kids identify what they’re actually feeling before they react.
Promotes Empathy: When a friend hears how their actions made someone else feel, it offers a window into another person’s perspective.
De-escalates Conflict: It’s a lot harder to argue with “I feel sad” than it is with “You’re a bad friend.”
Encourages Responsibility: Kids learn to take ownership of their emotions instead of making others responsible for how they feel.
From ‘You-Blame’ to ‘I-Feel’ Statements
Let’s look at how this shift works in real-world kid conflicts. It’s often easier to see the difference side-by-side. The goal is to move from an attack that shuts down communication to an invitation that opens it up.
Common Conflict
Problematic ‘You Statement’
Empowering ‘I Statement’
Being Left Out
“You never let me play with you!”
“I feel sad when I’m left out of the game.”
Sharing Toys
“You’re so selfish for not sharing!”
“I feel frustrated when I can’t have a turn.”
Unkind Words
“You’re being mean to me.”
“I feel hurt when you say things like that.”
Broken Promises
“You always break your promises!”
“I feel disappointed when you don’t do what you said you would.”
Seeing these examples makes it clear how “I-statements” can completely change the tone of a disagreement, turning a potential fight into a moment for understanding.
A Foundational Skill for Life
This isn’t just some clever script to memorize; it’s a core component of healthy relationships and emotional intelligence. Picture a classroom where a student can confidently say, “I feel sad when I’m not included in the game,” instead of shoving another child or withdrawing in silence. That’s the power of I-statements in action.
Research backs this up. Social-emotional learning (SEL) programs, which lean heavily on tools like this, have been shown to significantly improve student outcomes. In fact, schools with strong SEL curricula can see a reduction in disruptive behaviors by up to 20-30%, creating a more positive and collaborative learning environment.
By teaching children to speak from their own experience, we give them a tool to navigate disagreements constructively. It transforms a potential fight into an opportunity for connection and understanding.
From the Playground to the Boardroom
Mastering this skill early really does set kids up for future success. Knowing how to express yourself clearly and respectfully is fundamental to effective communication and builds broader diplomacy skills for students. This approach teaches kids that their feelings are valid and gives them a constructive way to share them, which in turn builds confidence and resilience. It’s a skill that will serve them on the playground, in the classroom, and one day, in their adult relationships and careers.
Ultimately, weaving I-statements into daily language helps create an environment where kids feel heard and respected. This small linguistic shift makes a massive impact, paving the way for more peaceful and effective communication.
If you’re looking for more ways to help children resolve disagreements, check out our guide on conflict resolution for kids.
The Four-Part Formula for Effective I-Statements
Think of a good I-statement like a recipe. When you add all the right ingredients in the right order, you get a much better result. We can break down powerful I-statements for kids into a simple, four-part formula that takes the guesswork out of clear communication.
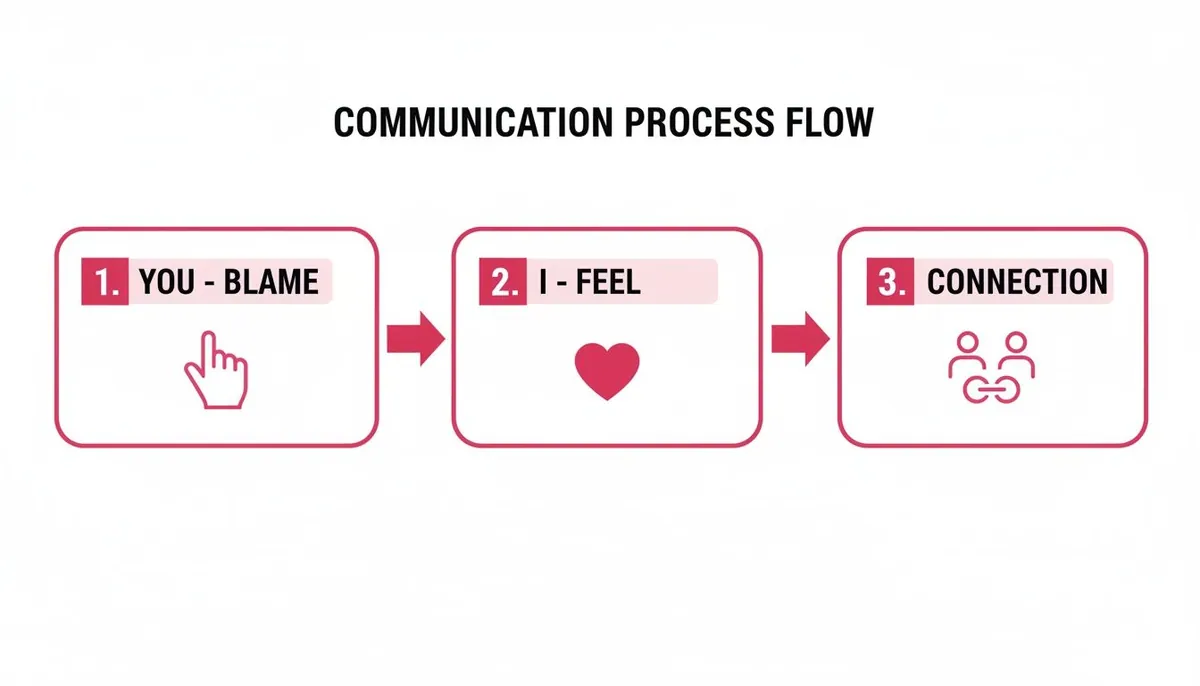
This structure helps kids organize their thoughts and express themselves without falling back on blame, which almost always shuts down a conversation. It’s about shifting communication from accusation to connection.
This visual shows exactly that—the shift from a “You-Blame” approach that creates conflict to an “I-Feel” approach that opens the door for understanding.
By focusing on personal feelings (“I”) instead of accusations (“You”), children invite empathy and problem-solving rather than making the other person defensive.
Part 1: Start with Your Feeling
The first step is simply to name the emotion. It sounds easy, but it requires a child to hit the pause button and figure out what’s really going on inside. Our goal is to help kids build a rich emotional vocabulary that goes way beyond just “mad,” “sad,” or “happy.”
For instance, instead of just “mad,” a child might feel frustrated, annoyed, or irritated. Instead of “sad,” they might be feeling lonely, disappointed, or hurt.
Practical Example: “I feel frustrated…”
Practical Example: “I feel lonely…”
Practical Example: “I feel annoyed…”
Using more specific words gives the other person a much clearer picture of the situation’s emotional weight. You can find more ideas for helping kids name their feelings in our other communication skill activities.
Part 2: Describe the Specific Behavior
This is probably the most crucial—and toughest—part of the formula. The key is to state the observable action that triggered the feeling, not a judgment or assumption about why the other person did it.
Think of it like being a video camera recording exactly what happened. A camera sees someone talking while another person is speaking; it doesn’t see someone “being rude.”
Avoid Judgment: “when you are mean.”
Stick to Facts (Practical Example): “when you call me a name.”
Avoid Generalizations: “when you never share.”
Stick to Facts (Practical Example): “when you don’t offer me a turn with the controller.”
Avoid Assumptions: “when you ignore me on purpose.”
Stick to Facts (Practical Example): “when you walk away while I’m talking.”
Sticking to a specific, observable behavior keeps the listener from feeling attacked and focuses the conversation on a single, solvable action.
Part 3: Explain the Impact on You
The “because” part of the statement is where the magic happens—it’s where empathy is built. This piece explains why the behavior led to the feeling, connecting the action to its consequence. It helps the other person understand the reasoning behind the emotion.
This step essentially answers the silent “So what?” that can hang in the air after someone states a feeling. It makes an abstract emotion feel concrete and real.
Key Takeaway: The ‘because’ clause is the bridge to understanding. It helps the other person see the situation from your child’s perspective, making it more likely they will want to help find a solution.
Let’s build on our earlier examples with practical scenarios:
Practical Example: “I feel frustrated when you don’t offer me a turn with the controller because I’ve been waiting a long time and thought we agreed to share.“
Practical Example: “I feel lonely when I’m not invited to sit at the lunch table because it makes me feel like I don’t have any friends.“
Practical Example: “I feel hurt when you call me a name because words like that stick in my head and make me feel bad about myself.“
This adds depth and a little vulnerability, inviting the other person to connect with the speaker’s experience instead of just reacting to a demand.
Part 4: Make a Positive Request
The final piece is stating what you need. This isn’t a demand. It’s a clear, positive, and actionable request for what would help fix things. The secret is to ask for what you want, not just for what you want to stop.
Framing the need positively is a game-changer. A negative request (“Stop doing that!”) can still sound like a criticism, while a positive one (“Could we try this instead?”) invites teamwork.
Negative Request (Avoid): “I need you to stop hogging the game.”
Positive Request (Use/Practical Example): “I need us to set a timer so we both get a fair turn.”
Negative Request (Avoid): “Stop being so mean.”
Positive Request (Use/Practical Example): “I need you to use my real name instead of calling me names.”
Here are the full, four-part statements, all put together in practical examples:
Practical Example: “I feel frustrated when you don’t offer me a turn with the controller because I’ve been waiting a long time and thought we agreed to share. I need us to set a timer for turns.”
Practical Example: “I feel lonely when I’m not invited to sit at the lunch table because it makes me feel like I don’t have any friends. I need you to save me a seat sometimes.”
Practical Example: “I feel hurt when you talk over me during my presentation because it makes me feel like my ideas aren’t important. I need to be able to finish my thoughts without being interrupted.”
This complete formula gives kids a clear, respectful, and effective roadmap for communication that empowers them to solve problems together.
Teaching I Statements with Age-Specific Scenarios
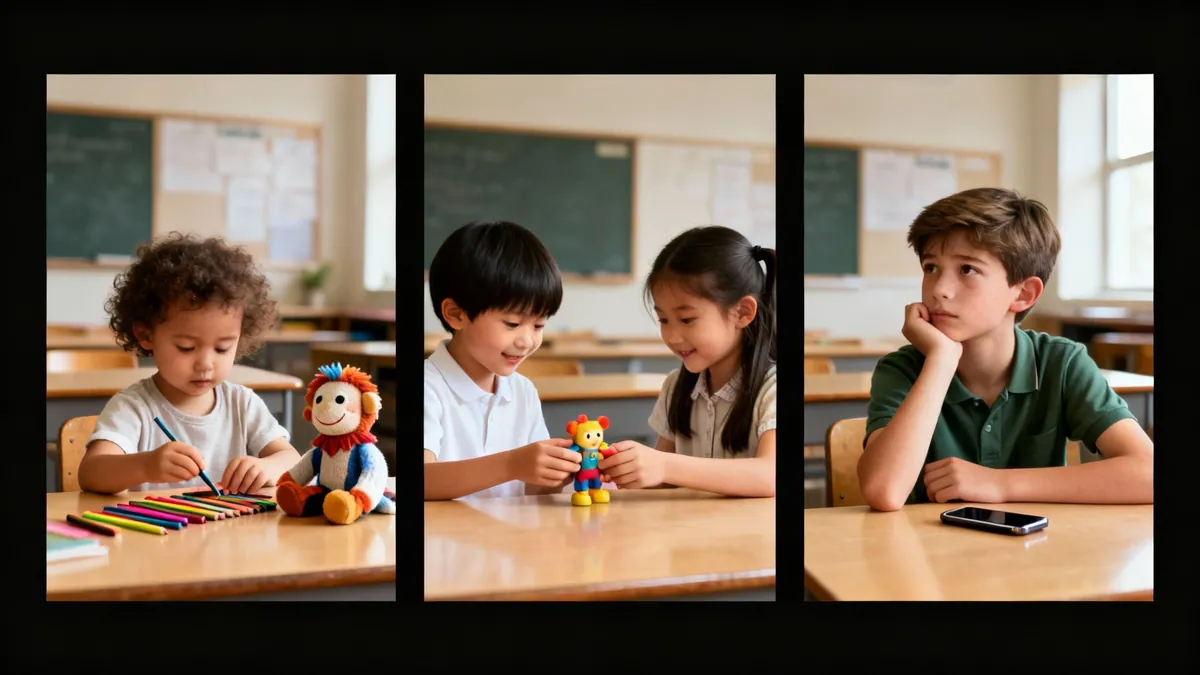
Kids’ emotional worlds and communication skills change dramatically as they grow up. The way you’d teach a four-year-old is completely different from how you’d approach a fourteen-year-old, right? That’s why teaching I statements for kids can’t be a one-size-fits-all lesson. It requires a flexible strategy that meets them right where they are, developmentally speaking.
Forget handing them a generic script to memorize. The real goal is to offer them tools that feel natural and genuinely useful for the social challenges they’re actually facing, whether that’s in the sandbox or on social media.
This age-differentiated method empowers children with language that feels relevant, making the skill less like a formula and more like a real way to express themselves.
Preschoolers: Simple and Concrete Language
At this age, emotions are HUGE, but the words to describe them are still pretty new. The goal here is to keep it simple and direct. We can introduce a shortened, two-part I-statement that clearly connects a feeling to a specific thing that happened.
For this age group, the most effective formula is straightforward: “I feel [feeling] when [action].”
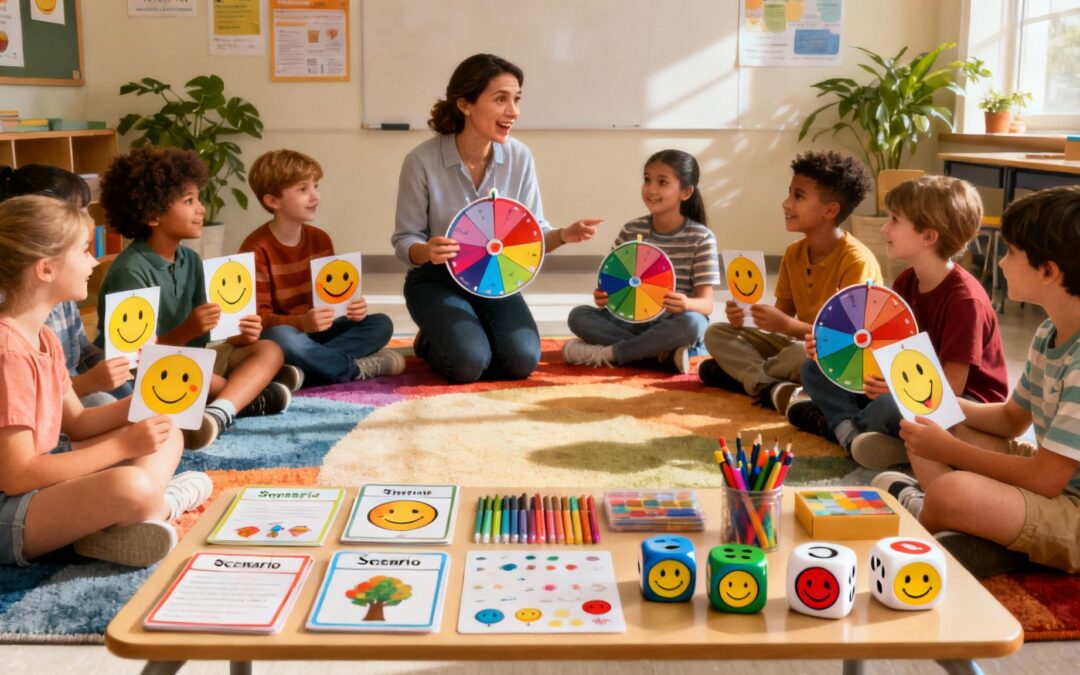
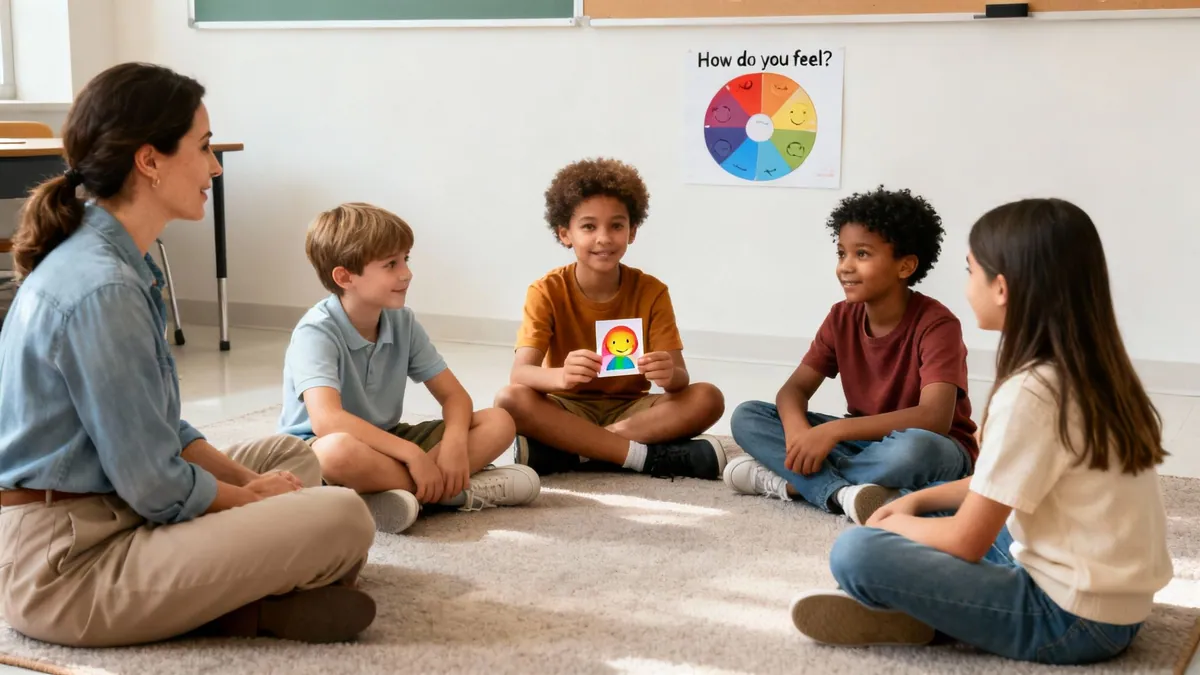
To make this idea stick, bring in visual aids like feelings charts with smiley, sad, and angry faces. Puppets are another fantastic tool for acting out different situations in a playful, low-stakes way. Repetition and connecting the words to physical experiences are everything.
Practical Examples for Preschoolers:
Sharing a Toy: Instead of a child yelling, “He’s hogging the blocks!”, you can gently model: “I feel sad when you take the blue block because I was using it.”
Unwanted Physical Contact: Rather than a shove or a frustrated cry, guide them toward saying: “I feel upset when you push me because it hurts my body.”
Being Ignored: Help them find the words for that left-out feeling: “I feel lonely when you run away from me during playtime.”
Clean-up Time: Instead of “You’re messy!”, try: “I feel frustrated when the toys are left on the floor.”
With preschoolers, the adult’s role is to provide the script and patiently coach them through it. Your consistent modeling is the most powerful tool you have. If you’re looking to expand your child’s emotional vocabulary, our guide on naming feelings and helping kids find the words they need is a fantastic resource to start with.
Elementary Students: Adding ‘Because’ and ‘I Need’
By the time kids hit elementary school, they can handle more complexity. They’re starting to understand cause and effect, and they can grasp how their actions impact others. This is the perfect time to introduce the full four-part I-statement formula.
Their social worlds are also way more intricate now. Friendships, playground politics, and classroom dynamics bring a whole new set of challenges. This is where the “because” and “I need” parts of the statement become so important—they help kids not only express feelings but also start thinking about solutions.
This is where the skill shifts from simply naming an emotion to actively solving a problem. By stating a need, kids learn to advocate for themselves respectfully and invite cooperation.
Practical Scenarios for Elementary Kids:
Feeling Left Out at Recess: “I feel left out when you and Sara run off to play without asking me because it makes me think you don’t want to be my friend anymore. I need us to make a plan to play together at the start of recess.”
Frustration with a Sibling: “I feel frustrated when you come into my room and take my things without asking because then I can’t find them when I need them. I need you to ask me first.”
Hurtful Words: “I feel hurt when you make a joke about my new glasses because it makes me feel embarrassed. I need you to stop making comments about how I look.”
Group Work in Class: “I feel worried when we wait until the last minute to do our project because I’m afraid we won’t finish. I need us to make a schedule to get the work done on time.”
The value of teaching I statements at this age is backed by decades of research in Social Emotional Learning (SEL). When a 7-year-old can say, “I need space because I’m feeling overwhelmed,” they are practicing a core SEL skill that helps them own their emotions without blame. Since its formation in 1994, CASEL has embedded these concepts into core SEL components. In fact, they are present in over 70% (10 of 14) of evidence-based elementary programs. Research shows SEL leads to academic gains of up to 11 percentile points, a 23% reduction in emotional distress, and a 9% drop in conduct problems. With 76% of U.S. schools using formal SEL in 2021-2022, this approach is clearly making an impact. You can explore the full report on SEL in U.S. schools and its impact to learn more.
Middle Schoolers: Navigating Complex Social Dynamics
Tweens and young teens are dealing with a whole new level of social pressure. Their conflicts are more nuanced, often tangled up in group dynamics, social media drama, and a huge fear of embarrassment. For this age group, I statements become a vital tool for navigating friendships and setting boundaries with integrity.
The biggest challenge is getting them to actually use the skill without it sounding robotic or “lame.” Encourage them to find their own words while sticking to the core principles: own your feelings and don’t place blame. Role-playing is incredibly powerful here, as it gives them a safe space to practice before trying it out with their peers.
Practical Scenarios for Middle Schoolers:
Social Media Drama: “I feel really stressed out when I see comments about me in the group chat because it feels like everyone is talking behind my back. I need you to talk to me directly if you have a problem.”
Group Project Frustrations: “I feel overwhelmed when I end up doing most of the work for our project because it doesn’t seem fair. I need us to sit down and divide up the remaining tasks equally.”
Responding to Peer Pressure: “I feel uncomfortable when you keep asking me to skip class because I’m worried about getting in trouble. I need you to respect my decision to say no.”
Feeling Unheard by a Friend: “I feel ignored when I’m telling you about my day and you’re on your phone the whole time because it makes me feel like you don’t care about what I’m saying. I need you to listen to me when we’re talking.”
By tailoring your approach to each stage of development, you give kids practical and relevant communication tools they can use for the rest of their lives.
Making I-Statements a Daily Habit
Learning the I-statement formula is one thing, but the real magic happens when this way of communicating becomes second nature. The goal isn’t to create a rigid script kids have to follow; it’s to weave this language into everyday moments until it becomes a genuine habit. For that to happen, consistency and adult modeling are everything.
Showing kids how it’s done is far more powerful than just telling them. When adults use I-statements to talk about their own feelings and needs, children see the tool in action. They learn that expressing emotions respectfully isn’t just for conflict resolution—it’s a normal and effective way to connect with others.
Weaving I-Statements into Home Life
At home, opportunities to model and practice I-statements pop up all the time. Sibling squabbles, chore negotiations, and setting simple boundaries are perfect moments to steer the conversation toward healthier communication. Instead of playing referee, you get to be a communication coach.
Here are a few practical ways to embed this habit in the real world:
During Sibling Disputes: When one child yells, “He won’t share!”, you can gently guide them by asking, “How does that make you feel inside? Can you try an I-statement to tell him?” A practical prompt could be: “Try saying, ‘I feel frustrated when I can’t get a turn.'”
Setting Boundaries Around Chores: Model it yourself. Instead of, “You never clean up your mess,” try something like, “I feel stressed when toys are left on the floor because it makes the room feel chaotic and hard to clean. I need us to work together to put them away before dinner.”
Dinner Table Check-ins: Make sharing feelings a low-pressure part of your routine. You could ask, “What was something today that made you feel proud?” or “Did anything happen that made you feel frustrated?”
Responding to Backtalk: Instead of “Don’t use that tone with me,” try modeling a response like: “I feel disrespected when you use that tone of voice because it makes it hard for me to listen to what you’re saying. I need you to speak to me calmly.”
By consistently prompting and modeling, you’re building emotional muscle memory. If you’re looking for more ideas on establishing positive patterns, check out our guide on creating routines that help kids feel emotionally grounded.
Creating a Culture of Respect in the Classroom
Teachers have a unique opportunity to make I-statements a core part of the classroom culture. When this language is used daily, it can dramatically reduce minor conflicts and build a much stronger sense of community. Visual reminders and dedicated practice time are key here.
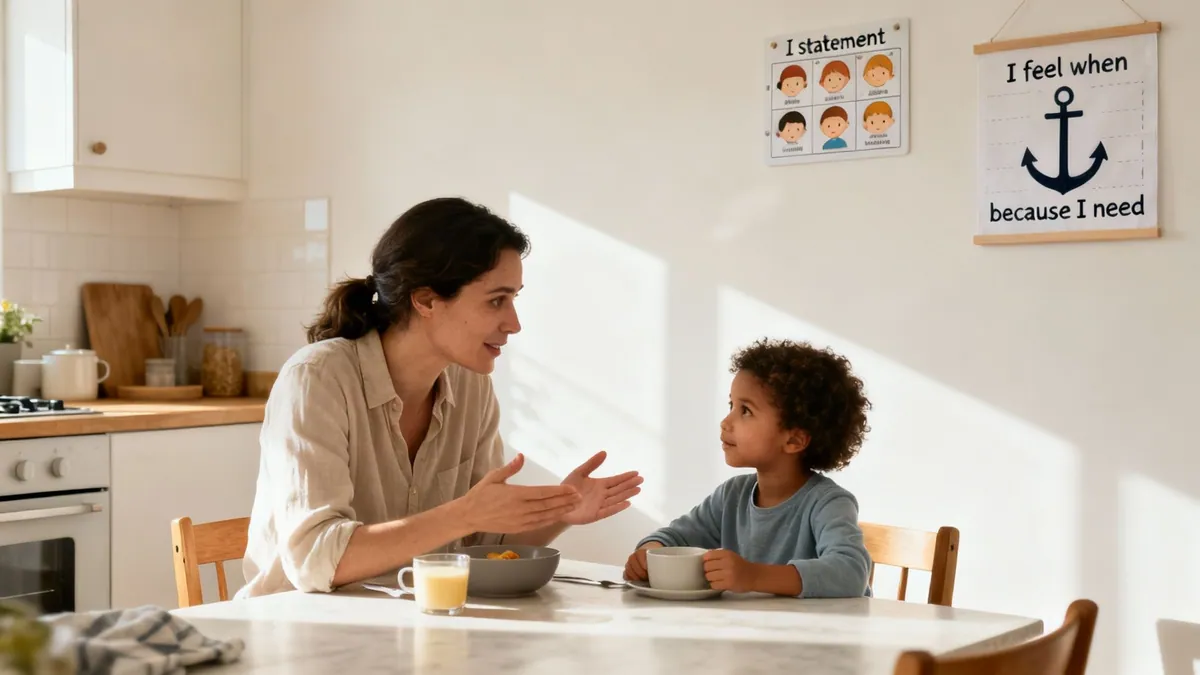
Creating an “I-Statement Anchor Chart” with the four-part formula and posting it in a visible spot gives students a quick reference point. This simple visual cue can help them recall the steps when they feel overwhelmed by a big emotion.
Practical Conversation Starter Prompt: “It looks like you two are having a tough time. Can we pause and try using our I-statements to figure out what’s happening?”
This simple prompt shifts the focus from blame to understanding. It empowers students to start solving their own problems. Incorporating I-statements into morning meetings also provides a regular, low-stakes time to practice. You might present a hypothetical scenario—like someone cutting in line or borrowing a crayon without asking—and have students work in pairs to craft an I-statement for it.
The widespread adoption of these tools is part of a larger, positive shift in education. As difficult events in the late 1990s revealed emotional gaps in schools, I-statements for kids became a frontline tool in Social-Emotional Learning (SEL) curricula, teaching students to voice needs safely. After the pandemic, federal relief funds led to a huge spike in usage, with principals reporting a 29-point jump in elementary SEL implementation by 2021. Today, 86% of school leaders connect discipline with emotional growth, directly using tools like I-statements for conflict resolution. Discover more insights about the growth of SEL in U.S. schools.
Navigating Common Roadblocks and Challenges
Teaching I-statements for kids is a huge step forward, but let’s be real—communication is messy. Even with the best tools, you and your child will hit moments where things just don’t go according to plan. Being ready for these bumps in the road is what builds confidence and turns this skill into a resilient tool, not just a formula to ditch when things get tough.
How to Guide Mindful Movement
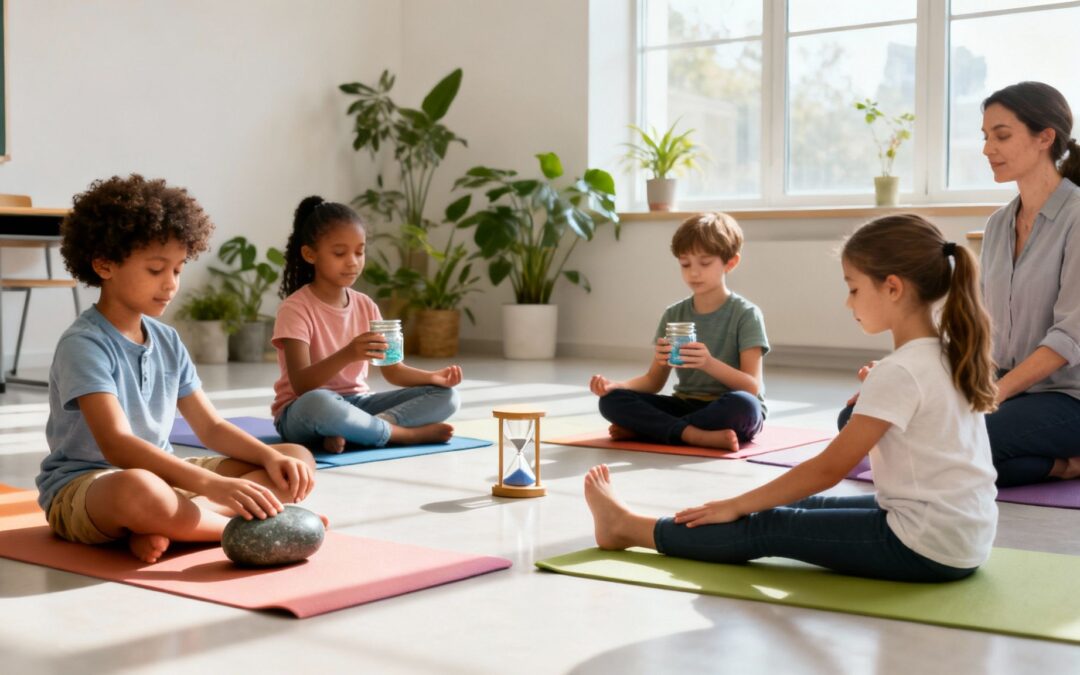
Create Space: Ensure students have enough room to stretch their arms and legs without bumping into others.
Start with Breath: Begin by guiding students to notice their breath, linking it to a simple movement like raising arms on an inhale and lowering them on an exhale.
Introduce Simple Poses: Guide them through a few accessible poses like Mountain Pose (standing tall), Cat-Cow (arching and rounding the back on all fours), or Tree Pose (balancing on one leg).
Use Accessible Language: Use simple, inviting cues like, “Reach for the sky like a tall tree,” or “Arch your back like a happy cat.” Avoid complex Sanskrit terms unless it’s part of a specific lesson.
Focus on Sensation: Encourage students to notice the feelings in their muscles as they stretch. Ask, “Where do you feel the stretch in your body?” to guide their awareness inward.
Classroom and Home Implementation
Age Adaptations: For K-2 students, use animal poses and storytelling (e.g., “let’s be a stretching cat”). For middle schoolers, introduce flowing sequences and partner poses to build connection and focus. A 5-minute yoga sequence can be a great brain break.
When to Use It: Use mindful movement to energize students in the morning, reset focus after lunch, or as a calming transition before quiet work. At home, it’s a great way to break up homework sessions or wind down before bed.
Behavioral Outcomes: This practice directly supports self-regulation and body awareness. A student who learns to use stretching to release frustration is better equipped to manage their energy and emotions in a positive way, reducing disruptive behavior.
Practical Example: After a long period of seated work, a teacher announces a “stretch break.” She leads the class in a “Mountain Pose,” having them stand tall and feel their feet on the ground. Then they do a “Volcano Breath,” reaching their arms up high as they inhale and letting them fall to their sides with an audible “haaaa” sound as they exhale. This 60-second activity releases pent-up energy and refocuses the class.
10. Mindfulness Bells, Pause Practices, and Gratitude
This practice integrates brief, intentional pauses into the daily school routine, often signaled by a bell or chime. These moments are combined with gratitude reflections to normalize present-moment awareness and cultivate a positive school culture. The goal is to embed mindfulness into the fabric of the day, creating consistent habits that reset classroom energy and build a community of appreciation. This is one of the most effective mindfulness exercises for students as it builds school-wide consistency.
By making these pauses a predictable part of the schedule, schools help students develop automatic self-regulation skills. The practice shifts from a special activity to a natural, expected part of learning, which supports social-emotional growth. For more strategies on embedding these habits, you can explore further ideas about bringing mindfulness into the classroom.
How to Guide a Pause and Gratitude Practice
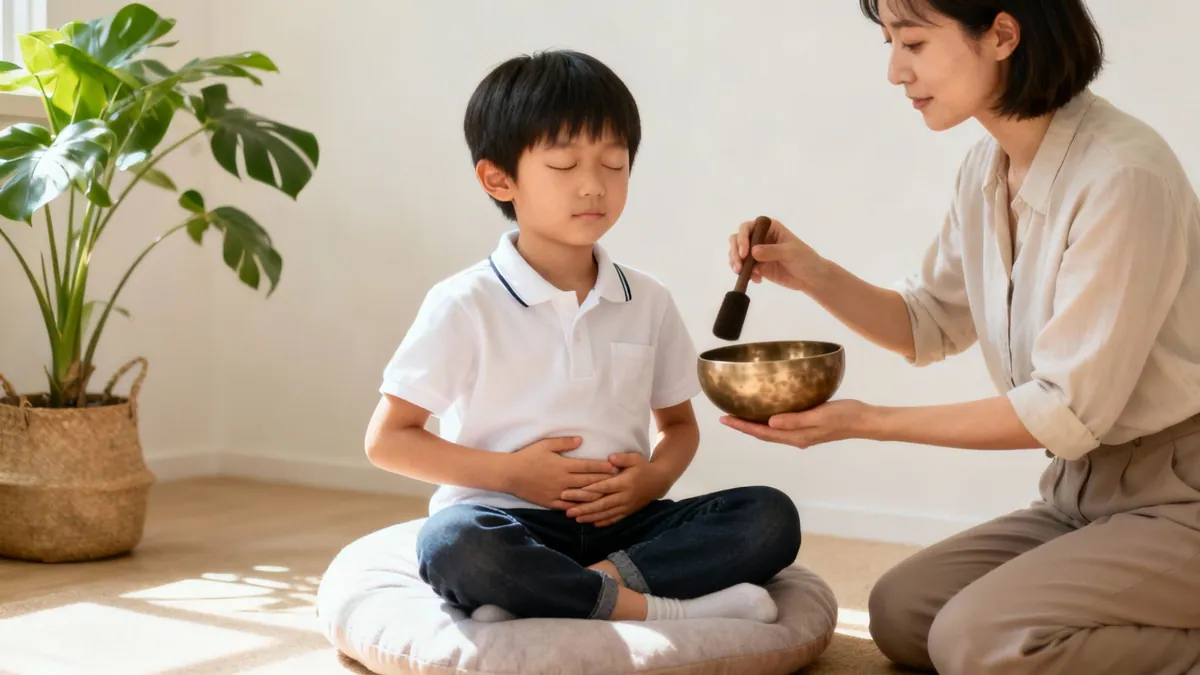
Establish a Signal: Choose a specific, calming sound like a chime, a singing bowl, or a gentle bell. Train students to recognize this as the signal to pause.
Model the Pause: When the bell rings, the teacher should immediately stop, take a visible deep breath, and become still. This provides a clear model for students to follow.
Introduce a Brief Focus: Guide students with a simple prompt. It could be, “Notice one breath in and out,” or “Feel your feet on the floor.” Keep it under 30 seconds.
Add a Gratitude Prompt: After the pause, pose a simple gratitude question. For example, “Silently think of one person who helped you today,” or “What is one small thing that made you smile?”
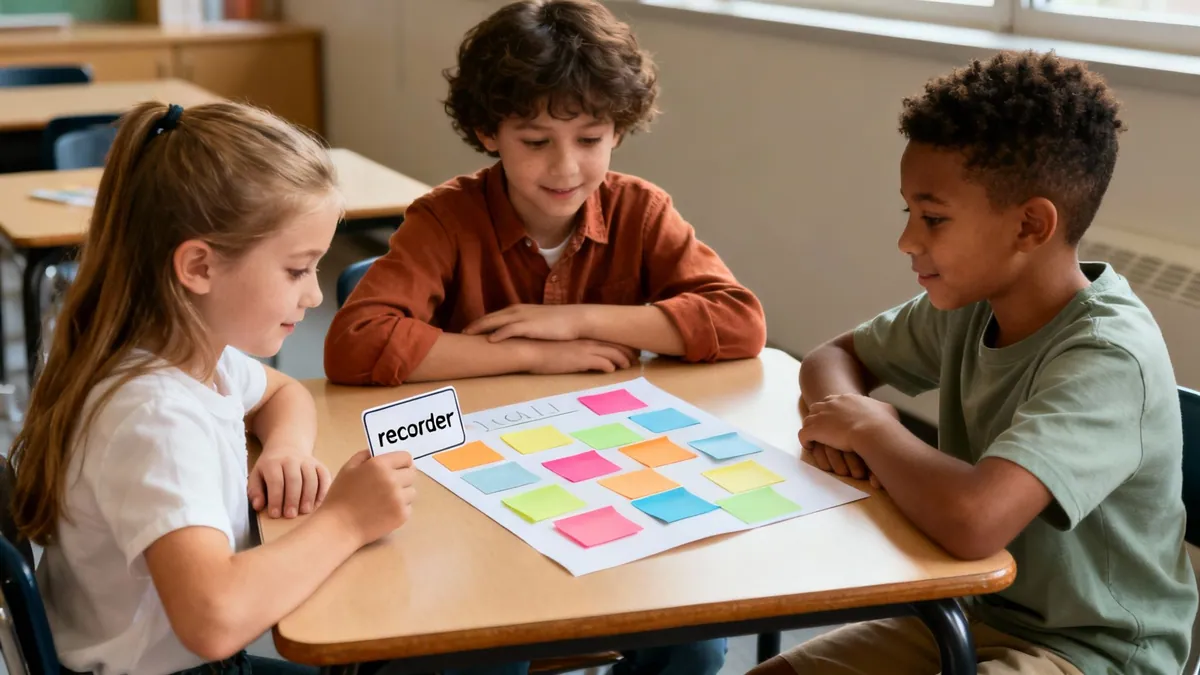
Share (Optional): Invite one or two students to share their gratitude aloud or have them write it on a sticky note for a “Thankful Tree” display in the classroom.
Classroom and Home Implementation
Age Adaptations: For K-2 students, the gratitude prompt can be very concrete, like “What is your favorite toy you played with today?” For middle schoolers, prompts can be more abstract, such as, “Think of a challenge you overcame this week and what you’re grateful for about that experience.”
When to Use It: Use a mindfulness bell to start each class period, to signal a transition between subjects, or as a whole-school pause at a set time (e.g., 11:00 AM). At home, families can use this before dinner or as part of a bedtime routine.
Behavioral Outcomes: This practice directly supports relationship skills and responsible decision-making. Regularly reflecting on gratitude builds empathy and positive peer connections, while the pause itself interrupts impulsive behavior and allows for a moment of thoughtful response.
Practical Example: A teacher rings a small chime to signal the end of group work and the transition to independent reading. As soon as the chime sounds, everyone in the room—including the teacher—freezes for one deep breath. Then, the teacher says, “Before we move on, quietly think of one helpful idea you heard from your group members.” This brief pause and reflection make the transition smoother and more purposeful.
10-Point Comparison: Mindfulness Exercises for Students
Practice
Implementation complexity
Resource requirements
Expected outcomes
Ideal use cases
Key advantages
Body Scan Meditation
Low–Moderate (needs guided scripts, age adaptation)
Minimal (quiet space, script)
Increased body awareness, reduced tension, improved focus
Pre-tests, transitions, calm-down routines
Easy integration, no equipment, supports self-regulation
Mindful Breathing Exercises
Low (simple techniques, quick teaching)
None (portable)
Rapid nervous-system calming, improved attention
Acute stress, test anxiety, quick classroom breaks
Brief, scalable, normalizes mindfulness across community
Empowering Students with Tools for Life: Your Next Steps
We’ve explored a powerful collection of ten mindfulness exercises for students, each designed to plant a seed of awareness, calm, and self-compassion. From the grounding stillness of the Body Scan Meditation to the shared connection of Mindful Listening Circles, these practices are more than just activities. They are foundational life skills that equip young people to navigate the complexities of their inner and outer worlds with greater grace and resilience.
The journey from learning about these techniques to integrating them into a bustling classroom or a busy home can feel daunting. The key is to remember that the goal is not to achieve a state of perfect, silent tranquility. Instead, it is about creating consistent, small moments of intentional presence. It’s about showing students, through practice and modeling, that they have the power to pause, breathe, and choose their response.
Making Mindfulness Stick: The Path from Practice to Habit
The true impact of these mindfulness exercises for students is realized through consistency. A single mindful breathing session can soothe a student’s anxiety before a test, but a daily habit of mindful breathing can fundamentally change their relationship with stress itself. To transform these exercises from isolated interventions into ingrained habits, consider these practical starting points:
Start Small and Build Momentum: Don’t try to implement all ten exercises at once. Choose one or two that resonate most with your students’ needs. Perhaps you start with a two-minute Mindful Breathing exercise every morning after the bell rings or introduce the 5-4-3-2-1 Sensory Grounding technique as a go-to tool during moments of high energy.
Link to Existing Routines (Habit Stacking): Anchor a new mindfulness practice to an established part of the day. For example, practice Mindful Eating during the first five minutes of snack time or transition from recess with a brief Mindful Walking exercise back to the classroom. This “habit stacking” makes the new practice feel less like an interruption and more like a natural part of the daily flow.
Model and Share Your Own Experience: Students are incredibly perceptive. When they see you, their teacher or parent, taking a deep breath when you feel overwhelmed, they learn that self-regulation is a tool for everyone. Be open and authentic. You might say, “I’m feeling a little scattered today, so I’m going to take three mindful breaths to recenter myself before we start our math lesson. Would anyone like to join me?” This vulnerability builds trust and normalizes the practice.
The Ripple Effect: Beyond Calm to Connection and Compassion
While the immediate benefits of mindfulness, like improved focus and reduced anxiety, are significant, the long-term impact is even more profound. These simple practices cultivate the core competencies of social-emotional learning (SEL).
A student who regularly practices Loving-Kindness Meditation is not just learning to be kind to others; they are wiring their brain for empathy and self-compassion, which are critical for building healthy relationships and navigating social challenges. Similarly, Mindful Listening Circles do more than teach active listening. They create a classroom culture where every voice is valued, fostering a sense of psychological safety and belonging that is essential for academic and personal growth.
The ultimate value of introducing mindfulness exercises for students is not just in creating calmer classrooms, but in nurturing more compassionate, self-aware, and resilient human beings. You are giving them a toolkit they can carry with them long after they leave your classroom, empowering them to face life’s challenges with a steady mind and an open heart.
This journey is a marathon, not a sprint. There will be days when a guided meditation is met with giggles, and days when students are too restless for a Body Scan. That is all part of the process. Meet your students where they are, celebrate small victories, and trust that with every mindful breath and every moment of shared presence, you are making a lasting and meaningful difference.
Ready to build a comprehensive, campus-wide culture of connection and emotional intelligence? Soul Shoppe provides the tools, training, and experiential programs that bring these mindfulness principles to life, creating safer and more connected learning environments for every child. Explore our Soul Shoppe programs to see how we can partner with your school community.
In a world buzzing with distractions, equipping children with tools to navigate their inner landscape is more essential than ever. Mindfulness isn’t about emptying the mind or sitting perfectly still for hours. It’s about paying attention to the present moment, on purpose, with curiosity and without judgment. This skill helps kids understand their big feelings, manage stress, and improve their ability to focus, whether in a bustling classroom or a busy home. By introducing simple, engaging mindfulness activities for kids, we provide them with a practical toolkit for life.
This guide moves beyond generic advice to offer a comprehensive roundup of 10 practical, evidence-based mindfulness activities designed for students in grades K-8. Each activity is presented as a valuable, standalone tool for building self-awareness and emotional regulation. For every item on our list, you will find:
Step-by-step instructions for easy implementation.
Age-specific adaptations for younger and older children.
Practical tips for both classroom and home settings.
Key social-emotional learning (SEL) targets for skill-building.
These aren’t just calming techniques; they are foundational practices for developing resilience, empathy, and self-control. They empower children to respond to challenges thoughtfully rather than reactively, aligning with Soul Shoppe’s mission to create safe, connected school communities. As children learn these vital skills, it’s also valuable to understand broader effective relaxation techniques for stress relief that promote calm and well-being at any age. Let’s explore how these simple yet powerful practices can transform your classroom or home, one mindful moment at a time.
1. Belly Breathing (Diaphragmatic Breathing)
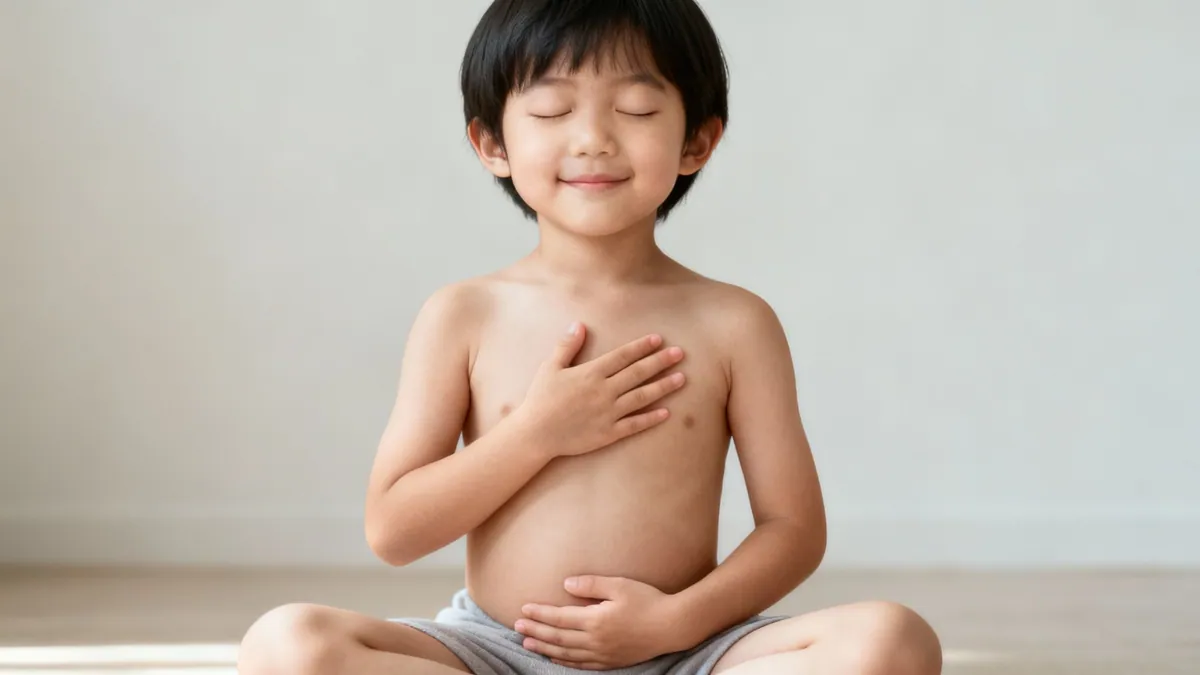
Belly Breathing, also known as diaphragmatic breathing, is a foundational mindfulness activity for kids that serves as a powerful anchor for self-regulation. It involves taking slow, deep breaths that originate from the diaphragm, causing the belly to rise and fall. This simple action directly activates the body’s parasympathetic nervous system, which is responsible for the “rest and digest” response, effectively countering the “fight or flight” stress reaction.
This technique is remarkably accessible for all ages, making it a go-to tool for educators and parents. Its power lies in its simplicity and immediate physical feedback, as children can feel their belly move, which helps them focus on their breath and body.
How to Implement Belly Breathing
The core instruction is to have a child place one hand on their chest and the other on their belly. Guide them to breathe in slowly through their nose, focusing on making the hand on their belly rise while the hand on their chest stays relatively still. Then, they exhale slowly through their mouth, feeling their belly fall.
For Younger Kids (K-2): Use playful imagery. Ask them to pretend their belly is a balloon they are slowly inflating and deflating. Or, have them lie on their backs with a small stuffed animal on their belly and watch it rise and fall with each breath.
For Older Kids (3-8): Introduce simple counting patterns. A “5-4-3-2-1” method works well: inhale for 5 seconds, hold for 4, exhale for 3, hold for 2, and repeat. This structure provides a concrete focus for a wandering mind.
Practical Classroom and Home Examples
Belly Breathing can be seamlessly integrated into daily routines to build emotional resilience.
Classroom Scenario: A second-grade teacher notices her class is restless and unfocused after recess. She initiates “Bubble Breaths,” guiding students to inhale deeply and then exhale slowly as if blowing a giant, delicate bubble they don’t want to pop. This 60-second reset helps the class transition calmly back to learning.
Home Scenario: A parent helps their anxious 10-year-old prepare for a big test. They sit together and practice “box breathing” (inhale for 4, hold for 4, exhale for 4, hold for 4) for a few minutes. This empowers the child with a tangible tool to use if they feel overwhelmed during the exam.
By practicing during calm moments, children build the muscle memory needed to deploy this skill effectively when they feel stressed, anxious, or angry. For more ideas on creating a peaceful learning space, explore these calming activities for the classroom.
2. Body Scan Meditation
Body Scan Meditation is a progressive relaxation technique that guides children on an internal tour of their own bodies. The practice involves bringing gentle, non-judgmental awareness to different body parts one by one, simply noticing any sensations like warmth, tingling, or tightness. This activity is a cornerstone for developing interoception, the sense of the internal state of the body, which is crucial for emotional regulation.
This technique teaches children to tune into their physical stress signals, such as a tight jaw or clenched fists, and consciously release that tension. It fosters a deeper mind-body connection, helping kids understand how their emotions manifest physically. Its quiet, introspective nature makes it an excellent calming tool for individuals or groups.
How to Implement a Body Scan Meditation
The core instruction is to have a child lie down comfortably with their eyes closed or with a soft gaze. Guide them to bring their attention to their toes, then slowly move their focus up through their feet, legs, belly, arms, and all the way to the top of their head, noticing sensations in each part without needing to change anything.
For Younger Kids (K-2): Use tangible and playful language. Ask them to imagine a warm, sleepy flashlight shining on each body part, or pretend to be a melting snowman, slowly softening each part of their body from their toes to their head. Keep sessions short, around 3-5 minutes.
For Older Kids (3-8): Introduce more nuanced concepts. Encourage them to notice the difference between tension and relaxation by first tensing a muscle group (like squeezing their hands into fists) and then releasing it completely. This “tense and release” method provides clear physical feedback.
Practical Classroom and Home Examples
A Body Scan can be used as a transition activity to help children settle their bodies and minds.
Classroom Scenario: A middle school teacher plays a 5-minute guided body scan recording for their students during the last few minutes of class. This provides a structured moment of calm before the bell rings, helping students decompress from academic pressure before transitioning to their next period or home.
Home Scenario: A parent guides their energetic 7-year-old through a short body scan before bedtime. Lying in bed, the parent softly says, “Notice your feet. Are they warm or cool? Now let’s say goodnight to your knees.” This routine helps the child wind down, release physical energy, and prepare for restful sleep.
Practicing this meditation helps children build body awareness, a key component of self-awareness. To explore this further, check out these powerful emotional intelligence activities for kids.
3. Mindful Walking
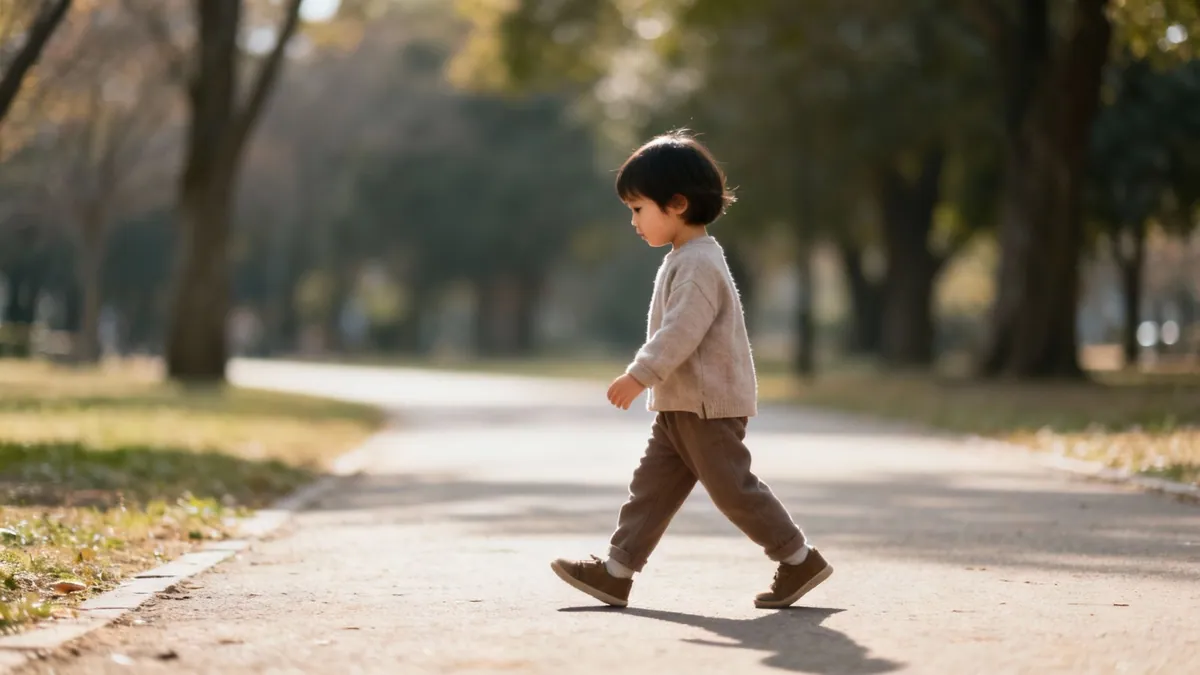
Mindful Walking is a dynamic meditation that bridges the gap between movement and awareness, making it one of the most accessible mindfulness activities for kids, especially for kinesthetic learners. This practice involves walking slowly and deliberately while paying close attention to sensory experiences: the feeling of feet on the ground, the sounds in the environment, and the sights along the path. It transforms a simple, everyday action into a powerful tool for grounding and presence.
This technique is highly effective for children who struggle with the stillness of traditional meditation. By engaging the body, it provides a physical anchor for the mind, helping to channel restless energy into focused attention and self-awareness.
How to Implement Mindful Walking
The goal is to shift focus from the destination to the journey of each step. Guide children to walk at a slower-than-usual pace, encouraging them to notice the sensations of lifting one foot, moving it through the air, and placing it back down on the ground.
For Younger Kids (K-2): Turn it into a game of observation. Ask them to be “Nature Detectives” or “Sound Spies,” walking as quietly as possible to notice things they might usually miss. Use prompts like, “Let’s walk like we’re sneaking up on a butterfly.”
For Older Kids (3-8): Introduce more structured sensory awareness. Create a “Sensory Scavenger Hunt” where they must find five different things they can see, four sounds they can hear, three textures they can feel, and two scents they can smell during their walk.
Practical Classroom and Home Examples
Mindful Walking can be used as a transition activity, a brain break, or a way to reconnect with the environment.
Classroom Scenario: A PE teacher begins class with a “Snail’s Pace Lap” around the gym or field. Students are instructed to walk as slowly as possible for two minutes, focusing only on the feeling of their shoes touching the floor. This serves as a calming warmup that brings the group’s energy together before more active games.
Home Scenario: A parent notices their child is feeling agitated after a long day of screen time. They initiate a five-minute “Awareness Walk” around the backyard. The parent prompts, “What do you notice with each step? Can you feel the grass under your shoes? What’s the farthest sound you can hear?” This short, active reset helps the child decompress and reconnect with their physical surroundings.
Practicing Mindful Walking helps children develop a greater appreciation for their environment and teaches them that mindfulness can be incorporated into any activity, not just sitting still.
4. Loving-Kindness Meditation (Metta)
Loving-Kindness Meditation, also known as Metta, is a heartfelt practice where children silently repeat phrases of goodwill and compassion. This powerful mindfulness activity intentionally directs kind thoughts toward oneself and then gradually outward to others, including loved ones, neutral people, and even those with whom they have difficulty. It directly cultivates empathy, quiets negative self-talk, and builds the neurological pathways for kindness and connection.
This practice is particularly effective for fostering a sense of belonging and reducing bullying behaviors. It shifts a child’s internal focus from judgment to compassion, providing a framework for understanding that everyone, including themselves, desires happiness and safety. Its structured nature makes it an accessible tool for nurturing social-emotional intelligence.
How to Implement Loving-Kindness Meditation
The core of the practice is guiding children to repeat simple, positive phrases. A common starting point is having them place a hand on their heart to create a physical connection to the feelings of warmth and kindness they are generating.
For Younger Kids (K-2): Use very simple, concrete phrases. Guide them to think of someone they love and silently wish them well: “May you be happy. May you be safe. May you be healthy.” Create a “kindness circle” where children imagine sending these kind thoughts out to their friends and family.
For Older Kids (3-8): Introduce a more structured sequence. Start with self-compassion, which is often the most challenging step. Then, extend the phrases to a loved one, a neutral person (like a school custodian), a difficult person, and finally to all living beings. The phrases can be adapted, such as: “May I be peaceful. May I be strong.”
Practical Classroom and Home Examples
Loving-Kindness Meditation can be a cornerstone for building a positive and inclusive community culture.
Classroom Scenario: After a conflict on the playground, a fourth-grade teacher uses Metta as a restorative practice. She guides the students to send kind thoughts first to themselves (“May I be calm”), then to a friend (“May you be happy”), and finally, when they are ready, to the person they disagreed with (“May you be peaceful”). This helps de-escalate lingering resentment.
Home Scenario: A parent incorporates a brief loving-kindness practice into their child’s bedtime routine. They sit together and silently send kind wishes to family members and friends. This ends the day on a positive, connected note and helps ease worries or anxieties about school relationships.
By regularly practicing Metta, children develop a “kindness muscle” that strengthens their capacity for empathy and forgiveness. To discover more strategies for nurturing this essential skill, explore these insights on how to teach empathy to students.
5. Five Senses Grounding (5-4-3-2-1 Technique)
The Five Senses Grounding technique, often called the 5-4-3-2-1 method, is a powerful mindfulness activity for kids that pulls their attention out of overwhelming thoughts and anchors them firmly in the present moment. This sensory-based exercise interrupts anxiety or worry spirals by systematically engaging each of the five senses to notice the immediate environment. It is a concrete, interactive tool that requires no materials and can be done anywhere.
This technique is especially effective for emotional dysregulation because it shifts focus from internal distress to external, neutral observations. By asking the brain to perform a specific, sequential task (find 5 things you see, 4 you can touch, etc.), it redirects cognitive resources away from the source of stress, providing immediate relief and a sense of control.
How to Implement Five Senses Grounding
The process is a simple countdown that guides a child through their senses. Verbally prompt them to silently or aloud identify:
5 things they can see.
4 things they can feel or touch.
3 things they can hear.
2 things they can smell.
1 thing they can taste.
For Younger Kids (K-2): Turn it into a game like “I Spy” or “Sensory Detective.” You can say, “Let’s use our detective eyes! Can you spot five blue things?” Simplify the prompts and offer gentle guidance if they get stuck.
For Older Kids (3-8): Encourage them to be specific and detailed. Instead of just “a chair,” they might notice “the smooth, cool metal of the chair leg.” Create a small, laminated card with the 5-4-3-2-1 prompts that they can keep in their desk or pocket as a discreet tool.
Practical Classroom and Home Examples
The 5-4-3-2-1 method is a versatile tool for managing moments of high stress.
Classroom Scenario: A school counselor is working with a fourth-grader who experiences panic before presentations. The counselor teaches the student the 5-4-3-2-1 technique to use while waiting for their turn. The student focuses on seeing the posters on the wall, feeling the texture of their jeans, hearing the hum of the projector, smelling their pencil, and tasting the mint they were given. This sensory input grounds them, reducing their anxiety.
Home Scenario: A parent notices their child becoming agitated and overwhelmed after a frustrating homework session. The parent gently says, “Let’s take a break and use our senses.” They guide the child through the 5-4-3-2-1 steps, bringing immediate awareness to the present and breaking the cycle of frustration before it escalates.
Teaching this technique during calm moments first allows children to practice and internalize the steps, making it easier to recall and use effectively when they feel overwhelmed.
6. Mindful Eating
Mindful Eating is a powerful practice that transforms a routine activity, like snack or mealtime, into an opportunity for deep, sensory awareness. It involves slowing down to engage all five senses: noticing the food’s colors and textures, inhaling its aroma, hearing its sounds, and savoring each flavor. This simple shift from automatic to intentional eating helps children develop present-moment focus, fosters a healthier relationship with food, and teaches gratitude.
This technique, often introduced with Jon Kabat-Zinn’s classic “raisin exercise,” is incredibly effective because it uses a familiar, tangible object. It teaches kids to appreciate their food and the journey it took to reach them, anchoring mindfulness in an everyday experience.
How to Implement Mindful Eating
The goal is to guide children through a sensory exploration of their food before and during consumption. Create a calm, distraction-free environment and encourage them to slow down and notice every detail of the experience.
For Younger Kids (K-2): Use simple, appealing foods like a single strawberry or a slice of orange. Guide them with questions like, “What does it look like? Is it bumpy or smooth? What does it smell like? What sound does it make when you bite it?”
For Older Kids (3-8): Introduce the concept of gratitude. Before eating, prompt them to think about where the food came from: the farmer, the sun, the rain. Have them write down or share one thing they notice about the taste or texture that they’ve never noticed before.
Practical Classroom and Home Examples
Mindful Eating can be easily incorporated into scheduled meal times to create moments of calm and connection.
Classroom Scenario: A first-grade teacher starts each day’s snack time with a “Mindful Minute.” Before the students eat their crackers, she asks them to hold one, look at its shape, feel its texture, and then take one slow bite, listening for the crunch. This brief ritual helps settle the class and fosters a calm transition.
Home Scenario: A family decides to have a “no-screens” dinner one night a week. The parent leads a short mindful eating exercise with a piece of broccoli, asking everyone to describe its taste and feel. This simple practice opens up conversations about food and encourages everyone to slow down and savor their meal together.
By practicing mindful eating, children learn to pay attention on purpose, improve self-regulation, and cultivate a deeper sense of appreciation for the simple things in life.
7. Guided Visualization/Imagery
Guided Visualization, also known as guided imagery, is a mindfulness activity that uses the power of imagination to transport a child to a calm and peaceful mental state. It involves listening to a descriptive narrative that helps them create a detailed, positive scene in their mind, such as a tranquil forest, a warm beach, or a personal “safe space.” This practice engages the senses and activates the parasympathetic nervous system, effectively reducing anxiety and stress hormones.
This technique is especially potent for visual learners, as it provides a rich, internal world they can access for comfort and self-soothing. By creating these mental sanctuaries, children learn they possess a powerful tool within their own minds to manage overwhelming feelings, accessible anytime and anywhere.
How to Implement Guided Visualization
The goal is to guide the child using calm, descriptive language that appeals to multiple senses. You can use pre-recorded scripts from apps like Calm or Headspace, read from a book, or create your own based on the child’s interests. Start by having the child get into a comfortable position, either sitting or lying down, and inviting them to close their eyes if they wish.
For Younger Kids (K-2): Keep visualizations short, simple, and magical. Guide them to imagine they are a fluffy cloud floating gently across a blue sky, or a tiny ladybug exploring a soft, green leaf. Use very concrete sensory details, like “feel the warm sun on your back” or “smell the sweet flowers.”
For Older Kids (3-8): Introduce more complex and empowering narratives. Guide them through building their own private treehouse or a secret garden. You can also use visualization to prepare for challenges, like imagining themselves successfully giving a presentation or scoring a goal in a soccer game.
Practical Classroom and Home Examples
Guided Visualization is a versatile tool for transitions, test preparation, and emotional regulation.
Classroom Scenario: A fourth-grade teacher plays a five-minute guided imagery audio track of a “walk through a peaceful forest” after lunch. Students listen with their heads on their desks. This quiet time helps them reset their energy, reduces post-recess chatter, and prepares their minds for an afternoon of focused learning.
Home Scenario: A parent helps their 8-year-old who is afraid of the dark. Each night, they do a “special star” visualization. The parent guides the child to imagine a warm, glowing star in their belly that fills their whole body with protective light, making them feel safe and brave as they fall asleep.
Practicing these mental journeys regularly helps children build a library of calming images they can call upon independently when they need to find their inner peace.
8. Mindful Coloring/Art
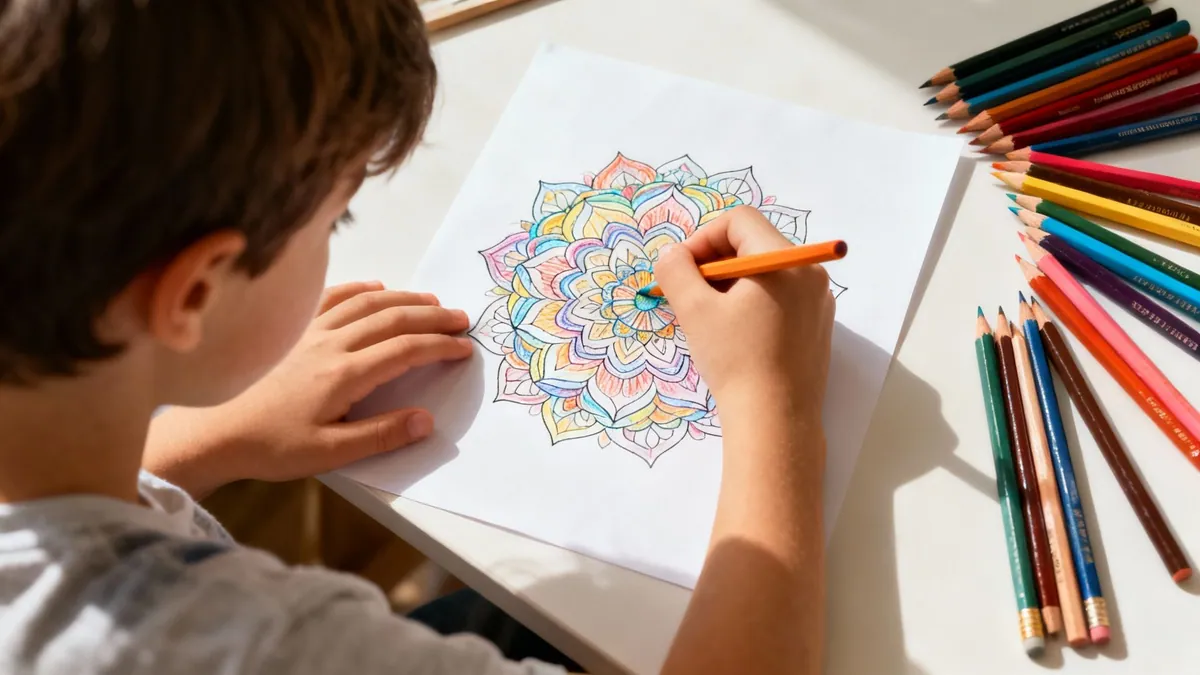
Mindful Coloring/Art is a creative practice that combines artistic expression with present-moment awareness. Instead of focusing on creating a perfect masterpiece, children engage in coloring, drawing, or painting while paying close attention to the sensory experience: the feel of the crayon on paper, the vibrant colors flowing from a marker, and the gentle movements of their hand. This approach makes mindfulness accessible to kids who may find traditional seated meditation challenging.
This activity helps children anchor their attention in a gentle, engaging way, calming a busy mind and reducing feelings of stress or anxiety. It beautifully shifts the focus from the final product to the process itself, encouraging non-judgment and self-acceptance.
How to Implement Mindful Coloring/Art
The goal is to guide a child’s awareness to the physical and sensory aspects of creating art. Frame the activity with the idea that there is “no wrong way” to do it. Encourage them to move slowly and intentionally, noticing what they see, feel, and hear.
For Younger Kids (K-2): Use simple, large designs like mandalas or nature scenes. Prompt them with sensory questions like, “What does the blue feel like? Is it calm like the ocean or bright like the sky?” and “Listen to the sound the marker makes on the paper.”
For Older Kids (3-8): Introduce more complex patterns or free-drawing prompts. Ask them to “draw their feelings” using colors and shapes that represent their current emotional state. Encourage them to notice how their body feels as they create, such as the tension in their hand or the rhythm of their breathing.
Practical Classroom and Home Examples
Mindful Coloring can be used as a calming transition, a brain break, or a quiet-time activity.
Classroom Scenario: A fourth-grade teacher provides mandala coloring pages as a “soft start” to the day. As students enter, they can choose a page and color quietly while soft instrumental music plays. The teacher circulates, asking gentle questions like, “What colors are you choosing today?” This sets a calm, focused tone for learning.
Home Scenario: A 7-year-old is feeling frustrated and overwhelmed after a difficult day at school. Their parent sets up a “mindful art station” with paper and watercolors, inviting the child to simply play with the colors on the page. The parent says, “Let’s just watch how the red and yellow mix together.” This provides a non-verbal outlet for difficult emotions.
By emphasizing the process over the outcome, this activity teaches children that their effort and presence are what truly matter, making it one of the most effective mindfulness activities for kids who express themselves visually.
9. Mindful Movement/Yoga
Mindful Movement, often expressed through kid-friendly yoga, is a dynamic mindfulness activity that combines physical postures, focused breathing, and present-moment awareness. It encourages children to connect with their bodies by moving through gentle poses while noticing physical sensations. This practice is exceptionally beneficial for kinesthetic learners, as it provides a physical outlet to release stored tension, improve body awareness, and calm the nervous system.
How to Implement Conflict Resolution
Begin by establishing a dedicated “Peace Corner” or “Conflict Resolution Zone” in the classroom. This area can be equipped with visual aids outlining the steps for resolving a problem, such as using “I-Feel” statements, listening without interrupting, and brainstorming solutions. Introduce these steps through role-playing common classroom scenarios, like arguments over toys or disagreements during a group project. For a more structured approach, older students can be trained as peer mediators to help younger students resolve conflicts during recess.
Practical Example:
Two third-grade students are arguing over a single red marker they both want for an art project. Instead of solving it for them, their teacher directs them to the classroom’s Peace Corner. Following the posted steps, the first student says, “I feel frustrated because I need the red marker for my drawing.” The second student listens and responds, “I hear you’re frustrated. I feel upset because I need it for my drawing, too.” They agree to take turns, using the marker for five minutes each, resolving the conflict independently and respectfully.
Tips for Success
Start Simple: Teach foundational skills like “I-Feel” statements to students in grades K-2 before introducing more complex mediation steps.
Use Real Scenarios: Role-play conflicts that genuinely occur in your classroom or on the playground to make the practice relevant and meaningful.
Practice Consistently: Regular practice helps students internalize the steps so they can recall them automatically during a real, emotionally charged conflict.
Establish Clear Boundaries: Define which problems students can solve themselves and which require adult help, ensuring safety and appropriate support.
By teaching these essential life skills, you equip students to build healthier relationships and contribute to a more positive community. For a deeper look into the language of resolving disputes, you can explore the use of “I-Feel” statements for kids and how they transform disagreements.
5. Gratitude and Appreciation Practices
Gratitude practices are powerful social emotional learning activities for elementary students that shift their focus toward appreciating the positive aspects of their lives. By regularly identifying and expressing thankfulness, children develop a more optimistic outlook, build resilience against setbacks, and strengthen their connections with others. This intentional focus on appreciation helps counter negativity and fosters a sense of contentment and well-being.
These activities directly support the SEL competencies of social awareness (recognizing the contributions of others) and relationship skills (communicating appreciation to build positive connections). The goal is to cultivate a habit of noticing the good, which can profoundly impact a child’s mental health and social interactions.
How to Implement Gratitude and Appreciation
Integrate gratitude into existing routines to make it a natural part of the day. A “Gratitude Circle” during a morning meeting allows students to share one small thing they are thankful for, setting a positive tone for learning. Another effective tool is a “Gratitude Journal,” where students can write or draw something they appreciate each day, creating a personal log of positivity to look back on.
Practical Example:
A third-grade teacher starts an “Appreciation Mail” system. Each Friday, students have a few minutes to write a short, specific note of appreciation to a classmate, teacher, or staff member and “mail” it in a decorated classroom mailbox. The teacher reads a few aloud (with permission), and then delivers the notes. This activity not only highlights kindness but also gives every student a chance to feel seen and valued by their peers.
Tips for Success
Model Authenticity: Share your own specific gratitudes with the class. For example, say, “I’m grateful for how quietly everyone came in this morning; it helped us get started right away.”
Encourage Specificity: Guide students beyond generic answers like “my family.” Prompt them with questions like, “What is something specific your brother did that you are grateful for?”
Offer Multiple Formats: Allow students to express gratitude by writing, drawing, speaking, or even creating a short video. This accommodates different learning styles and comfort levels.
Connect to Community: Create a whole-class “Thankfulness Tree” or an “Appreciation Board” where notes can be posted publicly, fostering a school-wide culture of recognition.
By consistently making space for gratitude, you help students develop a lasting habit of recognizing and appreciating the people and moments that make life meaningful. For more ways to foster a positive classroom climate, explore resources like those available on the Greater Good Science Center’s education page.
6. Social Stories and Perspective-Taking Activities
Social stories and perspective-taking activities are powerful social emotional learning activities for elementary students that use structured narratives to build empathy and social understanding. By stepping into someone else’s shoes through stories, role-playing, or discussions, children learn to recognize different viewpoints, motivations, and emotional experiences. This process helps them understand how their words and actions impact others, laying the groundwork for more compassionate and inclusive interactions.
These activities are essential for developing the core SEL competencies of social awareness (understanding the perspectives of others and empathizing with them) and relationship skills (communicating effectively and building positive connections). The goal is to move students beyond their own immediate experience and cultivate a genuine curiosity and respect for the diverse world around them.
How to Implement Social Stories and Perspective-Taking
Integrate perspective-taking into your existing literacy or morning meeting routines. Start by reading a book with a clear emotional conflict, like The Hundred Dresses by Eleanor Estes, and pause to ask questions that encourage students to consider different characters’ feelings. For example, “How do you think Wanda felt when Peggy teased her? What might Maddie have been thinking when she stood by and said nothing?”
From there, you can move into role-playing scenarios. Use situations that are common in a school setting, like a disagreement over a game at recess or someone feeling left out at the lunch table. Assign roles and have students act out the scenario, then discuss how each character felt and what could have been done differently.
Practical Example:
During a class meeting, a fourth-grade teacher addresses a recurring issue of students saving seats in the cafeteria. She divides the class into small groups and gives them a scenario: “A new student wants to sit at a table, but the other kids say, ‘You can’t sit here, we’re saving these spots for our friends.’ How does the new student feel? How do the other kids feel?” The groups discuss and then share their ideas, leading to a class-wide conversation about creating a more welcoming lunchroom.
Tips for Success
Use Diverse Literature: Select books and stories that feature characters from a wide range of backgrounds, cultures, and abilities to broaden students’ understanding.
Ask Probing Questions: Go beyond simple comprehension. Ask “why” questions like, “Why do you think the character made that choice?” or “What might have happened before this story started to make them feel that way?”
Connect to Real Life: Help students see the connection between the characters’ experiences and their own lives. Ask if they have ever felt a similar way or witnessed a similar situation.
Model Empathy: When discussing characters, model empathetic language yourself. Say things like, “It sounds like that must have been really hard for him,” to guide students’ responses.
By regularly engaging in these activities, you help students build the critical muscle of empathy, transforming your classroom into a more understanding and supportive community.
7. Self-Regulation and Coping Strategy Toolkits
Creating self-regulation and coping strategy toolkits is one of the most powerful social emotional learning activities for elementary students. It moves beyond simply identifying feelings to actively building a personalized plan for managing them. By teaching students to recognize their emotional triggers and the physiological signs of dysregulation, you empower them to proactively choose a strategy that helps them return to a calm, focused state.
This approach directly targets the core SEL competencies of self-awareness (recognizing internal signals) and self-management (deploying a specific coping tool). The goal is to equip every child with a menu of effective, accessible strategies they can use independently when emotions feel overwhelming, fostering resilience and a sense of agency over their well-being.
How to Implement Coping Strategy Toolkits
Begin by explicitly teaching a variety of strategies, explaining which emotions they might help with. Create a visual “Coping Menu” or use a framework like the Zones of Regulation to connect feelings to specific actions. A physical toolkit can be a small box with sensory items, while a classroom “peace corner” offers a designated space for students to use these tools without stigma.
Practical Example:
A third-grade teacher helps a student who gets frustrated during math create a personal toolkit. Inside a pencil box, they place a small piece of bubble wrap to pop, a smooth stone to rub, and a card with three deep-breathing steps. When the student feels frustration rising, they know they can quietly take out their toolkit at their desk and use one of the items to reset before asking for help.
Tips for Success
Practice Proactively: Introduce and practice coping strategies when students are calm, not just in the middle of a difficult moment. This builds muscle memory.
Offer Diverse Options: Include strategies that involve movement (wall pushes), sensory input (fidgets, weighted lap pads), and quiet reflection (drawing, listening to music).
Personalize the Toolkit: Help students identify what truly works for them. What is calming for one child might be overstimulating for another.
Involve Families: Share a list of the strategies being taught at school and encourage families to identify and practice them at home for consistent support. You can explore parent resources from Soul Shoppe for ideas on home implementation.
By normalizing the need for self-regulation tools, you create a supportive environment where students see managing emotions as a skillful and healthy part of life.
8. Morning Meeting and Class Circles
Morning Meeting is a structured daily gathering where students and teachers come together in a circle to start the day. This powerful ritual establishes a predictable and safe routine that intentionally builds classroom community, strengthens relationships, and provides a dedicated time for practicing key social skills. By creating this space for greeting, sharing, and engaging in a group activity, you set a positive tone for learning and reinforce a sense of belonging for every child.
These daily circles are a cornerstone of social emotional learning activities for elementary students because they directly target multiple SEL competencies. They foster social awareness (listening to peers’ perspectives), relationship skills (practicing respectful communication), and responsible decision-making (collaboratively solving class problems). It becomes a living laboratory for the social skills taught in other lessons.
How to Implement Morning Meeting and Class Circles
A typical Morning Meeting, popularized by the Responsive Classroom approach, includes four components: greeting, sharing, group activity, and a morning message. The greeting involves students acknowledging each other by name. Sharing allows students to talk about important events in their lives, while others practice active listening. The group activity is a short, fun game or song that promotes group cohesion, and the message previews the day’s learning goals.
Practical Example:
A third-grade teacher begins her Morning Meeting to address a recurring issue of students feeling left out at recess. During the sharing portion, she poses a prompt: “Think about a time you invited someone new to play. How did it feel?” After a few students share, she uses the morning message to announce they will be creating a class “Inclusion Agreement” together, turning a problem into a collaborative, community-building lesson.
Tips for Success
Establish Clear Norms: Co-create rules for the circle, such as “One person speaks at a time,” “Listen with your whole body,” and “It’s okay to pass.”
Start Small: Keep initial meetings short, around 10-15 minutes, especially for younger students in kindergarten and first grade.
Rotate Leadership: Empower students by allowing them to take turns leading different parts of the meeting, such as the greeting or group activity.
Protect the Time: Treat Morning Meeting as essential instructional time, not something to be skipped when you are busy. Consistency is what builds trust and safety.
By making this a non-negotiable part of your daily schedule, you show students that their voices matter and their relationships are a priority. For a deeper look into fostering this environment, explore these tips on how to build classroom community with Soul Shoppe.
9. Empathy and Kindness Challenges
Empathy and Kindness Challenges are structured campaigns designed to make thoughtful behavior a conscious and celebrated part of school culture. By prompting students to perform deliberate acts of kindness, these activities move empathy from an abstract concept to a tangible action. These challenges build positive momentum, demonstrating how small, individual choices can collectively create a more supportive and inclusive environment for everyone.
These social emotional learning activities for elementary students directly target social awareness (understanding and empathizing with others’ feelings) and relationship skills (building positive connections through prosocial behavior). The goal is to help children recognize the power they have to impact their peers and community positively.
How to Implement Empathy and Kindness Challenges
Launch a school-wide or classroom-specific challenge with a clear theme and duration. For example, a “Kindness is Our Superpower” week could feature daily prompts. Monday’s challenge might be to give a genuine compliment, while Tuesday’s could be to invite someone new to play during recess. The key is making the actions specific and achievable for young students.
Practical Example:
A third-grade classroom creates a “Compliment Chain.” When a student observes or receives a particularly kind act, they write it on a strip of colored paper. The teacher helps them add it as a new link to a paper chain hanging across the classroom. By the end of the month, the chain visually represents the class’s collective kindness, and the teacher reads some of the links aloud to celebrate their progress.
Tips for Success
Be Specific: Vague instructions like “be kind” are less effective than “hold the door open for someone” or “ask a classmate about their weekend.”
Celebrate the Process: Acknowledge effort and intention, not just grand gestures. Create a “Kindness Corner” where students can post notes about kind acts they’ve witnessed.
Connect to Empathy: After an act of kindness, facilitate a brief discussion. Ask questions like, “How do you think it made that person feel when you shared your crayons?”
Involve Families: Send home a note about the challenge and encourage families to participate by noticing and celebrating kindness at home.
These challenges transform the school environment by making kindness and empathy active, shared values. To see how these concepts are integrated into large-scale bullying prevention, you can learn about Soul Shoppe’s successful partnerships, like the one with the Junior Giants to help kids Strike Out Bullying.
10. Family and Community Engagement in SEL
Social emotional learning activities for elementary students are most effective when they extend beyond the school walls. Family and community engagement bridges the gap between classroom instruction and a child’s home life, creating a consistent and supportive ecosystem. By intentionally involving parents, caregivers, and community partners, schools can amplify SEL skills, ensuring children hear and practice the same positive language and strategies in every part of their lives.
This approach strengthens all five core SEL competencies by creating a shared understanding and commitment to social awareness, relationship skills, and responsible decision-making across different environments. When families and schools partner, children see that these skills are valued everywhere, not just in the classroom.
How to Implement Family and Community Engagement
Begin by providing accessible resources and opportunities for connection. Offer parent workshops at various times (in-person and virtual) to accommodate different schedules. Distribute take-home SEL activity packets or newsletters that align with classroom lessons, giving families simple, actionable ways to practice skills like empathy or conflict resolution at home. Partnering with community organizations for events can also broaden your reach and impact.
Practical Example:
A school hosts a “Peaceful Families Night” facilitated by a community partner. Families participate in interactive stations, learning a simple “I-statement” formula for expressing feelings. They are sent home with a magnet summarizing the technique. The following week, a parent shares that her son used an “I-statement” to resolve a disagreement over a toy, a direct result of the shared learning experience.
Tips for Success
Provide Multilingual Resources: Ensure materials are translated to reflect the languages spoken by your school community, making content accessible to all families.
Connect to Parent Priorities: Frame SEL as a tool to help with common challenges like managing homework stress or building cooperation. To extend the spirit of cooperation from the classroom to the home, learning how to creating a family chore chart that fosters teamwork can effectively foster teamwork and shared responsibility among family members.
Start Simple: Introduce one easy-to-use strategy at a time, such as a “calm-down corner” at home or a single feeling word to focus on for the week.
Create a Welcoming Environment: Foster a school culture where families feel valued, respected, and seen as true partners in their child’s education. Gather feedback regularly to ensure programming meets their needs.
10 Elementary SEL Activities Comparison
Program
Implementation complexity
Resource requirements
Expected outcomes
Ideal use cases
Key advantages
Mindfulness and Breathing Exercises
Low — short scripted practices; needs consistency
Minimal — time, quiet space; no special equipment
Faster calming, improved attention and emotion regulation
Creates positive norms, engages students, visible cultural shift
Family and Community Engagement in SEL
High — coordination, outreach, cultural adaptation
Moderate–High — workshops, multilingual materials, staff time
Greater consistency across contexts; stronger family-school partnerships
Family workshops, take-home activities, community partnerships
Extends SEL to home, builds trust, leverages community resources
Putting it All Together: Building a Culture of Connection and Empathy
We have explored a wide range of powerful and practical social emotional learning activities for elementary students, from the quiet introspection of mindful breathing to the dynamic collaboration of cooperative games. Each activity, whether it’s a quick Feelings Check-In or a structured Peer Mediation session, serves as a single thread. When woven together consistently, these threads create a strong, resilient, and supportive classroom tapestry. The goal is not to treat SEL as another box to check, but to embed it into the very heart of the school day.
The true power of these activities is unlocked through intentional and consistent application. A one-time empathy challenge is a great start, but a weekly practice builds a lasting habit of kindness. A coping strategies toolkit is most effective when students are regularly encouraged to use it, not just during moments of crisis, but as a proactive self-management tool. The journey from learning about emotions to living with emotional intelligence is a marathon, not a sprint, built upon these small, repeated practices.
From Activities to a Thriving Classroom Culture
Integrating these diverse activities creates a powerful synergy that transforms the learning environment. Imagine a classroom where a Morning Meeting sets a positive and inclusive tone, a Gratitude Jar visibly tracks the community’s appreciation, and a student-led conflict resolution corner empowers children to solve their own disagreements respectfully. This is the tangible result of a commitment to SEL.
This cultural shift doesn’t happen by accident. It is the direct outcome of educators and caregivers who model these skills and create predictable routines where students feel safe to be vulnerable, make mistakes, and grow. When students have a shared vocabulary for their feelings and a toolbox of strategies for managing them, you’ll see a decrease in disruptive behaviors and an increase in on-task learning, engagement, and peer support.
Your Actionable Next Steps for SEL Implementation
Moving from inspiration to action is the most critical step. Instead of feeling overwhelmed by the number of options, commit to a small, sustainable start.
Choose Your Starting Point: Select one or two activities from this list that resonate most with your students’ needs and your own teaching style. Perhaps it’s starting each day with a “Rose, Bud, Thorn” check-in or introducing a weekly cooperative game.
Schedule It In: Consistency is key. Formally schedule your chosen SEL activities into your weekly lesson plans. This ensures they don’t get pushed aside when things get busy. Even five dedicated minutes a day can have a profound impact over time.
Involve Your Community: Share these ideas with colleagues, administrators, and families. When students see and hear consistent SEL language and practices at school and at home, the learning is reinforced exponentially. Consider sending home a “Kindness Challenge” or a list of conversation starters about feelings.
By embracing these social emotional learning activities for elementary students, you are doing more than just managing a classroom; you are nurturing a generation of compassionate leaders, resilient problem-solvers, and empathetic global citizens. The investment you make in their emotional well-being today will pay dividends for the rest of their lives, equipping them with the essential skills to navigate an increasingly complex world with confidence, kindness, and a strong sense of self.
Ready to take your school’s commitment to SEL to the next level? Soul Shoppe provides comprehensive, research-based programs that create safer, more compassionate school communities by empowering students, staff, and families. Discover how their dynamic assemblies and in-depth curriculum can help you build a sustainable culture of empathy and connection at Soul Shoppe.
In today’s dynamic elementary classrooms, academic skills are only half the story. The ability to understand emotions, build relationships, and make responsible decisions forms the bedrock of a successful learner and a compassionate human being. This is the core of social-emotional learning (SEL), a framework that equips students with the essential tools to navigate their inner worlds and the world around them. For educators seeking a child-centered philosophy that deeply aligns with holistic child development and SEL, exploring foundational approaches like the Reggio Emilia approach to education can provide a powerful, inquiry-based framework for these practices.
For teachers, counselors, and parents, the primary challenge isn’t just knowing that SEL is important-it’s finding practical, engaging ways to integrate it into daily routines. This guide moves beyond abstract theory to offer a comprehensive roundup of field-tested social emotional learning activities elementary students can immediately benefit from. We provide step-by-step instructions, grade-specific adaptations from Kindergarten through 5th grade, and real-world examples to help you cultivate a thriving, emotionally intelligent community.
Inside this resource, you will discover a curated list of activities designed to build key competencies, including:
Self-Awareness: Identifying and understanding emotions.
Self-Management: Developing coping strategies and resilience.
Social Awareness: Cultivating empathy and perspective-taking.
Relationship Skills: Fostering collaboration and effective communication.
Responsible Decision-Making: Encouraging thoughtful and ethical choices.
Whether you’re looking to start an emotion check-in circle, introduce mindfulness exercises, or implement peer conflict resolution, this article serves as your practical playbook. These activities will help you foster connection, safety, and resilience in the children you support, building a foundation for lifelong well-being and academic success.
1. Emotion Check-In Circle
The Emotion Check-In Circle is a foundational routine where students gather to identify and share their current feelings in a safe, structured setting. This simple yet powerful practice serves as a daily emotional barometer for the classroom, helping students build self-awareness and empathy from the very start of their day. By creating a predictable space to name emotions, teachers normalize the full spectrum of feelings, from excitement to disappointment, fostering a culture of psychological safety.
This activity is more than just a morning greeting; it is a core component of many effective social emotional learning activities for elementary students. It provides valuable insight into who might need extra support and helps children connect their internal state to their readiness to learn.
How to Implement an Emotion Check-In Circle
Materials Needed: Emotion wheel, feeling cards, or a simple chart paper with different feeling words/faces. For a more structured approach, consider the Mood Meter framework popularized by Marc Brackett at the Yale Center for Emotional Intelligence.
Time: 5-10 minutes daily.
CASEL Competency: Self-Awareness, Social Awareness.
Step-by-Step Instructions:
Gather Students: Arrange students in a circle on the rug or at their desks.
Model First: The teacher starts by sharing their own feeling. For example, “Good morning, everyone. Today, I am feeling calm because I had a relaxing weekend and drank my favorite tea this morning.”
Provide a Framework: Students share their feeling using a sentence stem, like “Today I feel ____ because ____.”
Practical Example (Kindergarten): A student points to a happy face card and says, “Today I feel happy because it’s my turn to be the line leader.”
Practical Example (3rd Grade): A student shares, “Today I feel a little nervous because we have a math test, but I also feel hopeful because I studied.”
Listen and Acknowledge: The group listens without judgment. The goal is to acknowledge, not to fix. A simple “Thank you for sharing” is often enough.
Offer Alternatives: Always include a “pass” option. Students who are not ready to share can say “pass” without penalty.
Key Insight: Consistency is crucial. When the Emotion Check-In Circle becomes a non-negotiable part of the daily routine, students learn to trust the process and become more willing to share honestly over time. It transforms the classroom into a community where every emotional state is valid and heard.
2. Mindfulness and Breathing Exercises
Mindfulness and Breathing Exercises are brief, guided practices that teach students to focus their attention on the present moment. Through simple breathing techniques, body scans, or visualizations, these evidence-based exercises help reduce stress, improve focus, and build crucial self-regulation skills. They provide students with concrete, accessible tools to use independently when feeling overwhelmed, anxious, or dysregulated, making them a cornerstone of effective social emotional learning activities for elementary students.
These practices are not about emptying the mind but about anchoring it. For young learners, this can be as simple as a two-minute “belly breathing” break between subjects or using an app like Calm or Headspace Kids for a guided meditation. This builds a foundation for managing big emotions and enhances their ability to engage in learning.
How to Implement Mindfulness and Breathing Exercises
Materials Needed: A quiet space, optional items like a chime or bell, cushions, or guided meditation audio from an app or website.
Create a Signal: Use a consistent sound, like a chime, a soft bell, or a specific song, to signal that it is time for a mindfulness break.
Guide the Breathing: Start with a simple, tangible technique.
Practical Example (“Take 5 Breathing”): “Hold up one hand like a star. Use the pointer finger of your other hand to trace it. Breathe in as you trace up your thumb, and breathe out as you trace down. Inhale up your pointer finger, exhale down. Continue for all five fingers.”
Practical Example (“Belly Breathing”): “Place one hand on your tummy. Imagine a small balloon inside. As you breathe in through your nose, feel the balloon fill up with air. As you breathe out through your mouth, feel the balloon slowly deflate.”
Offer Options: Provide choices to accommodate different needs. Students can sit at their desks, lie on the rug, or stand. Offer “eyes open” options for students who may find closing their eyes uncomfortable, suggesting they find a single spot to focus on.
Keep it Brief: Begin with very short sessions (60-90 seconds) and gradually increase the duration as students build their focus “muscles.”
Practice Proactively: Introduce and practice these skills when students are calm. This ensures they can access the tools when they are actually feeling stressed or upset.
Key Insight: The goal is not to achieve perfect stillness but to practice returning focus to the breath. Frame it as a “brain break” or “reset button.” When students learn that they have the power to calm their own bodies and minds with their breath, they gain a profound sense of agency over their emotional well-being.
3. Peer Collaboration and Cooperative Learning Projects
Peer Collaboration and Cooperative Learning Projects are structured small-group activities where students work together toward a shared goal, requiring communication, compromise, and interdependence. This approach transforms academic tasks into powerful opportunities for social and emotional growth. By intentionally designing projects that necessitate teamwork, teachers help students develop vital competencies like perspective-taking, conflict resolution, and leadership in an authentic context.
These projects are more than just group work; they are among the most effective social emotional learning activities for elementary students because they integrate SEL directly into academic content. This method builds a classroom culture where students learn to value diverse ideas, support their peers, and navigate the social complexities of achieving a common objective.
How to Implement Peer Collaboration and Cooperative Learning
Materials Needed: Varies by project. Chart paper for group norms, role cards (e.g., Time Keeper, Encourager, Reporter), and project-specific supplies like research materials or STEM building items.
Time: Can range from a single 20-minute session (e.g., Think-Pair-Share) to a multi-week project.
Form Groups Intentionally: Create small, diverse groups that balance academic abilities, social skills, and personalities. Avoid letting students always pick their own groups.
Define Clear Roles and Goals: Assign specific roles to each member and provide a clear, measurable group goal. Rotate roles regularly so every student gains experience.
Practical Example (Science Project): In a group of four building a volcano, one student is the Materials Manager (gathers supplies), one is the Builder (constructs the model), one is the Recorder (writes down the steps), and one is the Presenter (explains the project to the class).
Teach Collaboration Skills Explicitly: Before starting, model and practice skills like active listening and respectful disagreement. Use sentence stems like, “I hear you saying…, what if we tried…?”
Structure the Task: Use a proven cooperative learning structure.
Practical Example (Think-Pair-Share): The teacher poses a question (“What was the main character’s biggest challenge?”). Students think quietly for one minute, pair up with a partner to discuss their ideas, and then share their combined thoughts with the whole class.
Monitor and Coach: Circulate the room to provide support, ask guiding questions, and help groups navigate challenges.
Include Group Reflection: After the project, guide students to reflect on their process. Ask: “What went well in our teamwork?” and “What could we do differently next time?”
Key Insight: The most crucial element is teaching collaboration as a skill in itself. Celebrate the process, not just the final product. Acknowledge groups for excellent communication, problem-solving, and mutual respect, reinforcing that how they work together is just as important as what they create.
4. Social Stories and Perspective-Taking Activities
Social Stories and perspective-taking activities use narratives and role-playing to help students understand that others have different thoughts, feelings, and experiences. These exercises are fundamental for developing empathy and reducing bias by allowing children to step into someone else’s shoes in a guided, safe way. By exploring character motivations and diverse viewpoints, students build a stronger “Theory of Mind,” which is the ability to understand others’ mental states.
This method is one of the most effective social emotional learning activities for elementary students because it translates abstract concepts like empathy into concrete, relatable scenarios. Whether through a picture book or a specific social narrative, these tools give children the language and framework to navigate complex social situations.
How to Implement Social Stories and Perspective-Taking
Materials Needed: Diverse picture books (like The Feelings Book by Todd Parr or In My Heart by Jo Witek), pre-written social stories for specific situations, chart paper, markers, or role-playing props.
Time: 15-20 minutes, 1-2 times per week.
CASEL Competency: Social Awareness, Relationship Skills.
Step-by-Step Instructions:
Select a Relevant Story: Choose a picture book or social story that reflects a current classroom challenge (e.g., sharing, handling disappointment, joining a new group).
Practical Example: After noticing students arguing over playground equipment, read The Recess Queen by Alexis O’Neill.
Read and Pause: Read the story aloud, pausing at key moments to ask perspective-taking questions.
Practical Example: While reading, pause and ask, “How do you think Mean Jean felt when no one wanted to play with her? Look at her face. What clues do you see? What about Katie Sue? How did she feel when she decided to ask Jean to play?”
Facilitate Discussion: Encourage students to share their interpretations. Validate different ideas by explaining that people can feel differently about the same situation. Use sentence starters like, “I think they felt ____ because ____.”
Extend with an Activity: Follow the story with a related activity.
Practical Example: Students can draw two faces: one showing how a character felt at the beginning of the story and another showing how they felt at the end. They then explain the change to a partner.
Connect to Real Life: Link the story’s lesson back to the classroom. For instance, “Remember how Katie Sue invited Mean Jean to play? Let’s be like Katie Sue today and look for someone who might need a friend at recess.”
Key Insight: The power of this activity lies in using diverse and authentic narratives. When students see characters from varied backgrounds, abilities, and family structures, they learn that empathy extends to everyone, not just those who are like them. It builds a foundation for an inclusive and understanding community.
5. Conflict Resolution and Peer Mediation Programs
Conflict Resolution and Peer Mediation Programs are structured systems that teach students the skills to identify, communicate about, and solve interpersonal problems collaboratively. These programs shift the classroom dynamic from adult-led discipline to student-led problem-solving, empowering children to become active agents in creating a positive school climate. By training students as mediators, schools build leadership skills and reduce teacher intervention in minor disputes.
This approach is one of the most impactful social emotional learning activities elementary students can engage in because it provides real-world application of complex skills. It reframes conflict not as a failure but as a valuable opportunity for growth, empathy, and understanding. Programs like Responsive Classroom and Soul Shoppe have popularized these practices in schools nationwide.
How to Implement Conflict Resolution and Peer Mediation
Materials Needed: “I-statement” sentence frames, conflict resolution posters with clear steps, a designated “peace corner” or table for mediations, and training materials for student mediators.
Time: 15-20 minutes for mediations as needed; ongoing training and reinforcement.
Teach Core Concepts: Introduce a simple, school-wide conflict resolution process. A common model is: 1. Cool Down, 2. Talk and Listen (using I-statements), 3. Brainstorm Solutions, 4. Agree on a Plan.
Model I-Statements: Explicitly teach and practice the “I feel ___ when you ___ because ___” framework.
Practical Example: Instead of “You’re a mean cheater!”, teach a student to say, “I feel frustrated when you change the rules of the game because I thought we already agreed.”
Train Peer Mediators: Select and train a diverse group of students (not just the “best behaved”) to act as neutral third-party facilitators. Train them to guide peers through the resolution steps without giving solutions.
Establish Protocols: Define which conflicts are appropriate for peer mediation (e.g., disagreements over games, feeling left out) and which require adult help (e.g., bullying or safety concerns).
Provide a Space: Set up a specific, quiet area where mediations can happen without an audience. This makes the process feel official and safe. A small table in the corner with a “peace rose” or talking stick can work well.
Key Insight: The goal of a student mediator is not to solve the problem for their peers but to ask powerful questions that help them solve it themselves. Train mediators with questions like, “What could you do differently next time?” and “What do you need to feel better?” This builds true problem-solving capacity and agency.
6. Gratitude and Kindness Practices
Gratitude and Kindness Practices are intentional activities designed to cultivate appreciation, generosity, and positive regard for others. These powerful routines shift a classroom’s focus toward optimism and interconnectedness, helping students recognize the good in their lives and in their peers. By embedding practices like gratitude journals and kindness challenges, teachers actively build a more prosocial and supportive learning environment.
This goes beyond simply saying “thank you.” These social emotional learning activities for elementary students teach them to look for and acknowledge kindness, which in turn boosts their own happiness, strengthens relationships, and improves their overall mental well-being. This practice helps rewire the brain to notice positive experiences.
How to Implement Gratitude and Kindness Practices
Materials Needed: Journals or notebooks, chart paper, sticky notes, a “kindness jar” or box, art supplies.
Time: 5-15 minutes daily or weekly.
CASEL Competency: Relationship Skills, Social Awareness.
Step-by-Step Instructions:
Introduce the Concept: Begin with a simple discussion about what gratitude and kindness mean. Use a story or personal example to illustrate the concepts.
Establish a Routine: Choose a consistent practice.
Practical Example (Gratitude Circle): During morning meeting, pass a “gratitude stone” around the circle. The person holding the stone shares one specific thing they are thankful for, like “I’m grateful for my dad because he made me pancakes this morning.”
Launch a Kindness Challenge: Dedicate a week to kindness. Provide daily prompts.
Practical Example: A “Kindness Bingo” card could have squares like “Give a genuine compliment,” “Invite someone new to play,” “Hold the door for someone,” and “Help a classmate clean up.”
Create a Visual Tracker: Use a “Caught Being Kind” bulletin board where students can post sticky notes acknowledging kind acts they witness. This makes kindness visible and celebrated.
Connect Gratitude to Action: After a special event or field trip, have students write thank-you notes or create a short thank-you video for the people who made it possible.
Key Insight: Specificity is the cornerstone of effective gratitude practice. Guide students beyond generic statements like “I’m grateful for my family.” Encourage them to elaborate: “I’m grateful my big sister read me a story last night because it made me feel safe and loved.” This deeper reflection anchors the feeling and makes the practice more meaningful.
7. Self-Advocacy and Assertiveness Skills Training
Self-Advocacy and Assertiveness Skills Training explicitly teaches students how to recognize and respectfully communicate their needs, boundaries, and preferences. This practice empowers children by giving them the tools to develop their own voice, agency, and confidence. By learning the crucial difference between passive, aggressive, and assertive communication, students build a foundation for academic success and lifelong healthy relationships.
This training is one of the most vital social emotional learning activities for elementary students, as it moves beyond simply identifying feelings to acting on them constructively. It is especially impactful for students who are marginalized, have learning differences, or tend to be more withdrawn, ensuring they have the skills to be seen and heard.
How to Implement Self-Advocacy and Assertiveness Skills Training
Materials Needed: Scenario cards, “I-statement” sentence frames, anchor charts defining passive, assertive, and aggressive communication styles.
Define and Differentiate: Use an anchor chart to explicitly teach the differences between passive (quiet, avoiding conflict), aggressive (blaming, demanding), and assertive (calm, clear, respectful) communication. Use simple examples for each.
Introduce “I-Statements”: Provide students with a clear and simple script for assertive communication, such as: “I feel ____ when you ____. I need ____.”
Role-Play Scenarios: Practice with low-stakes scenarios.
Practical Example (Academic Need): A student role-plays telling a teacher, “I feel confused by the directions for the project. I need you to explain step two again, please.”
Practical Example (Social Boundary): One student practices saying to another, “I feel uncomfortable when you stand so close to me. I need a little more space, please.”
Practice Saying “No”: Teach students respectful ways to set boundaries, such as “No, thank you,” or “I’d rather not do that.” Role-play situations where a friend asks them to do something they don’t want to do.
Debrief and Reinforce: After role-playing, discuss how it felt to be assertive. Acknowledge that it can feel uncomfortable at first but gets easier with practice.
Key Insight: Modeling is everything. When teachers and parents consistently use assertive “I-statements” and respect students’ boundaries, they demonstrate that self-advocacy is a valued and effective skill. Celebrate students’ attempts, even if imperfect, to create a culture where every child knows their voice matters and will be heard.
8. Growth Mindset and Resilience-Building Lessons
Growth Mindset and Resilience-Building Lessons teach students that intelligence and abilities are not fixed traits but can be developed through effort, strategic practice, and feedback. Based on the research of Carol Dweck, these lessons help children reframe challenges as opportunities, view mistakes as crucial parts of learning, and persist through setbacks. This approach shifts the focus from innate talent to the power of process, building a foundation for both academic achievement and emotional well-being.
These lessons are a cornerstone of effective social emotional learning activities for elementary students because they directly target self-management and responsible decision-making. By cultivating resilience, students are better equipped to handle academic frustrations and social conflicts with confidence and determination. To further cultivate this mindset, students can benefit from learning effective strategies to improve problem-solving skills, empowering them to tackle challenges constructively.
How to Implement Growth Mindset and Resilience-Building Lessons
Materials Needed: “The Magical Yet” by Angela DiTerlizzi or other growth mindset books, chart paper, markers, stories of famous failures (e.g., Michael Jordan, Oprah), goal-setting worksheets.
Introduce the Concept: Use a simple analogy like comparing the brain to a muscle. Explain that when we work hard and try new things, our brain grows stronger by creating new connections.
Read and Discuss: Read a story that models a growth mindset. Ask discussion questions like, “What challenge did the character face?” and “What did they do when they made a mistake?”
Teach “The Power of Yet”: Introduce the phrase “I can’t do it… yet.”
Practical Example: Create a class chart with two columns: “Fixed Mindset Thoughts” and “Growth Mindset Thoughts.” Fill it with examples like changing “This is too hard” to “This may take some time and effort.” Or “I can’t read this word” to “I can’t read this word… yet.”
Create a “Famous Failures” Gallery: Display pictures and stories of successful people who overcame significant setbacks. Discuss how failure was a necessary step in their journey to success.
Use Effort-Based Praise: In daily interactions, praise the process, not just the outcome.
Practical Example: Instead of saying “You’re so smart!” when a child solves a puzzle, say, “I love how you turned the pieces different ways to see what would fit. Your strategy worked!”
Key Insight: A growth mindset is cultivated through consistent language and classroom culture, not just isolated lessons. Creating a “mistake-friendly” environment where errors are celebrated as “brain builders” is essential. When teachers model their own learning struggles and resilience, students learn that productive struggle is a normal and valuable part of growth.
9. Diversity, Inclusion, and Anti-Bias Classroom Activities
Diversity, Inclusion, and Anti-Bias Activities are intentional lessons that celebrate human differences while actively addressing bias and discrimination. These practices move beyond surface-level multicultural celebrations to build genuine cultural competence, challenge stereotypes, and foster a deep sense of belonging for all students. By integrating these social emotional learning activities, elementary teachers equip children to understand their own identities and appreciate the diverse world around them.
This approach, championed by educators like Louise Derman-Sparks, is not just about being kind; it’s about creating justice. It gives students the language and tools to recognize and confront unfairness, making them active participants in building a more equitable classroom and community.
How to Implement Diversity, Inclusion, and Anti-Bias Activities
Materials Needed: Diverse books featuring “windows and mirrors” (characters both different from and similar to your students), identity charts, chart paper, markers, and curated read-alouds that tackle topics of fairness and bias.
Time: Varies; can be a 15-minute read-aloud or an ongoing, year-long unit.
CASEL Competency: Self-Awareness, Social Awareness, Relationship Skills.
Step-by-Step Instructions:
Introduce “Windows and Mirrors”: Using the framework from Rudine Sims Bishop, explain that books can be mirrors (reflecting our own lives) or windows (offering a view into someone else’s).
Practical Example: After reading Amazing Grace by Mary Hoffman, ask, “Who in our class saw a mirror in this story? Who saw a window into a new experience?”
Create Identity Charts: Give each student a large piece of paper with their name in the center. Have them draw or write words that describe the multiple facets of their identity (e.g., sister, artist, soccer player, Spanish speaker).
Share and Connect: Students share one part of their identity chart with a partner or small group, finding connections and celebrating differences.
Discuss Fairness: Use a picture book to introduce a scenario involving bias or unfairness.
Practical Example: Read The Sneetches by Dr. Seuss and ask, “Was it fair that only the Star-Belly Sneetches could go to the parties? Why or why not? What could the Plain-Belly Sneetches have done?”
Practice Being an Upstander: Role-play scenarios where students can practice being an “upstander” by safely and respectfully speaking up when they see something unfair.
Key Insight: Authentic representation is paramount. Anti-bias work must be woven into the curriculum year-round, not isolated to specific heritage months. This consistency ensures students see diversity as a fundamental and valued aspect of the human experience, not a special topic.
10. Emotion Regulation and Coping Strategy Toolbox
The Emotion Regulation and Coping Strategy Toolbox is a personalized collection of techniques students can use to manage overwhelming feelings and calm their nervous systems. This approach shifts the focus from adult-led intervention to student-led self-regulation, empowering children with a sense of agency and control over their emotional responses. By creating a tangible or mental “toolbox,” students learn to identify what they need in a moment of stress, building independence and emotional resilience.
This concept is a cornerstone of effective social emotional learning activities for elementary students because it acknowledges that there is no one-size-fits-all solution for managing emotions. It teaches children to become experts on their own needs, equipping them with practical skills to navigate challenges like frustration, anxiety, and excitement both inside and outside the classroom.
How to Implement a Coping Strategy Toolbox
Materials Needed: Poster board, index cards, art supplies, a physical box or container, sensory items (stress balls, scented dough, soft fabric), and visual aids for different strategies.
Time: 15-20 minutes for initial teaching of a new strategy; ongoing practice daily.
Introduce the Concept: Explain that a toolbox holds tools to fix things, and an emotional toolbox holds tools to help us manage our feelings. Use a physical box as a visual anchor.
Teach Strategies Explicitly: During calm moments, teach one or two strategies at a time.
Practical Example: For a “Grounding” technique, teach the 5-4-3-2-1 method: “When you feel worried, pause and silently name 5 things you can see, 4 things you can touch, 3 things you can hear, 2 things you can smell, and 1 thing you can taste. This helps bring your brain back to the present moment.”
Categorize for Clarity: Group strategies into categories like Movement (jumping jacks, stretching), Sensory (squeezing a stress ball, listening to music), Cognitive (counting to 10, positive self-talk), and Creative (drawing, journaling).
Create Visual Tools: Have students create their own strategy cards with drawings or words. These can be put on a ring, in a personal box, or displayed on a “Calm Down Corner” poster.
Model and Narrate: As the teacher, visibly use the strategies yourself. Say, “I’m feeling a little frustrated with this technology, so I’m going to take three deep breaths before I try again.”
Practice and Reflect: After a student uses a strategy, follow up later. Ask, “I saw you went to the calm corner to squeeze the dough. How did that feel for your body? Did it help?”