Restorative Circles in Schools a Guide to Building Empathy
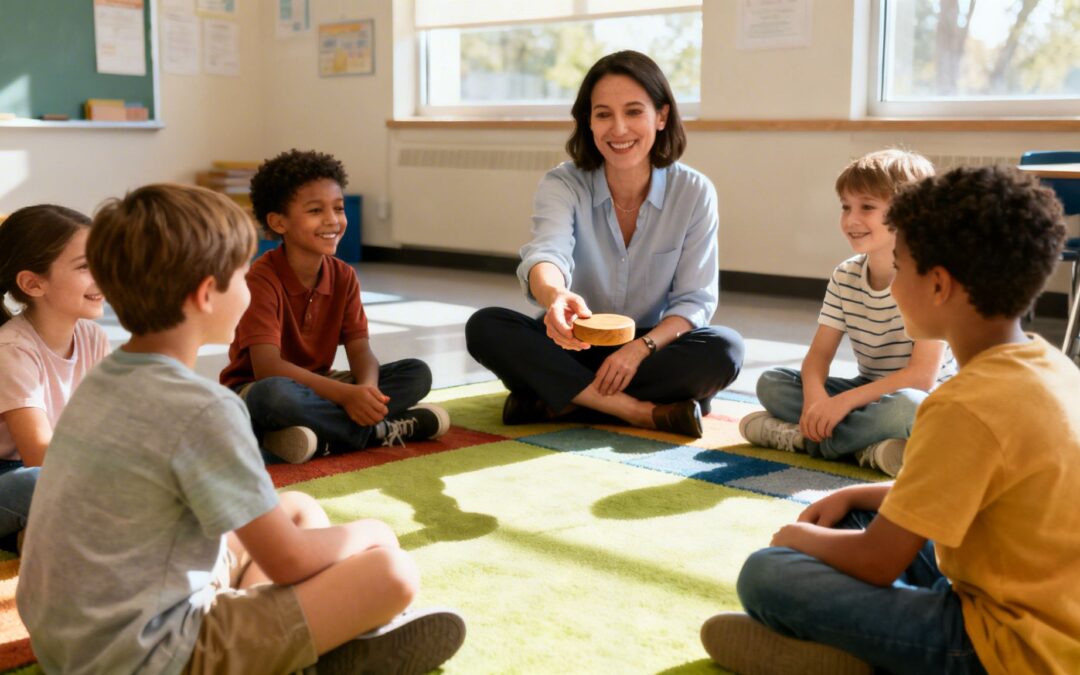
What if classroom conflict wasn’t something to be stamped out with punishment, but a chance for students to grow? That’s the idea behind restorative circles in schools. It’s a powerful shift away from focusing on consequences and toward repairing harm and rebuilding community. This simple method gives everyone a voice, turning tense moments into real opportunities for empathy and connection.
Moving from Conflict to Connection with Restorative Circles
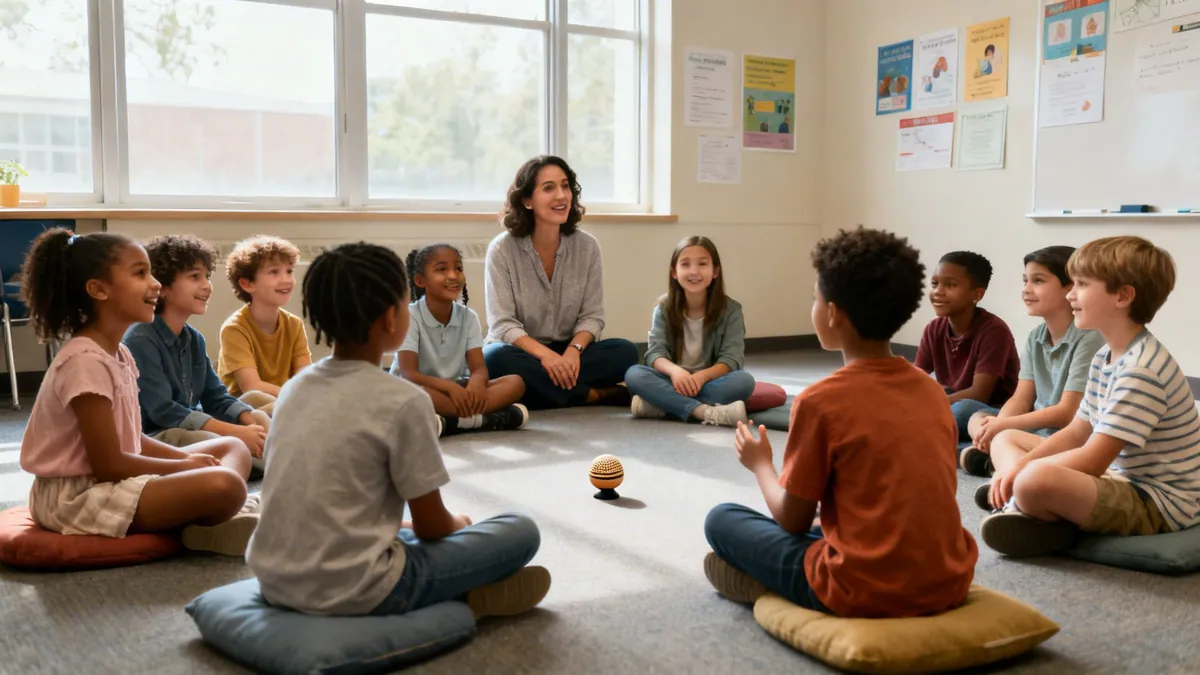
Think about what happens when a problem pops up in a typical classroom. Maybe two students get into a heated argument. The usual response is often punitive—a trip to the office, detention, or lost privileges. This approach zeros in on punishing the behavior, but it rarely gets to the root of the problem or helps mend the relationship.
Restorative circles offer a completely different path. Instead of asking, “What rule was broken and who gets punished?” we start asking different questions:
- Who was harmed by this?
- What do they need to feel okay again?
- Whose job is it to help make things right?
This small change in framing shifts the entire goal from punishment to accountability and healing. The focus is now on making things right, not just making someone pay for being wrong. By bringing everyone involved into a structured conversation, circles help students see and understand the real impact of what they do.
A Tale of Two Responses
Let’s look at a common scenario: a fifth-grader keeps disrupting a math lesson by making loud jokes while you’re trying to explain a new concept.
The Traditional Response: You’ve given several warnings, and your frustration is mounting. You send the student to the principal’s office. They get a detention slip and a lecture about being respectful. The disruption is over for today, but the student feels misunderstood and resentful. The rest of the class just learned that acting out gets you removed, and no one ever found out why the student was being disruptive in the first place.
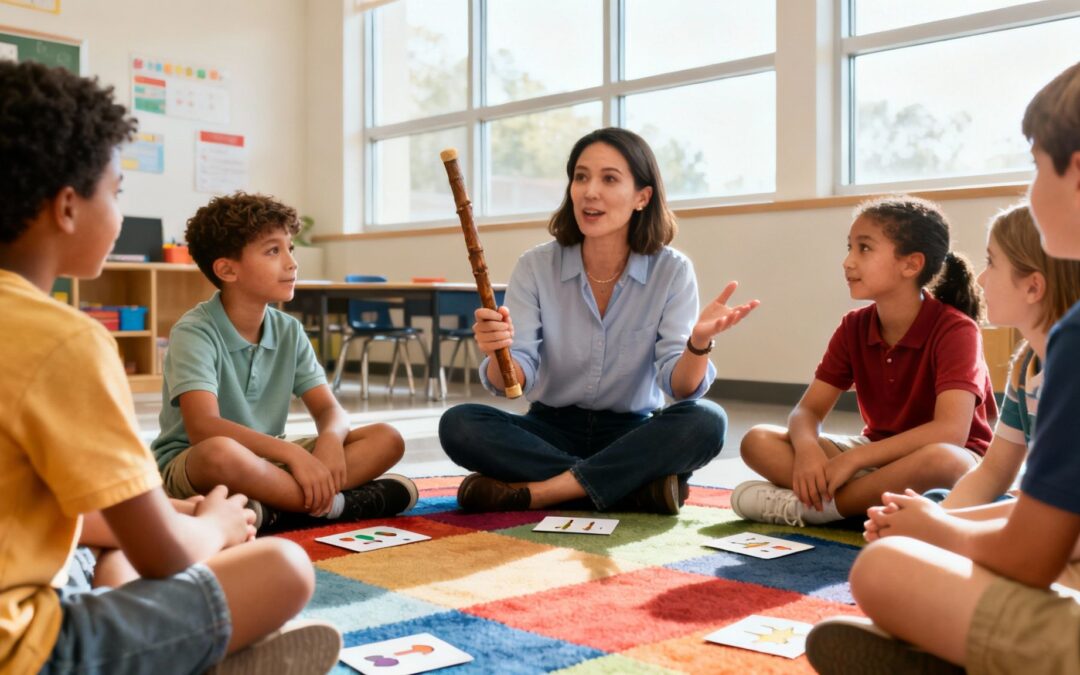
The Restorative Response: The teacher finds a calm moment to pull together a quick restorative circle. It includes the student who was being disruptive and a few classmates who were affected. Using a talking piece (an object that gives the holder the exclusive right to speak) ensures everyone gets heard without interruption. The teacher might ask, “What happened?” and “What were you thinking at the time?”
The disruptive student might share that they felt anxious about the math and used humor to cover it up. The other students might share that the jokes made it hard for them to concentrate. From there, the group works together on a solution. For example, the student could apologize and the group might agree on a quiet signal they can use with the teacher next time they feel lost or overwhelmed.
The restorative approach doesn’t let misbehavior slide; it tackles it head-on by making the community part of the solution. This process builds empathy and teaches priceless conflict-resolution skills that directly support social-emotional learning (SEL).
Beyond Discipline: A Tool for Community
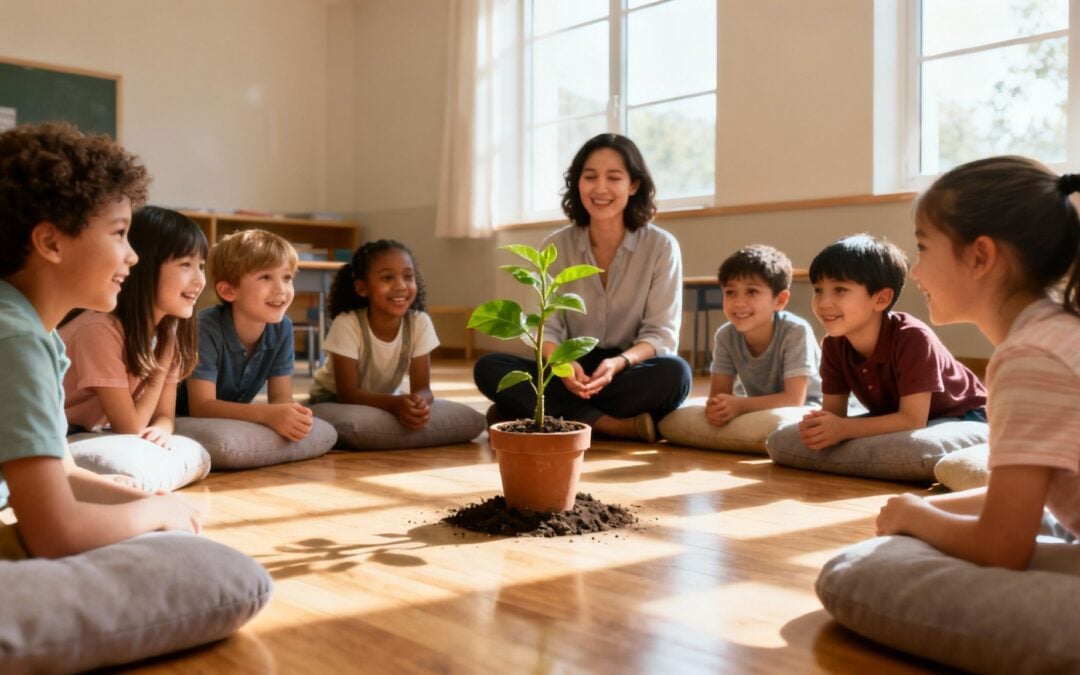
While circles are fantastic for responding to harm, their real power lies in being proactive. Many schools use them for daily check-ins, celebrating successes, or even discussing academic topics. For example, a teacher might hold a 10-minute circle every Monday morning with the prompt: “Share one goal you have for this week.” These routine, low-stakes circles build the trust and safety needed for the more challenging conversations to work when conflicts eventually happen.
By practicing sharing and listening when things are calm, students develop the skills to navigate difficult moments with maturity and respect. This foundation is at the heart of the entire restorative movement in schools, which you can explore further by learning about what restorative practices in education are. It all leads to a classroom where every student feels seen, heard, and valued—the essential ingredients for a truly positive learning environment.
The Real Impact of Restorative Practices on Students and Schools

When you hear “restorative practices,” it’s easy to think only of conflict resolution. But the truth is, the benefits go so much deeper, reshaping the entire school climate in ways you can see and measure. It’s not just about students feeling better; it’s about creating an environment where they can actually learn and you can actually teach.
One of the first things schools notice is a dramatic drop in punitive discipline. When students have a structured process for addressing harm and mending relationships, the need for office referrals and suspensions plummets. For any teacher or administrator, this is a game-changer.
Just think about all the time spent on discipline paperwork and the instructional hours lost when a student is sent out of the room. Restorative circles give you that time back, redirecting it toward proactive community building and positive learning experiences.
Building a Foundation for Academic Success
It turns out a more connected school community is a more academically successful one. When students feel seen, heard, and respected, they have more mental and emotional space to focus on learning. Instead of worrying about peer conflicts or feeling misunderstood, they can engage fully with their lessons.
This creates a calmer, more predictable classroom where education can finally take center stage. And the data backs this up, showing a clear link between restorative approaches and better student outcomes.
Schools that effectively use restorative circles in schools often see a powerful ripple effect. Fewer disruptions mean more time for focused instruction, which leads to stronger academic performance for everyone. It’s a positive cycle that feeds itself.
This isn’t just theory. A landmark study from the Learning Policy Institute looked at restorative practices in 485 middle schools, with data from nearly 2 million students. The research found that as students were exposed more to restorative practices, they saw measurable gains on standardized tests in both English and math.
Those same students were also significantly less likely to be suspended. It’s powerful proof that social and academic progress are deeply connected. You can explore the impact of restorative practices in this comprehensive report.
From Numbers to Real-World Wins
So, what does this impact look like on a day-to-day basis? It shows up in real, observable changes that make school better for everyone.
- Fewer Classroom Disruptions: Teachers can spend far more time teaching and less time managing behavior because students are gaining the skills to solve their own problems.
- Reduced Administrative Burden: Principals and office staff are freed from a constant cycle of discipline and can focus on instructional leadership and school improvement.
- Improved Teacher Morale: Educators feel more supported and effective when they are part of a collaborative, problem-solving culture.
- Stronger Student Relationships: Students learn empathy and communication skills firsthand, which naturally reduces incidents of bullying and social isolation.
Imagine a school that used to deal with daily lunchtime conflicts. After implementing regular community-building circles, students start mediating their own disagreements. A small argument over a game no longer blows up into a major office referral. Instead, kids use the language and skills they practiced in the circle (“When you said that, it made me feel…”) to work it out right there on the spot.
This kind of shift doesn’t happen overnight, but the results are profound. By investing in relationships, schools build a resilient community where every member feels a sense of belonging and responsibility. See firsthand how our programs help schools measure these positive changes. This focus on connection is the key to unlocking not just better behavior, but a healthier and more successful school for everyone.
Laying the Groundwork for Successful School Circles
A powerful restorative circle doesn’t just happen. The real magic begins long before anyone sits down in that circle. Without thoughtful preparation, even the best intentions can fall flat, turning what could be a cultural cornerstone into just another passing initiative.
Getting this groundwork right starts with the adults in the building. Restorative practices thrive when they’re a shared mission, not a top-down mandate. For this to take root, teachers, staff, and administrators need to see and believe in its value first.
Start with a Pilot to Build Momentum
Instead of attempting a massive school-wide rollout from day one, try starting small. Launching a pilot program with a handful of enthusiastic educators is a fantastic way to build momentum.
This approach gives a few teachers the space to experiment, figure out what works, and become your school’s first restorative champions. Their genuine success stories will do more to convince skeptical colleagues than any district directive ever could.
Form an implementation team with these early adopters and an administrator to steer the process. They can plan the training, share resources, and provide that crucial peer-to-peer support. Research consistently shows that schools with a dedicated coordinator see much better results. This person becomes the go-to guide, ensuring everyone feels supported as they learn.
A common misstep is assuming a one-day training is enough. Real implementation is a journey of learning, practicing, and reflecting over multiple years. It starts with building a shared philosophy and foundational skills among the adults first.
This groundwork is what builds the safe, predictable environment students need to thrive. To learn more about this, check out our guide on how to create a safe space for students. When educators feel confident, they can lead circles that truly build community.
Co-Creating Your Circle Agreements
Once your pilot team is ready to go, one of the first and most important steps is setting your circle agreements, or norms. Here’s the key: these must be co-created with your students.
This simple act of shared ownership is a restorative practice in itself. It sends a powerful message that their voices are essential in shaping the classroom community.
A teacher might kick this off by saying, “We’re going to start having circles to get to know each other and solve problems together. What promises do we need to make so everyone feels safe enough to share their thoughts?”
Through brainstorming, students almost always land on the core tenets of a strong circle:
- Listen to understand, not just to reply. This fosters deep, active listening.
- What’s said in the circle stays in the circle. This builds the trust needed for honesty, with the clear exception that safety concerns are always brought to a trusted adult.
- Speak from the heart. This encourages students to share what’s real for them, not what they think they should say.
- You have the right to pass. No one should ever feel forced to speak. The circle is an invitation, not a demand.
Post these agreements where everyone can see them. They’ll serve as a constant reminder of the community’s shared commitments. Of course, how you introduce these ideas will change depending on your students’ ages. The table below offers some practical language and prompts you can adapt for your classroom.
Age-Appropriate Circle Prompts and Agreements
This table provides sample circle agreements and tiered talking points to introduce and facilitate restorative circles for different elementary and middle school grade levels.
| Grade Level | Sample Agreement | Introductory Script Snippet | Proactive Circle Prompt (Community Building) | Responsive Circle Prompt (Addressing Harm) |
|---|---|---|---|---|
| K–2nd | Use kind words and listening ears. | “In our circle, we use a talking piece. When you have it, it’s your turn to talk, and everyone else has their listening ears on.” | “Share about a time this week when you felt proud of yourself.” | “What happened at recess? How did it make your heart feel?” |
| 3rd–5th | Respect the talking piece. Listen from the heart. | “Today we’re starting something new called a circle. It’s a special time for us to share and listen so we can be a stronger team.” | “If you could have any superpower to help others, what would it be and why?” | “What were you thinking when the argument started? What do you think is needed to make things right?” |
| 6th–8th | Speak your truth. Lean into discomfort. | “Circles are a space for us to be real with each other. We’re creating our agreements together to ensure this is a place of respect.” | “Share about a challenge you’ve overcome and what you learned from it.” | “What was the impact of your actions? Who was affected, and what do they need to move forward?” |
Using these age-appropriate starting points makes it easier to introduce restorative circles in schools in a way that feels natural and effective for every student.
How to Lead a Restorative Circle with Confidence
Knowing the theory is one thing, but stepping into the center of a circle to actually lead one? That’s something else entirely. Real confidence comes from having a clear process and practical tools ready to go. This guide will walk you through the essential parts of leading a circle, giving you the language and techniques to create a space built on trust and respect.
At the very heart of every circle is the talking piece. This is just a designated object—maybe a special stone, a small stuffed animal, or even a decorated stick—that gives the person holding it the floor to speak. It’s a simple but powerful tool that slows conversations down, prevents interruptions, and ensures even the quietest voices are invited to share. How you model its use is everything.
Opening the Circle and Setting the Tone
Every restorative circle needs a clear, intentional beginning. This simple ritual signals to students that they’re shifting out of their regular classroom routine and into a special, focused space.
Your opening can be quick, but it should be consistent. You might start by welcoming everyone and briefly stating the purpose of today’s circle.
- For a proactive, community-building circle: “Welcome, everyone. In our circle today, we’re going to share a little bit about what makes us feel proud. The talking piece will move around, and remember, you always have the right to pass.”
- For a responsive circle addressing harm: “Thank you all for being here. We’re coming together today to talk about what happened at lunchtime so we can understand everyone’s perspective and figure out how to move forward in a good way.”
That initial moment sets the stage. It establishes safety and reminds everyone of the shared agreements you’ve already created together. A strong opening makes it clear this isn’t just another conversation.
Using the Talking Piece to Guide the Flow
The talking piece is so much more than a turn-taking tool; it’s a physical symbol of respect and listening. When a student is holding it, they have the group’s full, undivided attention. When they don’t have it, their job is to listen with an open mind.
As the facilitator, you’ll use the talking piece, too. This is crucial because it shows you’re a member of the circle, not an authority figure standing outside of it. Your first few shares are a perfect chance to model a little vulnerability and set a constructive tone.
Effectively leading these circles hinges on your ability to facilitate meaningful dialogue. Knowing some powerful topics for group discussion and how to frame your questions will make all the difference, as your prompts truly guide the entire conversation.
Proactive vs. Responsive Circle Scenarios
The way you structure your circle will change depending on its purpose. Is it a proactive circle meant to build community? Or a responsive one meant to repair it?
Scenario 1: A Proactive Morning Check-In
Imagine you want to build community in your 3rd-grade class. You open with, “Good morning! As the talking piece comes to you, share one thing you’re looking forward to this week.” This is a low-stakes prompt that’s easy for everyone to answer, and it builds a positive habit of sharing.
Scenario 2: A Responsive Lunchtime Conflict
Two 7th-graders, Sam and Alex, had a heated argument over a game that almost got physical. You gather them along with two other students who saw what happened.
Here, your prompts become much more focused:
- “What happened?” (Each person shares their perspective, one at a time, without being interrupted.)
- “What were you thinking and feeling at the time?” (This gets to the heart of the matter, uncovering the emotions that were driving the behavior.)
- “Who has been affected by this, and how?” (This broadens the view from a two-person fight to its impact on the community.)
- “What’s needed to make things right?” (Now the focus shifts to accountability, repair, and finding a solution together.)
This structured line of questioning keeps the circle from turning into a blame game. Instead, it guides students toward taking responsibility for the harm and fixing it.
Key Takeaway: A facilitator’s primary role is not to solve the problem for the students, but to hold the space and ask the right questions so they can solve it together. This empowers them with invaluable problem-solving skills.
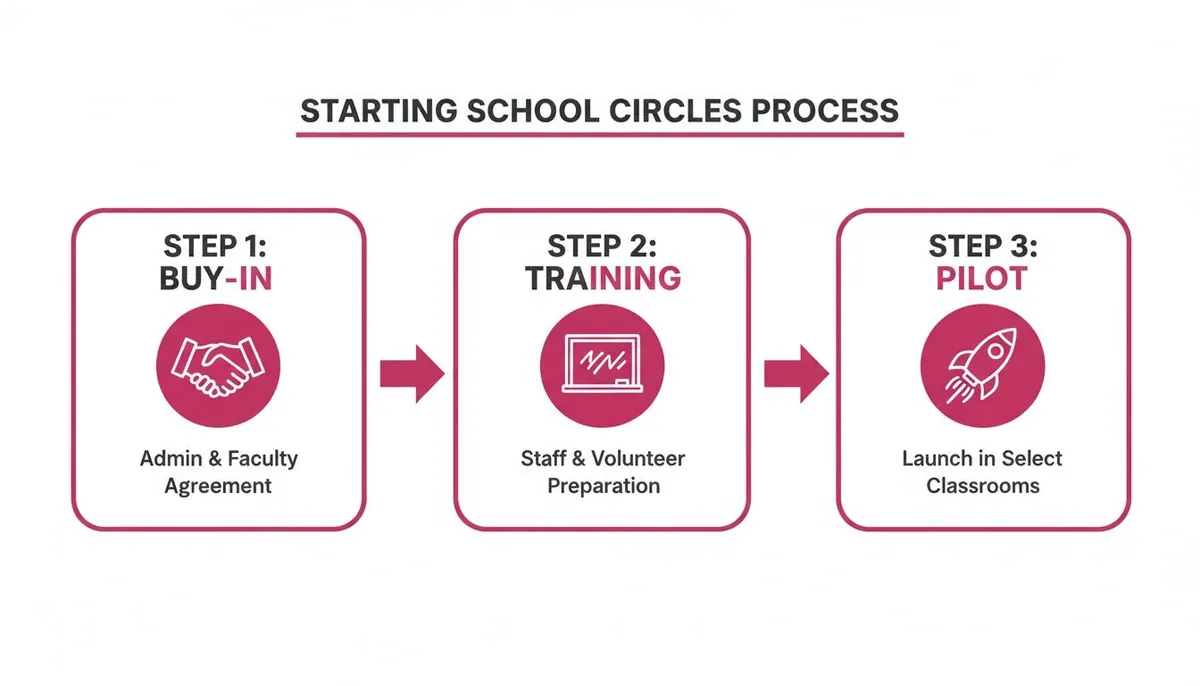
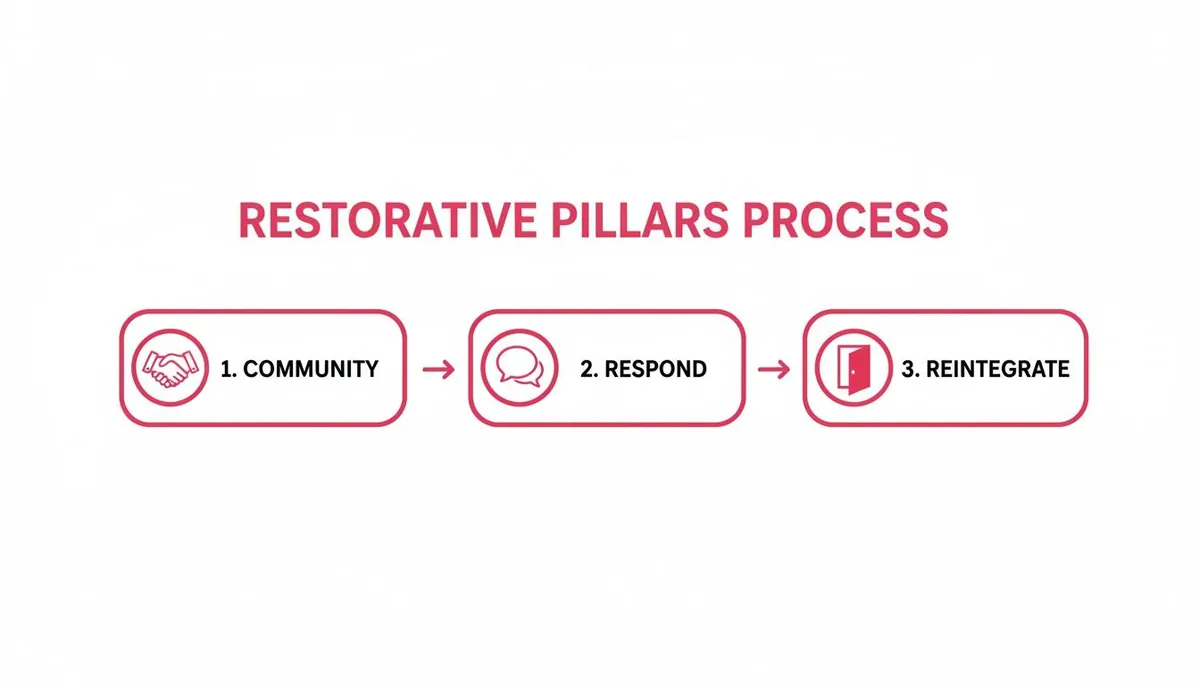
The image above shows the typical journey a school takes when starting with circles. It’s a phased process that highlights just how critical training is for bridging the gap between getting buy-in and launching a successful pilot program.
Troubleshooting Common Challenges
Even with the best preparation, things will come up. Here’s how to handle a few common challenges with grace.
The Quiet or Reluctant Student: Never, ever force a student to speak. The “right to pass” is sacred. If a student passes, just say, “Thank you for listening,” and move the talking piece along. Later, you can gently invite them back in by saying, “We’ve heard from everyone else. Is there anything you’d like to add?” This low-pressure invitation often works once they’ve had time to listen and feel safe. Your patience and validation are key here—it’s all about active listening. For more ideas, check out our guide on practicing active listening with your students.
The Dominant Personality: Some students will naturally want to speak without the talking piece or go on for too long. Gently redirect them. “Thanks for your energy, Michael. Let’s make sure Maria has a chance to finish her thought.” You can also remind the group of the purpose: “Remember, the talking piece helps us make sure every single voice is heard.”
The Outcome: The goal of responsive restorative circles in schools is to reach an agreement on how to repair the harm. This isn’t about you, the facilitator, handing down a consequence. You might ask, “So, what can we agree on to make sure this doesn’t happen again?” The solution needs to feel relevant, respectful, and reasonable to everyone involved. For example, if a group of students made a mess, the agreement might be that they stay after to help the janitor, not that they lose recess for a week.
Having a dedicated person to lead this work can make a world of difference. A trial at River Ridge Elementary found that hiring a full-time restorative coordinator was a game-changer. They saw a 28% decrease in student suspensions and a 30% drop in office referrals, not to mention academic gains. You can dive into the full study on the Restorative School Communities model to learn more.
Closing the Circle
Just as you opened with intention, you need to close the same way. The closing provides a sense of finality and appreciation. It could be a simple go-around where each person shares one word about how they’re feeling, or you could offer a short, collective statement.
For example, you could say, “Thank you all for your honesty and courage today. Let’s take the feeling of respect we built in this circle with us for the rest of the day.” This seals the experience and helps students transition smoothly back into their regular activities.
How to Adapt Circles for Your School and Measure Success
Key Insight: Restorative practices teach that conflict is an opportunity for growth. By focusing on repairing harm, we build accountability and strengthen the entire community.
Tips for Implementation
- Invest in Training: Thoroughly train both staff facilitators and student peer mediators. This training should cover restorative philosophy, active listening, and managing difficult conversations.
- Use Proactively: Don’t wait for harm to occur. Use community-building circles regularly to build relationships and establish a culture of trust and open communication. Practical Example: A teacher can start each week with a “check-in” circle, asking students to share one success and one challenge from their weekend. This builds trust so that when a conflict arises, the circle format is already familiar and safe.
- Establish Clear Protocols: Define when to use peer mediation versus a staff-led restorative conference. More serious incidents may require adult intervention.
- Follow Up: Always check in with the involved parties after an agreement is made to ensure it is being honored and to offer further support if needed.
For a deeper dive into this transformative approach, you can explore what restorative practices in education look like in more detail and learn how to implement them in your school.
5. Mindfulness and Breathing Pause Exercises
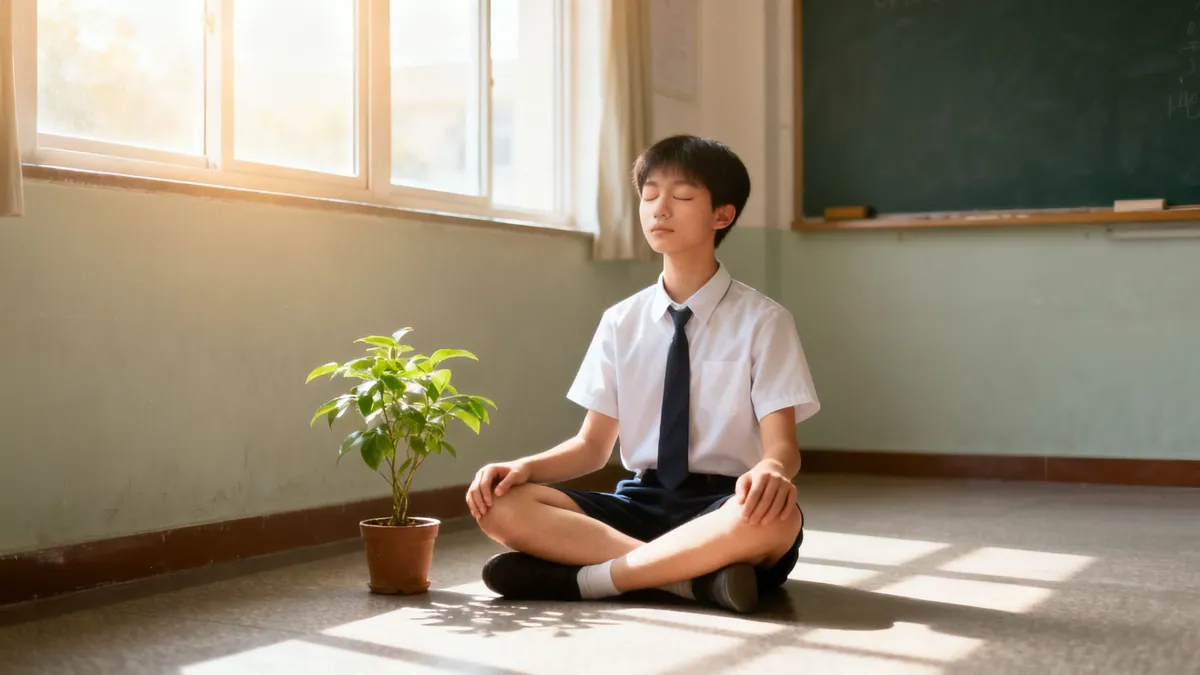
Mindfulness and Breathing Pause Exercises are structured practices that teach students to pause, notice their thoughts and emotions, and respond intentionally rather than react impulsively. These techniques create the mental space needed for effective problem-solving by supporting self-regulation and reducing reactive conflict. This problem solving activity is foundational, as it equips students with the internal tools to manage stress before tackling external challenges.
This approach transforms classroom management by empowering students to become active participants in their own emotional regulation. Instead of teachers managing behavior, students learn to manage themselves, which is a critical life skill.
How It Works: A Classroom Example
Consider a common scenario: two students, Maria and Leo, are arguing over a shared tablet. Emotions are escalating, and the argument is about to become a disruptive conflict. Instead of intervening immediately, the teacher initiates a pre-taught “Pause and Breathe” protocol.
- The Trigger: The students begin raising their voices.
- The Pause: The teacher calmly says, “Let’s take a Pause and Breathe.” Both students know this signal. They stop talking, place a hand on their belly, and take three slow, deep breaths.
- Noticing: During these breaths, they shift their focus from the conflict to their physical sensations. They notice their fast heartbeat and tense shoulders. This brief moment of awareness interrupts the reactive emotional spiral.
- Responding: After the pause, the teacher asks, “What do you both need right now?” Having calmed down, Maria can articulate, “I need to finish my turn,” and Leo can say, “I’m worried I won’t get a chance.”
- The Solution: The problem is now reframed from a fight to a scheduling issue. The students can now work with the teacher to create a fair plan for sharing the tablet.
The breathing pause didn’t solve the problem directly, but it created the necessary calm and clarity for the students to engage in a constructive problem solving activity.
Key Insight: A regulated brain is a problem-solving brain. Mindfulness provides the essential first step of calming the nervous system so higher-order thinking can occur.
Tips for Implementation
- Model and Co-Regulate: Practice these exercises with your students daily. Your calm presence is a powerful teaching tool. Never use a breathing exercise as a punishment.
- Start Small: Begin with just one minute of “belly breathing” or a “listening walk” to notice sounds. Gradually build up duration and complexity as students become more comfortable.
- Create a Ritual: Integrate a brief breathing exercise into daily routines, like after recess or before a test, to make it a normal and expected part of the day.
- Connect to Emotions: Explicitly link the practice to real-life situations. Say, “When you feel that big wave of frustration, remember how we do our box breathing. That’s a tool you can use.” Practical Example: Before a math test, a teacher can lead the class in “4×4 Box Breathing”: breathe in for a count of 4, hold for 4, breathe out for 4, and hold for 4. This helps calm test anxiety and improve focus.
For more ideas on integrating these practices, explore our guide on mindfulness exercises for students.
6. The Ladder of Inference (Assumption Analysis)
The Ladder of Inference is a thinking tool that helps students understand how they jump to conclusions. It illustrates the mental process of using selected data, interpreting it through personal beliefs, and forming assumptions that feel like facts. This problem solving activity is invaluable for deconstructing conflicts, misunderstandings, and hurtful situations by revealing the flawed thinking that often fuels them.
This method teaches students to slow down their reasoning and question their interpretations. Instead of reacting to a conclusion, they learn to trace their steps back down the ladder to examine the observable facts, making them more thoughtful communicators and empathetic friends.
How It Works: A Classroom Example
Imagine a student, Maya, sees her friend Chloe whisper to another student and then laugh while looking in her direction. Maya quickly climbs the ladder of inference and concludes Chloe is making fun of her, leading her to feel hurt and angry.
- The Conclusion: “Chloe is a mean person and not my friend anymore.” (An action or belief)
- The Assumption: “She must be telling a mean joke about me.” (An assumption based on the interpretation)
- The Interpretation: “Whispering and laughing means they are being secretive and unkind.” (Meaning is added based on personal beliefs)
- The Selected Data: Maya focuses only on the whisper, the laugh, and the glance in her direction. She ignores other data, like Chloe smiling at her earlier.
- The Observable Reality: Chloe whispered to another student. They both laughed. They glanced toward Maya. (Just the facts)
By working back down the ladder, Maya can see her conclusion is based on a big assumption. The solution is not to confront Chloe angrily but to get curious and gather more data, for example, by asking, “Hey, what was so funny?”
Key Insight: The Ladder of Inference reveals that our beliefs directly influence how we interpret the world. By learning to separate observation from interpretation, we can prevent minor misunderstandings from becoming major conflicts.
Tips for Implementation
- Use Visual Aids: Draw the ladder on a whiteboard or use a printable graphic. Visually mapping out the steps helps students grasp the abstract concept of their own thinking processes.
- Model the Language: Teach students phrases to challenge assumptions. Encourage them to say, “I’m making an assumption that…” or, “The story I’m telling myself is…” This separates their interpretation from objective reality.
- Practice ‘Getting Curious’: Instead of accepting conclusions, prompt students with questions like, “What did you actually see or hear?” and “What’s another possible reason that could have happened?” This builds a habit of curiosity over certainty. Practical Example: A parent sees their child’s messy room and thinks, “He’s so lazy and disrespectful.” Using the ladder, they can go back to the observable data: “I see clothes on the floor and books on the bed.” Then they can get curious: “What’s another possible reason for this?” Perhaps the child was rushing to finish homework or felt overwhelmed. The parent can then ask, “I see your room is messy. What’s getting in the way of cleaning it up?”
For more strategies on fostering mindful communication and emotional regulation, explore our conflict resolution curriculum.
7. Empathy Mapping and Perspective-Taking Exercises
Empathy Mapping is a powerful problem solving activity that guides students to step into someone else’s shoes and understand their experience from the inside out. By visually mapping what another person sees, hears, thinks, and feels, students move beyond simple sympathy to develop genuine empathy. This structured approach helps them analyze conflicts, social exclusion, and diverse viewpoints with greater compassion and insight.
This method transforms interpersonal problems from “me vs. you” into “us understanding an experience.” It builds the foundational social-emotional skills needed for collaborative problem-solving, making it an essential tool for creating a more inclusive and supportive classroom community.
How It Works: A Classroom Example
Imagine a conflict where a student, Maya, is upset because her classmate, Leo, laughed when she tripped during recess. Instead of focusing only on the action, the teacher uses an empathy map to explore both perspectives.
First, Maya maps Leo’s perspective:
- Sees: Maya falling, other kids playing.
- Hears: A loud noise, other kids laughing nearby.
- Thinks: “That looked funny,” or “I hope she’s okay.”
- Feels: Surprised, maybe amused, or a little embarrassed for her.
Then, Leo maps Maya’s perspective:
- Sees: Everyone looking at her on the ground.
- Hears: Laughter from his direction.
- Thinks: “Everyone is laughing at me. I’m so embarrassed. He did that on purpose.”
- Feels: Hurt, embarrassed, angry, and singled out.
This exercise reveals that while Leo’s reaction may have been thoughtless, Maya’s interpretation was rooted in deep feelings of embarrassment and hurt. The problem to solve is not just the laughter, but the impact it had and how to repair the trust between them.
Key Insight: Empathy mapping shows that intention and impact can be very different. Understanding this gap is the first step toward resolving conflicts and preventing future misunderstandings.
Tips for Implementation
- Use Concrete Scenarios: Ground the activity in specific, relatable situations, like a disagreement over a game or feeling left out at lunch. Avoid abstract concepts that are hard for students to connect with.
- Model Vulnerability: Share an appropriate personal example of a time you misunderstood someone’s perspective. This shows that everyone is still learning and creates a safe space for students to be honest.
- Connect Empathy to Action: After mapping, always ask, “Now that we understand this, what can we do to help or make things better?” This turns insight into positive action. Practical Example: After reading a story about a new student who feels lonely, the class can create an empathy map for that character. Then, the teacher can ask, “What could we do in our class to make a new student feel welcome?” This connects the fictional exercise to real-world classroom behavior.
For a deeper dive into fostering these skills, explore our guide to perspective-taking activities.
8. Collaborative Problem-Solving (CPS) Protocol
The Collaborative Problem-Solving (CPS) Protocol, developed by Dr. Ross Greene, is a structured dialogue method that transforms how adults address challenging behaviors in students. It operates on the core belief that “kids do well if they can,” shifting the focus from a lack of motivation to a lack of skills. This non-confrontational problem solving activity involves both the adult and student as equal partners in understanding and solving problems, making it a powerful tool for de-escalating conflicts and building competence.
This approach replaces unilateral, adult-imposed solutions with a joint effort, which reduces power struggles and turns every conflict into a valuable teaching opportunity. It is especially effective for students with social, emotional, and behavioral challenges.
How It Works: A Classroom Example
Consider a student, Maya, who frequently disrupts class during independent reading time by talking to her neighbors. Instead of assigning a consequence, a teacher uses the CPS protocol.
- Empathy Step: The teacher pulls Maya aside when she is calm. “I’ve noticed that during reading time, it seems like you have a hard time staying quiet. What’s up?” The goal is to listen and gather information without judgment. Maya explains she gets bored and the words “get jumbled” after a few minutes.
- Define the Problem Step: The teacher shares their perspective. “I understand it gets boring and difficult. My concern is that when you talk, it makes it hard for other students to concentrate, and for you to practice your reading.”
- Invitation Step: The teacher invites collaboration. “I wonder if there’s a way we can make it so you can get your reading practice done without it feeling so boring, and also make sure your classmates can focus. Do you have any ideas?”
Together, they brainstorm solutions like breaking up the reading time with short breaks, trying an audio book to follow along, or choosing a high-interest graphic novel. They agree to try a 10-minute reading timer followed by a 2-minute stretch break. This solution addresses both Maya’s lagging skill (sustained attention) and the teacher’s concern (classroom disruption).
Key Insight: CPS reframes misbehavior as a signal of an unsolved problem or a lagging skill. By working together, we teach students how to solve problems, rather than just imposing compliance.
Tips for Implementation
- Listen More Than You Talk: The Empathy step is crucial. Your primary goal is to understand the student’s perspective on what is getting in their way. Resist the urge to jump to solutions.
- Be Proactive: Use the CPS protocol when everyone is calm, not in the heat of the moment. This makes it a preventative tool rather than a reactive one.
- Focus on Realistic Solutions: Brainstorm multiple ideas and evaluate them together. A good solution is one that is realistic, mutually satisfactory, and addresses the concerns of both parties.
- Follow Up: Check in later to see if the solution is working. Be prepared to revisit the conversation and adjust the plan if needed. Practical Example for Parents: A parent notices their child always argues about bedtime. Empathy: “I’ve noticed getting ready for bed is really tough. What’s up?” The child might say, “I’m not tired and I want to finish my game.” Define Problem: “I get that. My concern is that if you don’t sleep enough, you’re really tired and grumpy for school.” Invitation: “I wonder if there’s a way for you to finish your game and also get enough rest. Any ideas?” They might co-create a solution involving a 10-minute warning before screen-off time.
To discover more ways to facilitate productive conversations, check out these conflict resolution activities for kids.
9. Brave Space Conversations and Dialogue Protocols
Brave Space Conversations and Dialogue Protocols are structured frameworks that teach students and adults how to navigate sensitive topics, express different viewpoints respectfully, and stay connected during disagreement. These protocols, inspired by works like Difficult Conversations and the Courageous Conversations framework, prioritize psychological safety and shared responsibility. This problem solving activity is essential for addressing bias, building inclusive communities, and maintaining relationships through conflict.
This approach moves beyond “safe spaces,” where comfort is the goal, to “brave spaces,” where the goal is growth through respectful, and sometimes uncomfortable, dialogue. It equips participants with the tools to talk about what matters most, even when it’s hard.
How It Works: A Classroom Example
Imagine a group of middle school students is divided over a current event involving social inequality. Tensions are high, and students are making hurtful comments. Instead of shutting down the conversation, a teacher uses a dialogue protocol.
- Establish Norms: The class co-creates agreements like “Listen to understand, not to respond,” “Assume good intent but address impact,” and “It’s okay to feel uncomfortable.”
- Introduce Sentence Starters: The teacher provides scaffolds to guide the conversation, such as “I was surprised when I heard you say…” or “Can you tell me more about what you mean by…?”
- Facilitate Dialogue: A student shares their perspective on the event. Another student, instead of reacting defensively, uses a sentence starter: “I hear that you feel…, and my perspective is different. For me, I see…”
- Focus on Impact: A student addresses a peer directly but respectfully: “When you said that, it made me feel invisible because my family has experienced this. Can we talk about that?”
- Seek Mutual Understanding: The conversation continues, with the focus shifting from winning an argument to understanding each other’s lived experiences.
This structured process prevents the conversation from devolving into personal attacks and transforms a potential conflict into a powerful learning moment about empathy, perspective-taking, and community.
Key Insight: Brave spaces normalize discomfort as a necessary part of growth. They teach that the goal of difficult conversations isn’t always agreement, but a deeper mutual understanding and respect.
Tips for Implementation
- Establish Psychological Safety First: Before diving in, clarify that the purpose is learning together. Emphasize that vulnerability is a strength and that mistakes are opportunities for growth.
- Co-Create Norms: Involve students in creating the rules for the conversation. This gives them ownership and makes them more likely to hold themselves and their peers accountable.
- Use Scaffolds and Sentence Frames: Provide language tools to help students articulate their thoughts and feelings constructively, especially when emotions are high. Practical Example: Provide a list of sentence frames on the board, such as: “Help me understand your thinking about…”, “The story I’m telling myself is…”, or “I’m curious about why you see it that way.”
- Acknowledge the Discomfort: Start by saying, “This might feel a bit uncomfortable, and that’s okay. It means we are tackling something important.” This normalization reduces anxiety.
To learn more about fostering brave and respectful classroom environments, explore Soul Shoppe’s approach to building school-wide community.
10. Solution-Focused Brief Therapy (SFBT) Questioning
Solution-Focused Brief Therapy (SFBT) Questioning is a strengths-based problem solving activity that shifts the focus from analyzing problems to envisioning solutions. Instead of dissecting what’s wrong, this approach uses targeted questions to help students identify their own strengths, resources, and past successes to build a better future. It empowers students by highlighting their capabilities and fostering a sense of agency.
This method is highly effective for interpersonal challenges and building resilience. It moves a student from a “stuck” mindset, where a problem feels overwhelming, to a proactive one focused on small, achievable steps forward.
How It Works: A Classroom Example
Consider a student who feels consistently left out during recess. A traditional approach might focus on why they are isolated, but SFBT questioning builds a path toward connection.
- The Miracle Question: “Imagine you went to sleep tonight, and while you were sleeping, a miracle happened and your recess problem was solved. When you woke up tomorrow, what would be the first thing you’d notice that tells you things are better?” The student might say, “Someone would ask me to play.”
- Identifying Exceptions: “Can you think of a time, even just for a minute, when recess felt a little bit better?” The student may recall, “Last week, I talked to Maria about a video game for a few minutes, and it was okay.” (This highlights a past success).
- Scaling the Situation: “On a scale of 1 to 10, where 1 is the worst recess ever and 10 is the miracle recess, where are you today?” The student says, “A 3.” The follow-up is key: “What would need to happen to get you to a 4?” They might suggest, “Maybe I could try talking to Maria about that game again.” (This defines a small, concrete step).
This process helps the student create their own solution based on what has already worked, building confidence and providing a clear action to take.
Key Insight: SFBT questioning assumes that students already have the tools to solve their problems. Our job is to ask the right questions to help them discover and use those tools.
Tips for Implementation
- Ask with Genuine Curiosity: Your tone should be supportive and inquisitive, not leading. Frame questions to explore possibilities, such as “What would that look like?” or “How did you do that?”
- Focus on Strengths: Actively listen for and acknowledge the student’s capabilities. When they identify a past success, validate it: “Wow, it sounds like you were really brave to do that.”
- Use Scaling Questions: These questions (e.g., “On a scale of 1-10…”) are excellent for measuring progress and identifying the next small step. The goal isn’t to get to 10 immediately but to move up just one point. Practical Example: A student is overwhelmed by a large project. The teacher asks, “On a scale of 1-10, where 1 is ‘I can’t even start’ and 10 is ‘It’s completely done,’ where are you?” The student says, “A 2, because I chose my topic.” The teacher responds, “Great! What’s one small thing you could do to get to a 3?” The student might say, “I could find one book about my topic.” This makes the task feel manageable.
To see how solution-focused language can be integrated into broader conflict resolution, explore our I-Message and conflict resolution tools.
Top 10 Problem-Solving Activities Comparison
| Method | Implementation complexity | Resource requirements | Expected outcomes | Ideal use cases | Key advantages |
|---|---|---|---|---|---|
| The Five Whys Technique | Low — simple, linear process | Minimal — facilitator and quiet space | Surface to root-cause insights; increased reflection | Quick conflict debriefs; individual reflection; classroom incidents | Simple, fast, promotes curiosity and reduced blame |
| Fishbone Diagram (Ishikawa) | Moderate — structured group analysis | Moderate — time, facilitator, visual materials | Comprehensive mapping of contributing factors; systems insight | Recurring schoolwide issues; bullying patterns; program analysis | Visualizes complexity; engages multiple stakeholders |
| Design Thinking Workshops | High — multi-stage, iterative process | High — trained facilitators, time, prototyping materials | Student-driven, tested solutions; enhanced creativity and agency | Reimagining student experience; designing new interventions | Empowers students; encourages prototyping and iteration |
| Restorative Practices & Peer Mediation | High — systemic adoption and sustained practice | High — extensive training, staff time, organizational buy-in | Repaired relationships; reduced recidivism; community accountability | Serious harm events, reintegration, community-building | Restores dignity; builds accountability and community ties |
| Mindfulness & Breathing Pause Exercises | Low — short, repeatable practices | Low — brief time, minimal materials, teacher modeling | Improved self-regulation; reduced stress and reactivity | Daily classroom routines; acute de-escalation moments | Immediate calming effects; easy to scale schoolwide |
| Ladder of Inference (Assumption Analysis) | Moderate — conceptual teaching and practice | Low — training/examples, facilitator guidance | Greater metacognition; fewer snap judgments and misunderstandings | Miscommunications; reflective lessons after conflicts | Reveals thinking patterns; promotes curiosity and verification |
| Empathy Mapping & Perspective-Taking | Moderate — guided activities and debriefs | Moderate — materials, facilitation, time | Increased empathy; shared language about needs and impact | Conflict resolution; inclusion lessons; curriculum integration | Makes empathy concrete; reduces othering and stereotyping |
| Collaborative Problem-Solving (CPS) Protocol | Moderate–High — structured dialogue, stepwise | Moderate — trained staff, time per conversation | Reduced power struggles; improved problem-solving skills | Chronic behavioral challenges; individualized supports | Non-punitive, skill-focused, builds trust between adults and students |
| Brave Space Conversations & Dialogue Protocols | Moderate–High — careful prep and facilitation | Moderate — skilled facilitators, norms, prep time | Improved capacity to handle sensitive topics; stronger norms | Equity discussions; identity-based conflicts; staff dialogues | Enables honest, structured difficult conversations; builds psychological safety |
| Solution-Focused Brief Therapy (SFBT) Questioning | Low–Moderate — focused questioning skills | Low — skilled questioning, brief sessions | Increased agency; small actionable steps; faster shifts in outlook | Individual counseling; resistant or low-engagement students | Strengths-based, efficient, fosters hope and concrete progress |
Putting Problem-Solving into Practice
The journey from a reactive classroom to a responsive and collaborative community is built one problem solving activity at a time. The ten strategies detailed in this guide, from the analytical Five Whys technique to the empathetic practice of restorative circles, are more than just isolated exercises. They are foundational building blocks for creating a culture where challenges are seen as opportunities for growth, connection, and deeper understanding. Integrating these tools empowers students with a versatile toolkit, preparing them not only for academic hurdles but for the complex social dynamics they navigate daily.
The true power of these activities lies in their consistency and thoughtful application. A one-time Fishbone Diagram workshop can illuminate a specific issue, but embedding this thinking into regular classroom discussions transforms how students analyze cause and effect. Similarly, a single breathing pause can de-escalate a tense moment, but making it a routine transition practice cultivates emotional regulation as a lifelong skill. The goal is to move these strategies from a special event to an everyday habit.
Key Takeaways for Immediate Implementation
To make this transition feel manageable, focus on a few core principles that unite every problem solving activity we’ve explored:
- Make Thinking Visible: Activities like the Ladder of Inference and Empathy Mapping help students externalize their internal thought processes. This visibility allows them to question their assumptions and see situations from multiple viewpoints, reducing misunderstandings that often fuel conflict.
- Prioritize Psychological Safety: For any problem-solving to be effective, students must feel safe to be vulnerable. Brave Space Conversations and Restorative Practices are designed to build this foundation of trust, ensuring every voice is heard and valued without fear of judgment.
- Shift from Blame to Contribution: The core of effective problem-solving is moving away from finding a person to blame and toward understanding the various factors that contributed to a problem. The Fishbone Diagram and Collaborative Problem-Solving (CPS) Protocol are excellent frameworks for this, encouraging shared ownership of both the problem and the solution.
- Empower Student Agency: True mastery comes when students can independently select and use the right tool for the right situation. By introducing a variety of methods, you give them the agency to choose whether a situation calls for deep analysis (Five Whys), creative innovation (Design Thinking), or emotional connection (Peer Mediation).
Actionable Next Steps for Educators and Parents
The path to embedding these skills begins with small, intentional steps. You don’t need to implement all ten strategies at once. Instead, consider this a menu of options to be introduced thoughtfully over time.
- Start with Yourself: Before introducing a new problem solving activity to students, practice it yourself. Try using the Five Whys to understand a recurring personal challenge or the Ladder of Inference to check your assumptions before a difficult conversation with a colleague or family member. Modeling is the most powerful form of teaching.
- Choose a Low-Stakes Entry Point: Begin with an activity that feels accessible and addresses a current need. If classroom transitions are chaotic, introduce Mindfulness and Breathing Pauses. If group projects frequently result in friction, try an Empathy Mapping exercise as a kickoff to build mutual understanding.
- Integrate, Don’t Add: Look for opportunities to weave these activities into your existing curriculum and routines. Use SFBT questioning during student check-ins (“What’s one small thing that’s going a little better today?”). Apply Design Thinking principles to a social studies project where students must solve a community issue. When problem-solving becomes part of the “how” of learning, it ceases to be just another thing “to do.”
By consistently applying these frameworks, you are doing far more than just teaching students how to solve problems. You are cultivating a generation of empathetic communicators, resilient thinkers, and collaborative leaders who can navigate a complex world with confidence and compassion. Each problem solving activity is a step toward building a school and home environment where every individual feels seen, heard, and capable of contributing to a positive solution.
Ready to build a comprehensive, school-wide culture of peace and problem-solving? Soul Shoppe provides dynamic programs, professional development, and hands-on tools that bring these activities to life, fostering empathy and resilience in your entire school community. Visit Soul Shoppe to learn how we can partner with you to create a safer, more connected learning environment.