

Box Breathing Visual: A Guide for Schools & Home

The room is loud again. A class has just come back from recess, two students are still arguing about the kickball game, one child is under the table because math feels too hard, and everyone else is carrying that jangly, post-transition energy into the next lesson. At home, it can look different but feel the same. Homework tears, a slammed bedroom door, a child who says “I can’t” before they’ve even started.
In those moments, adults usually want something simple, fast, and realistic. Not a perfect mindfulness routine. Not another thing to prep. Just one tool that helps a child come back to center without turning the moment into a bigger struggle.
That’s where a box breathing visual earns its place. It gives kids something concrete to look at, trace, and follow when words aren’t landing. It also helps adults stay grounded enough to guide instead of react.
Your Guide to a Calmer Classroom and Home
A breathing strategy earns its keep when it still works in the middle of real life. A child is upset. A class is restless. A parent is trying to get through homework without another power struggle. In those moments, box breathing helps because the pattern is clear, repeatable, and easy to cue without a long explanation.
The basic rhythm is steady: inhale, hold, exhale, hold. Many adults know it as a four-count pattern, but with K-8 students, the exact number matters less than the pacing. Younger children often do better with shorter counts. Older students usually tolerate a longer hold and may respond well when the practice is framed as a focus skill, not just a calming tool. That distinction matters in school settings. A third grader may join because it feels like a game. A middle schooler is more likely to participate if it feels useful and age-respectful.
I have found that the visual is often what makes the routine stick. Children do not have to remember a script while they are already overloaded. They can follow the shape, keep their eyes on one spot, and borrow the adult’s calm until their body catches up.
When this helps most
A box breathing visual fits best into predictable stress points, especially before a child is fully overwhelmed. Common examples include:
- At the start of the school day when students arrive dysregulated from the bus, a tough morning, or a rushed handoff
- After transitions when the group needs a quick reset before instruction can begin
- Before homework or reading practice when resistance shows up fast
- Ahead of tests, presentations, or hard conversations when nerves are high
- During repair conversations when everyone needs a pause before speaking clearly
The trade-off is simple. Box breathing is a strong regulation tool, but it is not magic. Some children will settle after one round. Others need movement first, a quieter space, or an adult to co-regulate beside them. The goal is not perfect calm. The goal is enough steadiness for the next workable step.
Language matters too. “Calm down” can feel like pressure. “Let’s do one square together” gives a child something concrete to do. In classrooms, that small shift reduces argument and preserves dignity. At home, it can lower the temperature before a routine goes off the rails.
The environment also supports the practice. A visible cue on the wall, a small card at a desk, or even calming decor can remind children what their body already knows how to do. For classrooms and family spaces that benefit from gentle visual reminders, a piece of South African designed artwork can reinforce that tone. If you want a few routines that pair well with breathing practice, these classroom mindfulness strategies are practical additions.
How to Use a Box Breathing Visual Step by Step
A box breathing visual works best when it stays simple. A square on paper, a poster on the wall, a card on a desk, or a screen-based guide can all work. The key is that the child can see the rhythm instead of trying to hold the pattern in their head.
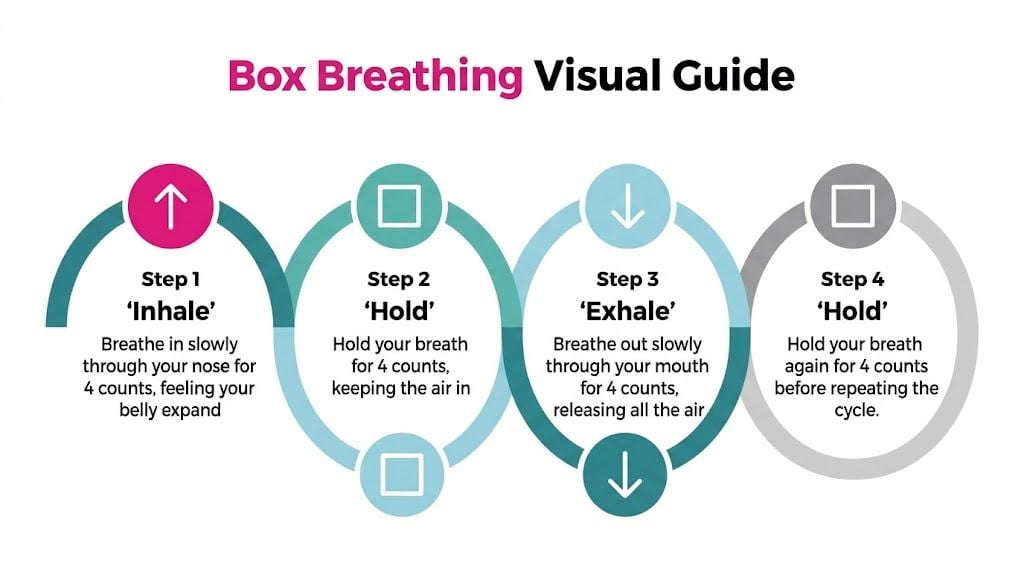
A visual anchor isn’t just decorative. Research summarized in the Journal of Pharmaceutical Research International article reports that tracing a screen-based box improved focus retention by up to 95%, compared with 60% for mental-only counting. The same source describes significant improvements in lung function, including FVC and FEV1, after visually guided box breathing practice in healthy adults.
Set up the body first
Before the first breath, fix the posture. That one adjustment prevents many of the “this isn’t working” moments.
Ask the child to sit or stand tall, with shoulders soft rather than lifted. If they’re open to touch cues, have them place one hand on the belly. That gives immediate feedback about whether the breath is moving low and steady rather than staying high in the chest.
If you already teach belly breathing, this belly breathing technique guide pairs well with box breathing because the body mechanics are similar.
Follow the four sides of the square
The square gives each part of the breath a beginning and an end. That matters for children who get lost in open-ended directions.
Here’s a classroom-friendly way to lead it:
Inhale along the first side
“Breathe in through your nose for four. Let your belly puff out a little.”
A child may like “smell the flower” language. Older students often prefer direct language.Hold on the second side
“Keep the air in for four. Body still. Jaw soft.”
The hold should feel gentle, not strained.Exhale on the third side
“Breathe out slowly for four, like you’re fogging a window or blowing through a straw.”
This is often the part kids rush, so model it.Pause on the fourth side
“Rest before the next breath. Count four.”
That final pause helps the rhythm feel complete.
Practical rule: If the count is making a child tense, slow the counting voice before changing the technique.
Use language that matches the age
The same box breathing visual can work across grade levels, but the script should change.
A younger child often responds to sensory cues:
- Inhale: “Smell the soup.”
- Hold: “Keep it safe.”
- Exhale: “Cool it down.”
- Hold: “Wait for the next bite.”
An upper elementary student may do better with performance language:
- “Breathe in.”
- “Hold steady.”
- “Breathe out slow.”
- “Reset.”
A middle school student usually wants brevity:
- “In for four.”
- “Hold four.”
- “Out four.”
- “Hold four.”
Keep the visual active
A lot of adults show the square and stop there. Kids usually need one more layer of engagement. Let them trace the box with a finger in the air, on a desk, on their leg, or on a laminated card. The movement gives the brain another anchor.
This is especially useful when a child says they “can’t focus.” They may not be resisting the practice. They may just need more sensory input.
A few practical options work well:
| Setting | Visual method | Adult cue |
|---|---|---|
| Whole class | Poster at the front of the room | “Eyes on the square. Trace with me.” |
| Small group | Laminated table card | “Use one finger and go side by side.” |
| Home | Sticky note square on fridge or homework table | “Let’s do two boxes before we start.” |
| Hallway reset | Finger-traced square in the air | “You don’t need words. Just follow my hand.” |
Start small and repeat
One or two cycles can help a child pause. A longer practice can help them settle more fully. In everyday school and home routines, short repetition works better than one long, forced session.
Try these examples:
- Morning entry: two boxes before announcements
- Homework launch: one box before opening the folder
- Conflict repair: three boxes before either child speaks
- Test prep: two quiet rounds at desks
If you want children to use box breathing when they’re upset, teach it when they’re calm.
That’s the part adults often skip. We introduce regulation tools during a meltdown, then decide the tool failed. Usually the timing failed.
Bringing Box Breathing into Your Classroom Routine
Teachers don’t need another complicated system. What works is a ritual that slides into moments you already have. A box breathing visual can become one of those rituals if students see it often, practice it when things are fine, and hear adults use the same language every time.
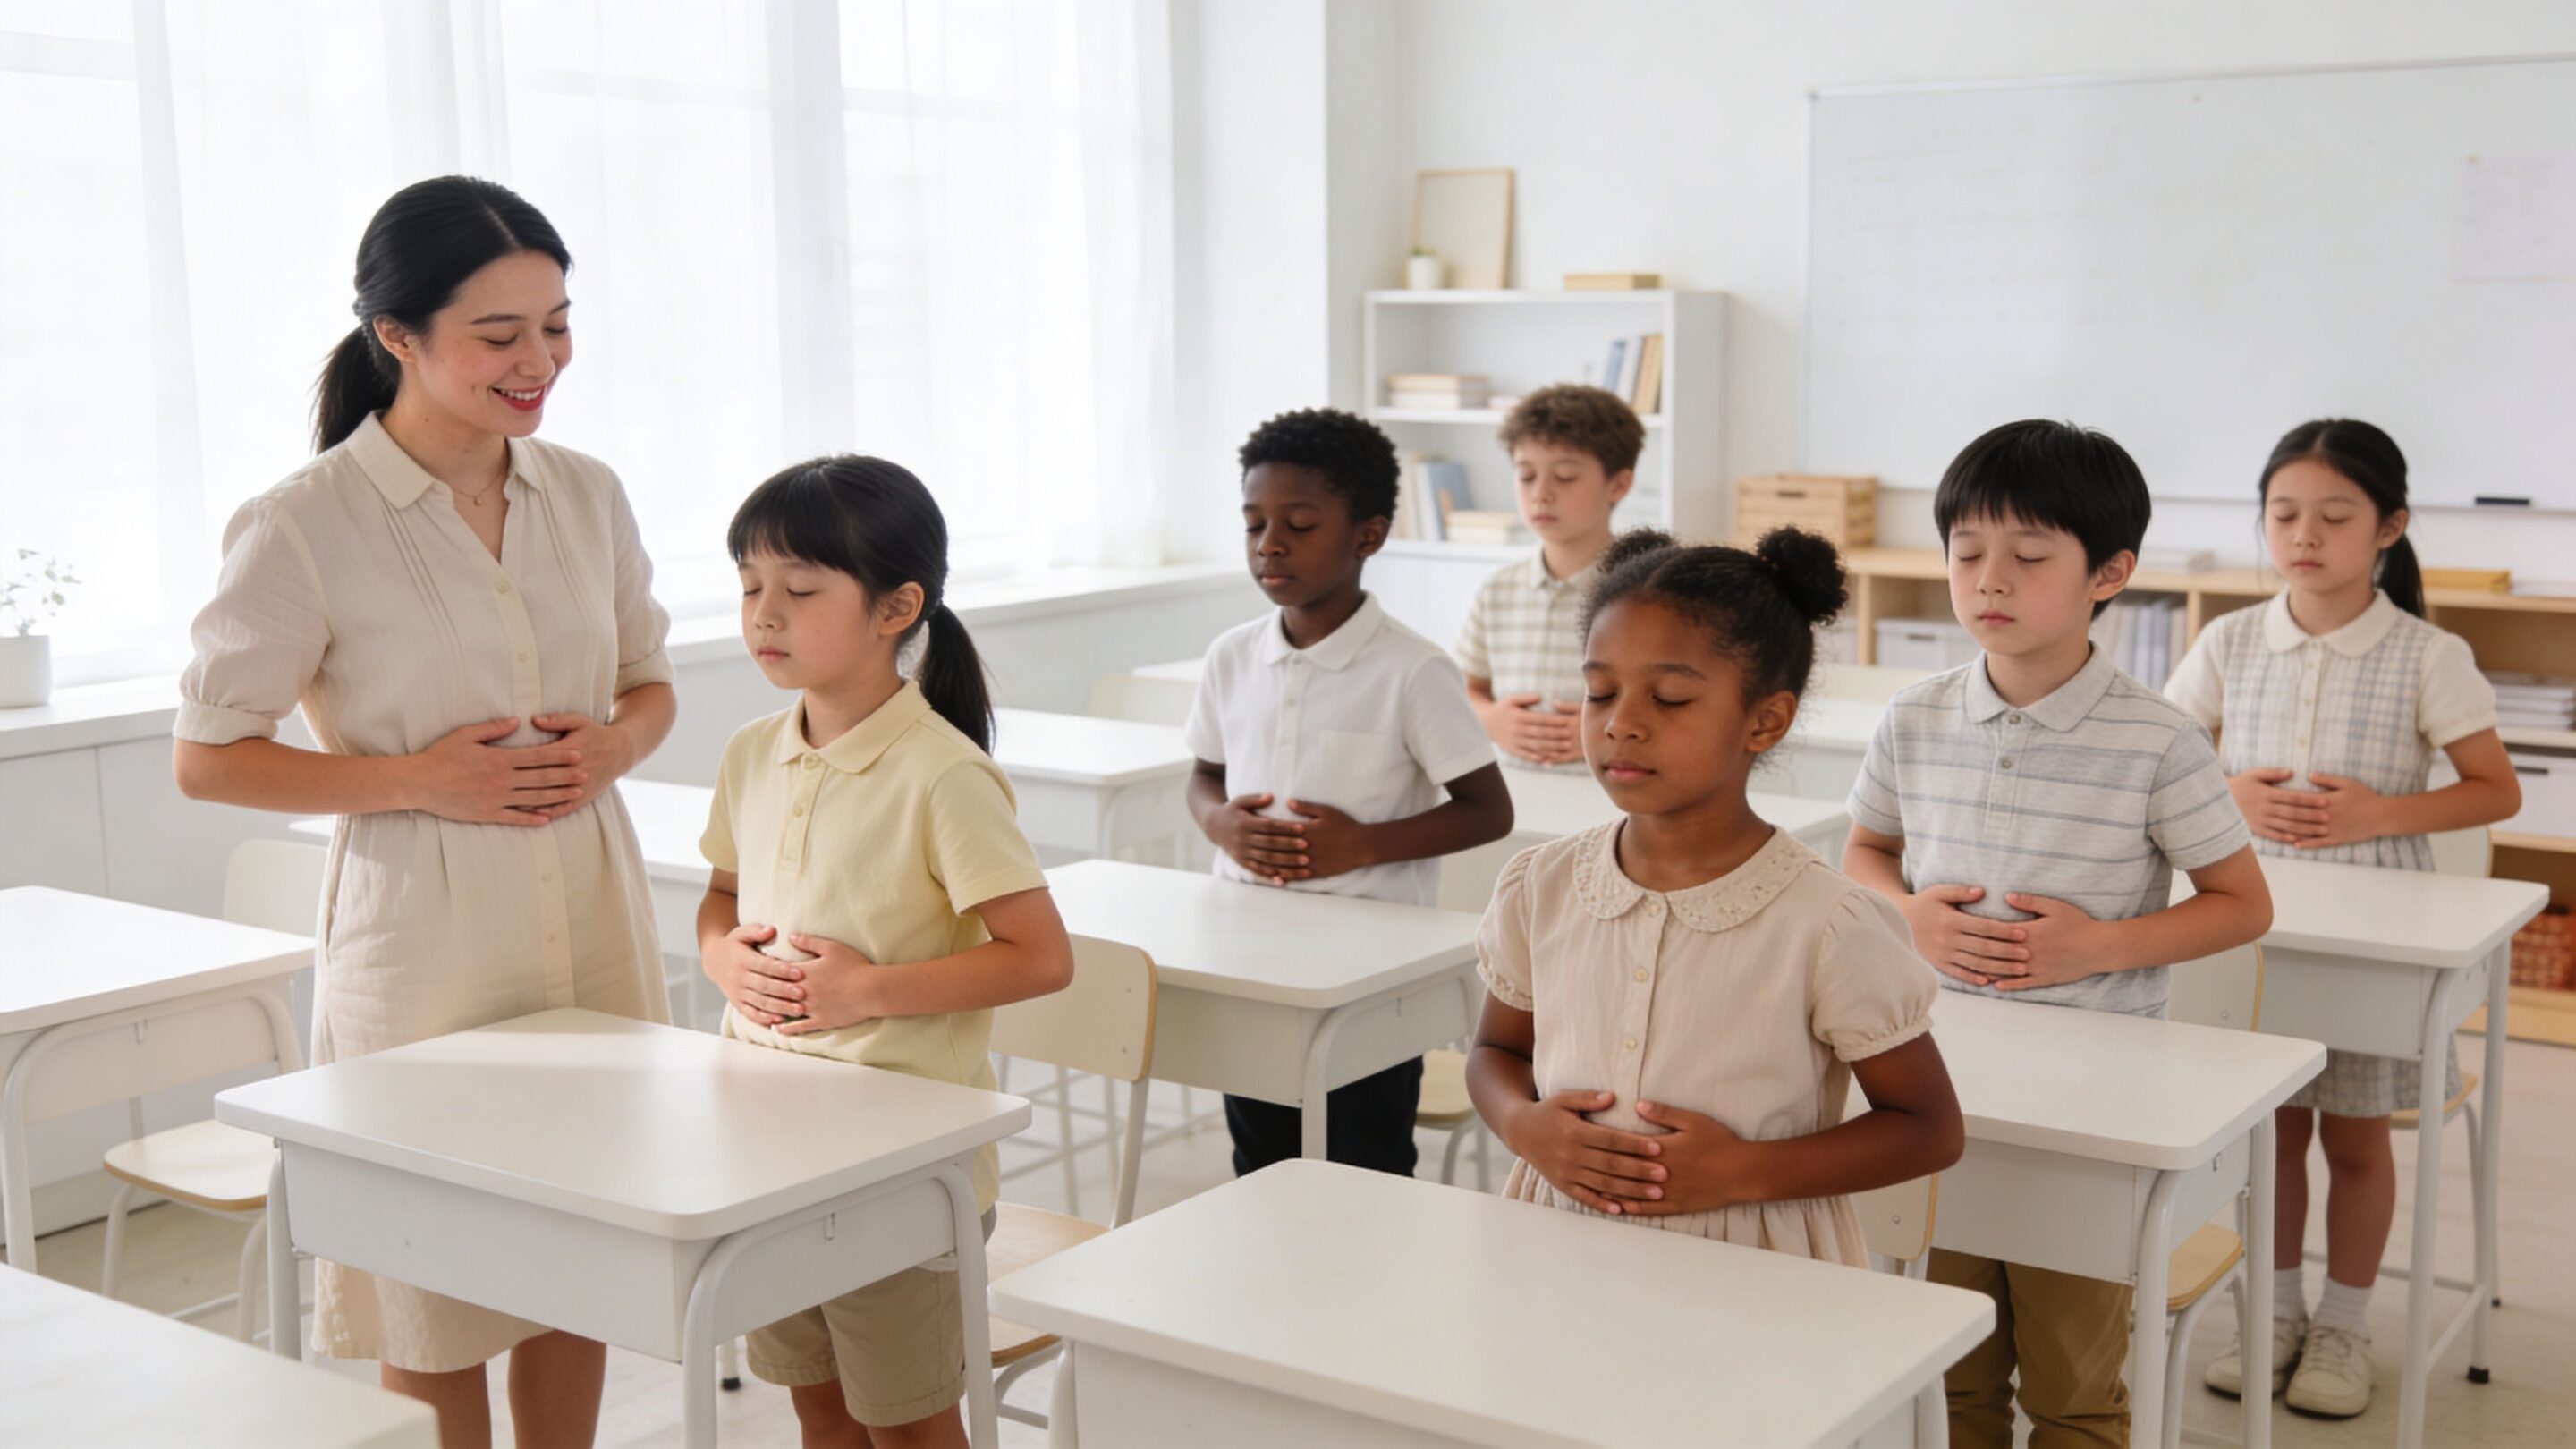
A 2021 study discussed here found that 30 days of box breathing led to significant improvements in lung function parameters tied to oxygenation and autonomic nervous system regulation. In practical school terms, that supports the bigger goal. Students need tools that help them return to learning, not just “behave better” in the moment.
Use it at predictable pressure points
The easiest way to build buy-in is to use box breathing before students are fully dysregulated. Think of it as a transition support, not an emergency-only intervention.
A few places where it fits naturally:
After recess
“Feet on the floor. Eyes on the square. One breath in, hold, out, hold. We’re bringing our bodies back inside.”Before a quiz or read-aloud
“Give your brain one quiet minute. We’re not trying to be sleepy. We’re getting focused.”During a hard task
“If your body feels frustrated, pause and take one square breath before you ask for help.”Before class meetings
“Let’s arrive in our bodies before we use our words.”
Teachers looking to layer this into broader regulation practice may also like these mindfulness activities for students.
Make it part of classroom language
Students use tools more often when the language is short and shared. The phrase matters. “Do your box” is easier to remember than a longer explanation.
You can also name it in a way that fits the age group:
- Kindergarten and first grade: square breath, magic square, calm corners breath
- Grades 2 to 5: box breathing, reset breath, focus square
- Middle school: tactical breathing, performance breath, reset cycle
A posted anchor chart helps. So does putting a small visual in the peace corner, on clipboards, or near the line-up spot by the door.
Show it, don’t overtalk it
Students learn this faster when the adult models instead of explaining for too long. If the class is escalated, fewer words work better.
A useful mini-script sounds like this:
“Watch my finger move around the square. Inhale. Hold. Exhale. Hold. Again.”
That script is brief enough to use in real time. It also keeps the adult regulated, which is half the intervention.
Here’s a quick video example you can use for staff modeling or for older students who like visual guidance.